


$1 Photo Wall Template
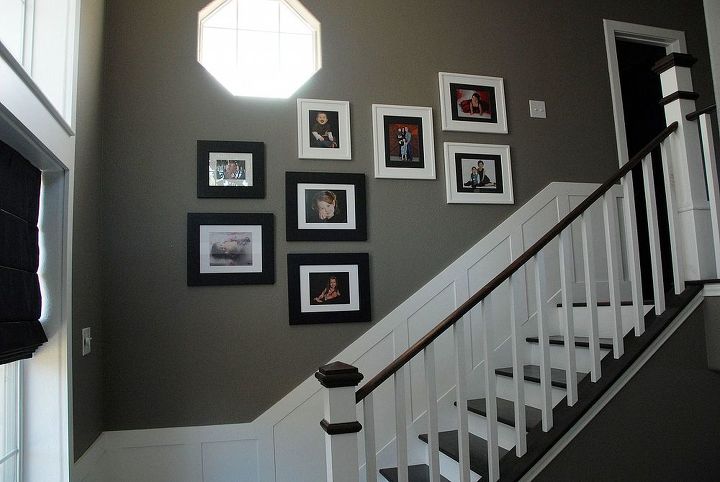
After adding wainscoting in my foyer, I knew I needed to rehang the photos along the stairs. I’ve seen those nifty little photo wall template kits that can help you design a layout and gives you the frames. I love the idea, but I already have the frames and I’m too impatient to wait for a kit to be mailed to me. So I grabbed a cup of coffee (to get the creative juices flowing) and had an a ha! moment. I ran down to the laundry room, went through a few boxes of “scraps” from projects and came up with this...
See the whole story at: http://www.therozyhome.com/2013/02/25/1-photo-wall-template/
See the whole story at: http://www.therozyhome.com/2013/02/25/1-photo-wall-template/
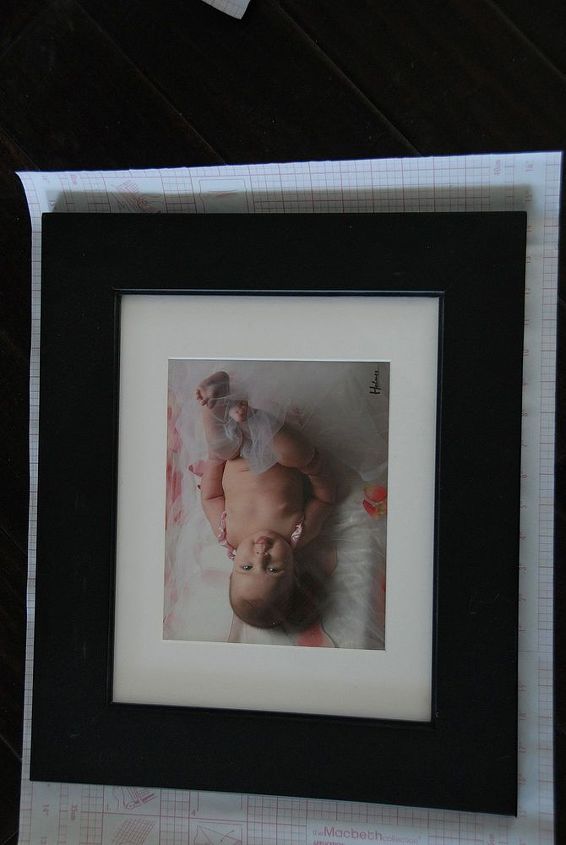
Step 1: Lay a picture on the contact paper and cut a square to size.
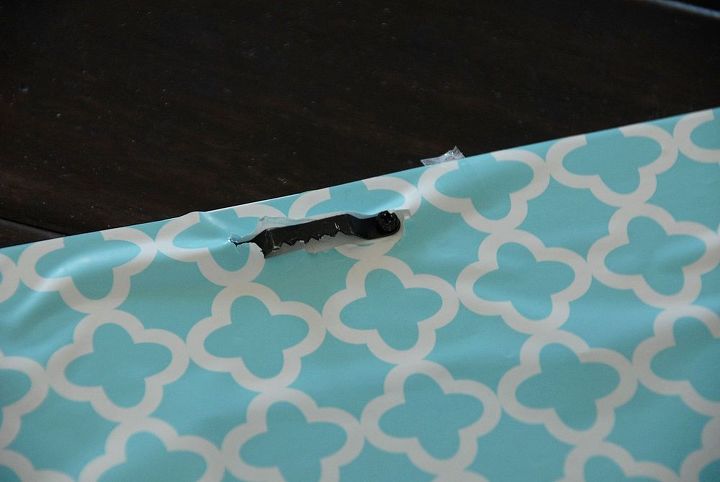
Step 2: Cut slits in the contact paper where the hangers are.

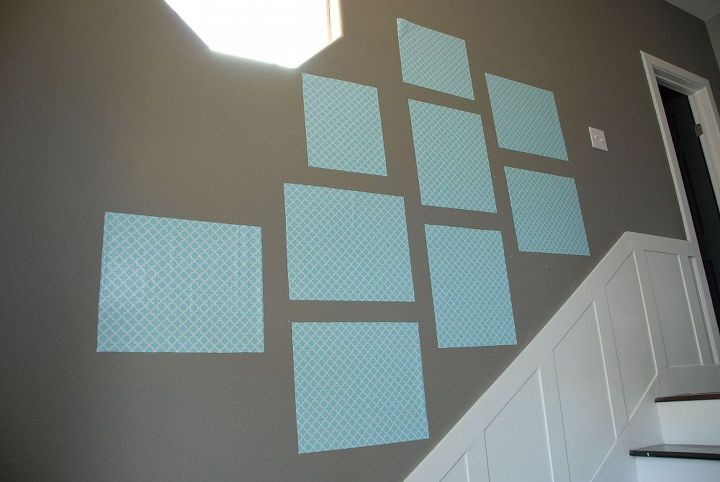
Step 3: Layout Your Photo Wall.
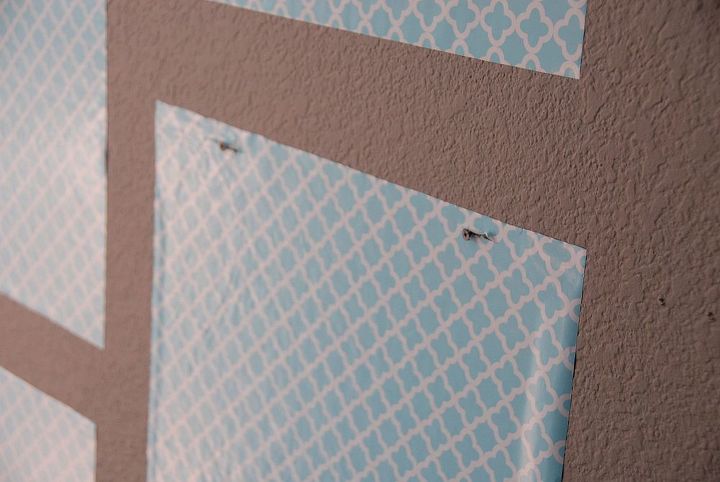
Step 4: Once you've decided on a layout, drill screws in the slat. You can also use nails. Because these are in a high traffic area, I screw them in (i.e. so the kids don't pull them off the wall).
Step 5: Remove the contact paper and hang your pics. That's it!

Want more details about this and other DIY projects? Check out my blog post!
Comments
Join the conversation
3 of 94 comments
-
So disappointed, I was ready to use your $1.00 photo hanging trick but I can't find it on your new spit!! I wanted to hang them today, a rainy cold Sunday :-(
-
Was that supposed to be site? Let me find it!


Frequently asked questions
Have a question about this project?