


Road Trash to a Gem

by
Wonderiris
3 Materials
My friend and I are always on the lookout for the trash that people leave on the side of the road marked FREE! She came upon this table on the side of the road, picked it up, delivered it to me, and it sat for nearly a year. I knew it was solid wood, but I wasn't sure if I really wanted to tackle stripping the entire piece. Someone had already started to sand the top and I could tell it would be a long process. I took the entire piece apart and then it sat in pieces in my barn...just waiting patiently for me to figure out what I would do with it.
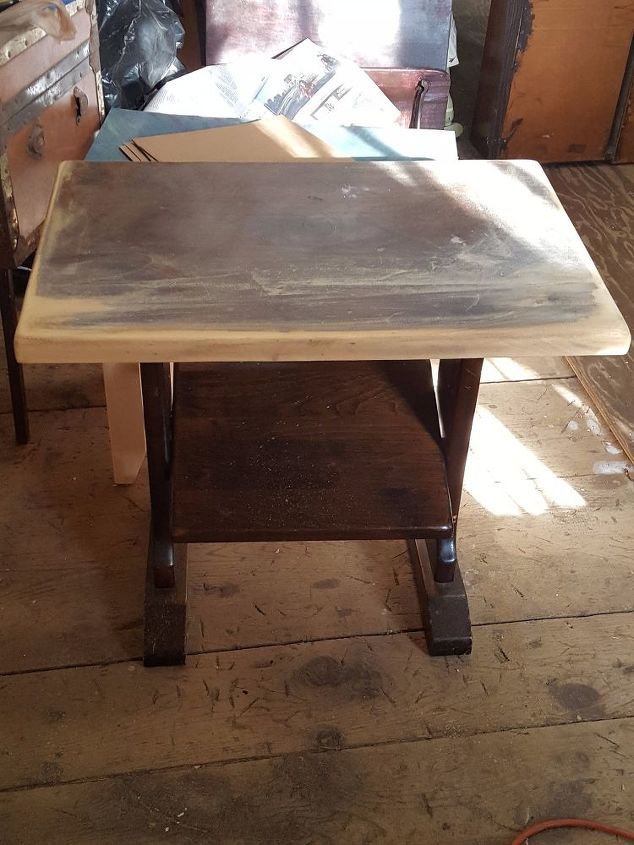
My first thought was to strip the top and paint the rest of it. That way I wouldn't have to strip/sand the entire piece. But I couldn't decide what I wanted to do with it, and I couldn't decide where I would put the table once I did finish it. Then inspiration struck (at midnight) and I decided that having a small table in my bathroom wouldn't be a bad thing. I got out my handy electric sander and started on the top shelf. It was a long process and when I had finished I was more determined that I would paint the remainder of the table. Then, I remembered my soy stripper. Blue Bear Soy Paint and Urethane Stripper is a wonderful substance. It is completely odorless, biodegradable, effective paint/stain/varnish removal. I spread out a tarp in an unused bedroom, set out all the pieces, coated them with the stripper, let it go to work and then simply scraped it off. Washed the pieces and then a little sanding was required for some of the thicker areas of varnish - but compared to the top piece it was nothing!
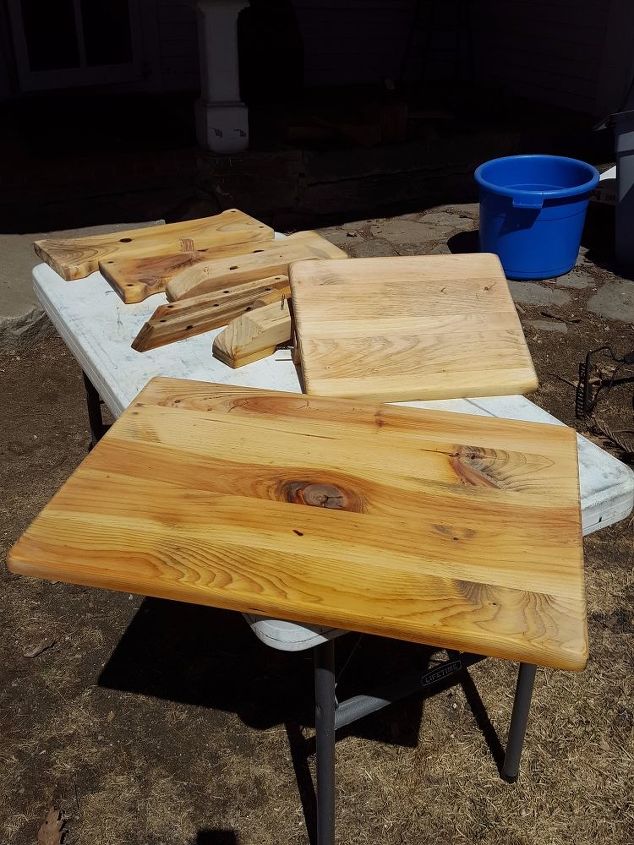
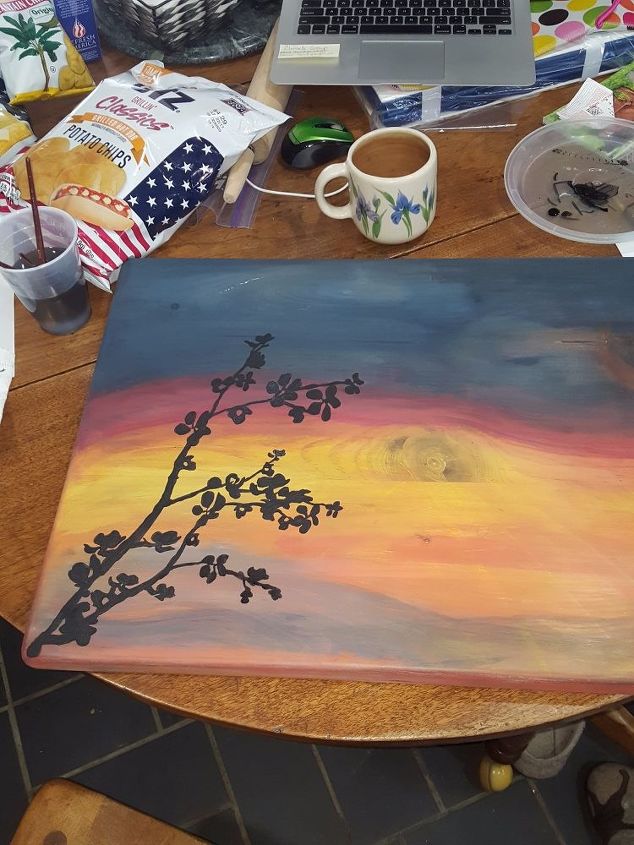
I immediately noticed the wonderful wood grain. I think that it had been stained a dark color because they were trying to hide the knots and waves of the wood...but that is exactly what I loved about the wood. I could see sunset, and waves...
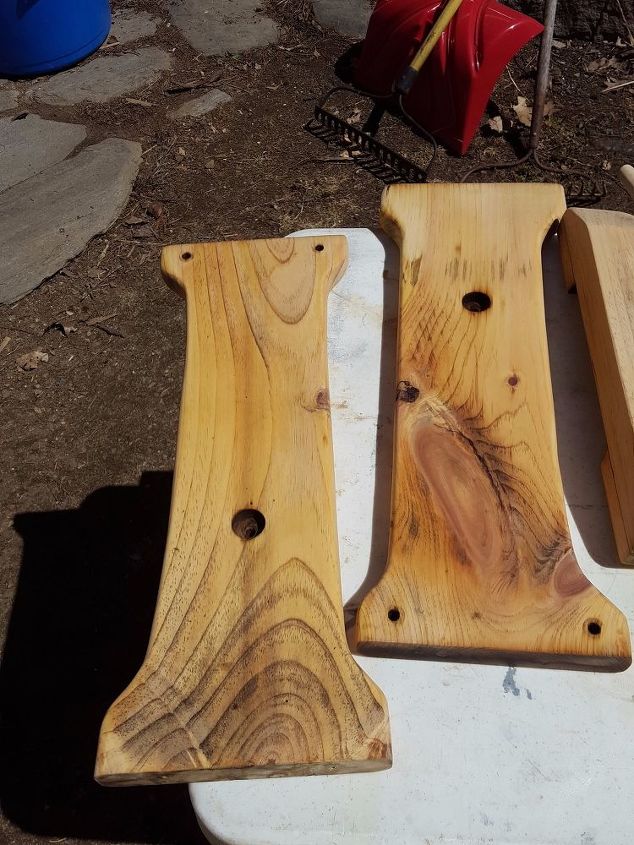
I knew I couldn't hide the wood grain, and so painting the pieces were now out of the question!! Out came my trusty Unicorn SPiT in all the wonderful colors that it comes in. I started with the table top. I was envisioning a sunset so I wanted darker at the top and the middle knot would be the sun setting over water....I went to work. I dry rubbed the stain into the wood. This means I thinned the spit a very little bit, put it on the wood following the path I wanted and then used a rag to rub it into the wood, blending into the other colors as I worked. I used Lemon Kiss, Phoenix Fire, Molly Red Pepper, Blue Thunder, and White Ning. All other colors you see are due to the blending and natural color of the wood.
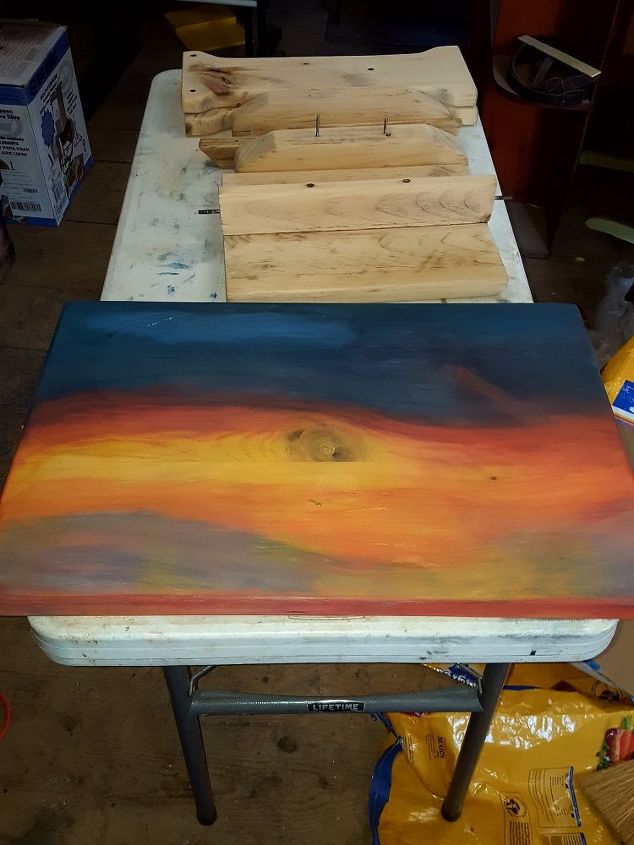
I then started working on the sides. Usually, my take on DIY is less is more and so normally I would do something on the top of a table but the remainder of a piece would remain fairly neutral. This time though I didn't listen to myself and I started doing a similar color scheme to the sides. I immediately regretted my decision. But, because I was dry rubbing and I was really rubbing the stain into the wood I couldn't just wash off and start again. So I continued and finished the two sides and then walked away, positive that I had ruined the table.
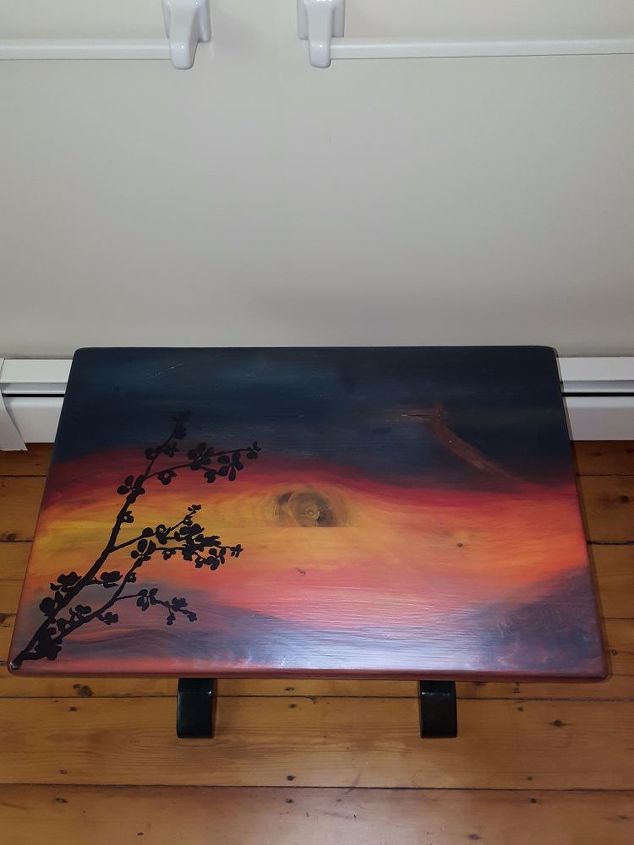
In my dreams (or subconscious) I thought of putting a silhouette of something on the top of the table. Since the plan was for the table to go into my bathroom and I had recently done the cabinets in red I decided to do a cherry/apple blossom silhouette on the top of the table. Using Unicorn SPiT Midnight Blackness I painted my silhouette onto the top of the table. I was still bemoaning my decision to do the sides similar to the top, but I figured I would tackle one problem at a time.
unsealed
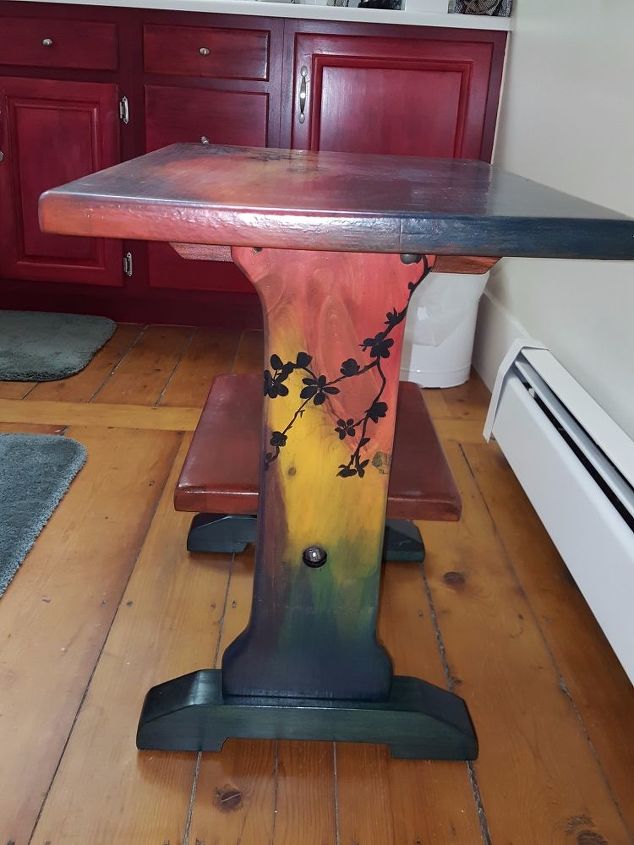
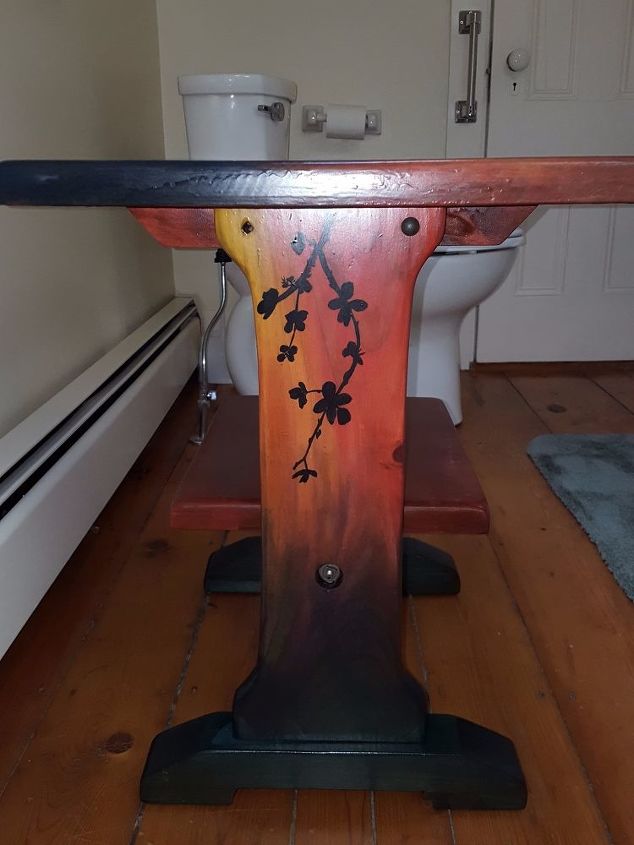
I stained the middle shelf red (to match the bathroom vanity color), and then did the leg bases in the darker green/blue of the bottom of the sides. I was wishing that I hadn't decided to do the sides the same as the top. I couldn't change that I had done it though, so I decided to paint a silhouette on each one to mimic the silhouette on the top. I was hoping that would pull the whole piece together. And it did.

sealed
What I love about Unicorn SPiT is that when it is initially dry it is a chalky dull color. But when you put the oil-based sealer on it, the colors just burst forth. Sometimes what you see before the sealer is completely changed once the sealer is applied. I sealed the entire table with a marine varnish for three reasons:
1. it is oil-based sealer which Unicorn SPiT requires
2. it was going in my bathroom and I wanted plenty of moisture protection
3. there wasn't any white on the piece so I wasn't concerned about yellowing
right side
Painting a silhouette is so easy. Just basic shape is all that is needed. I'll clarify, painting some silhouettes are easy. I can't master the silhouette of a person for the life of me!! 
left side
The silhouette branching down each side helped pull the top and sides together. So, even though initially I was bemoaning doing the sides multicolored I really like the end result.
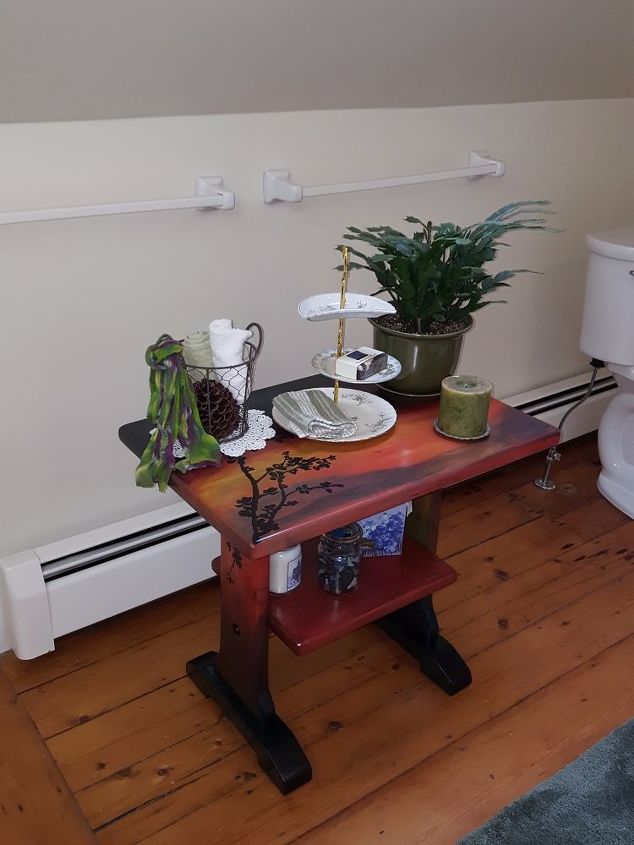
staged
All set up in the bathroom. The red cabinets were very thankful to have something prettier than the toilet to look at! I was happy with the end result. It is definitely better looking than the original rejected piece of furniture that showed up at my door. And now it is serving a purpose.

Comments
Join the conversation
3 of 96 comments
-
Very nicely done! You have major skills and great taste!!
-
I love it. Now you have me eyeing up my wood TV trays.


Frequently asked questions
Have a question about this project?
@Wonderiris. This is a beautiful table, now. I thought the top was interesting and pretty. When I saw the painted legs with more silhouetting, I decided this is a piece of art. I'm going to guess this gave the toilet and tub something thrilling to look at, also. Best wishes 😇 Question: did you use a full jar of any one color of Unicorn Spit on the table?