


Macrame & Mason Jar Planter
3 Materials
$12
30 Minutes
Easy
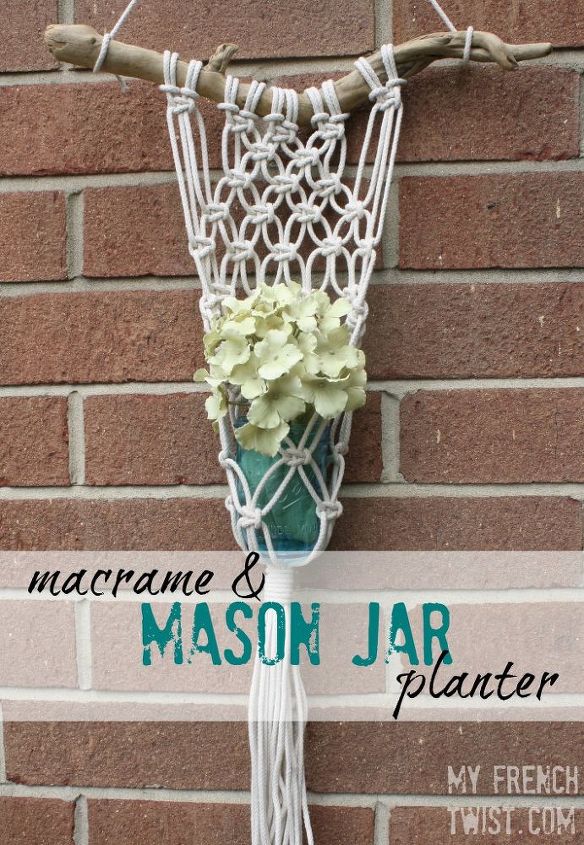
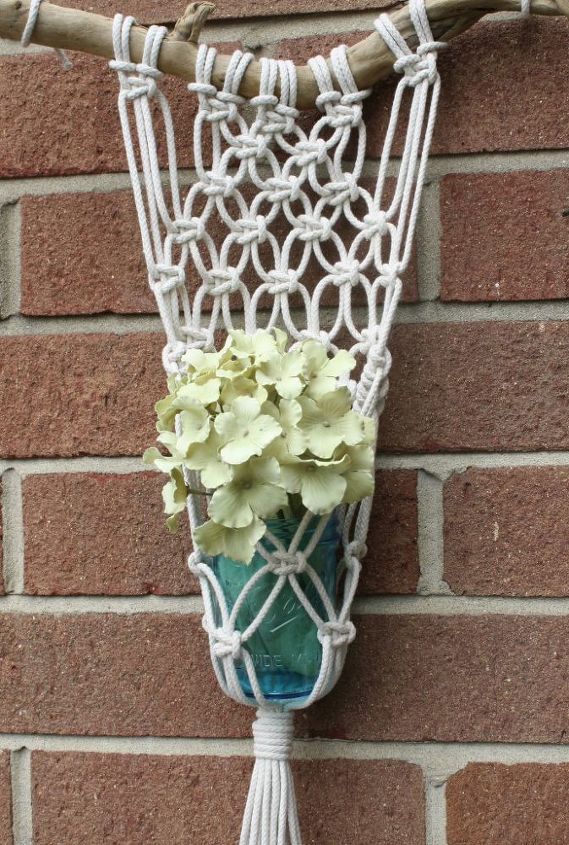
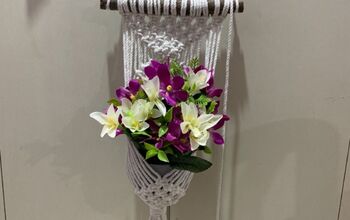
The perfect macramé/mason jar merger!... an easy-to-make macramé planter which holds a mason jar vase.
Of all the current craft trends spotted in the homes of hipsters, two of the most popular are mason jars and macramé. Mmm… why not create a lovely project using them both? You know, a macramé/mason jar merger. (Sorry, English major here. Alliterations turn me on.)
If you’re new to the art of macramé, don’t worry. This little project – my Don’t Be Square planter – is not difficult, and I’ve formatted it in an easy-to-follow tutorial. It consists mainly of Square Knots (hence the name.)
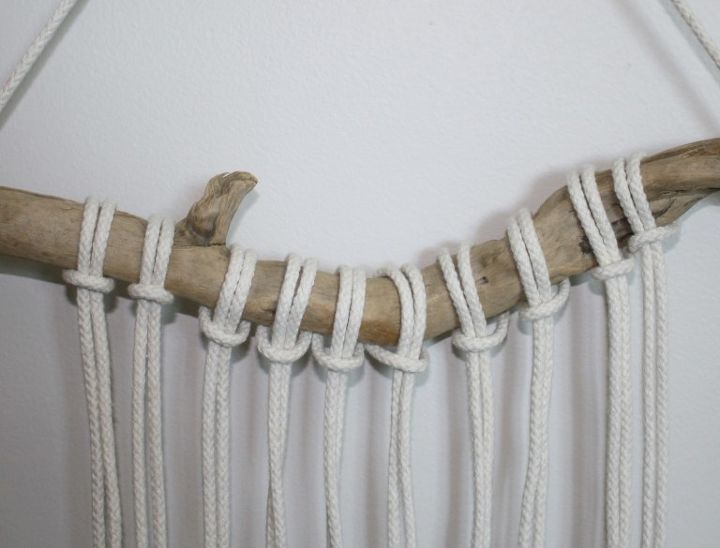
Step 1 - Cut rope into 10 pieces, each 10 feet long. Tie the cords onto the ring or dowel, using the Lark’s Head Knot (refer to my basic knots tutorial here as needed throughout this project.) I’m making this planter as a gift for a vacation friend, so I thought it would be very fitting to use a piece of driftwood instead of a dowel rod. I love the beachy feeling it lends.
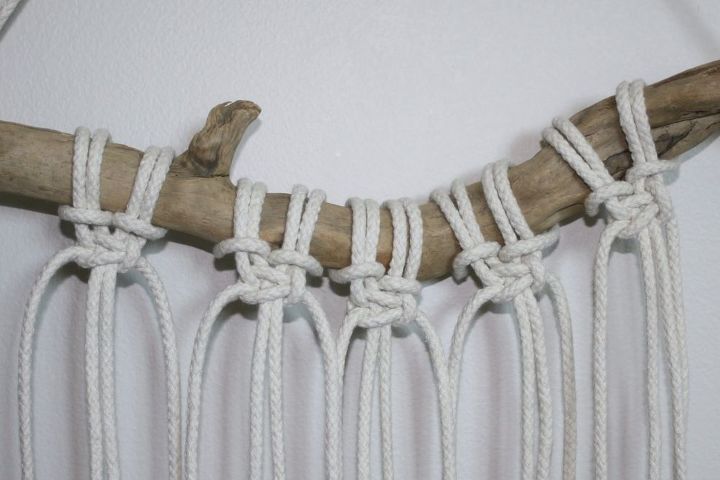
Step 2 - Now that you’ve tied 10 Lark’s Head Knots and found a place to hang your project while weaving, you need to make sure you are familiar with the Square Knot (instructions also in my basic knots tutorial.) Practice a few times until you get the hang of it.
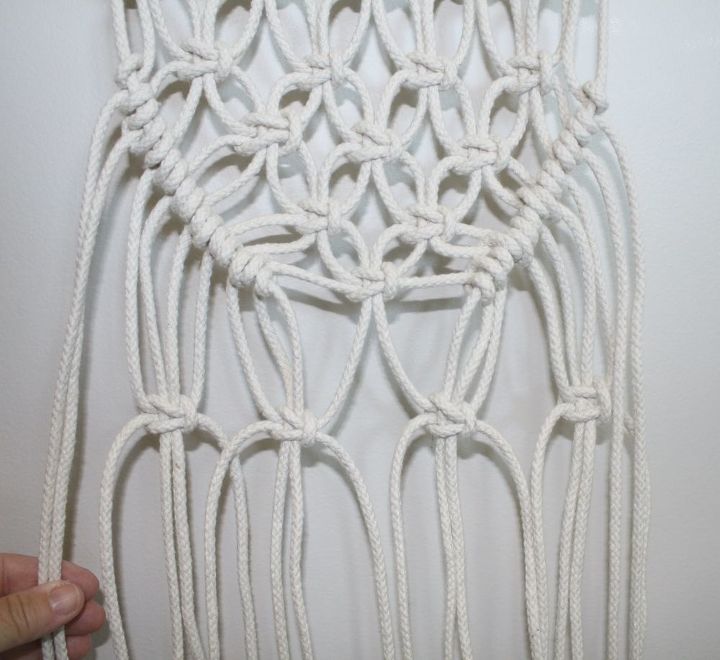
Step 3 - After you’ve mastered the Square Knot, it’s time to begin weaving the wall-hanging. Follow the steps below for making the first 9 rows.
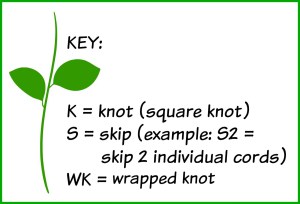
1. Start with the first cord on the left: 5K
2. Start with 7th cord: 2K
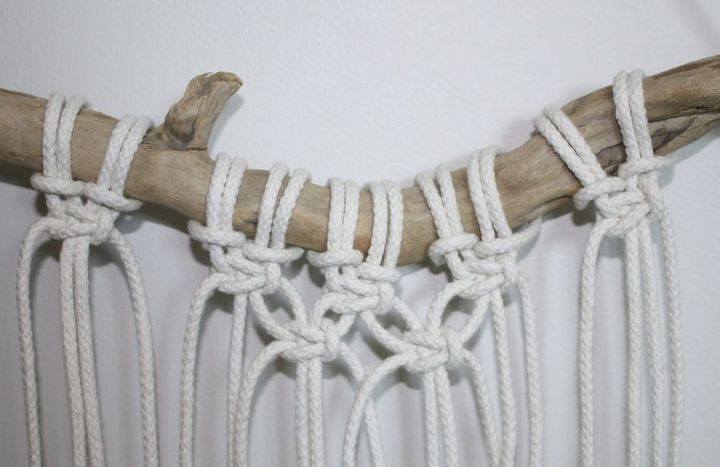
3. Start with 5th cord: 3K
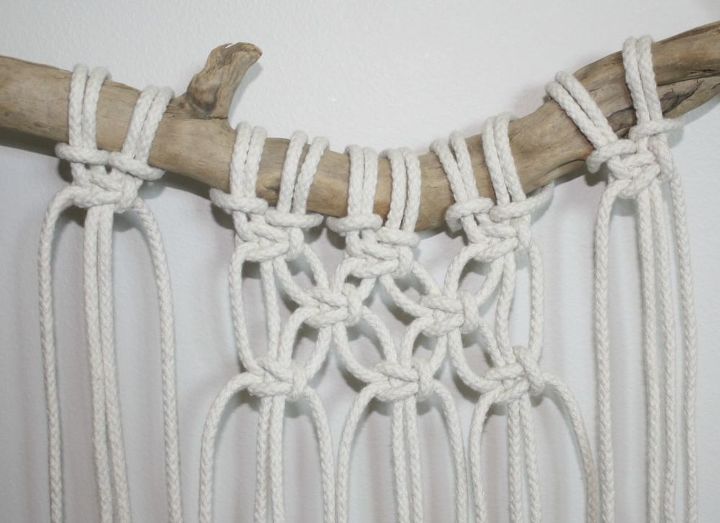
(Continue making rows of Square Knots, following the instructions below.)
4. Start with 3rd cord: 4K
5. Start with 1st cord: 5K
6. Start with 3rd cord: 4K
7. Start with 5th cord: 3K
8. Start with 7th cord: 2K
9. Start with 9th cord: 1K
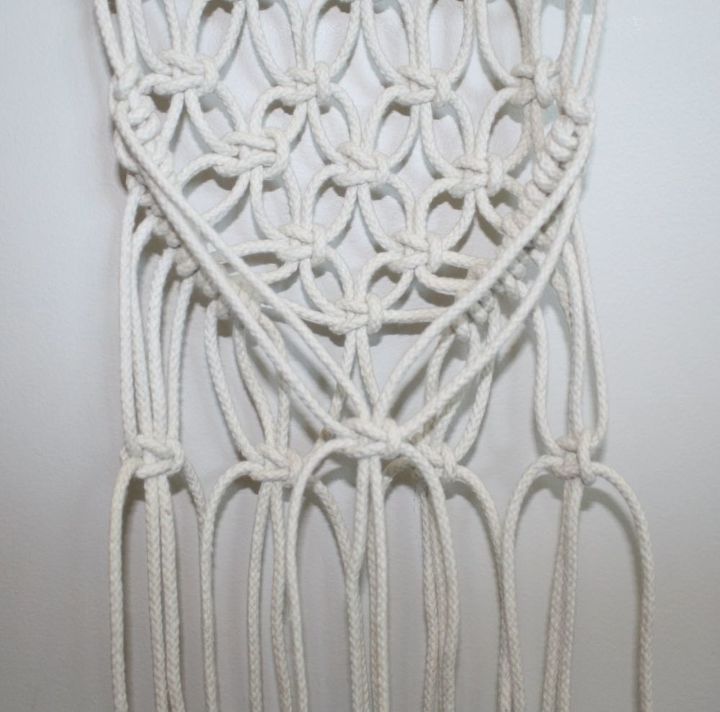
(You now have a completed diamond design.)
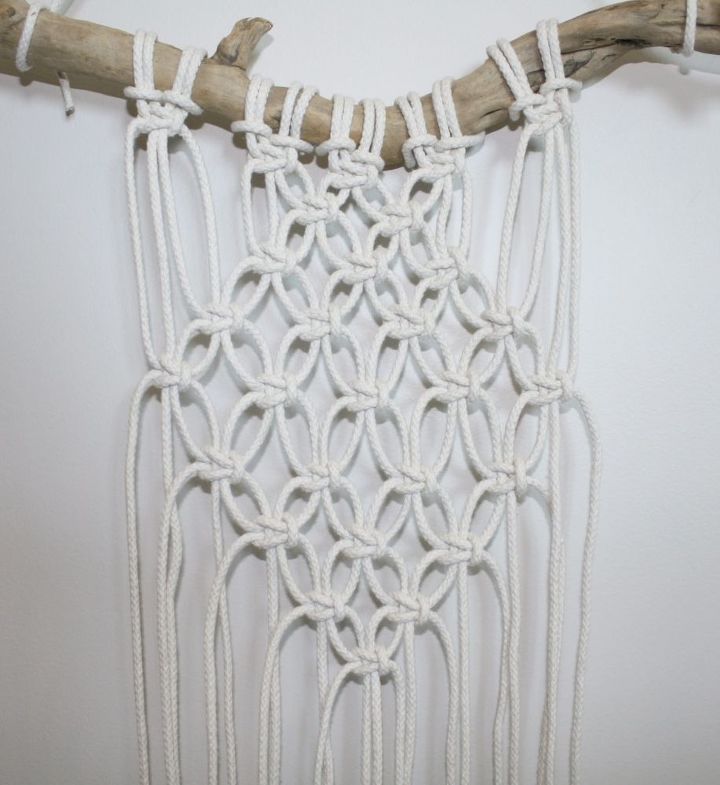
Step 4 - Starting from the left side of the wall hanging about 6 rows down, begin making Half Hitch Knots from left to right, slanting down towards the center. (Follow this video tutorial for making a Half Hitch Knot.) Stop at the center (do not include the middle 2 cords of the wall hanging), then begin making Half Hitch Knots starting with the right side, weaving right to left and slanting down towards center. The two rows of Half Hitch Knots should meet in the center. (Remember, do not include the middle 2 cords of the wall hanging in your Half Hitch Knots.)
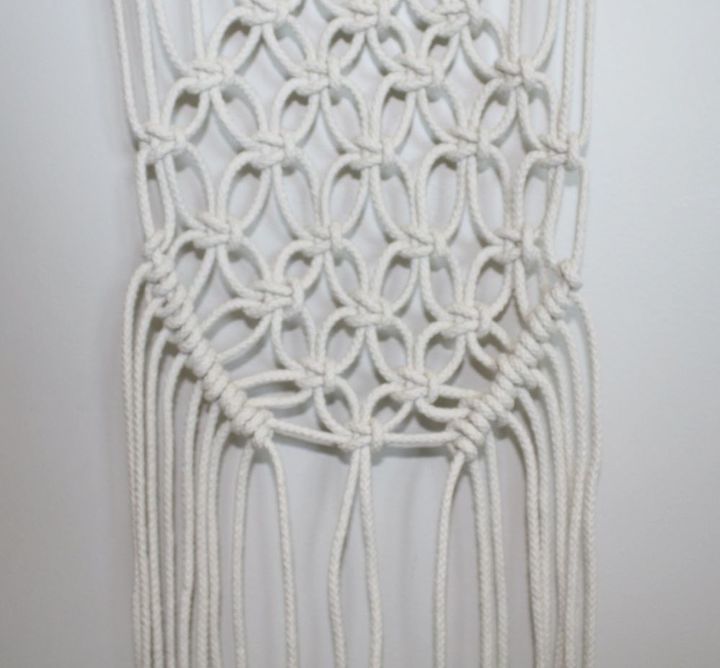
Step 5 - About 3 inches down from the last row, starting with the 3rd cord, tie 4 Square Knots.
Next, make a fifth Square Knot with the 2 extra cords on the left and the 2 extra cords on the right. This will form a “pocket” or circular pattern to the weaving.
Step 6 - About 2 inches down from the last row, begin a final “circular” row of 5 Alternating Square Knots. (See the tutorial for creating Alternating Square Knots on my website.)
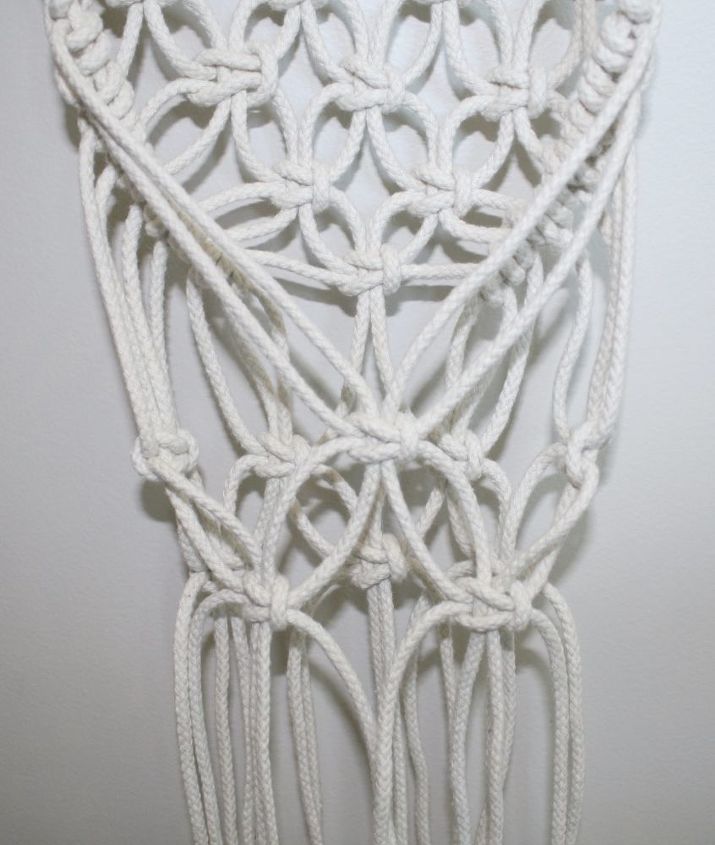
Step 7 - Finish the planter with a Wrapped Knot about 3″ lower than the final row. (See tutorial for a Wrapped Knot on my website.) Then cut the rope ends at your desired length.
Step 8 - The final step is easy. Simply fill the planter with a mason jar, then add water and flowers. As if this project isn’t sweet enough, why not hang it by your back door or in the kitchen to use for holding flowers your children pick from the yard? Hey, even wild dandelions would look hip in this adorable planter.

Want more details about this and other DIY projects? Check out my blog post!
Comments
Join the conversation
3 of 34 comments
-
I love this! I will be doing one this afternoon! Thank you!
-
I loved this


Frequently asked questions
Have a question about this project?
Does it matter what mm of cord you use?
I want to try this . what mm cord did you use?
Could you use thick yarn instead of that cording?