


Laying a Wooden Base for a Large Shed or Workshop

by
DIY Doctor
1 Material
$800
3 Days
Medium
If you are thinking about building a shed or workshop you can get some great tips from this DIY Doctor project. DIY Doctor offers free help on all aspects of home improvement all over the UK and how to build a shed or workshop is just one of the many thousands of projects we have available. Read on to see how to build your shed properly.
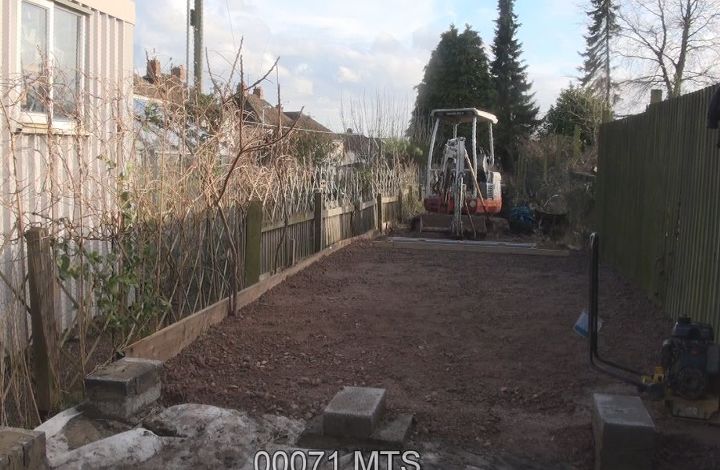
The first thing to do is to make sure you have a level base. This garden has very soft ground so we needed to lay 150mm of scalpings to make sure our base was going to stay level and flat without sinking into the mud. We used a digger to drag out all the soft spots and to level out the scaplings. The scalpings were then rammed down using a whacker plate to ensure they would not sink. You can see videos on scalpings and using a whacker plate here; https://www.youtube.com/edit?o=U&video_id=uO9f59eFL3Y and here https://www.youtube.com/edit?o=U&video_id=diU8fHNOruc
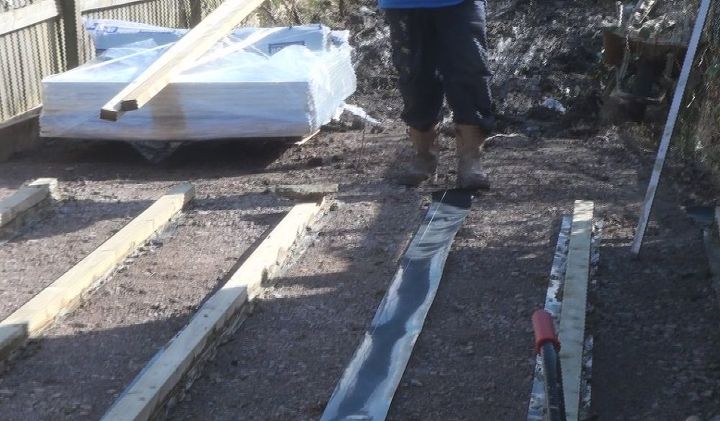
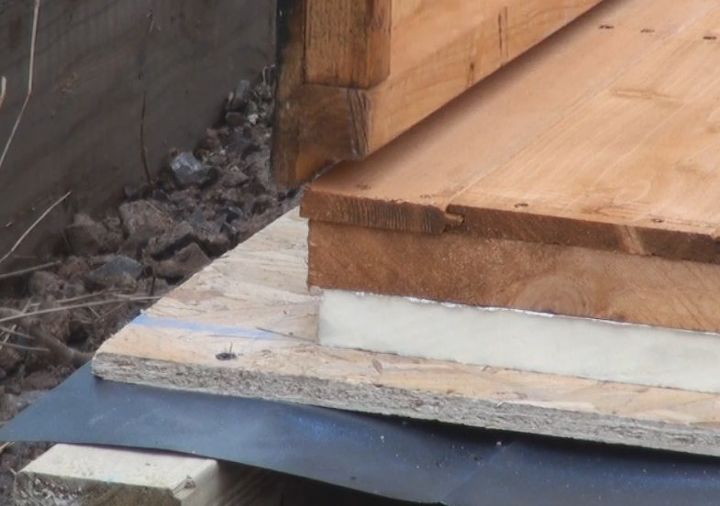
We laid timber runners on top of the scalping. These timbers were laid onto a damp proof course even though the timbers were treated. The less water in the timber, the better. The timbers were then bedded onto sand and cement to get them completely level. One of the reasons for doing this is to raise the actual shed base off the ground a little. This allows an air flow under the shed base which in turn allows and damp in the timber to evaporate.
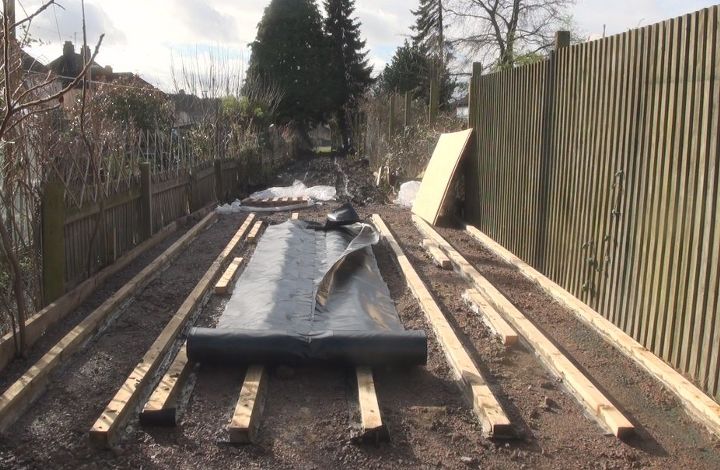
Once the timber runners were in place and level we covered them with a damp proof membrane. This membrane stops any water that is in the timbers from rising up into the shed floor. The membrane is stapled to every third runner minimising the number of holes in it.
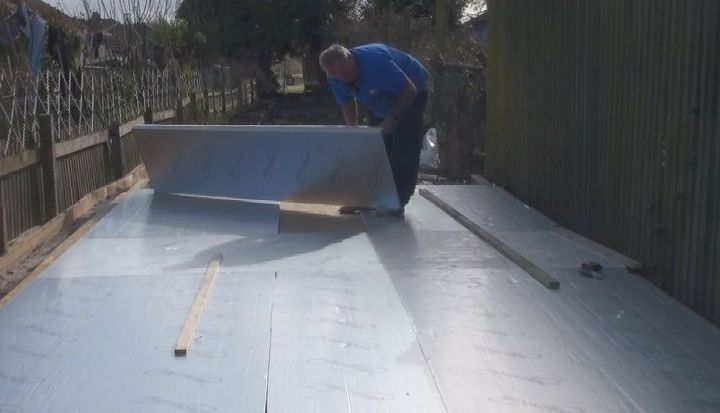
After laying a timber sub-floor of 18mm Stirling board, we laid a 50mm layer of solid insulation. This keeps the floor warm and stops any cold rising up from the ground. The sub floor was laid 80mm over size all round to accomodate any errors in measurment of the shed base. Nothing in this line of work is ever absolutely exact so always prepare for the unexpected!
The shed floor was laid and fixed together. We measured the diagonals to be as sure as possible the floor was laid square. Then it was time to erect the sides. You can see from the video that we got it right! The sides of the shed panels have a 30mm lip which slots over the base. to make sure any water running down the sides runs down below the level of the floor. When the shed was finished, we drilled holes in our sub-floor to allow this water to run away under the base completely. Setting the base out correctly is the most imporatant thing when erecting any shed, let alone one of this size. Taking your time here will pay big dividends later.
{
"id": "3880203",
"alt": "",
"title": "",
"video_link": "https://www.youtube.com/embed/8pKDo_aZyz0",
"youtube_video_id": "8pKDo_aZyz0"
}
{
"width": 634,
"height": 357,
"showRelated": true
}
The video shows what happened next. Putting the shed together panel by panel is not hard but be prepared to add a few timbers here and there for strength. When this workshop was finished we actually lined the roof with insulating foil also. The shed was racked out as you can see here
Comments
Join the conversation
2 of 4 comments
-
Man, that is one heck of a shed. I would love to have a nice big shed like that. Great job and great tutorial, thanks for sharing.
-
Yes we will try this for storage on our Colorado Mountain
Homestead, Thanks


Frequently asked questions
Have a question about this project?
And roof boots? What are roof boots?
What happens to the water that runs onto your subfloor that is cut larger than the structure?
It would be good to get an American translation. Scalpings? I can guess at much of it but that one has me stumped. Nice shed. Wish we had space.