


Bonjour Modge Podge Collection

by
Jemma
10 Materials
$2
8 Hours
Easy
Thank you for joining me today!
I love sharing craft ideas and projects with you and when they are crafts for any age and any skill level, well that makes them all the sweeter!
The things that I love most about this project which I am sharing with you today is the ease with which anyone can make it, the joy of the process and then it turns out pretty too!
No technical measurements either! 
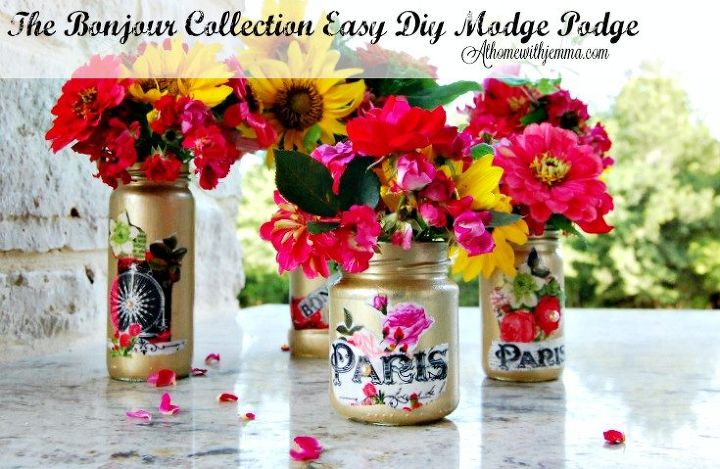
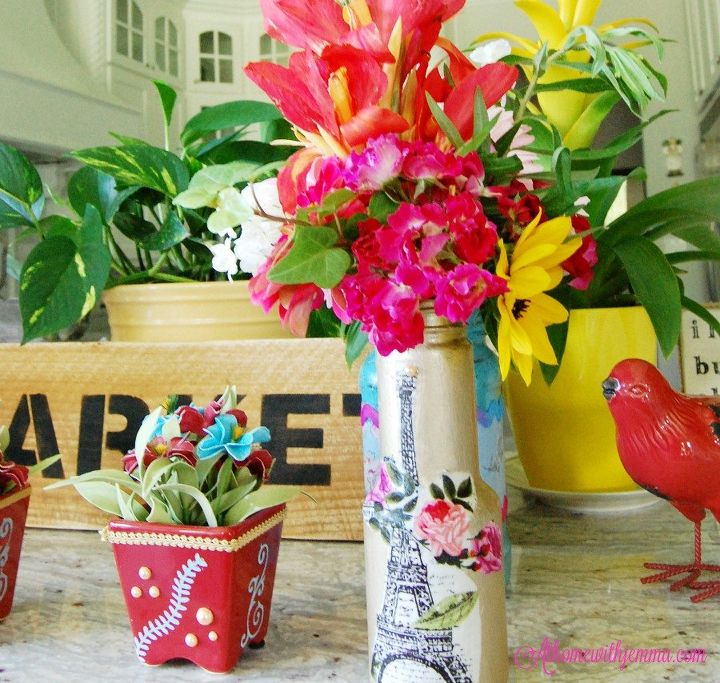
As you can tell I am pretty much obsessed with this Paris themed fabric, today's project is the third in a series of using this gorgeous fabric.
If you'd like to catch up with the earlier posts you can find them on my blog or right here on Hometalk!
I designed this little ensemble for a garden party, Ladies luncheon, shower or Birthday and you can too, if you so desire!
Remember the plates can go home with your guests too!
The big chunk of time is spent in the drying of the paint and the modge podge, so just allow yourself the better part of the day for the process to take place and you'll be good.
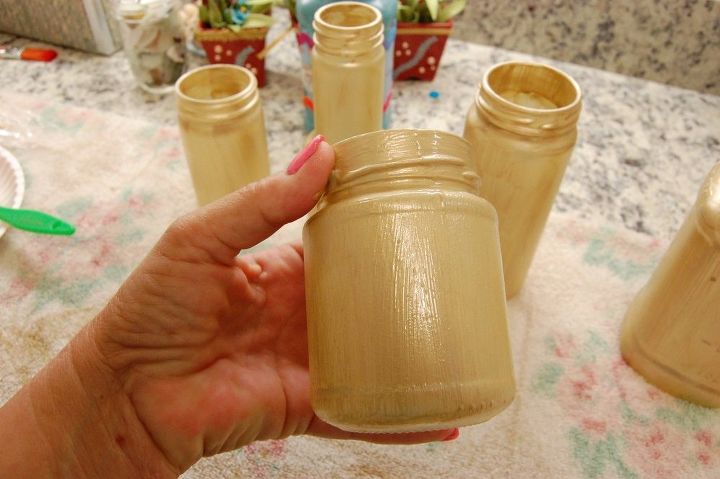
Always cover your work area before beginning.
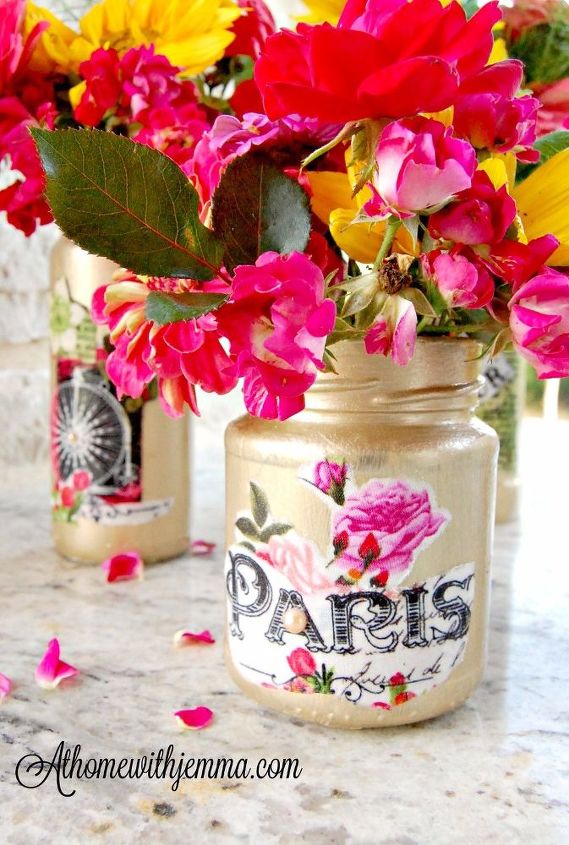
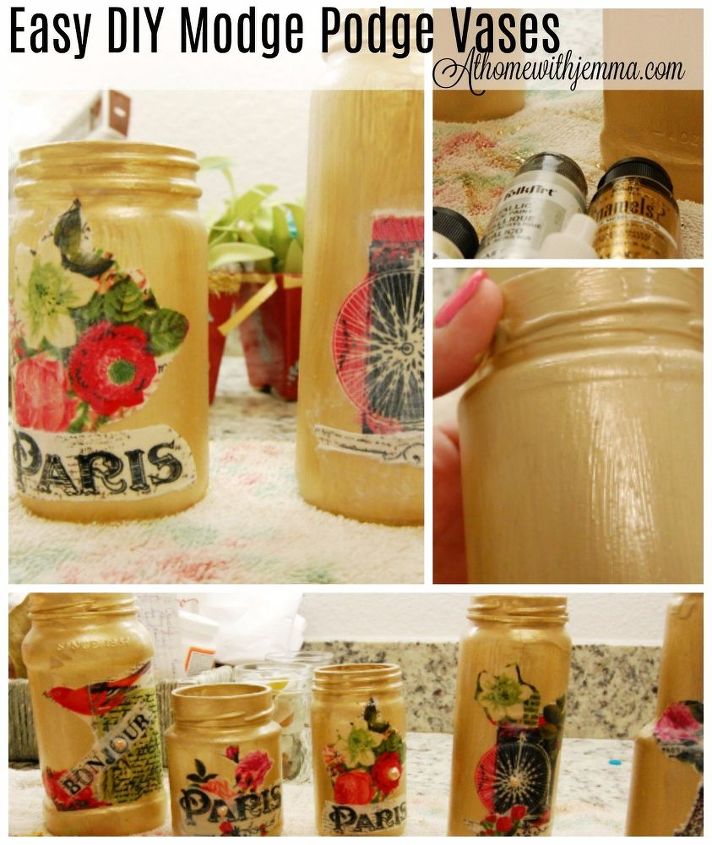
1-Take those clean and dry jars and start painting them with your favorite colors.
2-Dry completely, no sticky paint.
3-While paint dries cut out your fabric, I layered my fabric on these jars to create depth and interest.
4- Once paint is dry take a clean paint brush and brush modge podge on jar, place fabric on jar and brush more modge podge on top of fabric.
5- Work all air bubbles out of modge podge, add another layer of fabric if desired and repeat previous process.
This is very important and must not be skipped, bubbles are not a good thing under fabric!
6- Add embellishments if desired and another coat of modge podge.
7- If modge podge is cloudy it is not dry.
8- Dry overnight.
When our children were younger we were pretty much crafting several times a week. Many times it was nothing more than paper dolls, snowflakes, or paper chains out of construction paper, and then there was the glitter...always, always glitter, no matter the mess glitter made we always used it, because glitter makes us sparkle and sparkling is good!
And there you have it!
Easy, fun and great for all age levels!
Happy Crafting from Jemma's 
Want more details about this and other DIY projects? Check out my blog post!
Comments
Join the conversation
1 comment
-
Where did you get that beautiful fabric? I love it and want to get the same fabric!!!! You are a genius and I’m totally copying your projects! Thanks so much for sharing!


Frequently asked questions
Have a question about this project?
Will this work on pictures