


Iris Folded Book Covers

by
Susan Myers
1 Material
$5
1 Hour
Easy
I came up with a school craft project that incorporates brightly colored paper. After all, a long school day could certainly use some sunshine! I created fun book covers using the technique called Iris Folding!
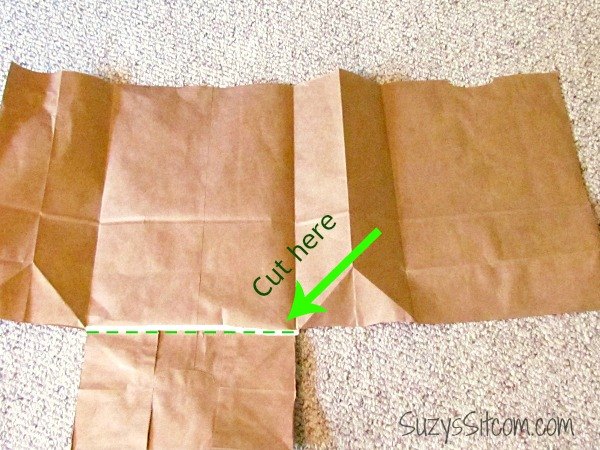
Begin by cutting your paper bag open as shown, and then cut off the bottom flap, so that you have one large sheet of paper.
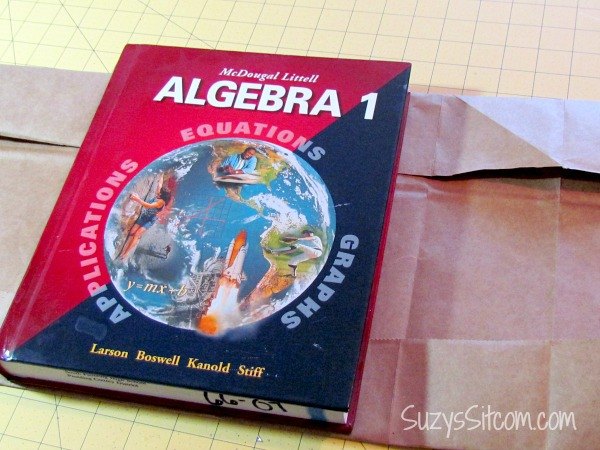
With printed side of the grocery bag up, place the book on top and fold down the top and bottom edges of the paper to match the top and bottom of the book.
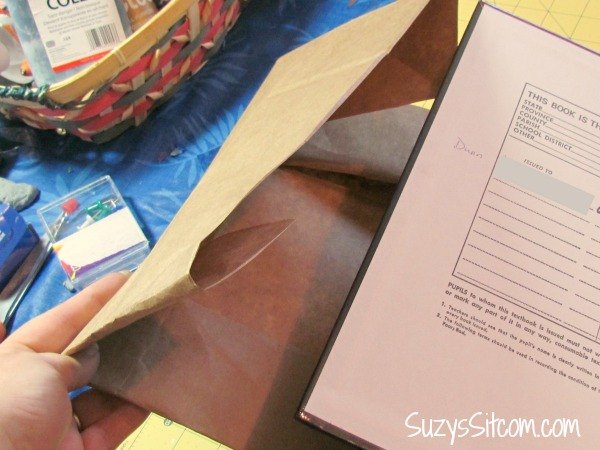
Fold one end of the paper and slide the front cover of the book into the open end until the edge of the cover meets your fold.
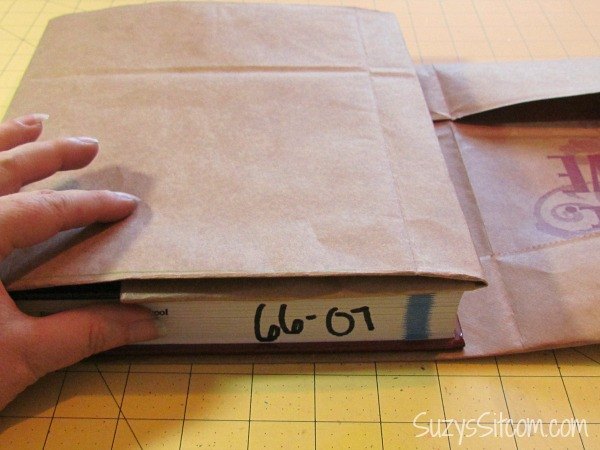
Close the book and crease the other end of the paper where the edge of back cover meets it. Slide the back cover into the open fold. Your book cover is now complete. Well, your boring bookcover is complete. Now let’s spice it up some with colorful paper!
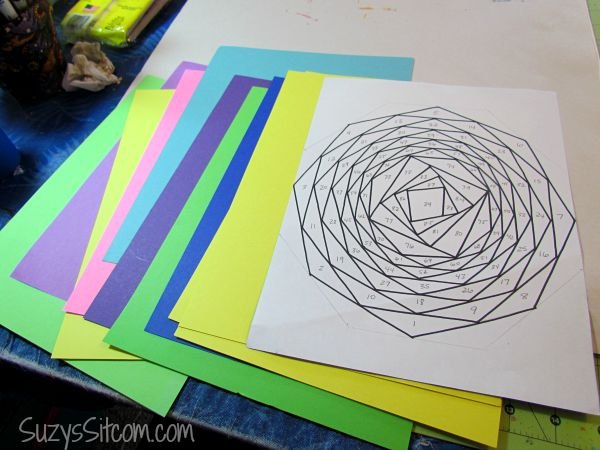
This is the Iris Folding Pattern that I am using for this project. You can get this free pattern along with several others by clicking on the link at the bottom of this post!
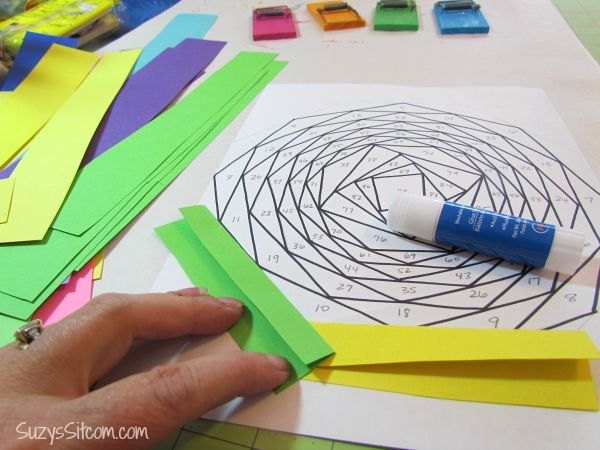
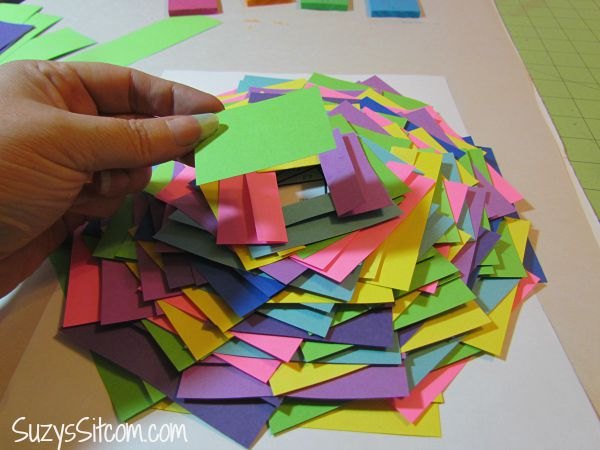
Choose a color and cut a strip of paper that is wider than your numbered section when folded. Fold it lengthwise and place over the section, starting with section number one. Be sure the fold is towards the center and is facing up. (We are working from the backside of the project).
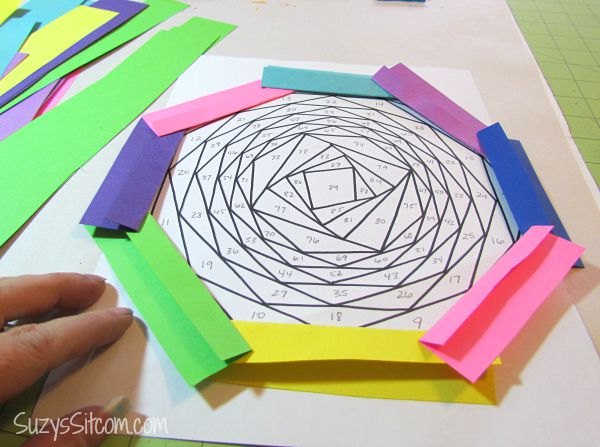
Cut another color strip and fold lengthwise, placing it over section number two, tacking the two strips together with glue stick. Repeat this process going around, being sure to do the sections in numerical order. (Do not glue it to the pattern).
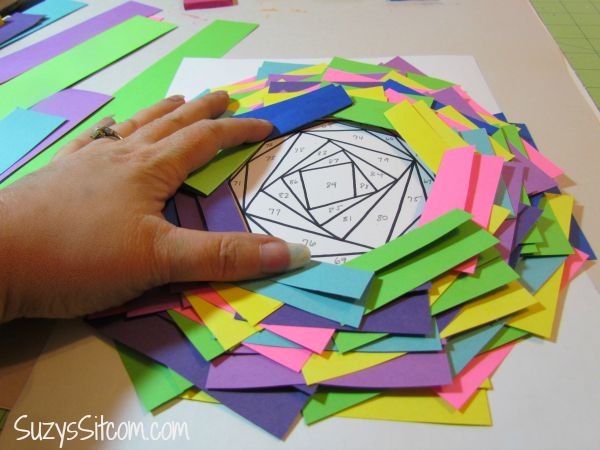
Continue around, in numerical order, using a glue stick to glue each strip in place.
The final piece is a simple square glued to cover the center.
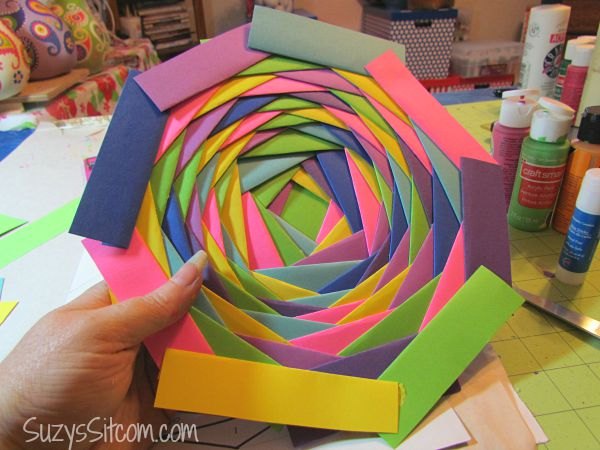
Flip your project over and you will be thrilled at the effect!
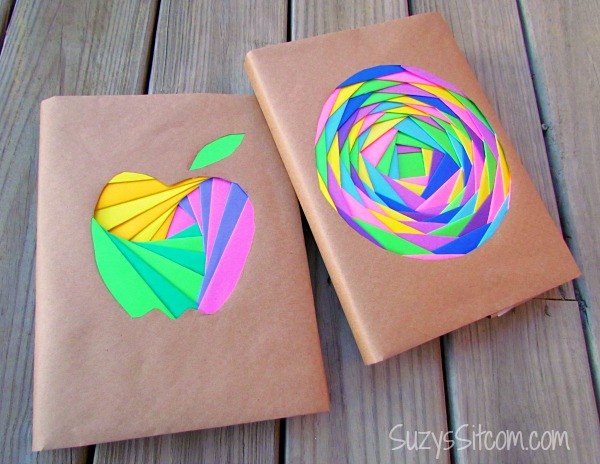
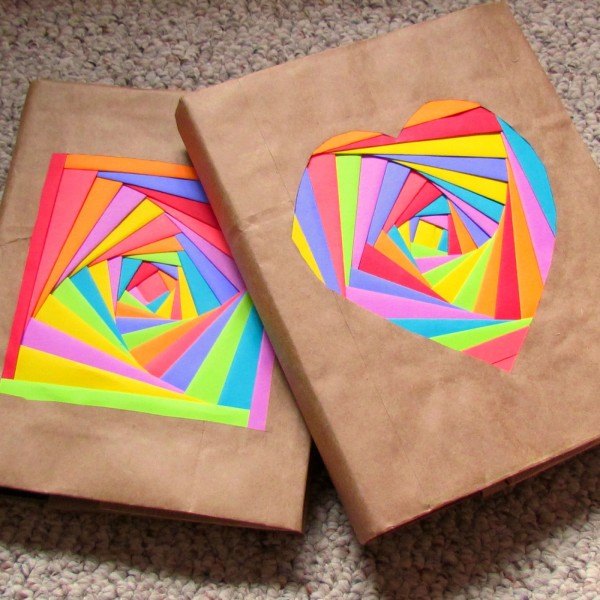
For the apple cover, I drew a apple on the cover of the book that is just a bit smaller than the finished Iris Fold. Unwrap the book and cut the shape of the heart out of the cover. Glue the Iris Fold onto the inside of the cover using tacky glue with the front side of the Iris Fold against the inside of the front cover.
Not so boring now, is it? Let your colorful creative ideas go wild!
For the free patterns for this project, be sure to click on the link below!
Want more details about this and other DIY projects? Check out my blog post!
Comments
Join the conversation
2 of 40 comments
-
This is the way i did my books back in the later 70's early 80's. Mom said it was a waist to pay out good money for pricey book cover already made. So she showed us how to use grocery bags, back then thats what we had alot of. LOL. Nice to see it's still around. Some kids laughed at it some acted like that way to cool, can you make some for me. Really nice.
-
I haven't done iris folds since I made cards for all the other "islanders" in Gilbert and Sullivan's Utopia Ltd. Thanks for the reminder, I'll have a go at some more cards though I don't think a parrot peeping through the hole in the middle would be appropriate for a Christmas card.😂


Frequently asked questions
Have a question about this project?
Really can't wait to try this! However, I joined your site and got the promised 5 free patterns [thank you], but I did not get the Iris Folding Pattern. Where did I go wrong? Toni Rowe
May I please have everything I need sent to me in an email to make folded book covers? My email is jlbutner03@gmail.com. I would like to sign up to get more of your projects please. Thank you!
Would you kindly send the book cover patterns to jannetcrawford@yahoo.com?
Thank you!