


Making a Solar Powered Waterfall for Our Fairy Herb Garden
This is how we made a solar powered waterfall for our new fairy herb garden. It cost us less than $10 to make, and is such a fun feature to have.
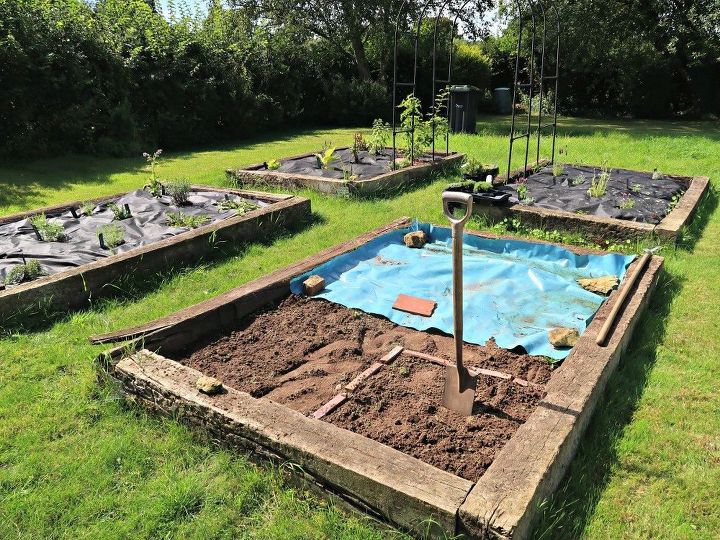
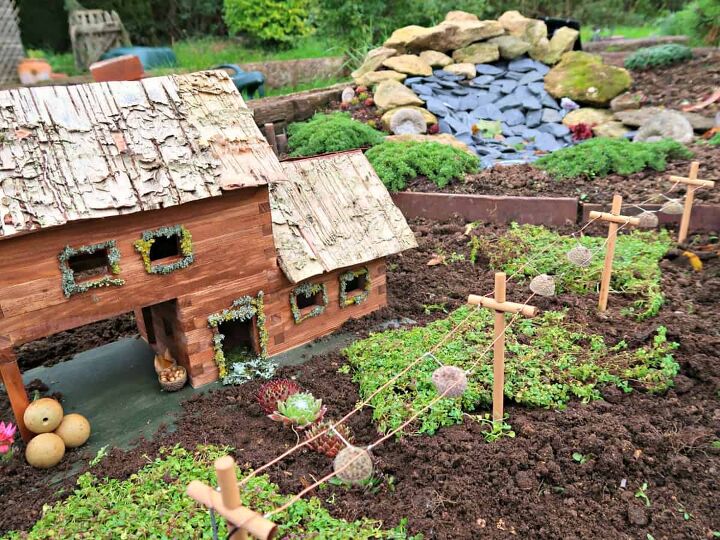
We recently decided to convert our raised vegetable beds into a large herb garden. A herb is any plant whose leaves, seeds, or flowers are useful for flavouring, food, medicine, fragrance or other useful applications. We have six raised beds available for our herb garden. We have already planted three, while two are still covered with plastic until we are ready to plant them. Earlier this week we made a start on the one the kids, and I are most excited about. - Our fairy herb garden. Our fairy herb garden will house all the beautiful miniature herbs that would get lost in our other beds. It will also be home to some of the fairy craft projects that we make. To make the build manageable, we plan to build and plant it in sections. And as with any garden, we needed to start with the hard-landscaping first. When I talked to the kids about they wanted in the garden, a fairy waterfall was the top of the list. We didn't have the budget or inclination to spend lots of money on garden features, so enlisted the help of my brother who is brilliant at doing electronic projects with the kids and he helped us put together the solar powered pump.
The parts used for the solar powered pump are:
5V Submersible pump
6V 3amp Solar Panel
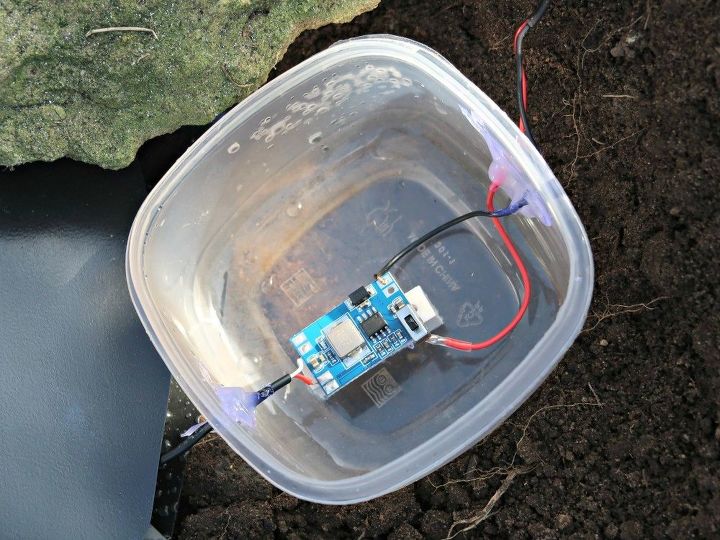
4-20V to 5V Step Down Voltage Regulator – This is the chip which converts the output from the solar panel to a steady 5V for the pump
Wire & Tube
The total cost of parts was around £5.
You simply solder the solar panel to one end of the chip and the pump to the other.
We housed the chip in a small plastic box and used lots of hot glue around the entry exit holes to make it watertight. It would be fine to bury the box under the soil although we hid ours under a rock. We also put plenty of hot glue over the soldered connection to the solar panel to make it watertight.
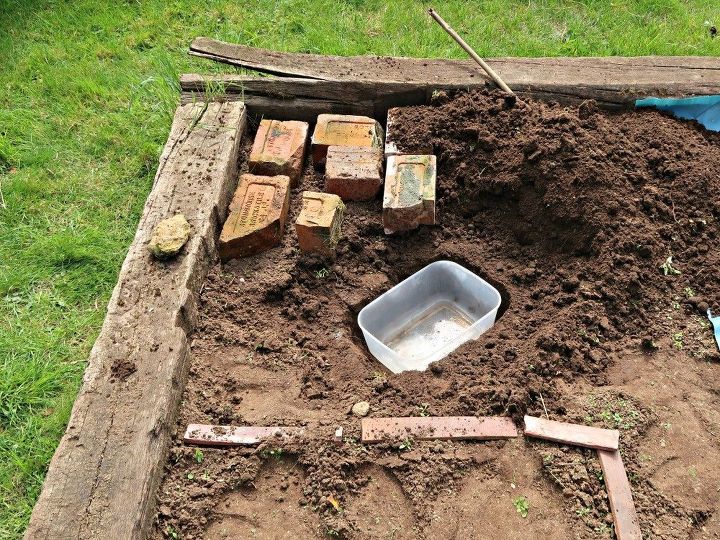
We found most the materials used in the structure of our waterfall in our garden. One exception was the pond liner offcut which we found at the garden centre, and got for a pound.
We started with a few pieces of brick to give our mound some stability. Then simply used soil dug out of another section of the bed and our water reservoir to create our slope.
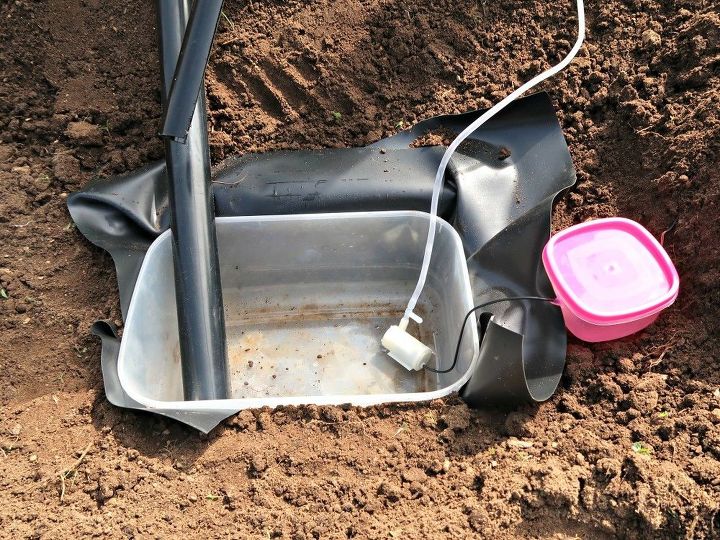
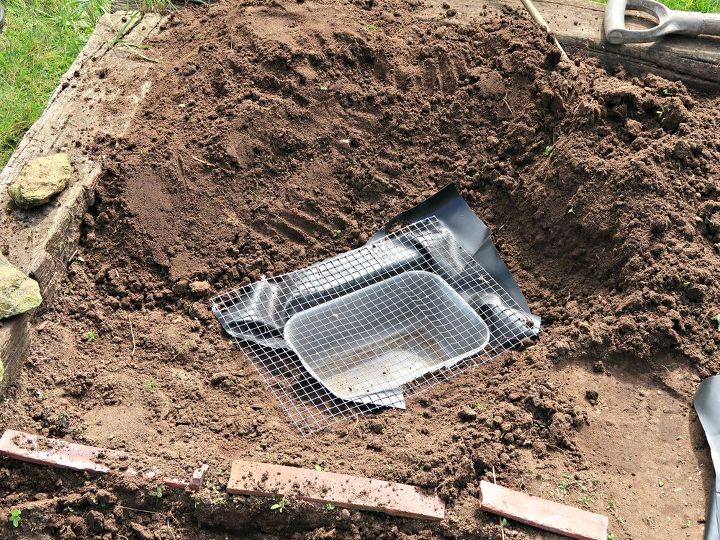
To make sure we didn't lose too much water, we used the pond-liner strip and two half pipes to make sure it all channelled back to the reservoir.
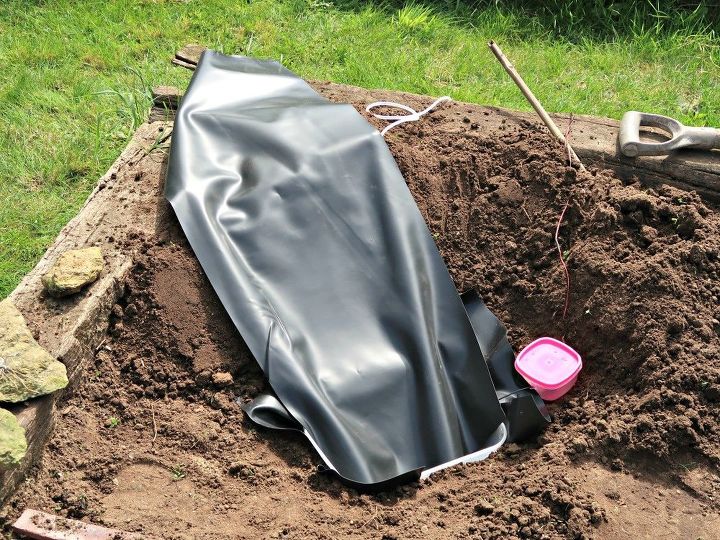
We also used one of the pipes to protect our plastic tube carrying our water from the pump.
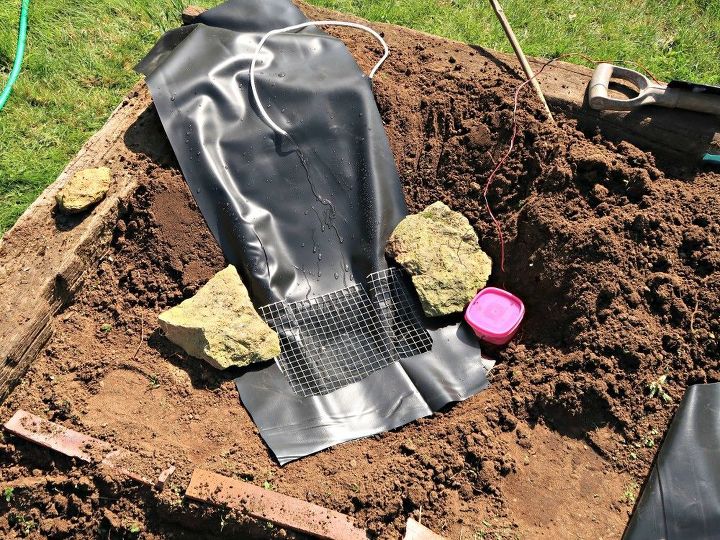
Once everything was in place, we surrounded our reservoir with strips of pond liner to discourage soil washing into the water (and potentially clogging up the pump) and covered it all with a piece of mesh to give further protection and to hold our slate.
The tube carrying our water to the top of the waterfall runs into a little indent that we made at the head of the liner. We used a small piece of bent copper pipe to carry the water out.
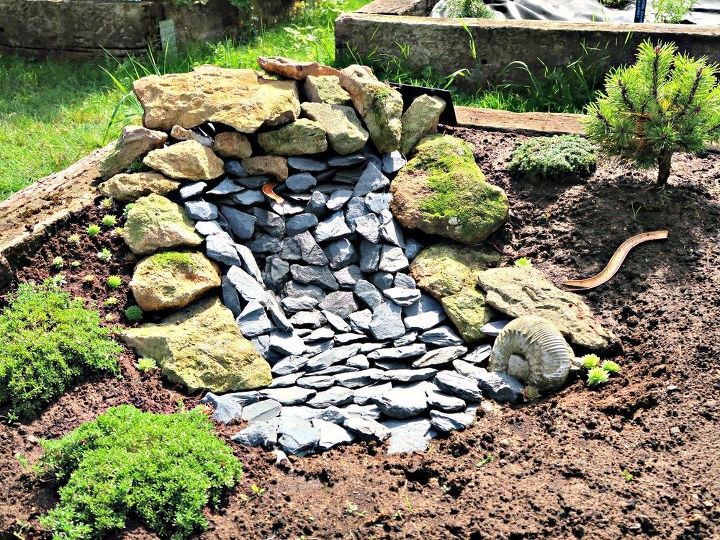
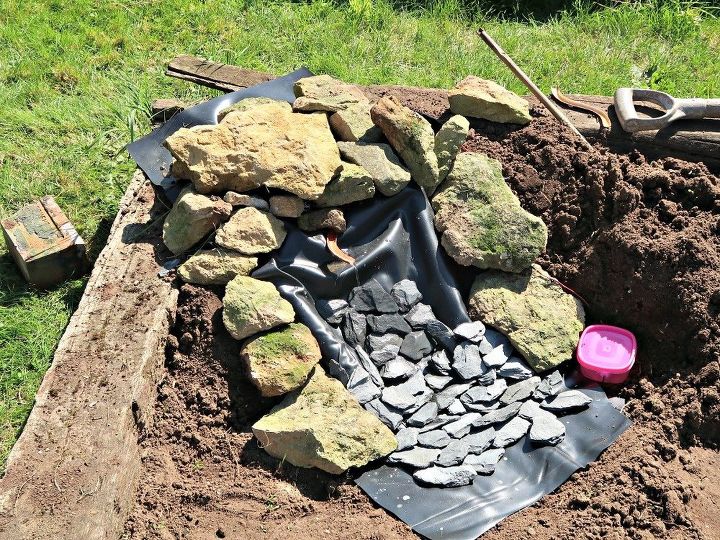
We used a combination of stone and slate to get the look we wanted and started planting some herbs. This project is working progress, and we'll be adding more plants and embellishments as we go along!
You can see our little waterfall in action in this short clip. We have also uploaded a short clip to youtube of us testing the pump and reservoir before adding the stones in case it's of interest to anyone.
And if you'd like to see more of our fairy garden check out our adorable 'How to make fairy lights out of acorn caps' tutorial using an adapted garden solar light.
Resources for this project:
See all materials


Comments
Join the conversation
-
Since the area under the slate is covered in plastic, how does the water get back to the top? I can't visualize that.
-
Beautiful and creative. I’d love this in my backyard. Sigh. . .my dogs would have it trashed in the first 5 minutes, unfortunately. But, it’s nice to dream!


Frequently asked questions
Have a question about this project?
Looks good dry, but how does it look with the water running through it?
What kind of wood you used to make your garden bed? I really would like one!🥰
I’m amazed at how all the materials only cost £5. Is that correct?
The parts used for the solar powered pump are:
5V Submersible pump
6V 3amp Solar Panel
4-20V to 5V Step Down Voltage Regulator – This is the chip which converts the output from the solar panel to a steady 5V for the pump
Wire & Tube
The total cost of parts was around £5.