


Distressing Wood: Feature Wall Part 3
$250
2 Days
Medium
It's time for the fun part: Distressing & Antiquing our wood wall with wax!
If you’ve stuck with us the last two weeks (Part 1 nluvstudio.com/2017/08/23/snowboard-feature-wall/ & Part 2 nluvstudio.com/2017/08/30/snowboard-gear-organization/), our Snowboard Feature Wall has come a long way.
We finalized the design, gathered all the materials, cut the fence boards, picked the colors, installed mounting strips and even painted! Whew! It has been great progress, but now is where the fun begins… distressing wood.
The Art of Distressing Wood
Distressing wood is a personal and unique process. No two boards will ever look alike. If perfection and symmetry are your calling, leave distressing wood out of your design. But, if you are like me and love a truly one-of-a-kind look, a distress technique will create an original design no one can duplicate.
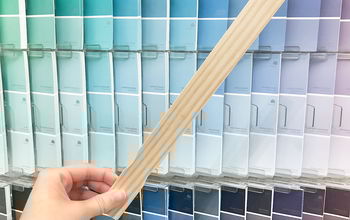
In many of my past articles, I stress the importance of a design plan and following it. When it comes to distressing wood, there is no plan. I literally get started and see where the look goes. We left off last week with bright, fully painted fence boards reminiscent of a circus tent. I love color but the bold, solid tones do not fit with our Tahoe home style, and I always had the intention to be ‘rustic-ified’. With all our snow-sports gear soon to be living on this wall, these boards are going to get beat up. So, I might as well start the process for them and get the ‘worn-in’ look on its way.
Tools
- Sandpaper
- Mask & goggles
- Vacuum
- Rags (dry & wet)
Distressing time!
There are a total of 15 boards for the Snowboard Feature Wall. My process is to distress each color of board fully, wipe down with a damp cloth and then move onto the next color. This methodology will keep the colors from cross-contaminating each other through dust, sandpaper transfer and wet rag residue. I purposely painted each a specific color. Now is not the time to get lazy and muddle the colors across them all.
Pick a method
There are two main methods of distressing – heavy or gently used.
- If your final look is wanting of a smooth, polished coat with only slight wear & tear like a well-cared for antique would hold, you’re on the ‘gently used’ side. To achieve this look, choose a finer sandpaper, such as 150 grit, and only lightly distress against corners, edges and any other raised details that would naturally have paint wear off of them. Leave any smooth surfaces un-scuffed for a more polished finish.
- But, if you are wanting a more rugged & rustic appearance, you will need to go to the heavy spectrum of distressing. Pick a coarse sandpaper, like 60 or 80 grit, and put some muscle into it! Make sure you get the edges, corners, any raised points and even across smooth surfaces like they would wear over time from being touched or rubbed. TIP: It’s important that you like the underneath color when heavy distressing. When you remove much of the painted color, the base color whether another paint or wood will take a dominant role in your design. Plan ahead for this!
Let’s distress
- My design warrants a heavy distressing wood look, so I will use 80 grit sandpaper for the entire process.
- I like sanding blocks but not buying them. Try this out. TRICK: Take an old sanding block and cut a strip of fresh sandpaper to wrap around it. Tape the underside and top side of the sandpaper to the sanding block for a fresh new block at a fraction of the price.
- Get out your mask & goggles. Even turn on a fan if you’re inside to blow out a window or just sand outdoors. Start with the edges and sides. Use the sanding block and scuff in the direction of the wood, carefully wearing off the color as you desire.
- Move onto the center of the fence boards. The boards already have a rough, heavy wood texture as they are rough cut & I didn’t sand them down smooth. Take the sanding block and use a circular motion to rough up color on the faces of the boards. Finish this step off by sanding with the grain to smooth out the marks and create a more natural worn effect. NOTE: If you have multiple colors on a board, be careful how hard you sand. If you want some spots to show the base paint color while others go down to the wood, sand accordingly. Do a little planning on where the bare wood will show vs. the multiple colors so the finished product is natural.
Do a little cleaning
- At this point, there is dust everywhere! Clean up your dust as you go by color with a vacuum, rags and any other means to control the air quality. TIP: Tape a vent filter to the back of a box fan to create a filtered way to suck in the dust while blowing out cleaner air on the other side of the fan! It works. When the filter gets all dirty, vacuum it or shake outside.
- Take your time and distress each board until you are happy with the results. When finished, wipe down each board with a damp cloth to remove all remaining dust and smooth out any spots from sanding. Let boards dry.
Seal ’em with wax
With all the fence boards distressed and wiped down clean of dust, it’s waxing time! I like wax for several reasons. When multiple layers are applied and properly cured, it creates a water-repellent type layer to combat Mother Nature’s elements as well as an active family lifestyle. I also love the creative freedom to antique with colored waxes rather than solely relying on paint layers. My final plug on wax is its ability to be either matte in finish or polished to a high shine. With paint & varnish, you must decide that ahead of time when you buy materials, but with wax, you can decide at the end to leave alone or polish it up!
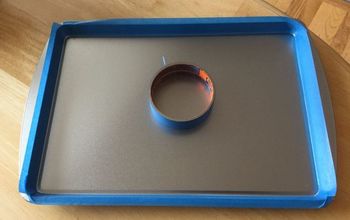
Tools
- Wax (clear & dark brown)
- Wax brush
- Clean t-shirt towels
- Plastic bag
Wax on!
Since this Snowboard Feature Wall will get wet, banged, abused and roughed up, I am applying two full clear wax coats and a dark wax antique layer to finish off the look.
- Get the clear wax & brush. I prefer to use an actual flat-faced wax style brush to save on product application use and really push into all the grooves. Brush on the clear wax with smooth strokes with the grain of the wood. Less is more here! Don’t glob on the wax. Multiple thin layers is better than a gloppy single layer. Dab the brush into the wax tin and apply to each board, all sides, edges and faces.
- Wipe off any excess spots if the wax is a little thick anywhere. Set each board aside to dry. The wax will feel smooth to the touch and be ready for a second coat in about 30 min.
- Apply a second coat of clear wax to EVERY board. This is important to fully seal the paint & ensure these boards are ready for real-life use.
- The third and final coat of wax is the dark brown wax. VERY LIGHTLY apply on the wax brush and dab on either a paper plate or even a plastic container so that the application will be ever so slight. Lightly brush across the edges and any heavily textured spots on the fence boards. Get a clean t-shirt towel and wipe the boards to work in the dark brown color and create an antiqued finish look that is reminiscent of an aged, weathered fence. TIP: If you apply too much dark wax and can’t rub it off, apply more clear wax over-top and wipe. The clear wax will help remove more of the dark wax from your surface.
- Lay out all the boards and let the wax dry overnight, as close to 24 hrs as you can get.
- If you like the matte wax finish, you are done and ready to start mounting the fence boards to the wall. If you want a little sheen, now is the time to do it.
- Take a clean towel or plastic bag (my favorite tool) and buff your boards till the wax becomes shiny. Keep at it until you reach the desired shine.
The Perfect Finish
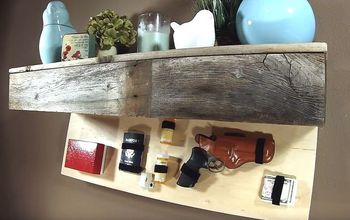
Distressing wood takes vision, time and patience but the finished product can be stunning. Take time with each step and don’t rush the process. With our boards now cut, painted, distressed & waxed, the next step is to mount them on the wall and start installing the feature wall display.
Stay with us as we begin the installation of our Snowboard Feature Wall. Once the boards go up, the shelves, baskets, and gear will follow.
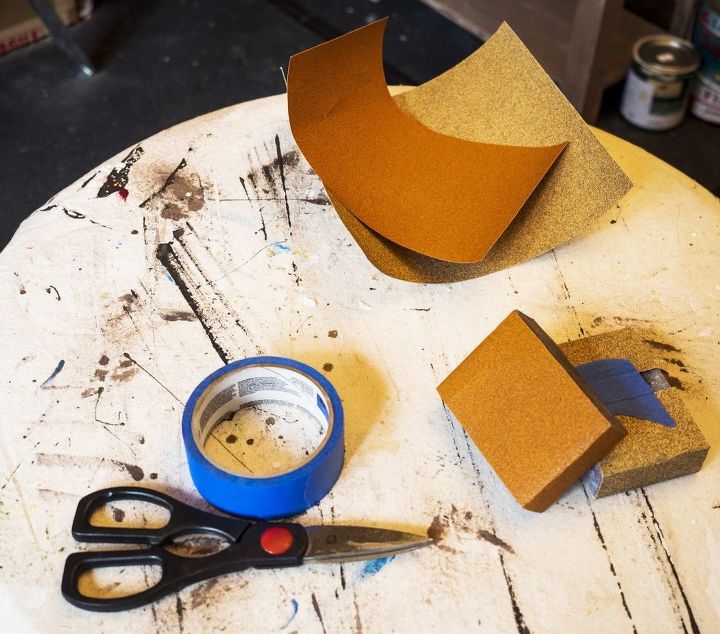
Create your own sanding blocks.
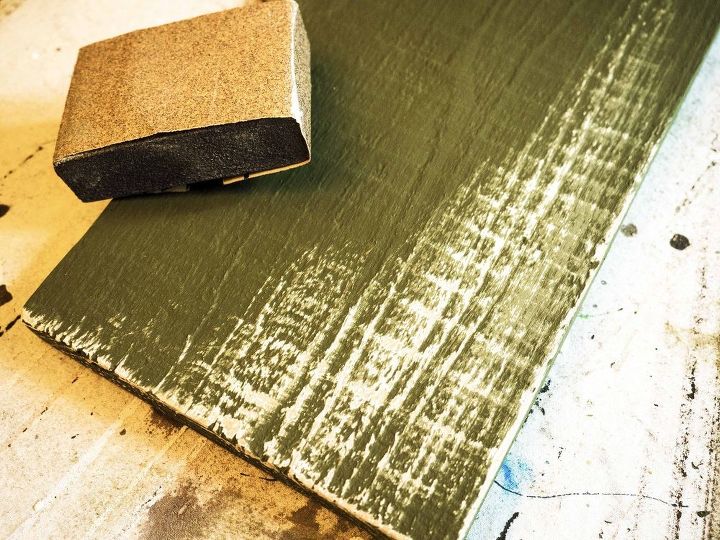
You control the process. Distress a little or a lot!
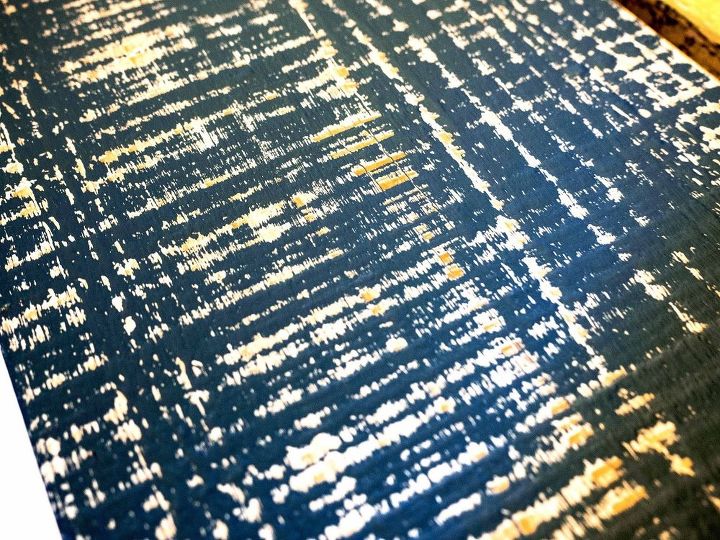
Multiple colors exposed with heavy distressing.
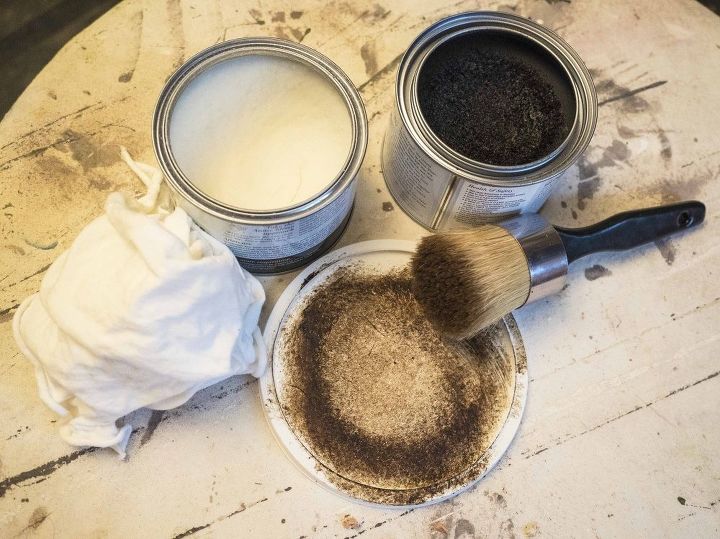
Clear & dark wax w/ supplies for a great finish coat.
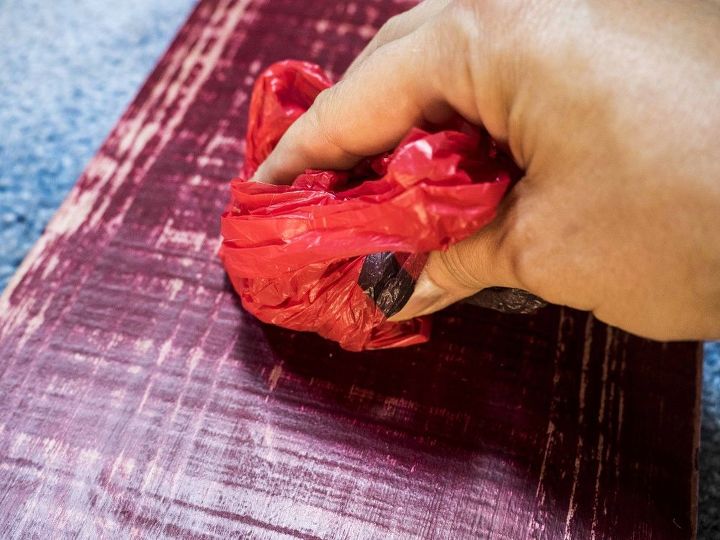
Recycle those plastic bags. They’re a great buffing tool.
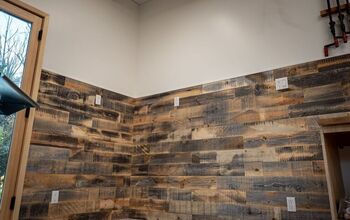
The wall is really starting to take shape!
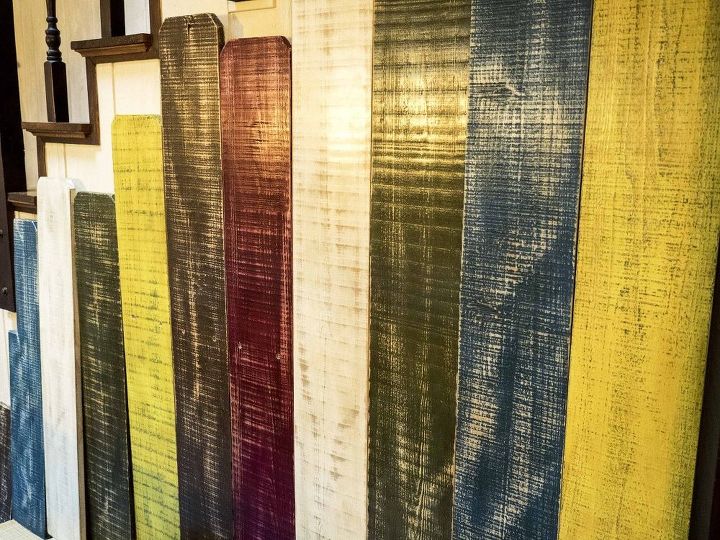
Painted, distressed, waxed, antiqued & buffed!

Want more details about this and other DIY projects? Check out my blog post!


Frequently asked questions
Have a question about this project?