


Fall to Winter Wreath: How to Make a Cute Reversible Scarecrow Snowman

As the leaves change and the air turns crisp, it's time to embrace the spirit of the seasons with a delightful DIY project: crafting a reversible scarecrow snowman wreath.
This Fall to Winter wreath will not only elevate your home's curb appeal but also bring a touch of warmth and festivity to your front door.
In this easy-to-follow guide, I'll walk you through each step, helping you create a versatile decoration that can seamlessly transition from autumn's embrace to the enchantment of winter.
Tools and Materials
- Lathing strips or pallet wood
- Utility knife
- Staple gun and 1/2" staples
- Paints (brown, black, orange, white, pink)
- Paintbrush
- Hot glue gun
- Material or a real scarf
- Paddle/thin wire
- Fall ribbon and decorations/picks
- Bandanna
- Pumpkins and mums
- Winter ribbon and decorations/picks
- Grapevine wreath
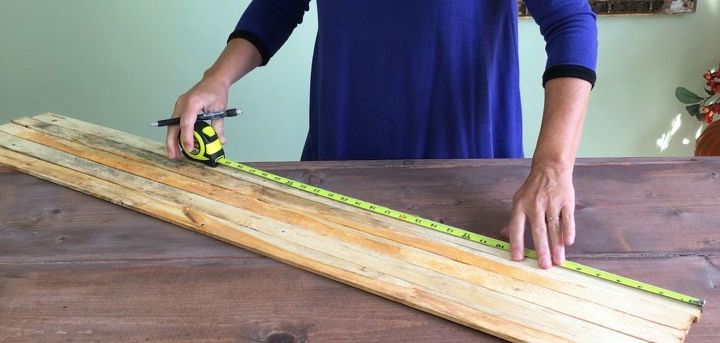
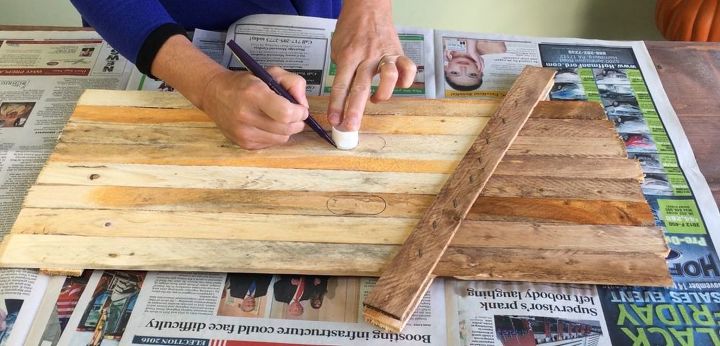
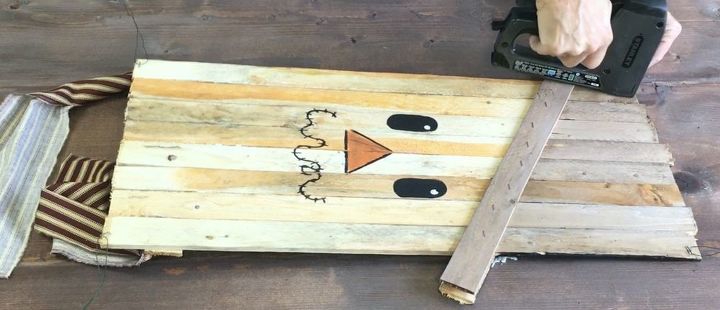
1. Measure and Cut the Wood
Begin by measuring your wood to determine the height of your wreath. If you're using lathing strips, cut 4 strips in half using a utility knife.
If you prefer pallet wood, cut it to the desired size for a stand-alone decoration.
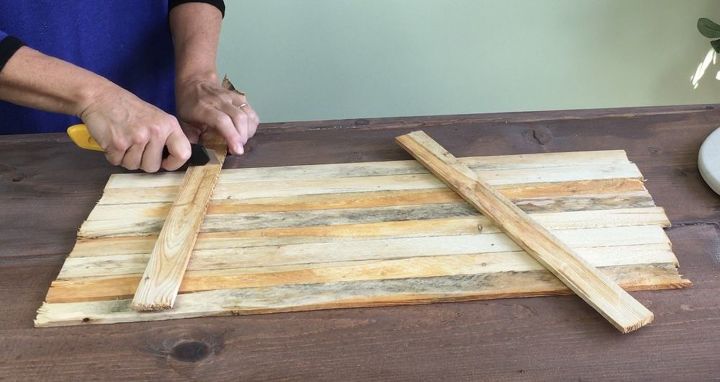
2. Assemble the Base
Arrange the 8 wood pieces side by side, creating a solid base for your wreath.
Cut a piece of wood for the scarecrow's hat brim and another piece to match the width of the base.
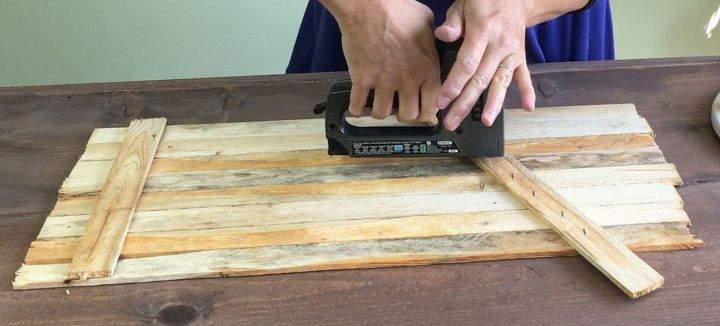
Use a staple gun and 1/2" staples to secure the hat brim (placed at an angle) and bottom cross piece to the wood base.
Flip the piece over and add another hat brim (diagonal piece) to this side.
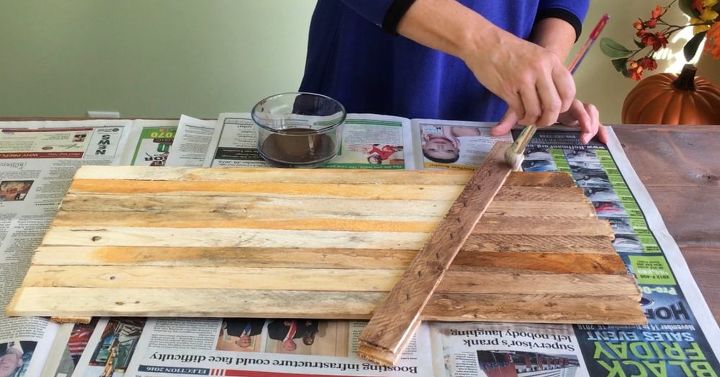
3. Paint the Scarecrow
On the side without wood at the bottom, paint a scarecrow. Coat the hat brown with a water and paint mixture for a rustic look.
Add oval eyes (using a paint container cap). To make oval eyes, trace the cap's top edge, move the cap down about 1/2", then trace the other edge of the cap. Connect the two half circles with a line.
Paint the eyes black and add twinkle with white paint.
Allow the paint to dry.
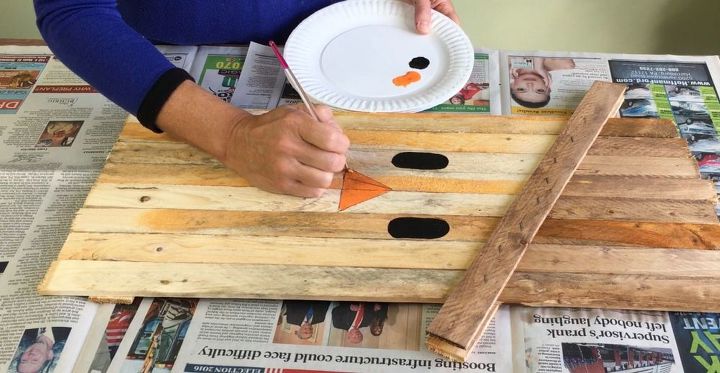
To make the nose, draw a triangle and it paint orange.
When the paint is dry, trace the nose in black.

I made a squiggly mouth and added dash marks so it looked like it was sewn on. You can either use black paint or a Sharpie to draw the mouth.
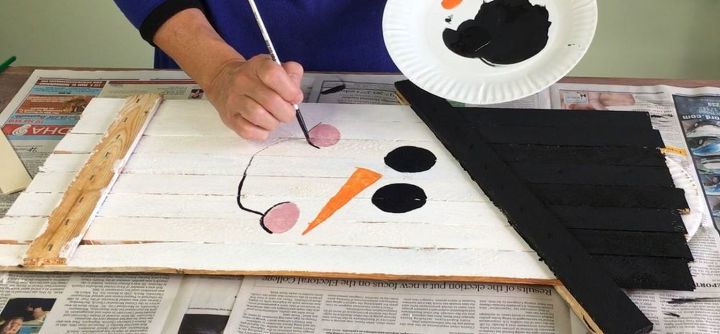
4. Paint the Snowman
Flip your wood base and paint a snowman on the other side.
Paint his hat black, and his face white, then allow it to dry.
Next, add round eyes (tracing the paint bottle), a carrot nose, and a mouth with pink cheeks. Don't forget to include twinkle highlights in the eyes and on the cheeks.
Allow the paint to dry.
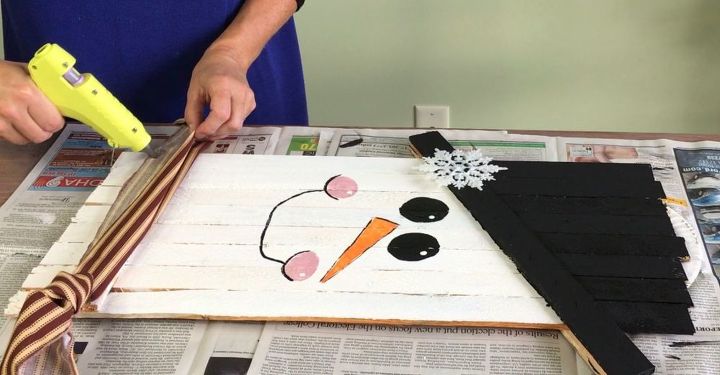
5. Add Decorations
Hot glue your choice of decorations to the scarecrow's hat brim on both sides.
To conceal the wood at the bottom of the snowman, create a scarf by hot gluing a piece of material or a real scarf over it.
Staple one piece of paddle/thin wire to each corner.
6. Secure the Wreath and Decorate
Staple a piece of paddle/thin wire to each corner of your wood base.
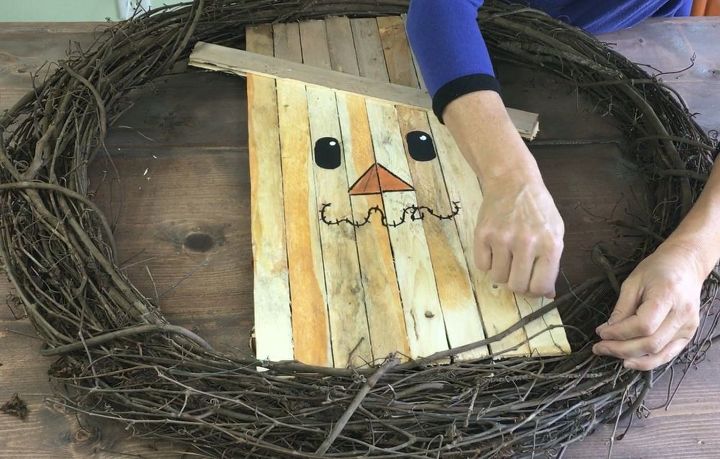
Using the wire, attach the scarecrow/snowman to the wreath.
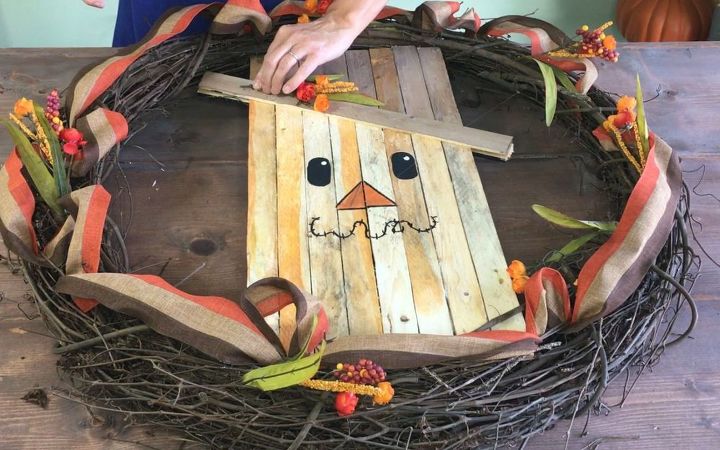
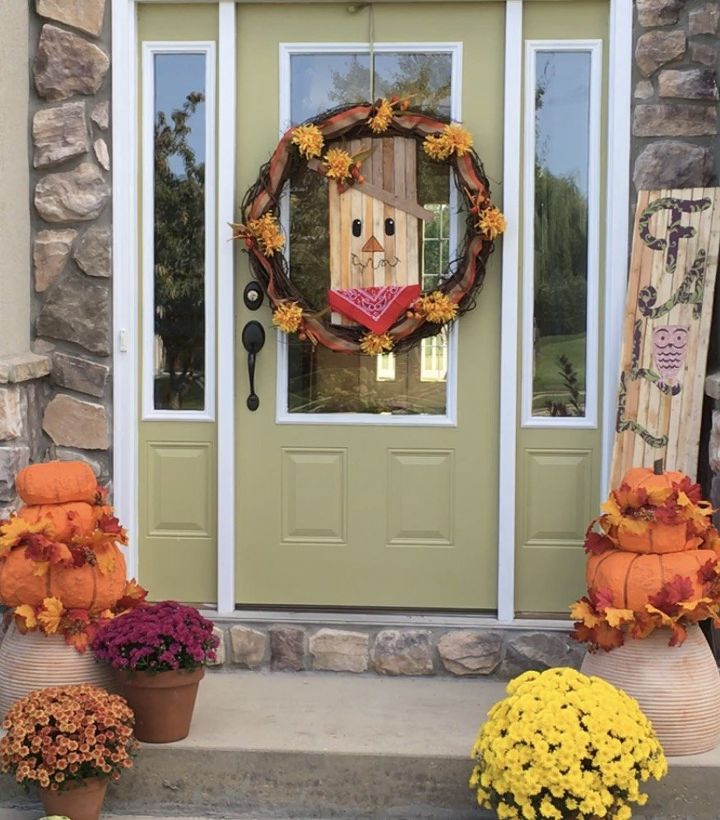
Now decorate each side with the appropriate ribbon and picks for each season. Add fall ribbon and decorations/picks to the wreath on the scarecrow side.
I decided to hot glue a bandanna to the scarecrows "neck".
More Thanksgiving Wreath DIY Projects
Scarecrow Snowman Wreath Tutorial
Here is our beautiful reversible scarecrow snowman wreath, perfect for welcoming both fall and winter with open arms.
When fall transitions into winter, simply flip the wreath for a snowy hello.
I'd love to see your seasonal creations—please share your thoughts and photos in the comments below.
Happy crafting!
Comments
Join the conversation
-
Made one similar last year at spur of the moment with an old shutter, no one would buy for a dollar?!? Painted it white white then roughed it up rustic..Made a jack o lantern on one side and snowman on other. Used orange bag and cut out nose for both...Used buttons and glued on for eyes and mouth...So many compliments from all. Cost...nothing, Shutter came from old house many years ago and I always save orange, black and red bags and have tons of buttons and bows. The shiny, black hat was made from an inverted bag from an order, so Voila..Amazing what you can do for little or nothing...Go for it, all of you!!!! HAPPY HOLIDAYS COMING UP...🤩
-
No question....Just so CUTE !!!!


Frequently asked questions
Have a question about this project?
Can you tell me the color of your door? I have been looking for a new color for mine and would like to try this color
Do you also use lathing strips for that brim?
Are you going to show what it looks like for the Christmas holiday?