


Updating a Light Fixture...FOR CHEAP (or FREE)

by
Heather
2 Materials
$5
10 Minutes
Easy
My favorite two words: cheap and free! HA!
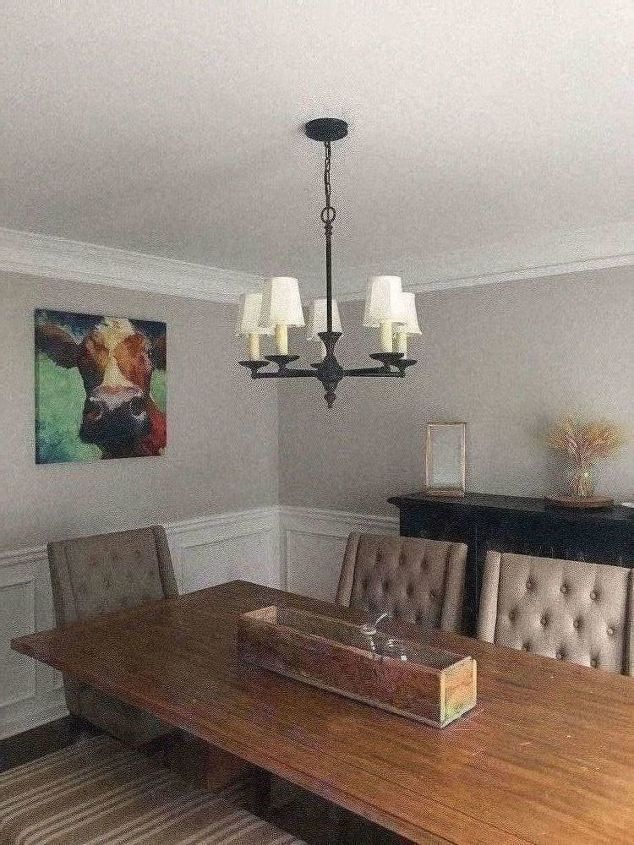
I am trying to do as many updates in our dining room without spending a ton of money because there are a few bigger ticket projects we may want to conquer in the future.
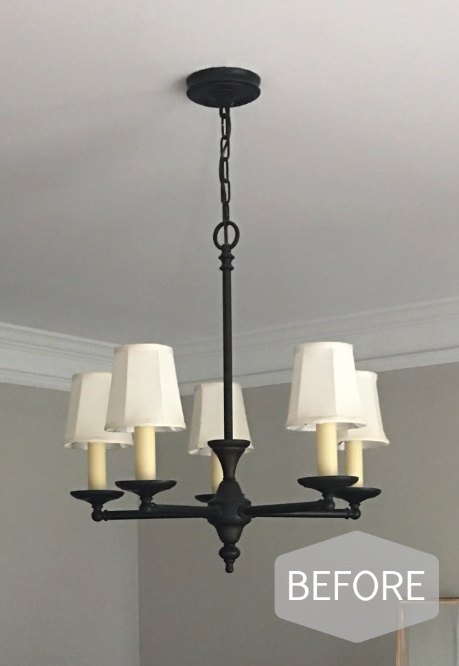
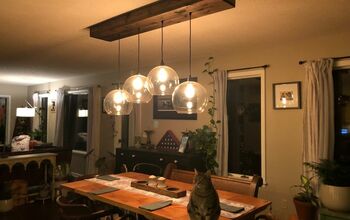
One project I wanted to take on in the dining room was changing out this light fixture. The issue I was running into was my cheapness was setting in and not allowing me to buy anything online or in store. I mean, it is hard for me to justify to the project manager (husband) to drop $200++ on something that already exists. What I was not a fan of with this light were the shades and the cream socket sleeves. I searched around to get inspired but nothing really caught my eye. I started chatting with a friend and via texting pictures back and forth, an idea hatched
It just didn't fit the space the way I wanted to. (And don't mind anything you see in this picture. Things are changing in here!)
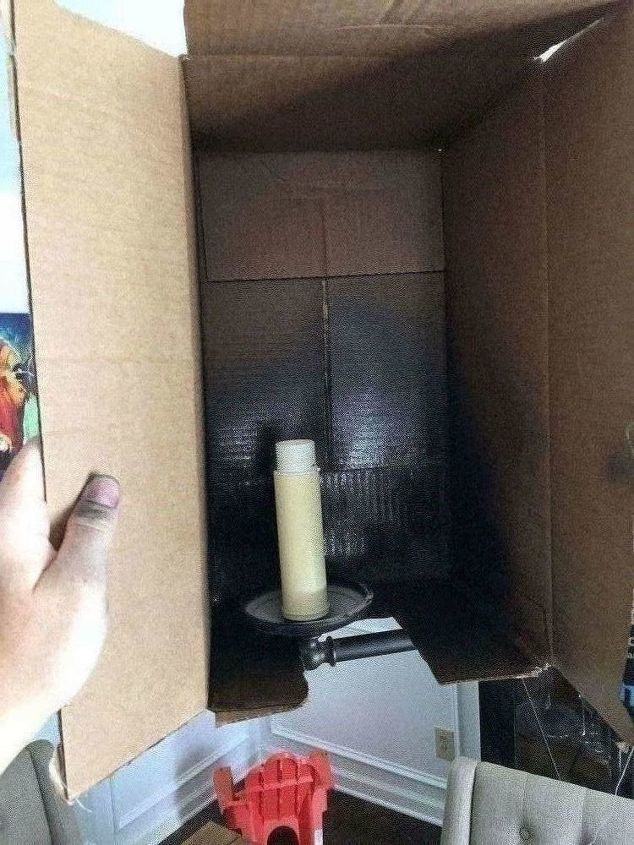
After chatting with my friend, I decided I would try to paint the sleeves. If it looked bad, I could just paint right back over it!
I grabbed a can of spray paint I had (Rust-Oleum Metallic Oil Rubbed Bronze) and a spare box, cut a long hole in the side of the box so the candle could slide in easily, and sprayed.
It allowed me to paint these specific spots without having to take the whole fixture down. It made the air smelly, but paint only got all over my hands and not furniture!
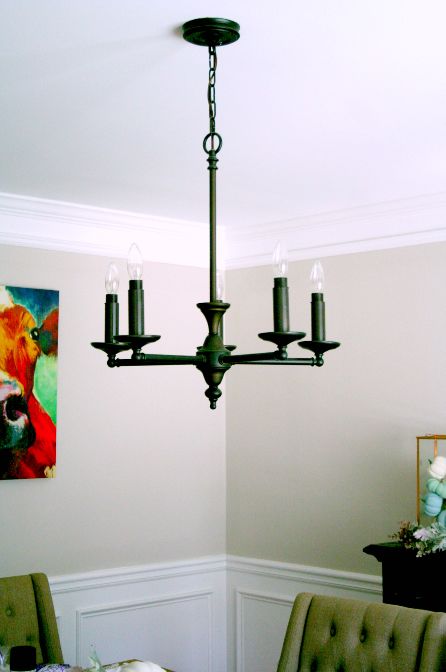
Spray paint made a world of difference! I am thinking about leaving the bulbs exposed (because I love that look) but maybe updating them a bit!
This project was SUPER easy and FREE! But if you don't have the paint, it would cost the amount of a can of spray paint!
Want more details about this and other DIY projects? Check out my blog post!
Comments
Join the conversation
4 of 39 comments
-
Great inexpensive update! I have a silver chandelier hanging over dining table, haven't wanted to spend the money to change it to the same thing in oil-rubbed bronze to match lamps and curtain rods in same room. Same spray paint you used will be a great solution! I may have to pay a service call to shut off power to light, and unwire it from ceiling so I can paint it outside of the house, and have neighborhood electrician come back to rehang it once it's done - still a lot less expensive than a new chandelier just to change the color of it. Note to self: disposable gloves

-
Love it when you can make a DIY change and wait for something you'll like better.


Frequently asked questions
Have a question about this project?
I wanted to ask did you take the rest of the chandlier down to spray it, especially the part that’s attached to the ceiling how were you able to spray that?
Many thanks in advance