


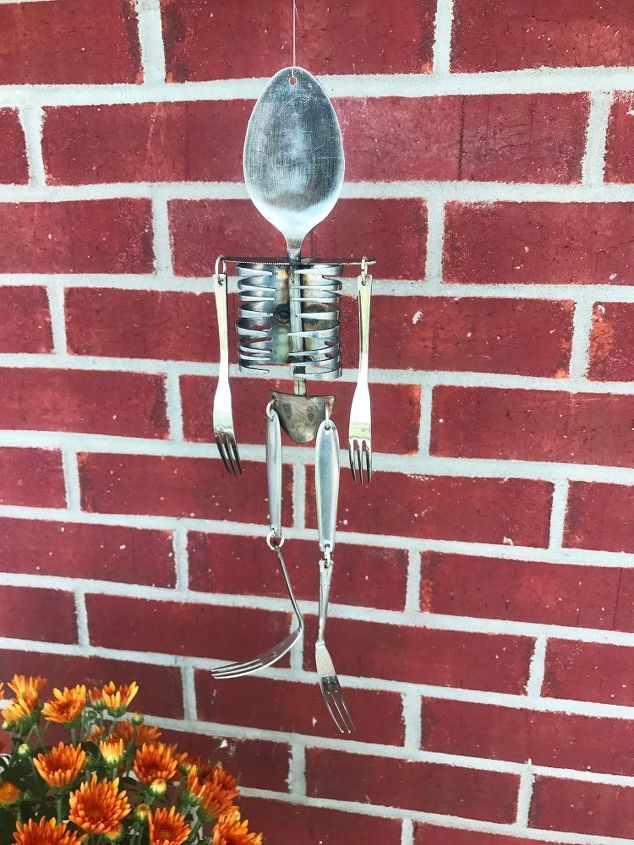
Silverware Skeleton Wind Chime
UPDATED!!
Here it is…October 1st. The first day of my favorite month. Basically one month before my favorite holiday and I couldn’t think of a better time to show you my latest creation. It’s a skeleton wind chime made only from silverware.
I don’t know how I’ve amassed so much silverware. *pause* Never mind. Yes I do. It’s because I was buying every silverware storage box I could find to make one of these (https://www.hometalk.com/diy/bedroom/furniture/vintage-luggage-from-a-flatware-storage-chest-26465947). Some were full and some were empty. Needless to say, I have more than enough silverware to serve all the Knights of the Round Table. Well, as long as are were no appetizers (more on that later). For the life of me, I can’t remember what caused this creation to come to fruition. All I remember thinking is that forks could work as a ribcage. (For the record I don’t normally sit around thinking of ways kitchen utensils could be used as parts of the human anatomy.) Enough of the backstory, or lack thereof. Let’s get down to the nitty-gritty!
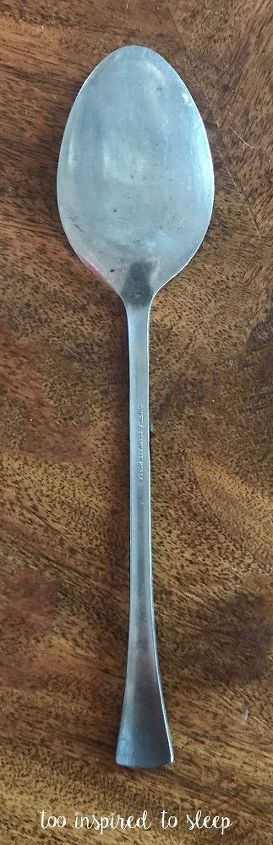
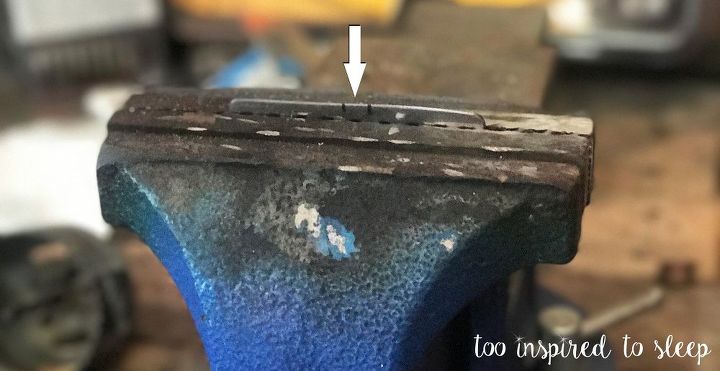
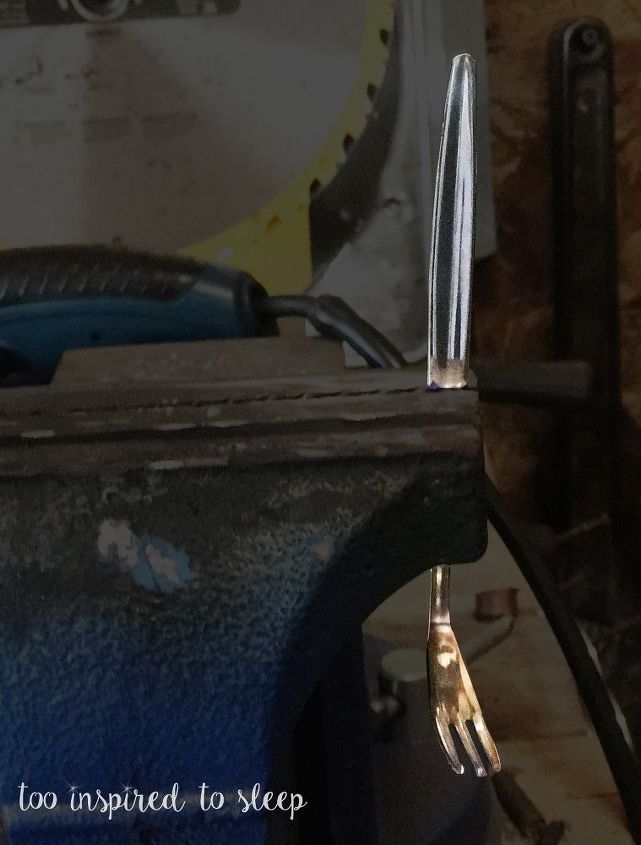
After digging deep in the pile of silverware, I found a single serving spoon. This would act as the head and spine. First thing’s first-I had to flatten the “head.” (I used a rubber mallet to do this.)
Now it was time for the "ribcage." To do this we were going to have to bend the tines of the forks. Hubby found an URO (unidentified round object) to bend the forks over that would create the perfect bend.
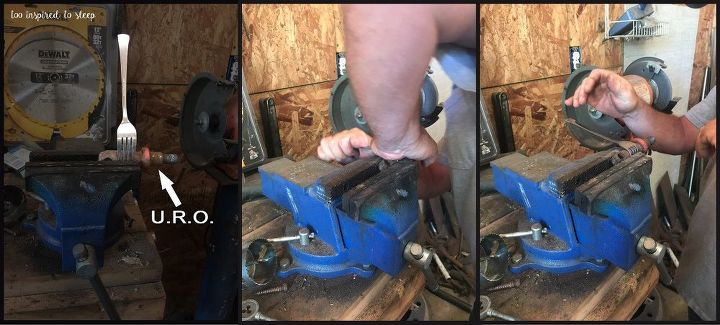
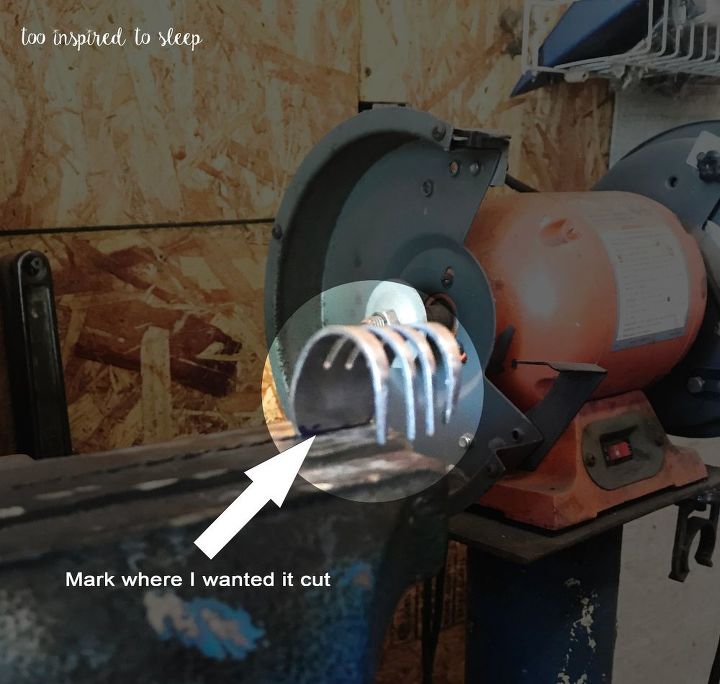
Since we didn’t need the whole fork, mainly just the tines, I marked where I wanted it cut and my hubby took it from there. (Neither he nor I trust me with the saw.)
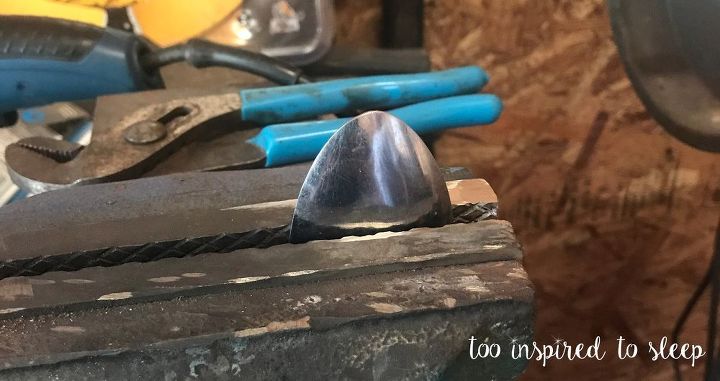
Now I had the "head," "spine," and "ribcage." I needed something for the “arms” to fit on so I opted to make a “collarbone” out of a knife blade.
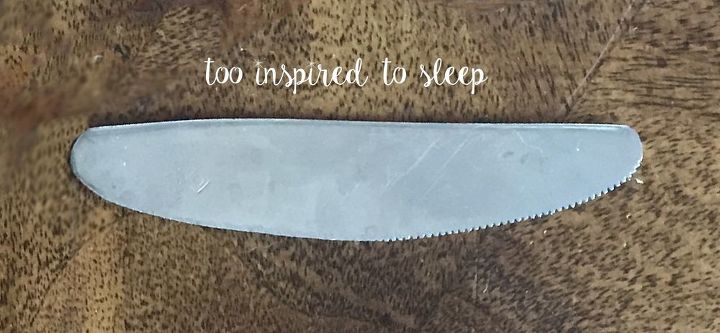
Therefore, Hubs cut off the handle and rounded the edge for me.
He then cut out a little place where the “spine” would fit.
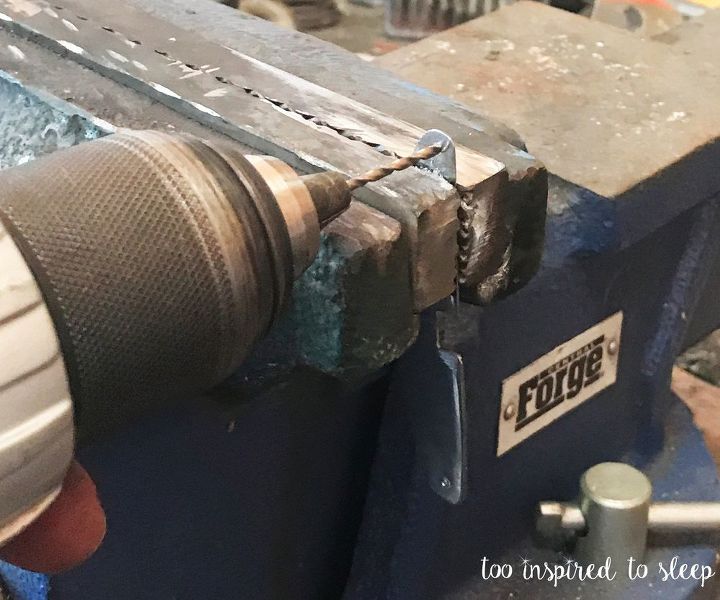
Next he drilled two holes on each side of the knife blade so that we’d have something to attach the "arms" to.
Now that we had something for the "arms," we needed something for the "legs." To be honest, what we needed was a "pelvis".
I decided the bottom half of a spoon would work perfectly for this. I made a mark and he cut it. Once again, he drilled holes on either side of the “pelvis” so we’d be able to attach the "legs" to it.
So now we have the "head," "spine," "collarbone," and "pelvis." Next will be the "arms" and "legs." This is where I ran into trouble. I wanted to use forks as “hands” but they were too large. After deliberating a bit, I decided appetizer forks would work perfectly. Although, in my huge assortment of silverware, I had no appetizer forks. I searched on Amazon and found a great deal on four pickle forks (that’s what they were calling them).
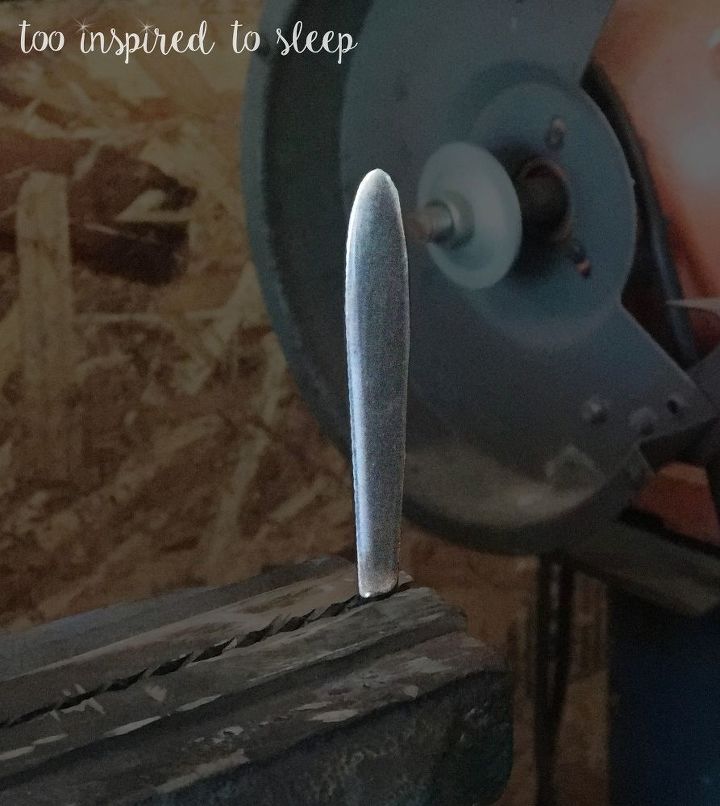
While waiting on them to arrive, I decided to make the "legs" 2-piece, as in a "thigh" and a "shin." I made the "thighs" out of two forks handles.
When the pickle forks finally arrived (two days seem like an eternity when you’re excited about a project), Hubby cut them to the desired length and bent them.
Throughout most of this project, I’d been mainly useless. I mean, I originally told my hubby my idea and what I needed him to do, plus I marked where he needed to cut. That was basically the extent of my duties. But this next part was when I was no help whatsoever. This is when he welded the "body parts" together. (Mwahahaha!!)
After all of the welding, then we were able to attach the “arms” and “legs” using jump rings. They’re found in the jewelry department.
At last…we are done! (Notice, I said “we”.)
I plan on making another one soon because halfway through making this one, I realized how I should have made the "face." By then it was a little too late. Oh well, I have plenty of sliverware (just no pickle forks).
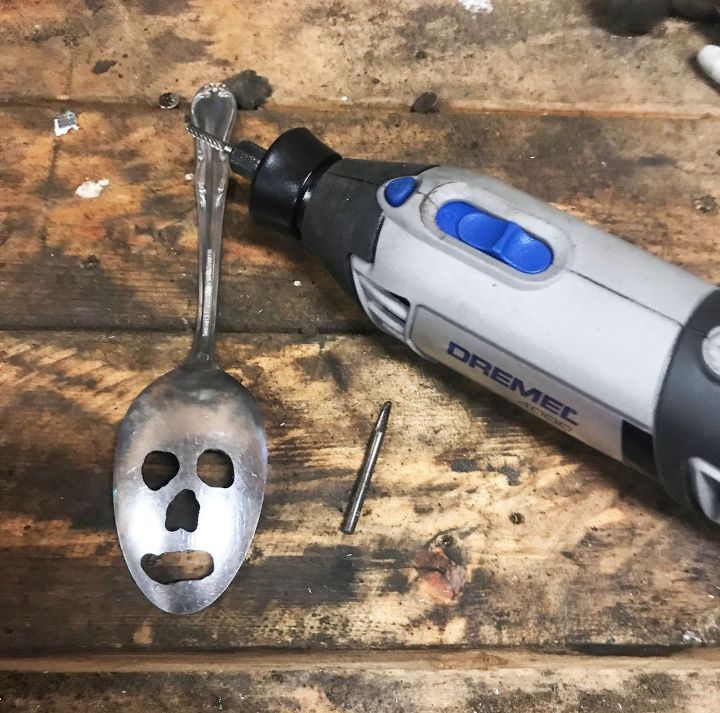
UPDATE: I just got a Dremel tool. The photo below is my first attempt of a "face" on an old spoon. Once I get the hang of it, I'll try it on the one above. Oh, and I'm also considering adding fork tines as "teeth."
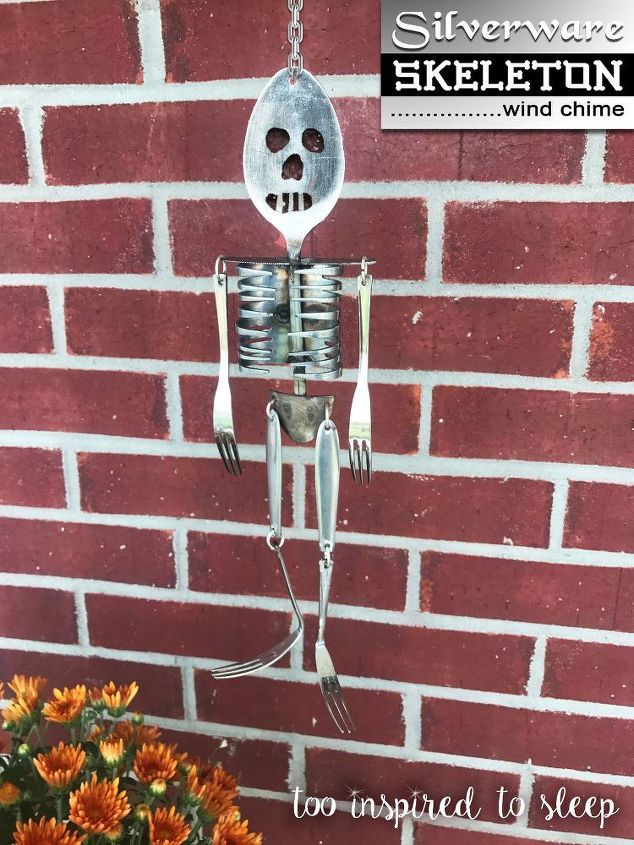
UPDATED update: So, here it is....all finished. What's your opinion?
DIY home decor using old kitchen utensils

Comments
Join the conversation
-
Fantastic idea!!.. it’s just awesome! Thanks for sharing!!!
-
My niece loves skeletons! So, even though it is July I am going to “try” to make this project. If I can find a spot welder….hmmm.


Frequently asked questions
Have a question about this project?
If the metal doesn't weld (some seem a bit thin) could you pop rivet the pieces together
Can the pieces be soldered together, rather than welded?
LOVE him!! I had my husband make me, and my mom, one. I'm just wondering, what Dremel bit did you use on his face? I could not use my Dremel, so my husband used a drill bit. Thank you for sharing this AWESOME project!