


Guest Bathroom Complete Remodel
Are you ready for this? Put your boots and gloves on before entering. Oh, and probably nose plugs! I know it’s going to be hard for you to believe, but this by far my most favorite room in the house! Hopefully by the time you get done with this tour, you’ll see why! This space has gone from nasty to demolished, to a beautiful black and white farmhouse spa feel.
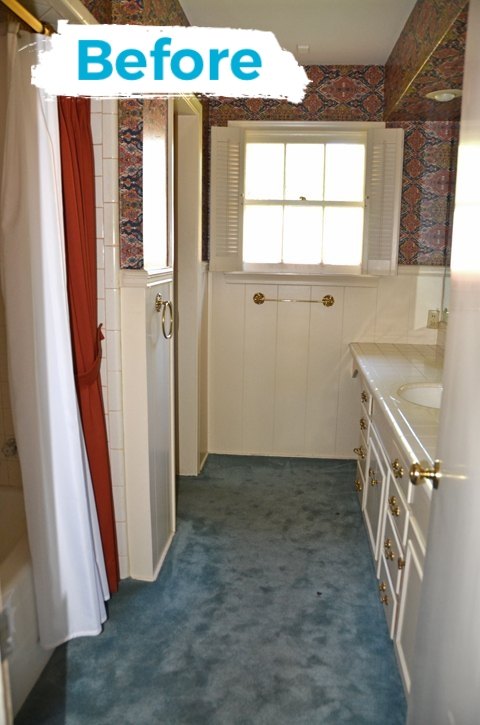
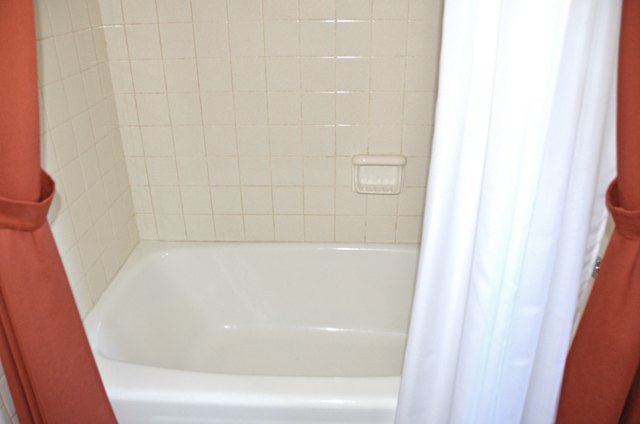
This is what the space looked like when we purchased "The Brick House on Pecan Drive". Whew, our work was cut-out for us on this one!!! The bathroom is located between two bedrooms and the one that most guests would use. For some reason, the original owners covered up the the white 4 inch floor tile with carpeting.
I knew from the moment I saw this bathroom what I wanted to do. It was just a matter of demoing to finding and putting all the pieces back together!
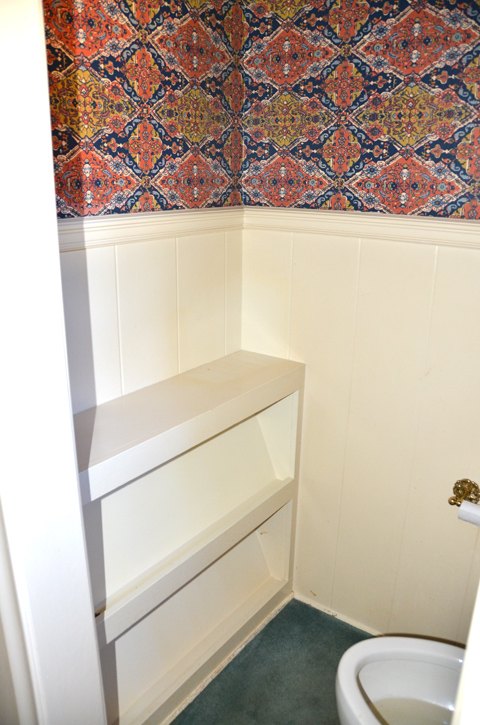
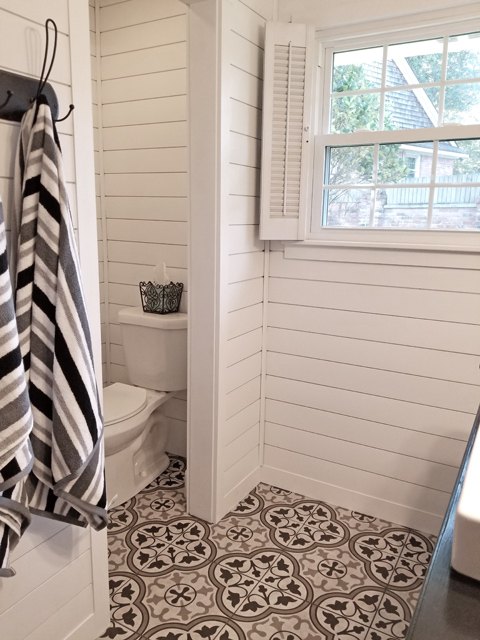
It has an interesting layout. The toilet has its own little space but does not have a privacy door. We thought we might change it but then it kind of grew on us so we decided to keep the layout as-is and just chose to build new shelves.
The only thing we wanted to save in this room was the tub. It’s a porcelain tub and in really good shape. But everything else, not so much!!!
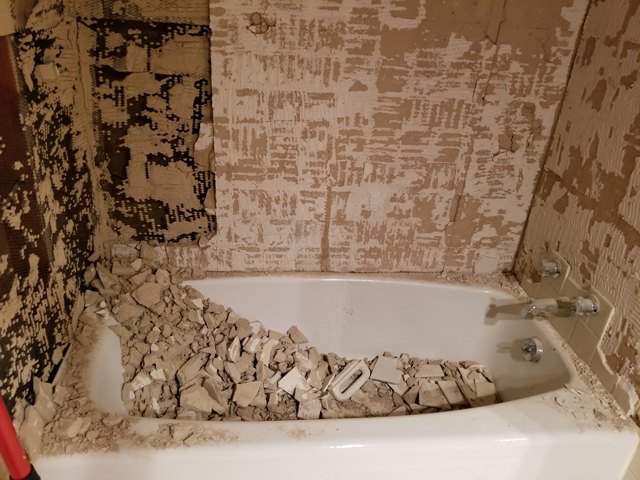
We hired our neighbor’s son next door to help my hubs rip out all the tile. Eeks, what a mess!
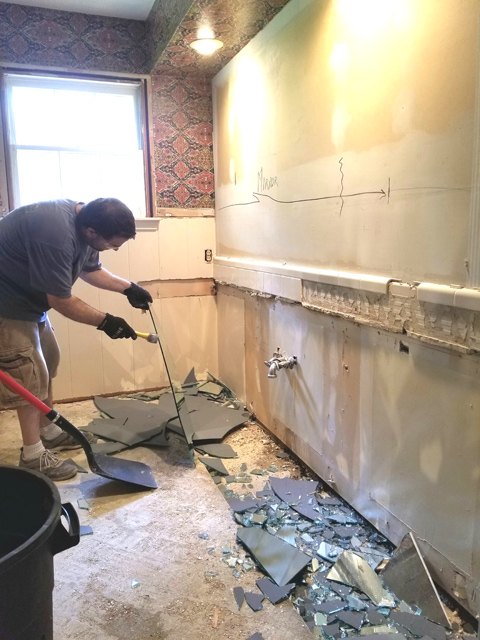
This is how NOT to remove a wall mirror! Haha! My husband stood in the hallway and threw a hammer at it. It took a couple of throws before it finally shattered. He’s a little bit crazy when it comes to demo!
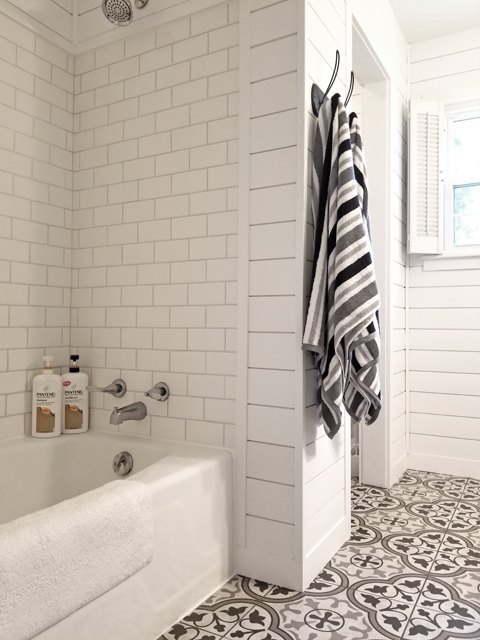
Once the demo was complete we started installing new white subway tile around the tub. My brother had taught me how to tile years ago and now it was my turn to teach my husband. He had it down in no time.
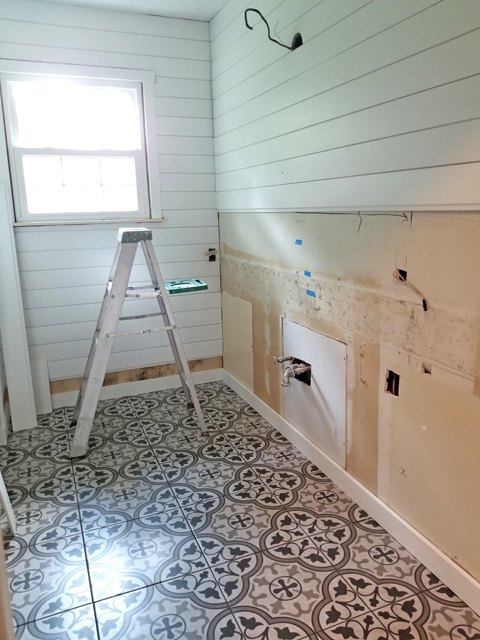
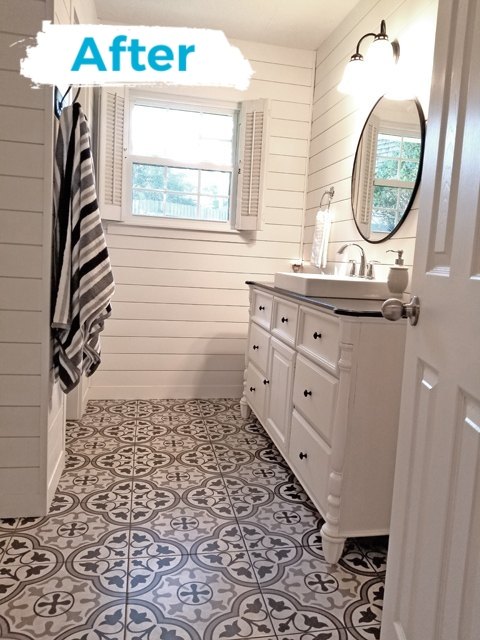
I was SO excited to find an affordable tile for the floor that looked like the stylish cement tiles. Then came the shiplap walls. Lets brighten this place up!!!
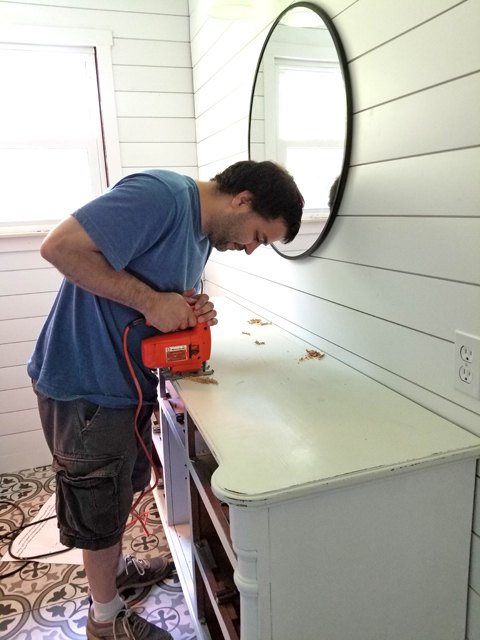
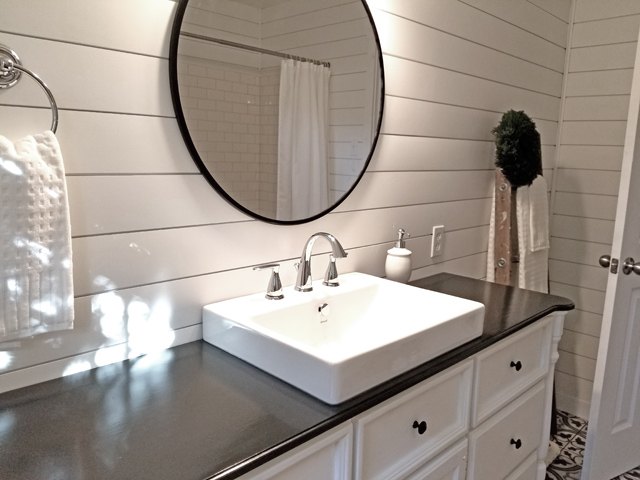
Here’s my hubs cutting the hole for the sink. I was a bit nervous! We found this dresser at a vintage market to turn into a vanity for this bathroom reno. We picked it up for $100. Huge savings compared to the vanities this size I was considering. All smiles on our faces this day!!!
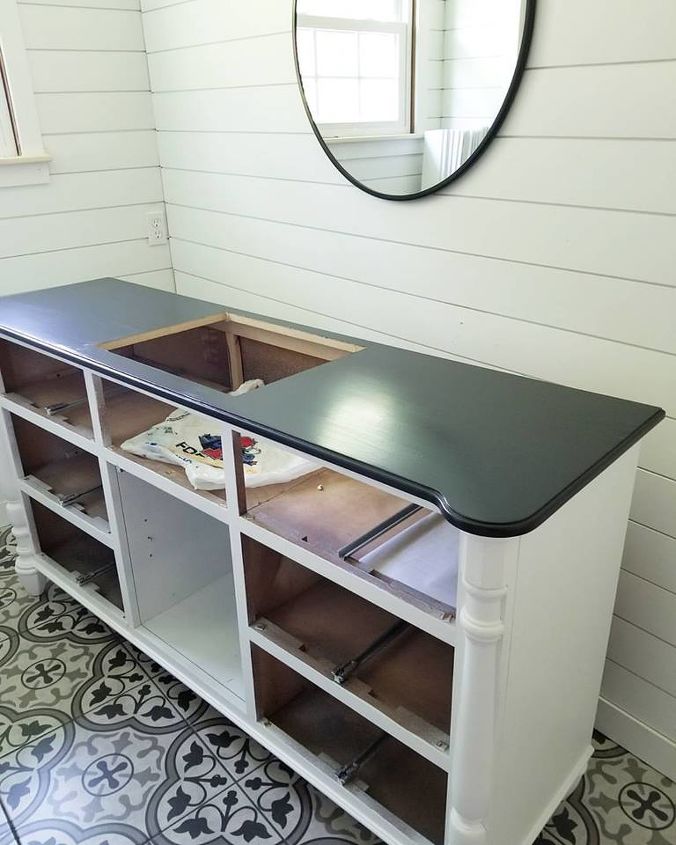
Once the hole was cut, I repainted it white and the top black. I then put several coats of poly on the top to secure the finish.
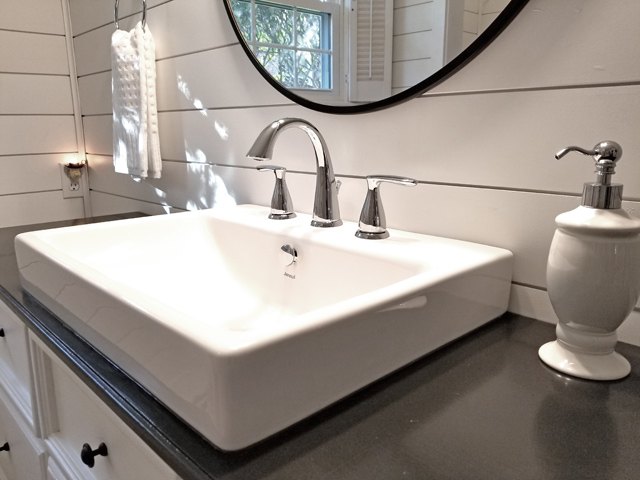
The sink was purchased at Lowes. It’s called Anna White Farmhouse Sink. The faucet was just happened to be on a close-out sale at the same time! Yeah!!!
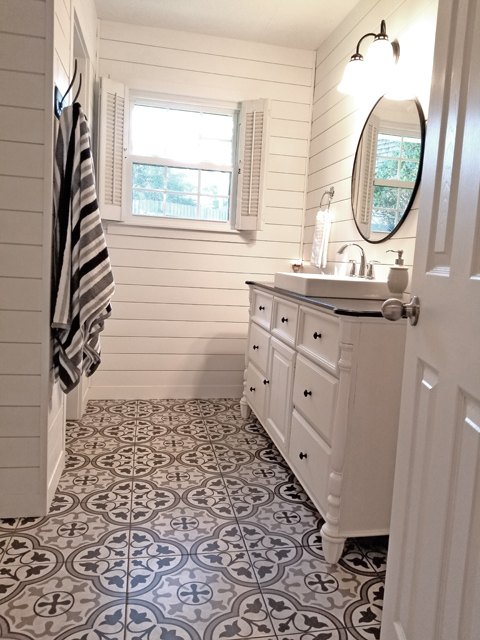
All the finishing touches now needed to be added. Mirror, wall hooks and new yummy stripped towels.
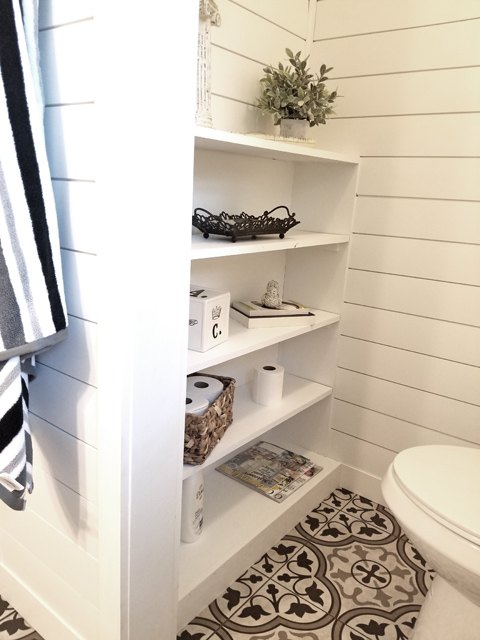
Look how cute the new built-in bookshelves look now!
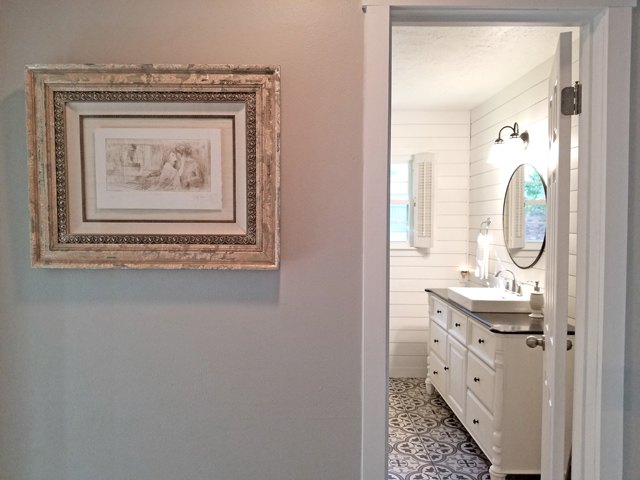
This space is so fresh and clean. I love the crisp contract between the black and white. Out of all the rooms in the this sprawling Texas Ranch Style home, can you see why this is my favorite?
Hope you enjoyed the big reveal of this project. More before and after photos are on my blog post. Grab a cup of coffee and stop on by for a visit.

Comments
Join the conversation
-
Love it!!!
-
Looks great but such a shame you forgot to make a shampoo cubby in shower.


Frequently asked questions
Have a question about this project?
What did you use for the shiplap? I like how uniform each piece is as well as the spacing between each board.
Where did you get your towel hooks? We have similar style!
What's this style called? Also, did you use any interior design software to make this reno happen?