


Brown Paper Flooring Vs. Bamboo Flooring

We recently replaced the carpet in our bedroom with bamboo flooring. It looks so good that I really wanted to replace all the carpet in all our rooms with bamboo but alas, it’s not in our budget right now. What to do, what to do...
I decided on brown paper flooring. Why? It’s inexpensive and when we want to put down hardwood, it can be laid on top.
So here we go!
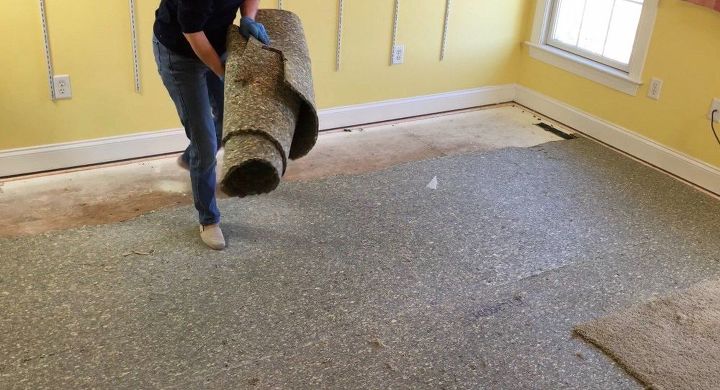
Begin by removing the carpet, padding and tacking strips.
Vacuum and damp mop the floor so it’s super clean.
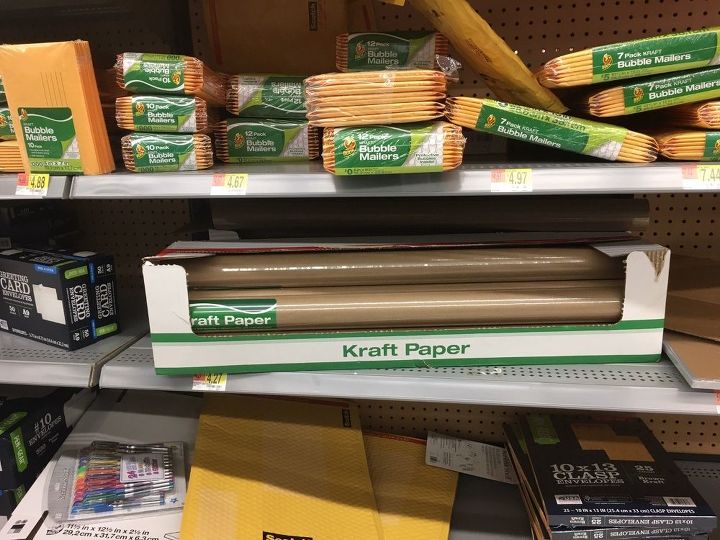
Brown paper: I bought 4 rolls of kraft paper. It seemed to be the perfect weight. (I ended up only using 3-1/4 rolls)
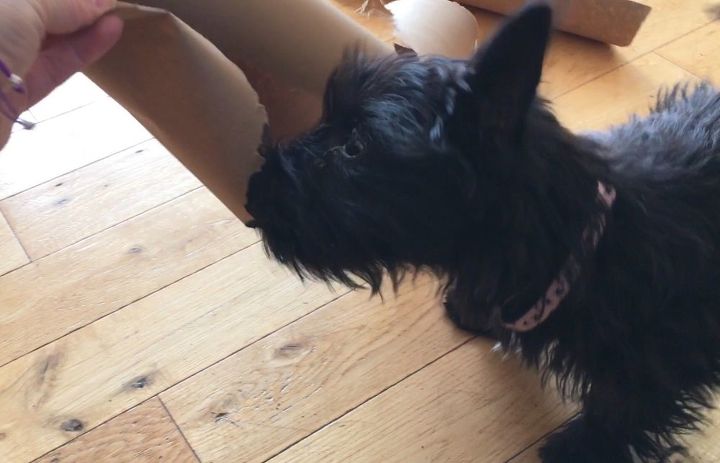
Tear the paper into pieces no larger than 8”x8” - I had my 4 month old puppy help me.
Crumble the paper into balls and then smooth out the wrinkles so the paper is flat. The wrinkles will give it texture.
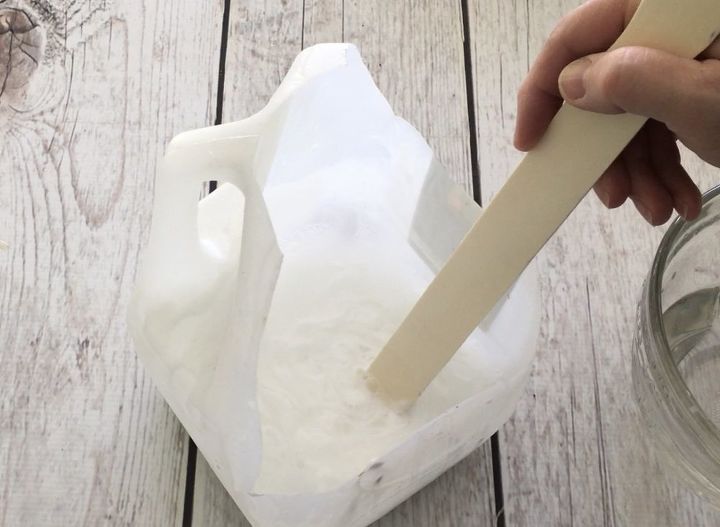
Glue: To adhere the paper to the floor, mix one part white school glue with one part water. The consistency should be like cream.
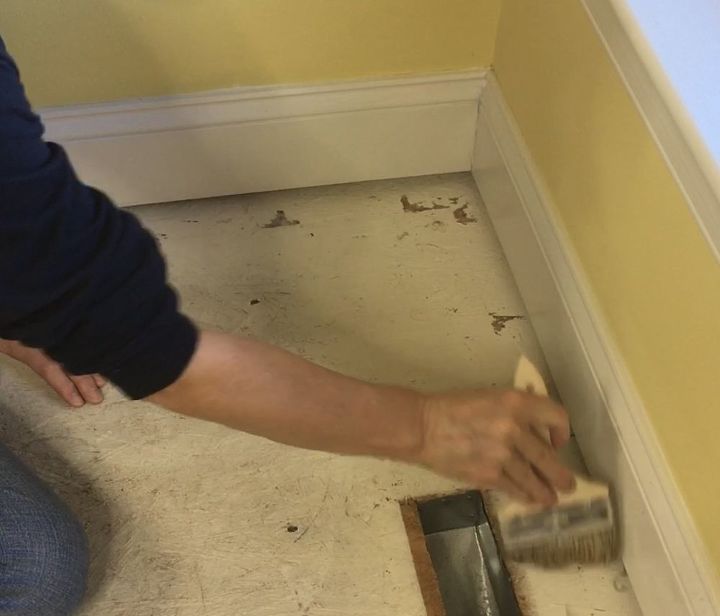
Begin by spreading the glue onto the floor using a wide brush. Make sure you get under the baseboards, this is where a brush works well.
I began in a closet just so I could get the hang of it before tackling the main floor.

Lay your first piece of paper onto the glue making sure it goes underneath the baseboard.
Apply another coat of glue on top of the paper, smoothing it out with the brush.
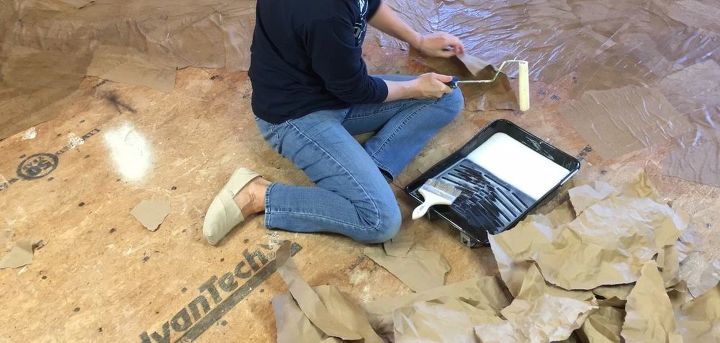
Continue to add paper, overlapping it as you go.
My floor is pretty big so I started using a small roller to apply the glue. It worked well but there were times when I had to use the paint brush to smooth out the paper.
If you find small gaps between your paper, tear off smaller pieces and apply over the gap. These smaller pieces will give your floor a unique look.
The paper will be lumpy when it’s drying but it will smooth itself out as it dries so don’t be scared.
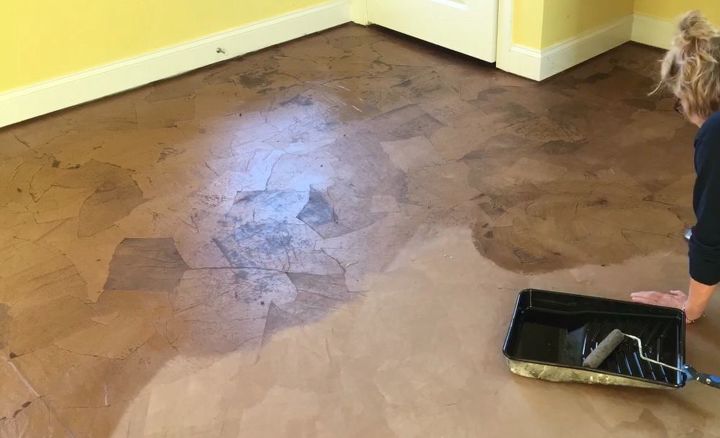
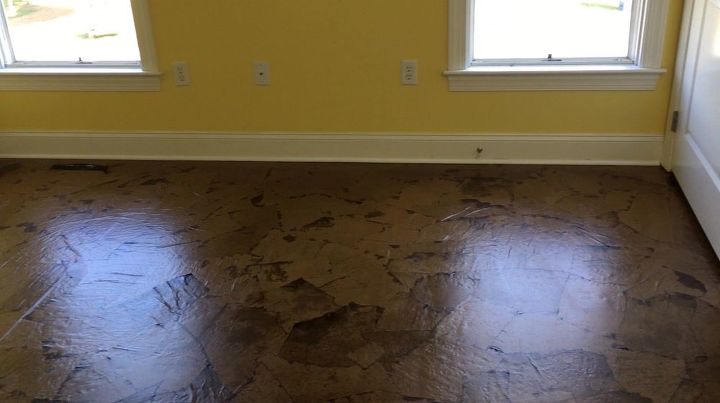
Staining the floor.
Working in small sections, apply the stain with a smaller roller.
Using a clean cloth or paper towel, remove the excess stain in a circular motion.
Once the entire floor is stained, allow it to dry.
I used Minwax stain in Early American.
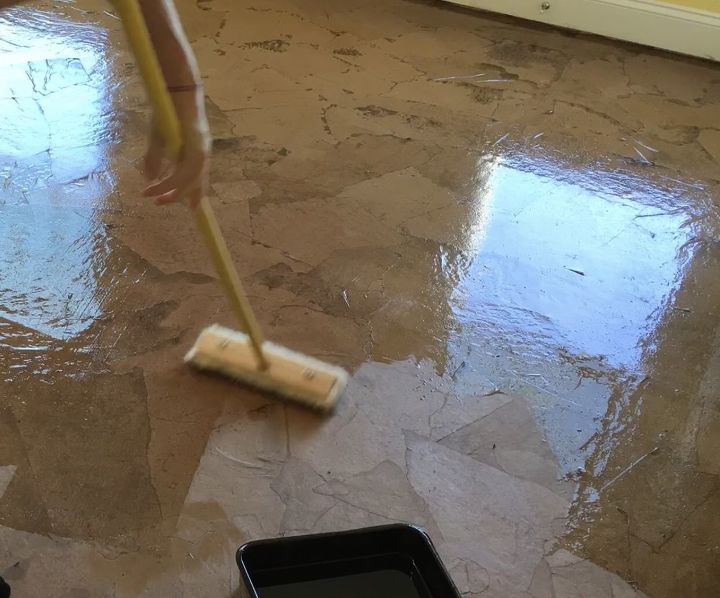
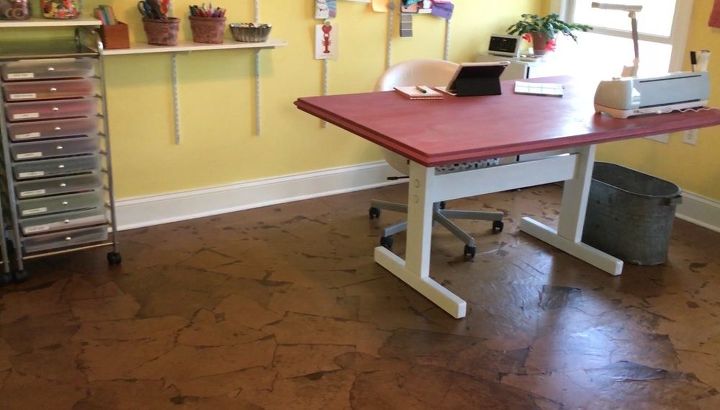
Sealing the floor with polyurethane.
Using a lamb’s wool head and working in small sections, apply the polyurethane using long strokes, pulling the brush towards you. This will assure an even coat. Don’t scrub back and forth or you’ll have bubbles in your floor.
Allow each coat to dry.
I applied 2 coats but you can apply as many as you like.
Spend the extra money and buy a lamb wool’s mop head. This really makes this process a piece of cake.
After the polyurethane has dried, install 1/4” round strips to the bottom of your baseboard. This will finish off your floor.
This step is optional if your baseboard meets your floor. Mine didn’t because I had carpet.
Move the furniture back into the room and enjoy!!
This project while it might seem daunting really isn’t. It takes a few days but the results are awesome. The floor looks like leather and seems to be wearing very well.
So in conclusion -
the bamboo floor installation for our bedroom = $3,000
the brown paper floor installation for my office = $65
So many people have asked about paper bagging their cement floor. You can do this project on cement; however, you must seal the cement first as it is porous. Once the cement is sealed, you can apply as I did.
DIY home decor using recycled paper
Resources for this project:
See all materials


Comments
Join the conversation
-
I love the look. I'd like to try it on a wall or some other area to make an accent.
-
Hello and thank you for the detailed instructions!! I, as others, love the look and the idea!!! I do have a question, have you seen this done on hardwood floors? And if so, how does this technique affect the spaces between the wooden slots?


Frequently asked questions
Have a question about this project?
Can this project be installed on sheet linoleum?
I’d like to do this in the furnace room. Would that be dangerous?
Could I do this on a countertop?