


EDITED$5 Glass Cabinet Door Transformed Into Faux Stained Glass Window

by
LP
10 Materials
$10
10 Hours
Easy
Hello friends! Thank you so much for your feedback on this project. This is my very first post on Hometalk.com Many of you have taken the time to comment or query so I do apologize for not providing better instructions. I will endeavour to update my instructions in the next day or two. (I also didn't have photo for every step of the process, so I will be sure to address that in my next project. )
In What to do with a reclaimed glass cabinet door....? Well, with $3 dollar poster paints, some white glue, shaving cream and battery powered led lights, you can make a beautiful faux stained glass window!
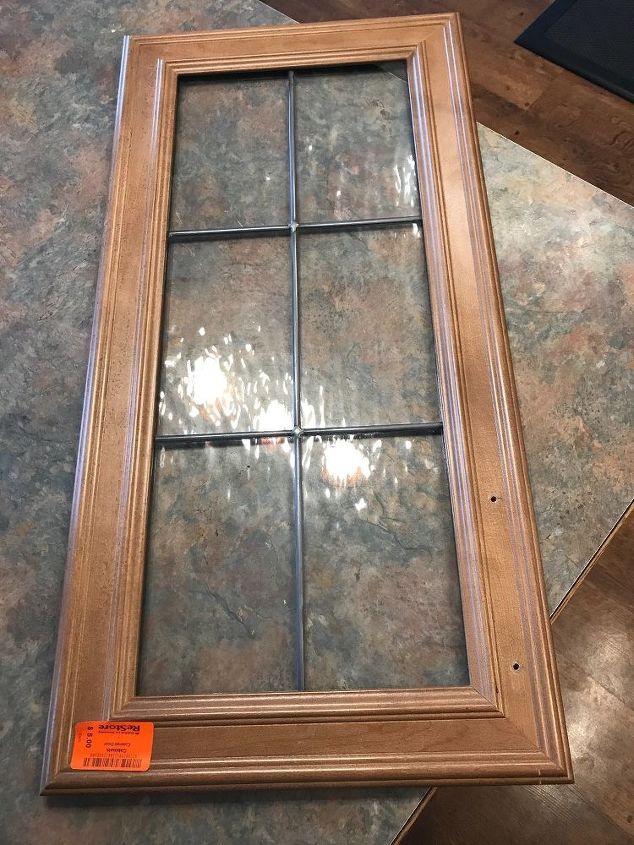
At the local recycled building materials store (the one in my community benefits Habitat for Humanity" I picked up this glass cabinet door for $5.
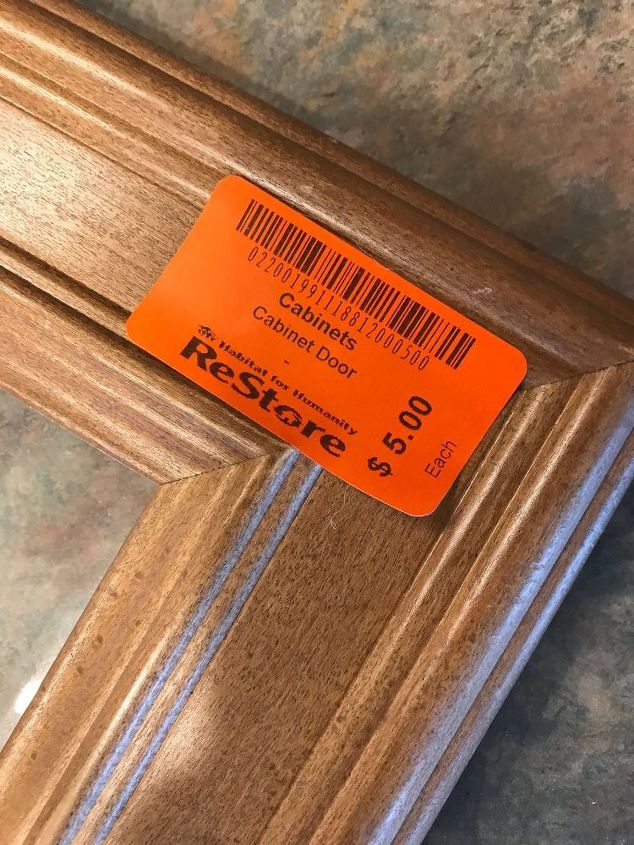
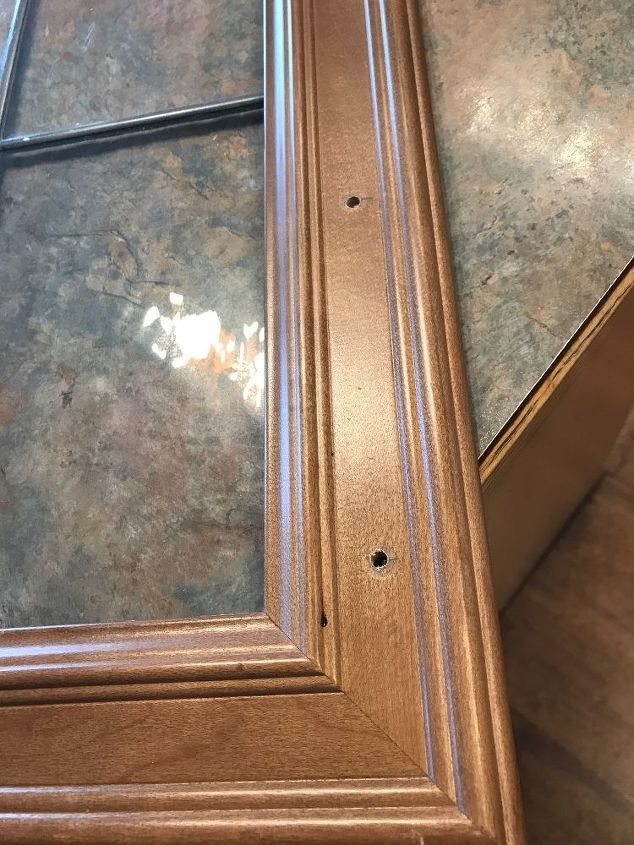
I removed the label and plugged the hardware holes with some wood filler and sanded it smooth.
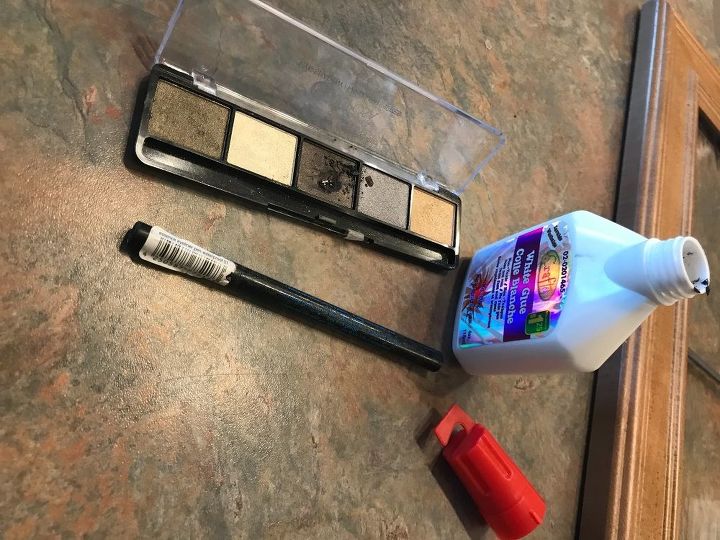
I started to gather what I needed to make a faux "leading" paint (the black lines between the different glass colours.) I wanted a bit of "sheen" in my leading, so I was looking in old makeup for some eye liner or shadow with a bit of sparkle.
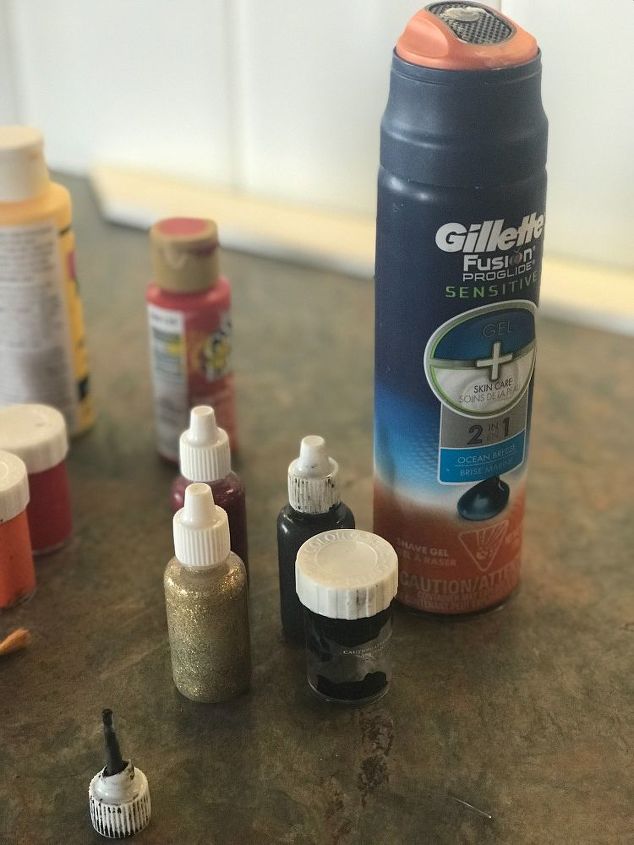
I found a great recipe that called for 1 part white glue, 1 part shaving cream and a few drops of acrylic paint. (The shaving cream makes the paint a bit "puffy" which helps keep the paint from different coloured sections from running into each other.) I found some water soluble glitter glue at the Dollar Store and incorporated that into the recipe for the sparkle I wanted. As a bonus, the bottles were great to re-purpose to hold the new concoction before outlining my design.
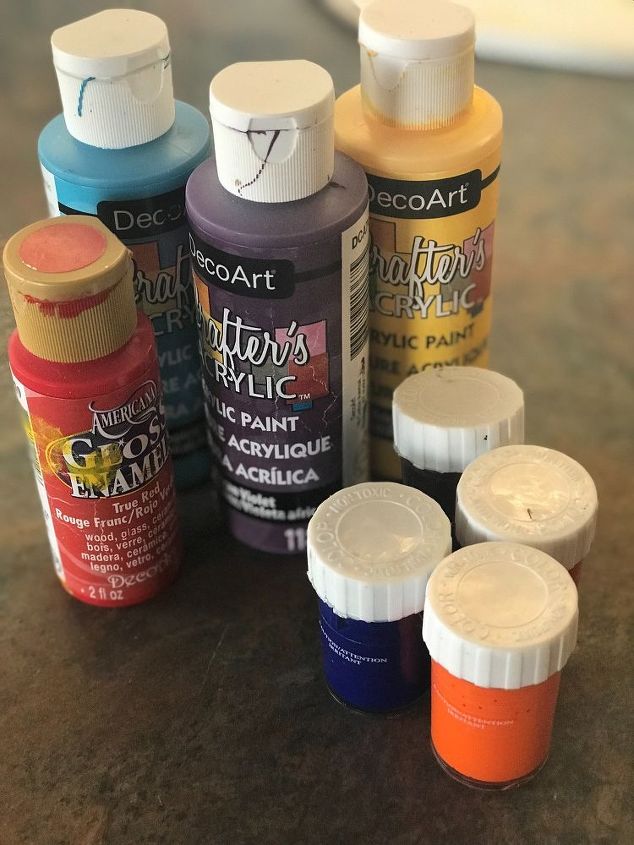
I also gathered any acrylic paint I had on hand and found a faux stained glass paint recipe (white glue with a few drops of paint to achieve the colour desired.)
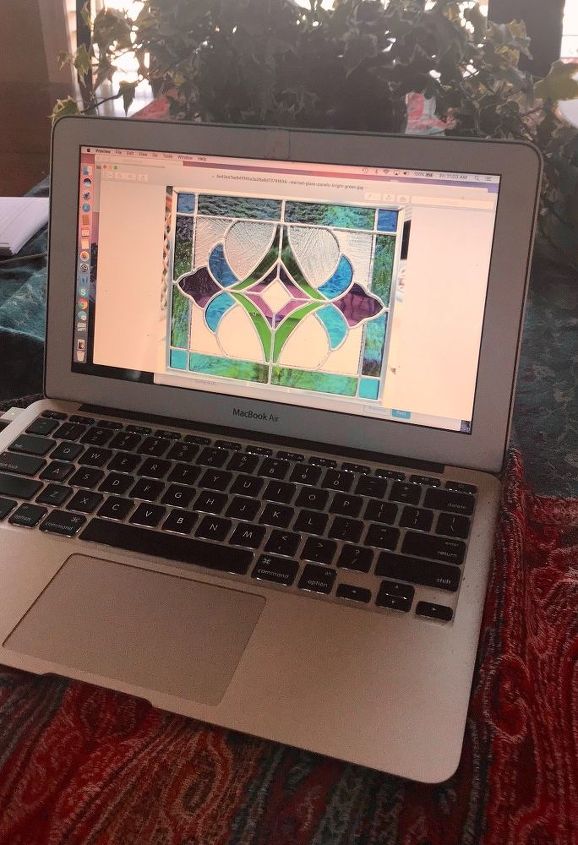
I searched online for ideas/patterns that might work with the window shape and size. To be honest, I made my own design based on this one, and drew it freehand onto the FRONT of my glass door with an eyeliner pencil. (sorry, no pics of that).
Once I finished drawing a pattern I liked on the FRONT of the window, I TURNED it over, took my LEADING PAINT and carefully outlined the pattern in black.
(This is a messy process. I used my fingers and cotton swabs to clean up any errors. It takes some trial and error to get the lines right.)
I let the leading paint dry overnight. I used a craft knife and swabs and to keep the edges clean and straight and made any corrections with a bit of leading paint.
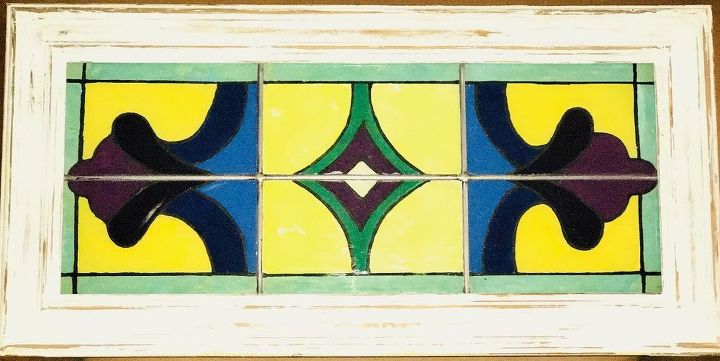
I painted the frame with a white indoor acrylic and sanded it a bit for a weathered effect. At this stage, the faux window could be hung or leaned in a window and the translucent paint allows the light to shine through.
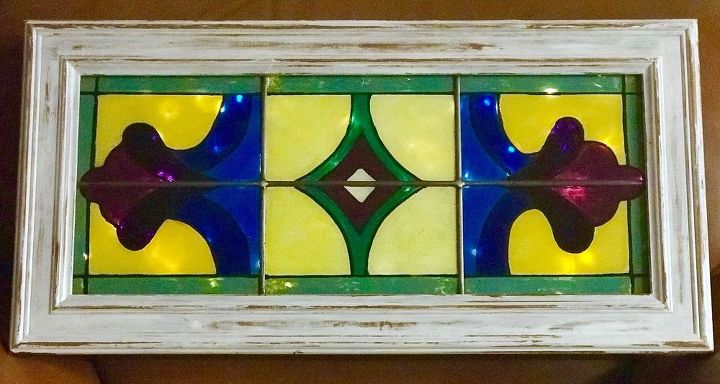
I taped some battery powered LED lights onto the back of the window so that I could also put it on a wall. I'll follow up with a picture once I find the perfect spot!
Resources for this project:
See all materials


Any price and availability information displayed on [relevant Amazon Site(s), as applicable] at the time of purchase will apply to the purchase of this product.
Hometalk may collect a small share of sales from the links on this page.More info
Comments
Join the conversation
2 of 206 comments
-
There is an important step missing:filling in the color
-
I have done something similar to this. For the leading, I used tulip paint and acrylic paint the picture. I tried other paint but I like the results of the acrylic paint the best. Coloring books are great for ideas.


Frequently asked questions
Have a question about this project?
What applicator was used to paint the glass?
Seems like you left out a step between letting the leading paint dry and painting the frame. What did you use to apply the colored paint? How thick?
These directions aren’t complete. Are you saying you used Black Tulip paint for the leading? What did you use to make the leading look silver in your finished photo?!?! Did you use a brush to spread the paint???