


Total Kitchen Transformation Under $150

When I first walked up to this house, it was gorgeous. Was it my style? Not necessarily. Did it scream Texas? Yes, which I loved. My love for colonial & craftsman homes are a few and far between here in Texas. In Texas, you get stone, stone & more stone.
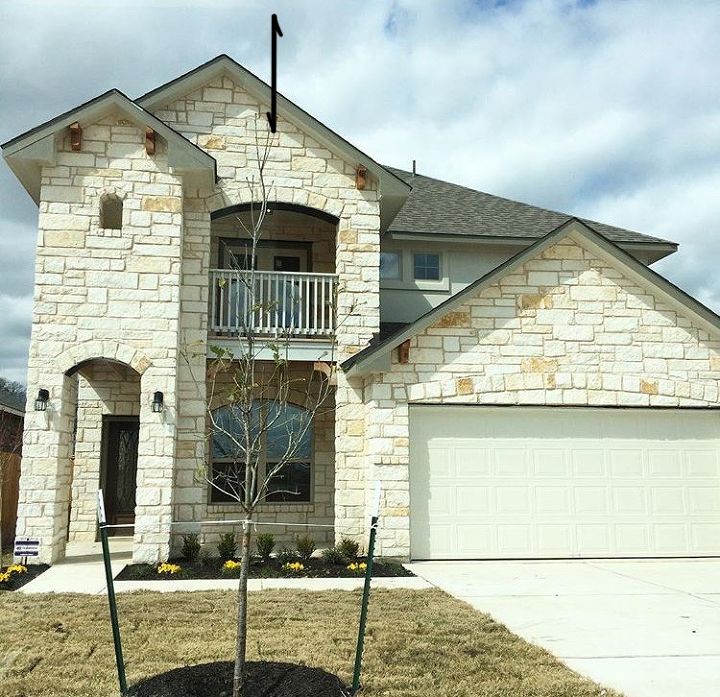
We walked in to tour this spec home. I did not like it, if we are being honest. The outside was gorgeous, the inside... meh, it was a spec home! It had brown kitchen cabinets with a backsplash I wasn't too fond of either. It wasn't my dream house but it was a crazy good deal and in a great neighborhood. My husband said "I'll make this your dream kitchen!" Swoon! Am I right? What a guy.
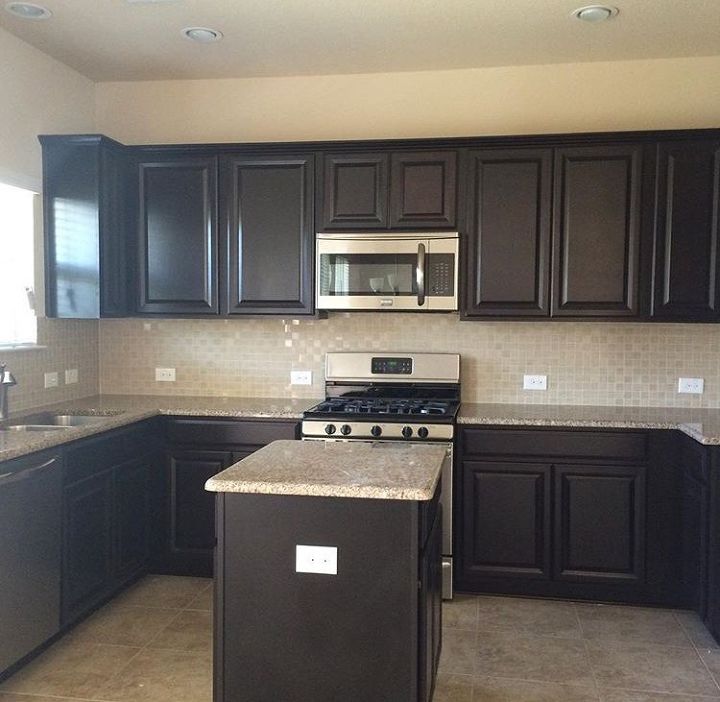
So, here is the kitchen in all it's glory. A lot of people around me loved it, saying it's perfect, yada, yada, yada. Nope, not for me. It also felt too dark in there. I love white because it instantly brightens up your space. I knew what my vision was instantly.
I was so nervous to paint the kitchen. It took me almost a whole YEAR to get the courage to do it! (Boy, I'm so glad I did though!)
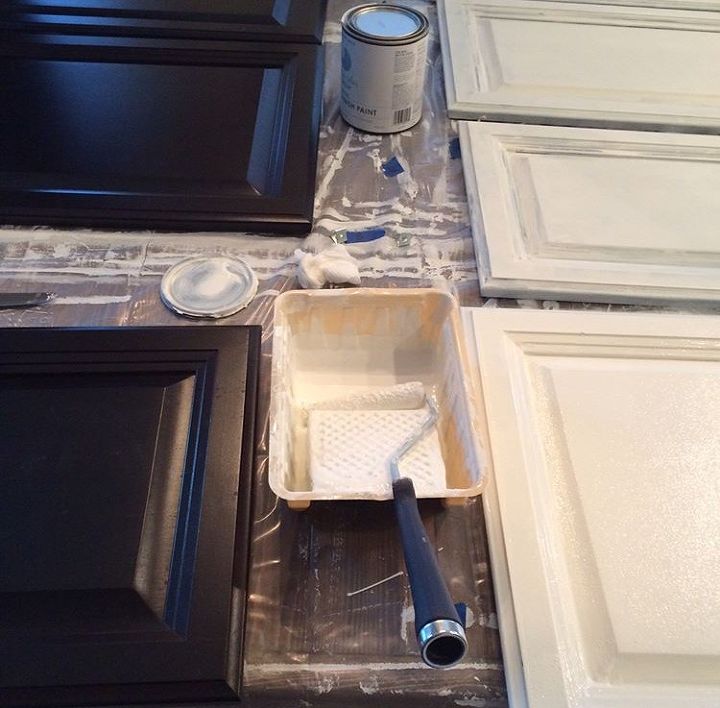
We used a chalk paint from Devine Color by Valspar. It required no sanding, none of that time consuming stuff. For a DIY'er, it's a dream. I started a whole assembly line. We were truly learning as we went. I loved working with chalk paint. It was a little tricky at first but it gets better. It's amazing coverage and you don't use a lot which equals to not spending a lot.
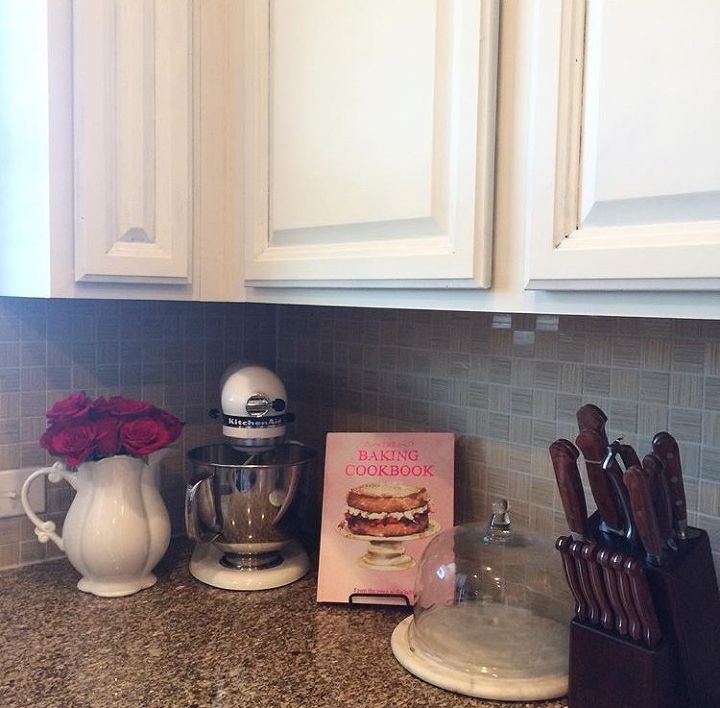
We could have stopped here. The cabinets were white, the kitchen was so much brighter! It looked great but I just felt it wasn't done yet. I didn't want to spend the money and frankly the time to take this backsplash out. So, I did something crazy... super crazy! I painted the backsplash. Yes, I sure did. I was so nervous but I just knew my vision wasn't complete.
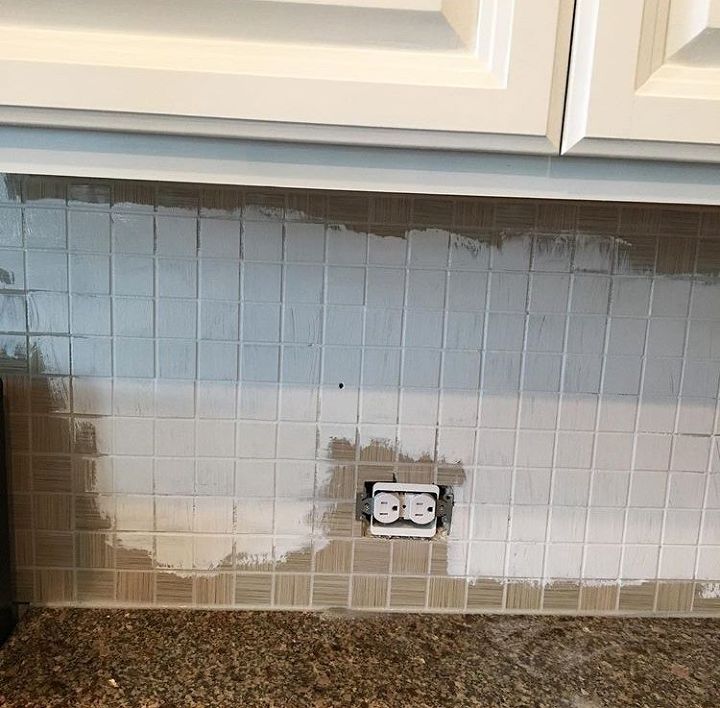
Eeeek!!! I did it and instantly loved it! I knew I made the right choice & I couldn't wait to see the final product. I used the same paint as the cabinets. And sealed it with poly (the water based, the blue one not the yellow) I know you are thinking... too much white, lady. Just wait your pretty little face, some change is coming ;)
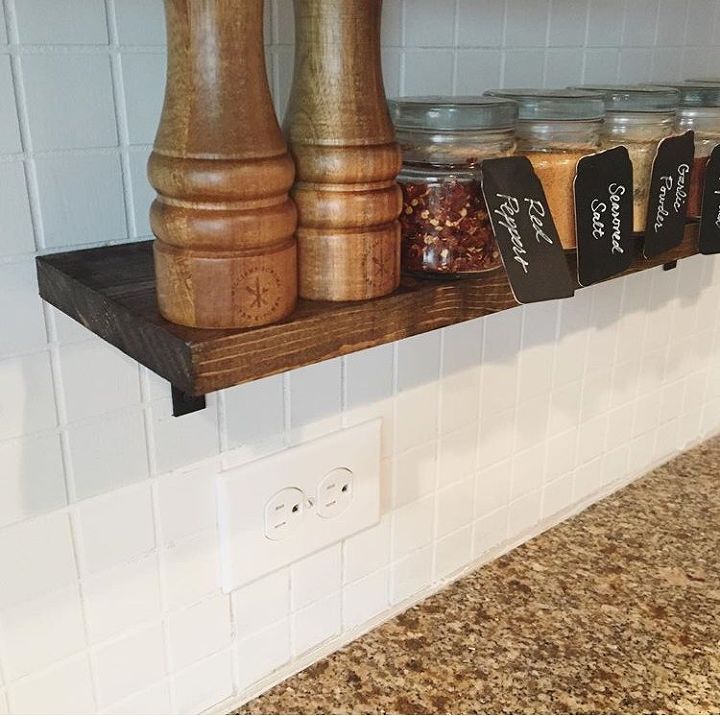
After painting, we added shelves the the backsplash. Yes, shelves on a backsplash! Mind blown!
The very last thing we did was add some cabinet & drawer hardware. I decided to go with knobs for the cabinets and these adorable pulls for the drawers. All black matte, of course. And it was complete. My kitchen was perfect.
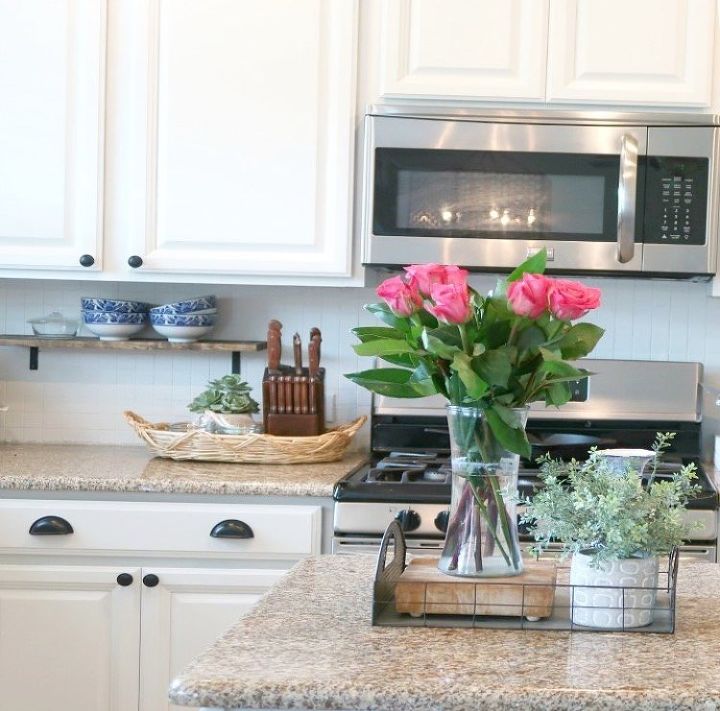
I absolutely love the way it turned out. Look how bright it looks! We spent roughly $150 for everything. I can only imagine how expensive it would have been to have the cabinets painted professionally or replaced entirely as well as the backsplash. No thank you! I'll take the DIY route! I mean, that's why you are reading this right now right ;) in the end, my husband kept his word. He definitely gave me my dream kitchen. Happy wife, happy life. Am I right?
Resources for this project:
See all materials


Comments
Join the conversation
-
Just beautiful!
-
As a long time resident of Spring, TX and Realtor for over 20 years I can verify if I saw a pic of your home and had to guess I'd say that's a Texas home! You did a great job for a low budget!


Frequently asked questions
Have a question about this project?
What an outstanding and stunning transformation!! Your kitchen is beautiful! Could you share where you found your shelves? I love how you decorated your kitchen too. It is perfect.
Have you found the paint to come off where you open doors are drawers??
Omg, I was here to know how you painted your cabinets black. So you painted them white? I'm dying to paint mine black, from natural honey color.