


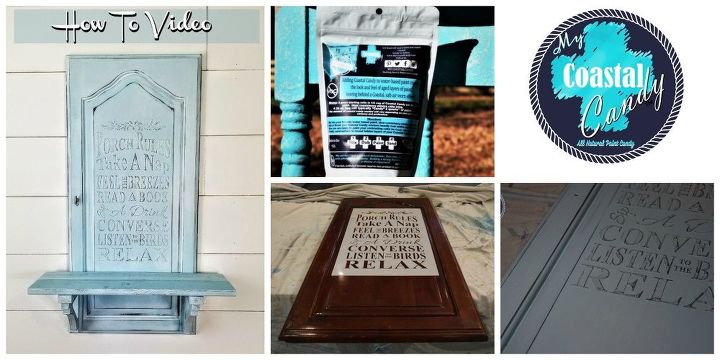
Repurposed Cabinet Door - Raised Stencil Technique
10 Materials
$35
2 Hours
Medium
Raised Stencil Technique - How to Video
If you're looking for a non toxic option to creating raised effects, this is for you.
This cabinet door was headed for a landfill and now it’s a beautiful Coastal chic statement piece with purpose.
How to Video Below
How To Video Included.
{
"id": "4473353",
"alt": "",
"title": "",
"video_link": "https://www.youtube.com/embed/Eu_gEuJUbug",
"youtube_video_id": "Eu_gEuJUbug"
}
{
"width": 634,
"height": 357,
"showRelated": true
}
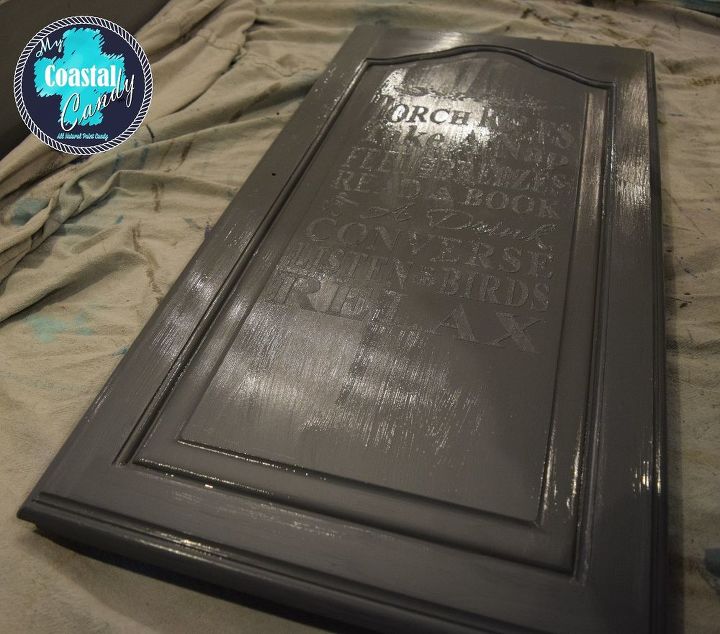
Safely create raised stencils without the use of toxic products like Bondo or spackling.
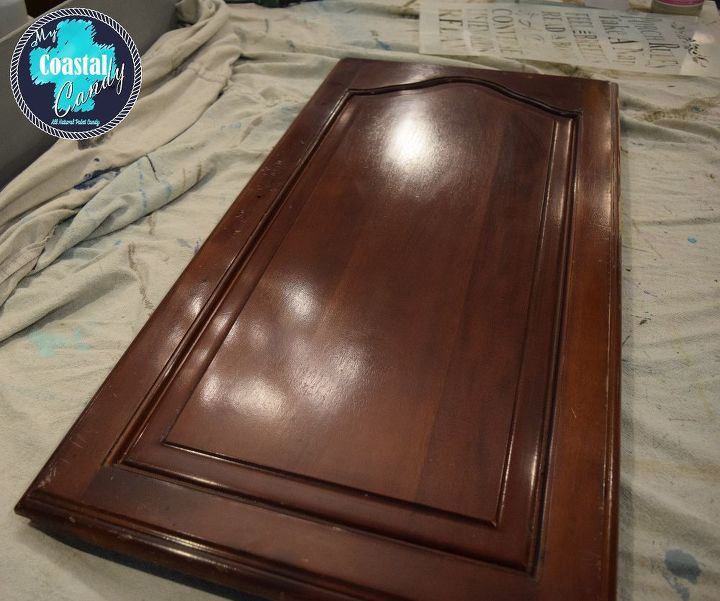
Before-Prep for paint. Follow your paints recommendations.
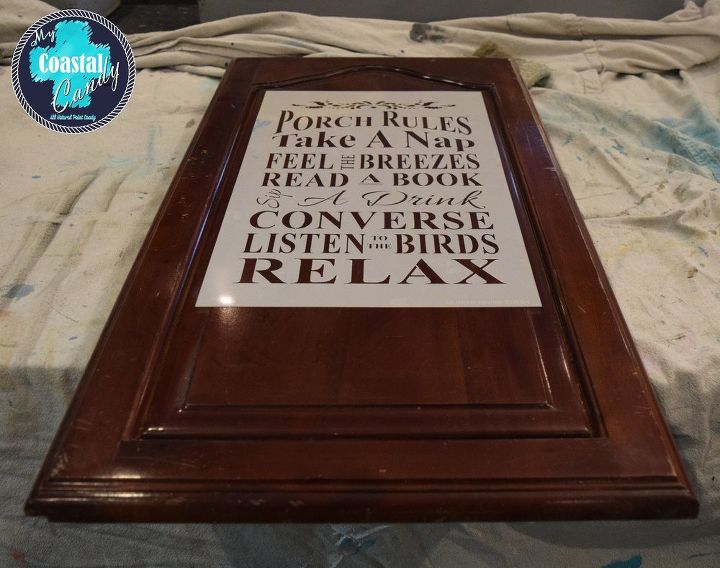
Attach your stencil with painters tape. Mix Coastal Candy into your favorite paint. Consistency of icing.
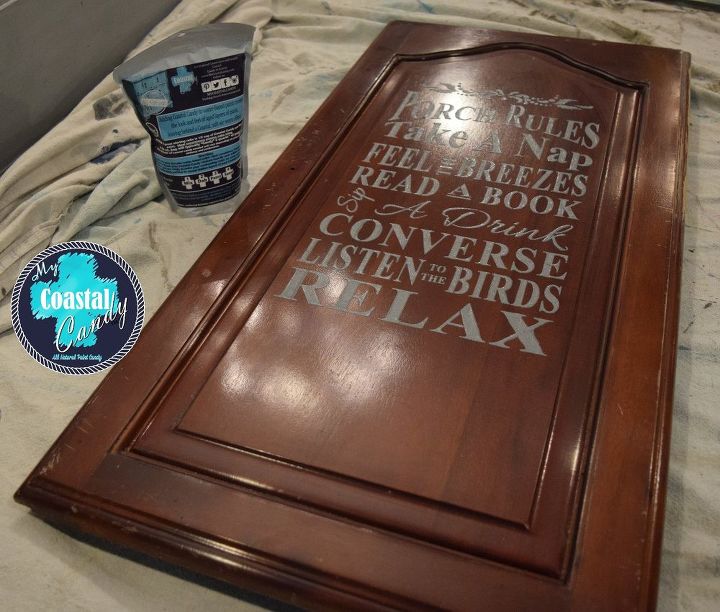
Apply with a plastic putty knife and carefully remove stencil. Let Dry.
Once Dry you can paint with a contrasting color or the same color. (No Coastal Candy required)
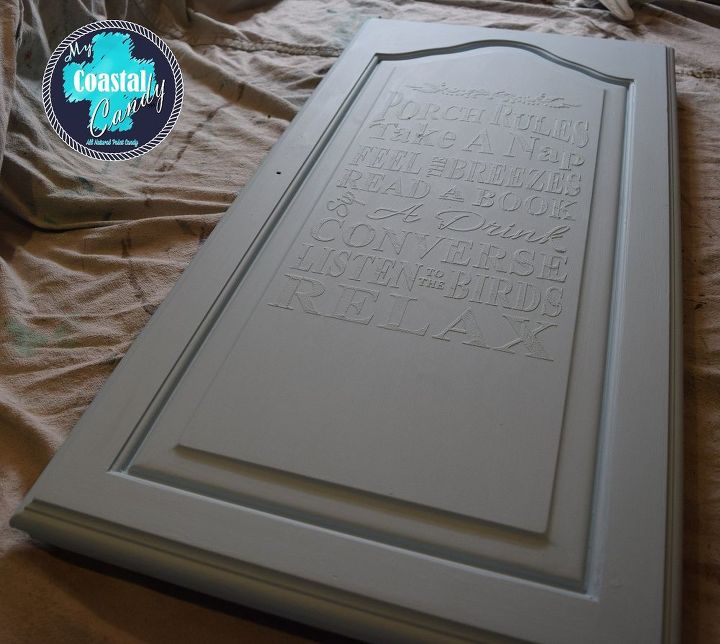
Optional, Paint with a contrasting color. Let Dry

Distress edges if desired or just the raised stencils to reveal some of the base Color.
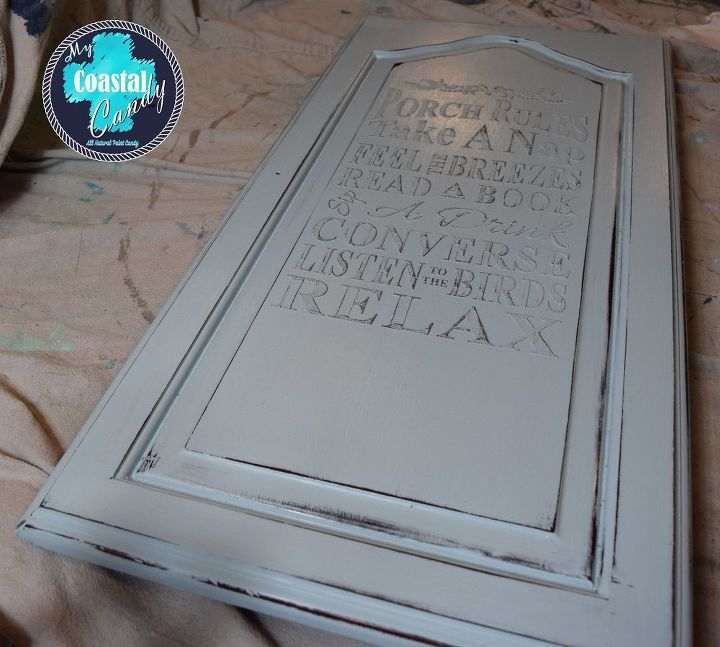
Enhance with Glaze. I used a mixture of White paint and varnish.

Add shelf brackets and scrap wood to add a shelf.
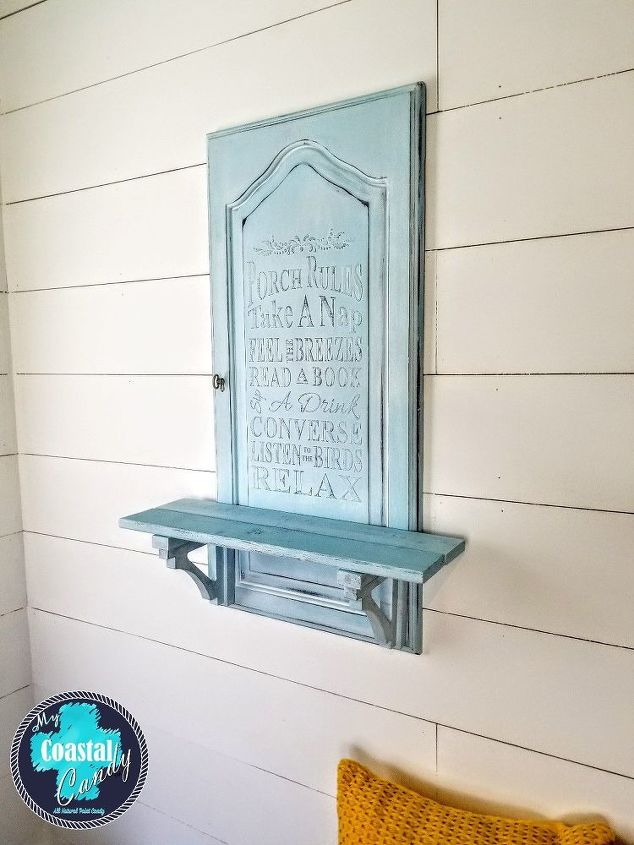
Optional: add hooks for coats or keys.
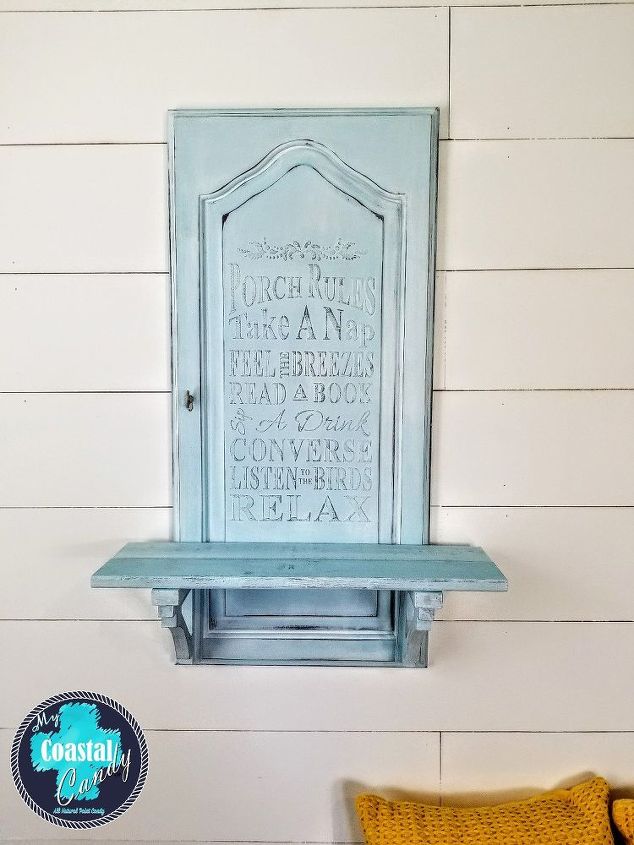
One more piece saved from the landfill.
Resources for this project:
See all materials


Any price and availability information displayed on [relevant Amazon Site(s), as applicable] at the time of purchase will apply to the purchase of this product.
Hometalk may collect a small share of sales from the links on this page.More info

Want more details about this and other DIY projects? Check out my blog post!
Comments
Join the conversation
2 of 77 comments
-
Cool
-
Really classy and beautiful


Frequently asked questions
Have a question about this project?
Love it. Yes i want to try it but where did you get the stencil at?
What kind of paint and any certain kind of varnish..?
fun project, but one picture shows the stencil removed after the words are painted, then the next picture shows the entire door painted, but the instructions say apply with a plastic putty knife and carefully remove stencil. There seems to be a step missing?