


How To Build A Corner Fireplace Surround & Mantel With Airstone & Oak
5 Materials
$500
3 Weeks
Advanced
When we bought our home, the existing gas fireplace was sitting on a tile insert in the corner of the room. It was functional, but it was pretty plain. My husband and I decided to build up a fireplace surround to give it a finished, beautiful look. Besides, I really wanted somewhere to hang all the homemade stockings that I’ve made my family over the years. I searched the internet for inspiration for my corner fireplace, but I didn’t really see anything that had the look I was envisioning. So we decided to just build everything from scratch. The woodworking was one the harder projects we’ve tackled in our home, but I’m really pleased with how it turned out! So read ahead to see how we got the fireplace surround of our dreams!
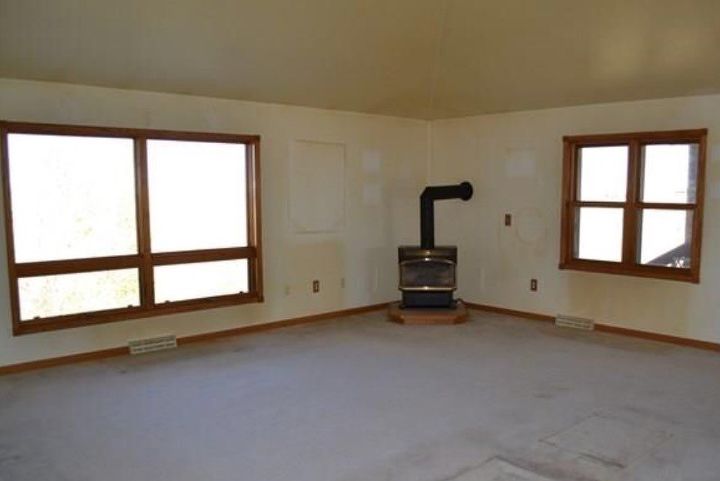
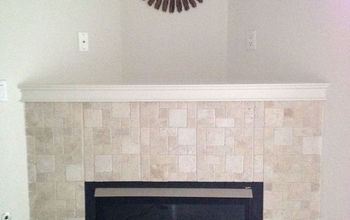
Our corner gas stove: before. First, we took out the carpet and the tile insert and removed the stove (with the gas off, of course). We covered the hole in the wall for the vent while our stove was removed.
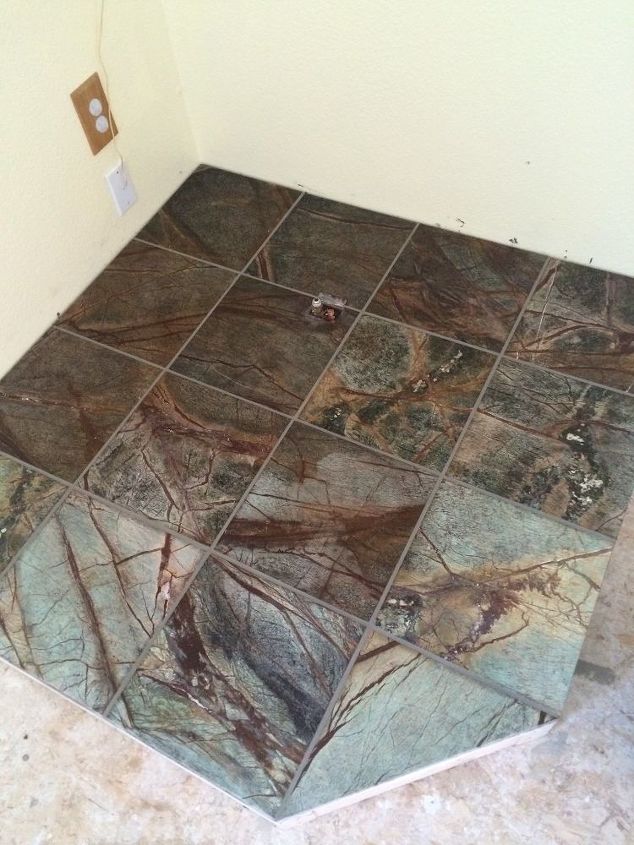
We built the base using 2×4’s and subflooring. Then we covered it with cement board and tiled it with 12x12 inch Verde Amazonia marble tile from Home Depot. Marble tiles are a bit hard to cut because they like to break on their fault lines, but with a good blade on your tile saw, you’ll be okay. I love my tile. They are a bit dark for a large space, but they're perfect for a small project like this.
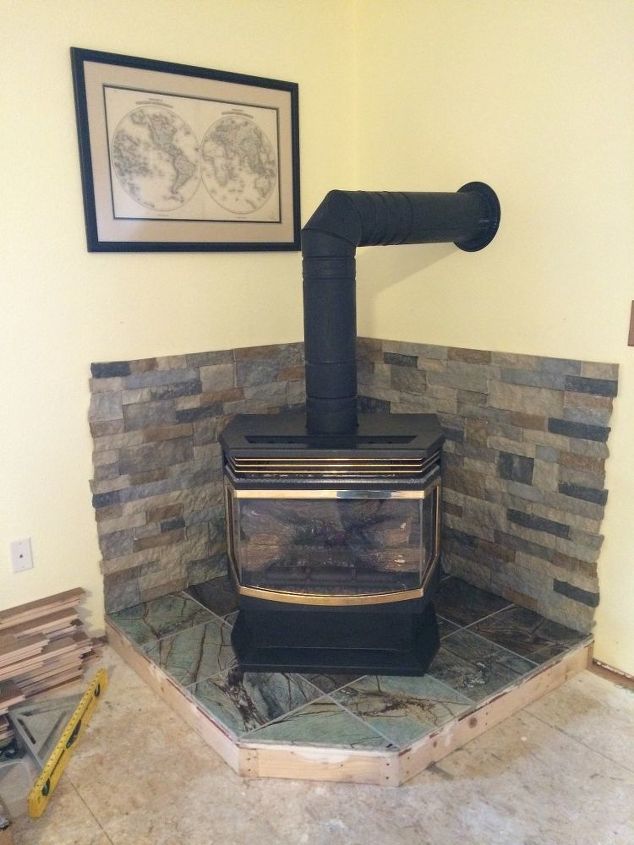
We decided to go with Airstone for our brick surround. I really didn’t want to have to reinforce the wall to build an actual brick surround. Plus, a brick wall would be much thicker. Stoves have a minimum distance that they must be from the wall, so a brick surround would mean that we would have to push our stove further out into the room. I didn’t want to do that, so we went with the Airstone instead and I’m really glad we did. I bought four boxes to finish our wall, two of Autumn Mountain and two of Spring Creek. I mixed the two different colors of Airstone so that I would have more variation in color.
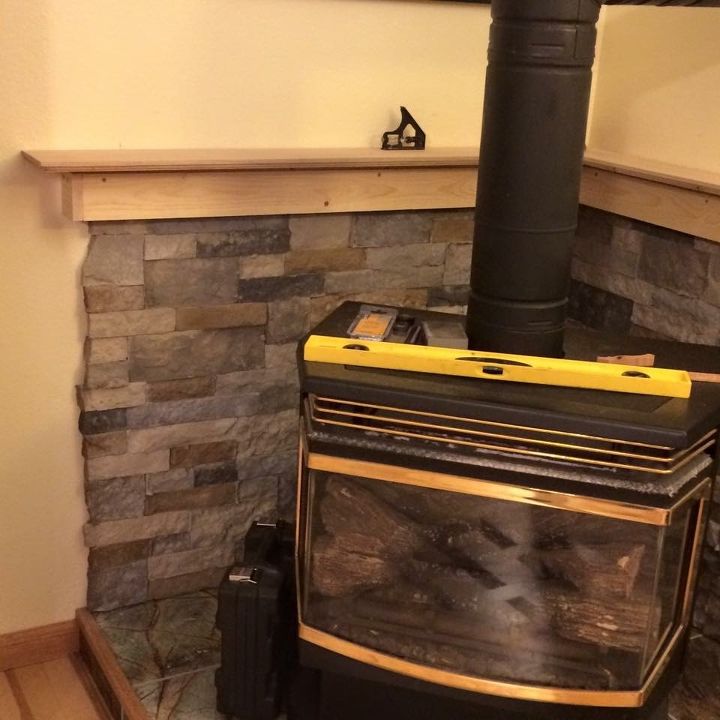
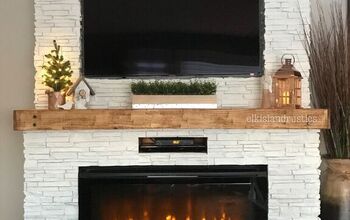
Oh boy, the mantelpiece. I’m honestly lucky that our marriage survived the mantel. It was such a pain. First, we built a 1×4 base on the wall above the Airstone to support our mantel. The 1×4 base sits over the top of the Airstone to hide the top edge of the Airstone. We routed the sides and front of two oak boards to make the top of the mantelpiece and attached them to the top of the 1×4 base. The two oak boards come together with a 45 degree angled joint in the corner.
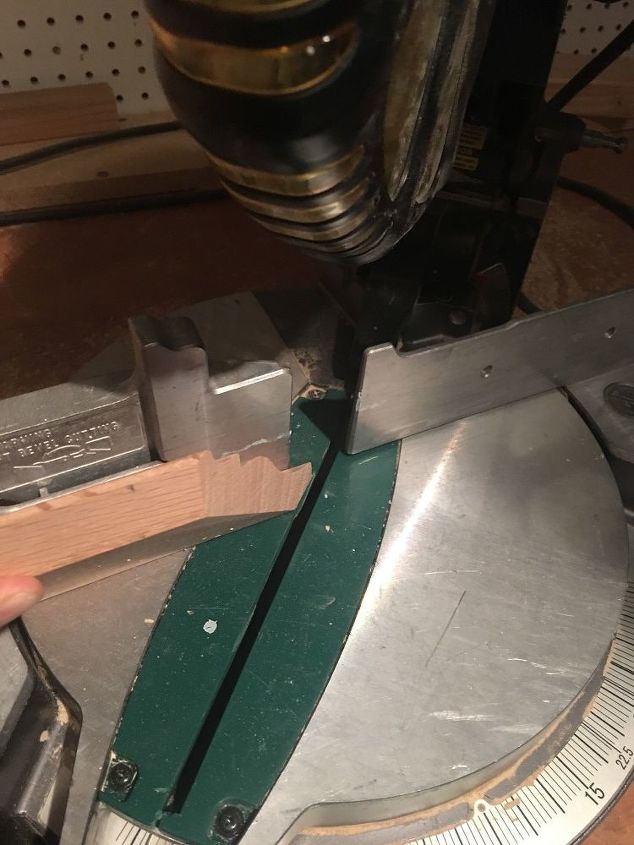
Next, we cut oak crown molding for the vertical face of the mantelpiece. This was the hardest part. I cut my outside corner pieces at 45 degree angles and they lined up pretty nicely (after a couple infuriating misses). You can see from the picture that my guide (the vertical brace) is pretty short so I couldn’t brace the top and bottom edges of my crown molding against it. Instead, I had to brace it backwards, with just the top edge of my molding braced against the saw. Luckily, I was able to hold it steady and cut my outside corners cleanly (eventually). I used the coping method for the inside corner. When you cope a corner, you basically cut the meat off the backside of a mitered cut with a coping saw. You can also miter the corners, but inside corners can sometimes pull apart, so I've read that the pros prefer coping inside corners for fine woodworking. I recommend watching a video to learn how. That's what I did.
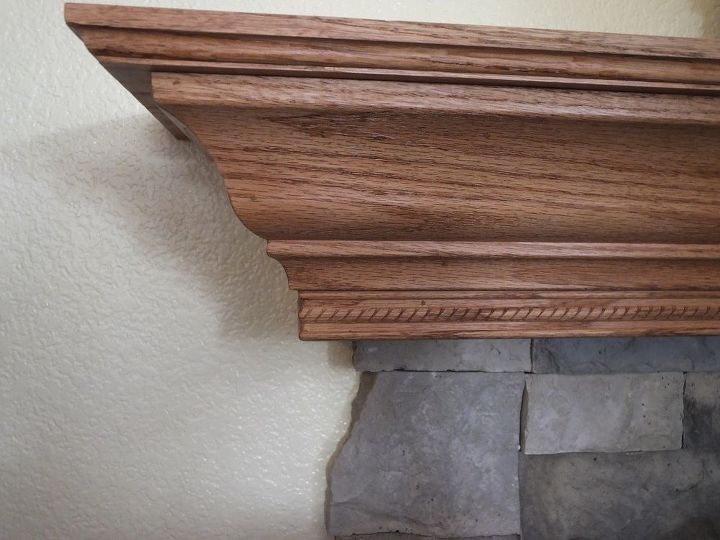
Finally, I installed matching braided rope oak trim pieces along the bottom of the mantelpiece and along the floor as well to tie everything together. I installed this braided trim along the bottom of the mantelpiece and on the floor with a nail gun.
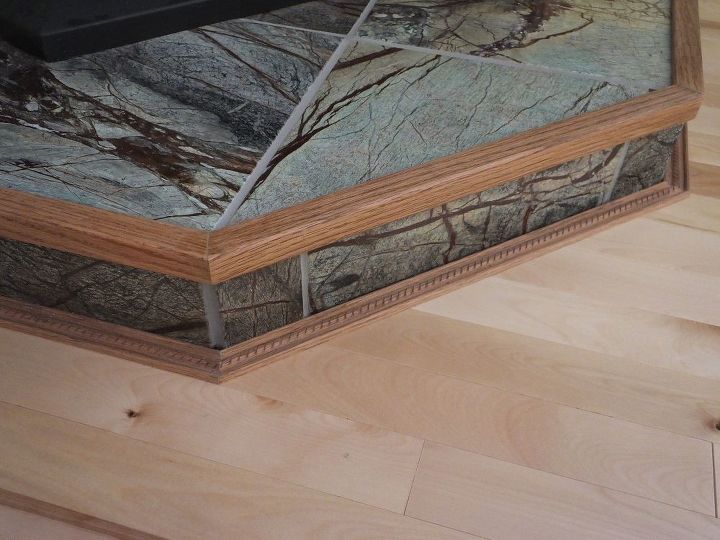
I also used corner oak trim on the front edge of the tile to hide the raw edges of the tile. I installed this with adhesive since I couldn’t nail into the tile. To finish all the wood on the fireplace surround, I filled all my nail holes and sanded all the wood with fine sandpaper. I stained the wood to match my existing wood trim. Then I coated all the wood with poly.
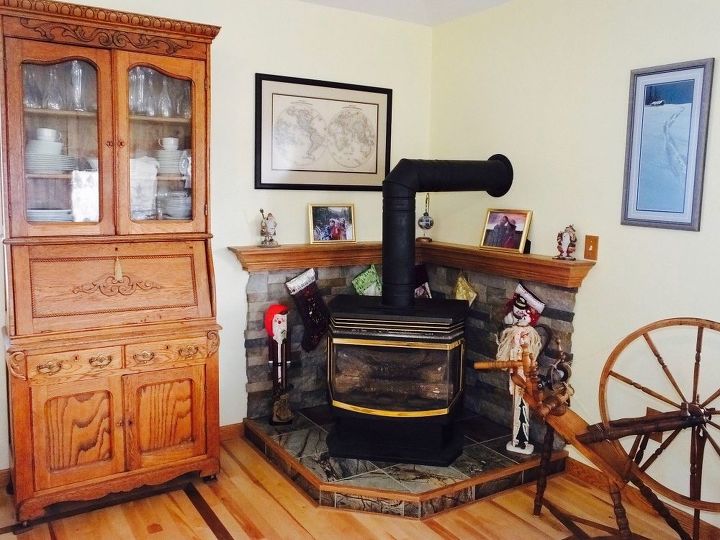
I LOVE the way my mantelpiece turned out! This is by far my favorite corner in the whole house :) If you find the woodworking intimidating, you could simplify this project by building a boxier, square mantel. But here's the thing: Five years ago, I didn't have a lot of carpentry skills. Zero, in fact. But I read a lot of articles and watched a lot of videos. And I made mistakes. And I learned. What's great about the box stores is that they sell wood moulding in every shape and size to dress up any woodworking project. So don't be afraid to give it a try!
Resources for this project:
See all materials


Any price and availability information displayed on [relevant Amazon Site(s), as applicable] at the time of purchase will apply to the purchase of this product.
Hometalk may collect a small share of sales from the links on this page.More info

Want more details about this and other DIY projects? Check out my blog post!
Comments
Join the conversation
2 of 46 comments
-
It is beautiful! My grandfather was a master wood worker and he would approve. Congratulations!
-
It is beautiful , I love your choices of colors.


Frequently asked questions
Have a question about this project?
Is the mantel within code for being so close to a wood stove? I would think it would get hot enough to combust. I need to build this base for my stove, so I really need to know about the mantel, lol.
How is the soft marble wearing?
BTW, do not clean the marble with a vinegar water solution as it will etch the finish.
I have a corner wood burning stove and I struggle with how to decorate the mantle. It never seems to look right plus it gets extremely hot..so no candles. Any suggestions?