


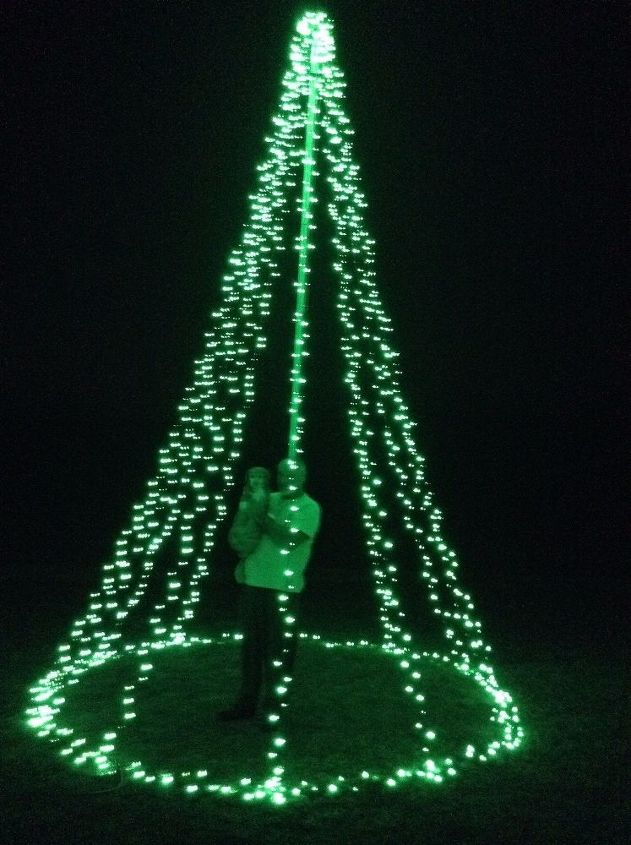
My 18' Tall Christmas Tree

by
Carol H
8 Materials
$90
2 Hours
Medium
Every year at Christmas time I get "Christmas Tree Envy." I've always wanted a giant outside tree but didn't want to pay a huge amount of money for something that's only on display for 30 days each year.
Last summer our flag blew off the flag pole; as I was putting the flag back up, it occurred to me that I could turn our flag pole into a giant Christmas tree.
Our flag pole is 18' tall and is comprised of 4 pieces with each pole section being 4-1/2'. Since I'm not 18' tall and I don't have a ladder that's 18' tall, I started off with just one 4-1/2 foot section. This will help me to attach the lights while still standing on the ground.
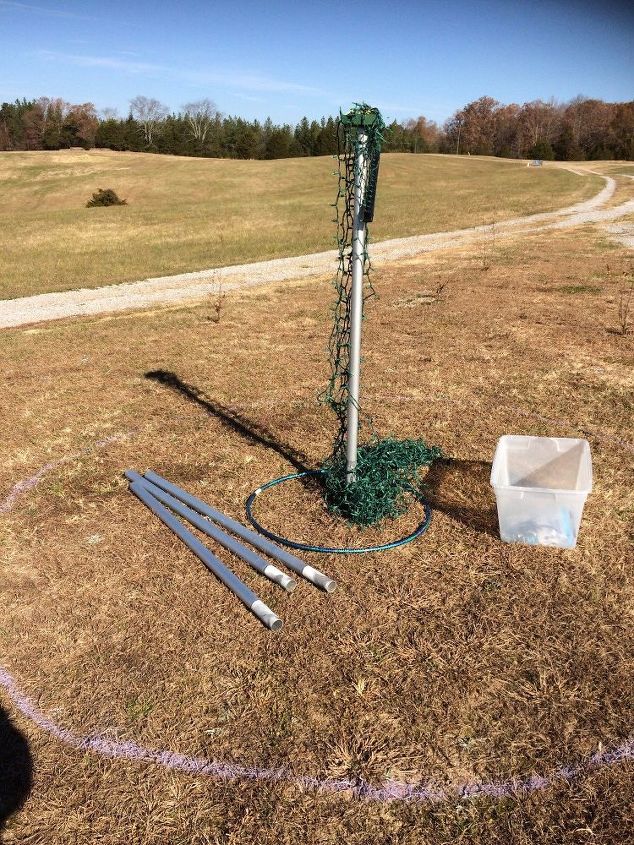
My 4-1/2' section
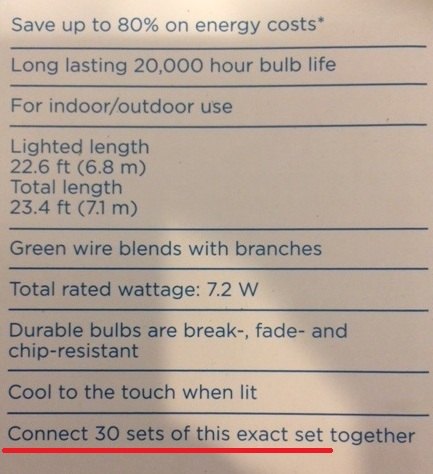
LIGHTS - Tip 1: I wanted to add 12 strings of lights. Last year I did a lot of work adding lights only to find out that the fine print on the box stated not to attach more than 3-4 strands together. Why did our lights go out after 5 minutes? I looked like Chevy Chase in National Lampoon's Christmas Vacation. You remember the scene, right?
Below is an example of what to look for. The LED lights we purchased states that 30 sets could be connected.
LIGHTS - Tip 2: When you connect 12 sets of lights together as one solid piece taped to the top of the flag pole, you don't want to have a fluorescent orange extension cord running down the pole. At the end of this step, you want only one male end of your string lights resting on the ground. That one strand gets plugged into your extension cord which turns on all 12 lights. See the example below -- from the right: Strand 1 female end gets plugged into 2nd strand male. All the rest are male end plugged into female end.
Test your lights to make sure they are all working properly.
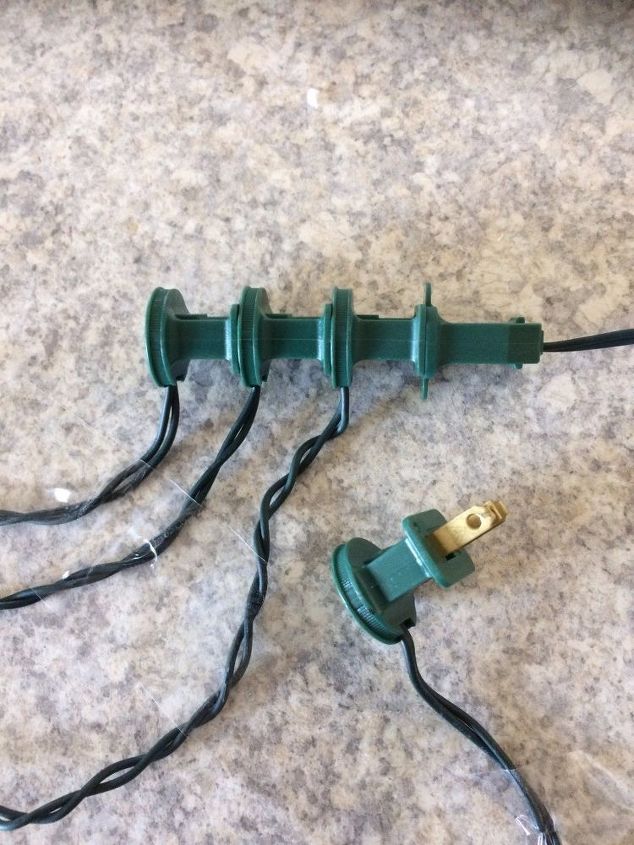
Plugging in 12 strands of lights
LIGHTS - Tip 3: When you connect 12 sets of lights together, it's heavy and I didn't want to have to reconnect these lights if it got windy one day. I took a piece of wood about 14" long and about 1/2" thick, and using black electrical tape, I taped the 12 sets of lights to the wood plank (this also protects your lights from the weather). I then taped the wood plank to the top of the flag pole. (after Christmas you can remove only the tape you used to strap it to the pole; the 12 sets of lights that are covered with electrical tape can stay as is until next year).
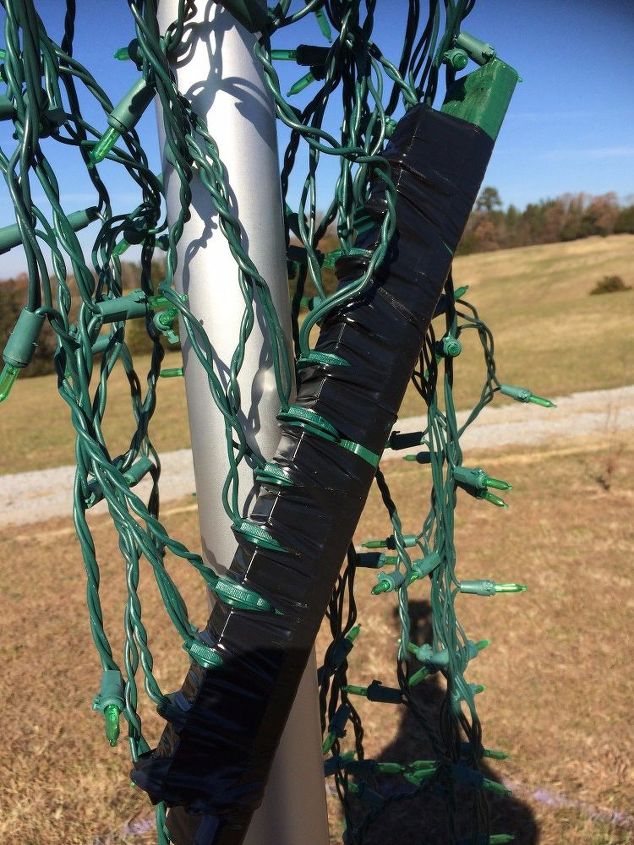
Electrical Tape
LIGHTS - Tip 4: Attaching the lights to the top of the pole. I used a wooden block that measured about 6"x6" -- something big enough to hold 12 screws on the top and a Floor Flange on the bottom (see below picture of a Floor Flange). Optional: spray paint the wooden block green to blend in with the green strands of lights.

Wooden block at top of flag pole
Attach the Floor Flange to the bottom of the wooden block. On the top of the wooden block, attach twelve 2" screws (leave about 1" of the screw exposed). Attach 1 string of lights to each screw. Attach the steel pipe to the flange. By placing the steel pipe inside the flag pole will prevent the lights from falling off the top of the pole.

Floor Flange with a Threaded Steel Pipe
The picture above shows a floor flange with a threaded steel pipe
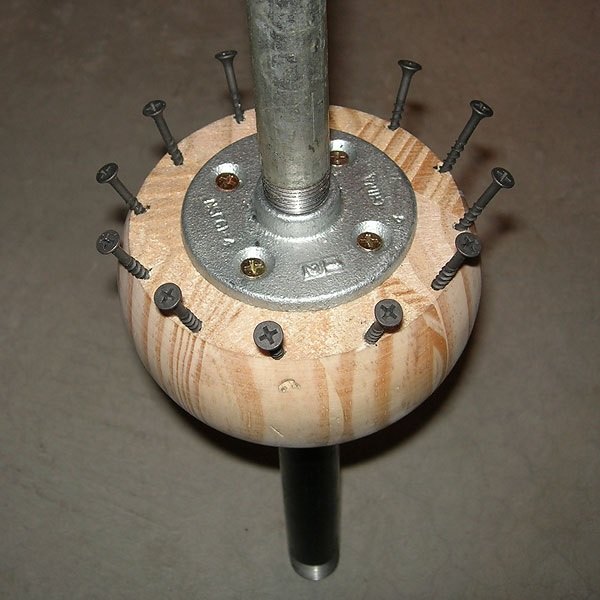
Another example of attaching screws
The above picture shows another example of how the screws should look; the flange should be attached on the opposite side of the wooden block from the screws. This example is only to show the screws, the wooden block, and the flange and pipe.
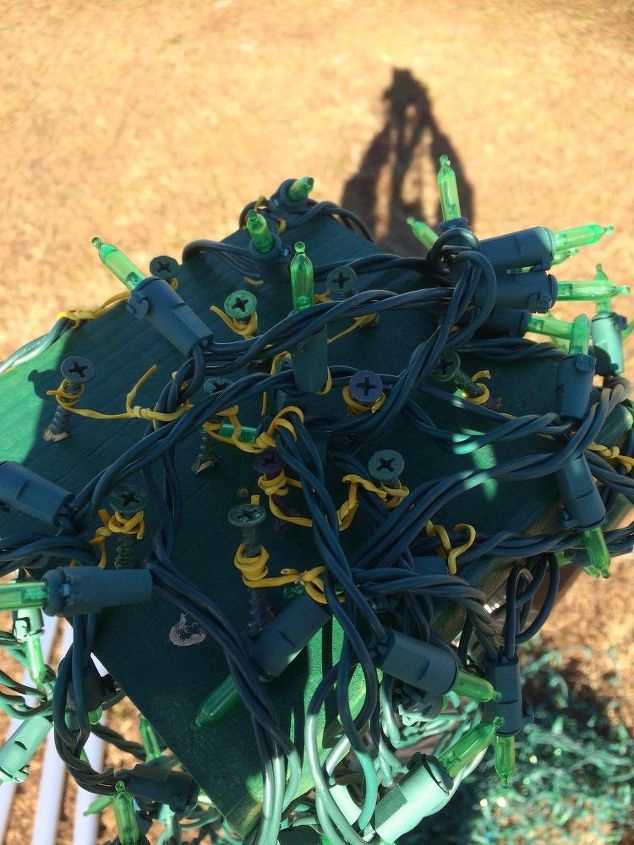
LIGHTS - Tip 5: The above picture shows my unruly mess! Regardless of how you attach the lights, you will need to have 3 sets of lights coming down from each side of the wooden block. To keep the lights from getting crossed, I tie string underneath the wooden block being careful to keep 3 strings dangling down per side. THIS IS A CRITICAL STEP!
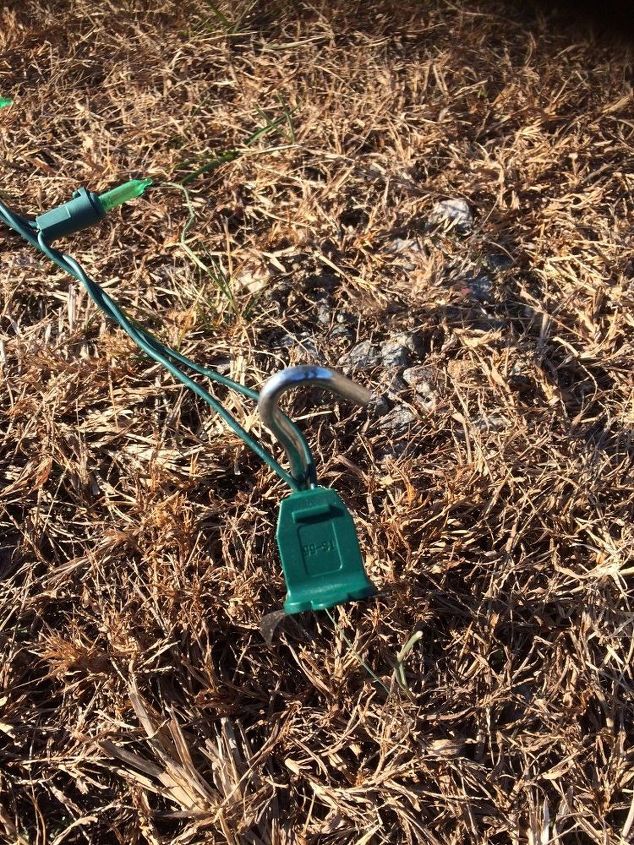
I stretch out all 12 strings of light on the ground to resemble a clock. Using a tent stake (see example below) about 4 feet out from the pole, stake down your lights. At this point, don't worry about how much play you have between the top of the pole and the ground. You still haven't "raised the flag" pole with the other 3 sections. We're staking it to the ground just to keep the strings from getting tangled.
You are now ready to attach the remaining 3 flag sections. You will need 1 strong person to lift the 4-1/2 foot section out of the ground while the other person slips the other 3 sections into the pole and placed back in the ground. Once that is done, re-stake the lights so that the string lights are tight (but not too tight).
This may seem like a lot of steps, but next year you'll only have to attach the wooden plank to the pole and to stake the lights on the ground. I have my lights on a timer where they come on a dusk and turn off 6 hours later.
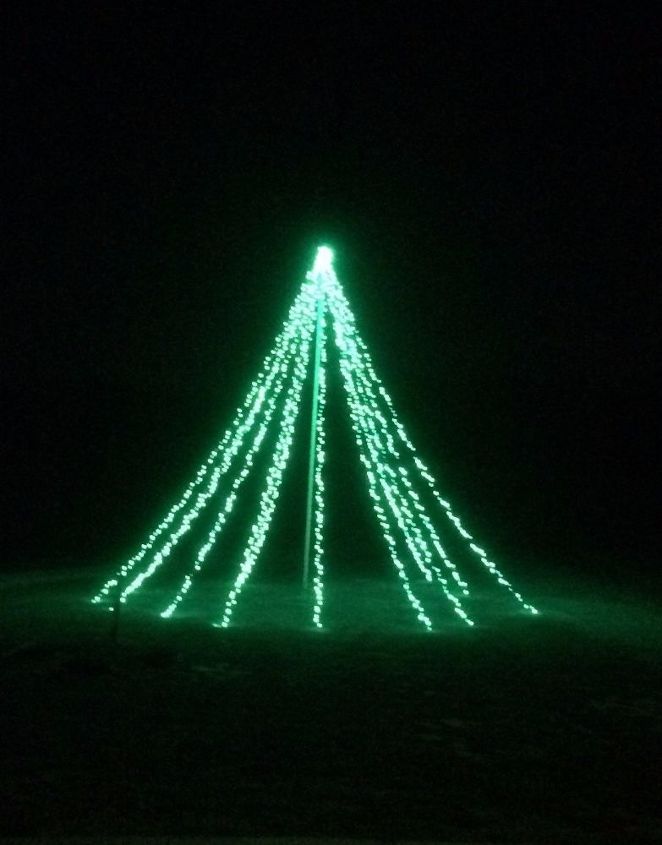
If you like a tree that has a smaller span around the bottom (see example below), use the extra strand of lights to circle the tree vs. fanning the lights out. The tent stakes will keep it in place.
Resources for this project:
See all materials


Any price and availability information displayed on [relevant Amazon Site(s), as applicable] at the time of purchase will apply to the purchase of this product.
Hometalk may collect a small share of sales from the links on this page.More info
Comments
Join the conversation
2 of 25 comments
-
i love this wish i could figure this one out! haha! thanks for sharing
-
Thanks for sharing how you do this!


Frequently asked questions
Have a question about this project?
My husband thinks his flag pole Christmas tree needs a large star on top, any ideas?