


Rustic Kitchen Cabinets

6 Materials
$100
2 Weeks
Medium
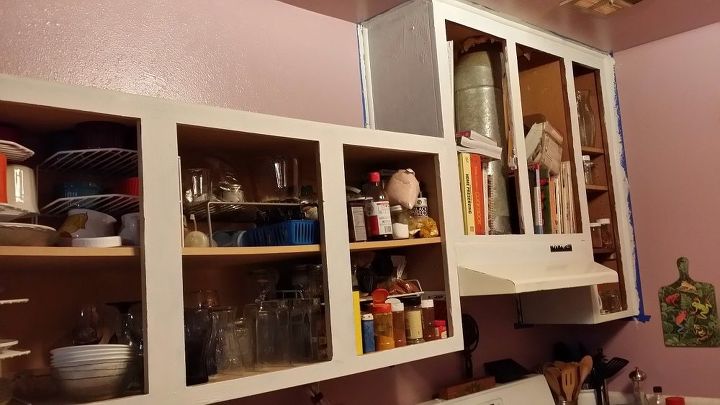
When I bought my house there were 2 different kinds of kitchen cabinets and an empty wall. The cabinets were Pepto Bismol pink  . We added cabinets to that empty wall and now we had 3 different kinds of cabinets. I had painted them all shades of pumpkin my only excuse was it was October. I had sponge painted them, I think I was going for a stone look. It was 15 years ago, I have no clue what I was thinking.
. We added cabinets to that empty wall and now we had 3 different kinds of cabinets. I had painted them all shades of pumpkin my only excuse was it was October. I had sponge painted them, I think I was going for a stone look. It was 15 years ago, I have no clue what I was thinking. 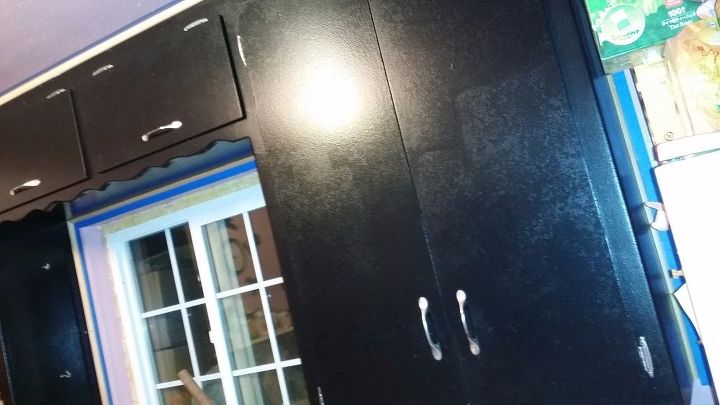
A few years ago I bought some really expensive black paint at Home Depot. It was the kind with the bear on it. It was something like $35 for a gallon. She said it was a true black that it wouldn't look blueish like some black paints. I loved the color, I didn't love the finish. I had rolled it on and you could tell. I lived with it for years and I hated it. I finally decided it was time for a change.
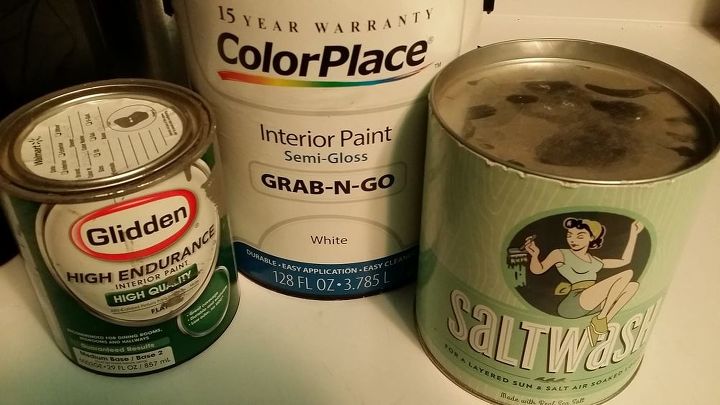
I decided I wanted to try this Saltwash stuff that I had seen so many posts about. They made it look so easy.
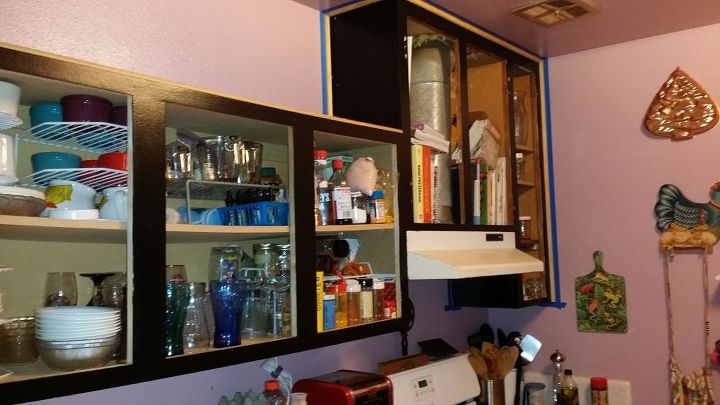
I took off all the cabinet doors and pulled out all the drawers. I bought new molding and put around all the cabinets. Just trying to make them all get along. I added some to the top of the only cabinet that didn't touch the ceiling. Trying to give it a finished look. I could have bought a cabinet that touched the ceiling. But at the time when I bought it all the new houses had high ceilings and the cabinets had space for knick knacks. I wanted that look too. I was dumb. LOL It's a small kitchen.
Out in the garage I made space for all the doors. In my attempt to get them all to look the same I painted the insides white. This was after 2 coats and I realized it was going to take a lot of paint to cover the black. Only the old doors were black. I was covering the icky pink.
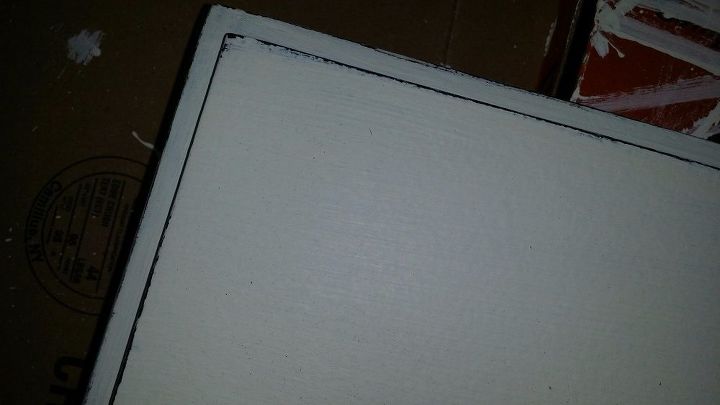
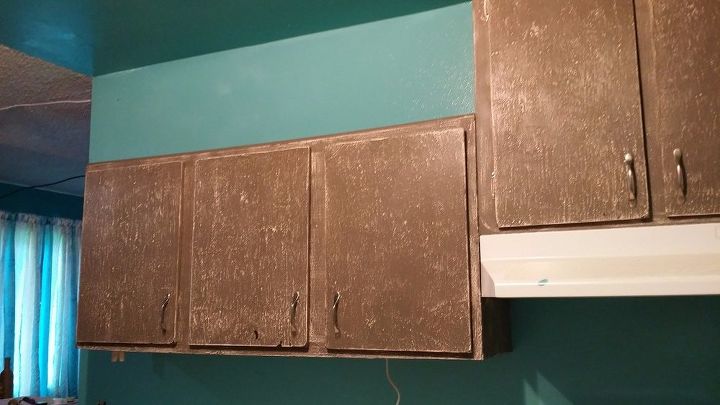
I decided to try chalk paint. I got some calcium carbonate and followed the directions, mixing it into the white paint. I wasn't prepared for the rough texture. I got out my sander and sanded it smooth. This made the black edges stand out. That's fine we are going for a rustic look anyway, might as well carry that to the inside too.
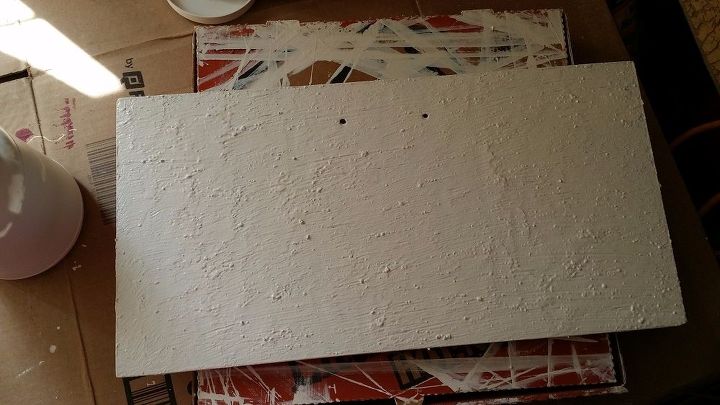
I mixed the Saltwash into the white paint and applied it. It didn't exactly look like posts and how to videos I had watched. Maybe if I had applied it with a trowel? Oh well it is what it is we keep on going. I did all 17 doors, 7 drawers and the base cabinets. Something I have not seen addressed in any of the tutorials or videos... Saltwash will ruin your paint brush. So don't use your $400 diamond crusted gold plated natural boars hair paint brush. Get yourself a cheap crappy brush that you can just throw away when you are done. Don't even bother washing it. I kept my old brush I think it will work well for dry brushing texture on a couple of things I'm going to add between and under the cabinets later. Things I'll need to be smooth but want to blend in.
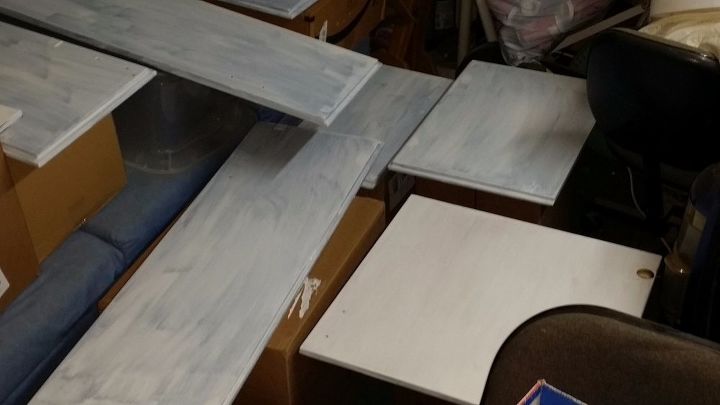
Salt wash painted on the base cabinets. I did eventually have to remove everything. Once I got the gray color on and needed to sand to bring out the texture for that old weathered look. Sanding makes a terrible mess, But what can I do. Pull the cabinets off the wall and drag then out side?
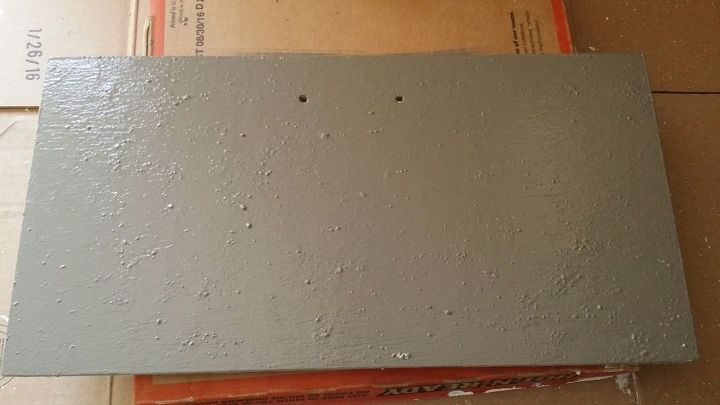
Painted the gray color over the salt wash. this was a quart of oops paint by the way. I love oops paint someone's mistake was just a bit easier on my wallet.

After sanding off some of the gray paint. I didn't get the clumpy look from the Saltwash that other people got. I was a little disappointed, but Saltwash is expensive so the look will have to stay until it has lived out it's price. I will admit that is has been about a year now and the look has grown on me.
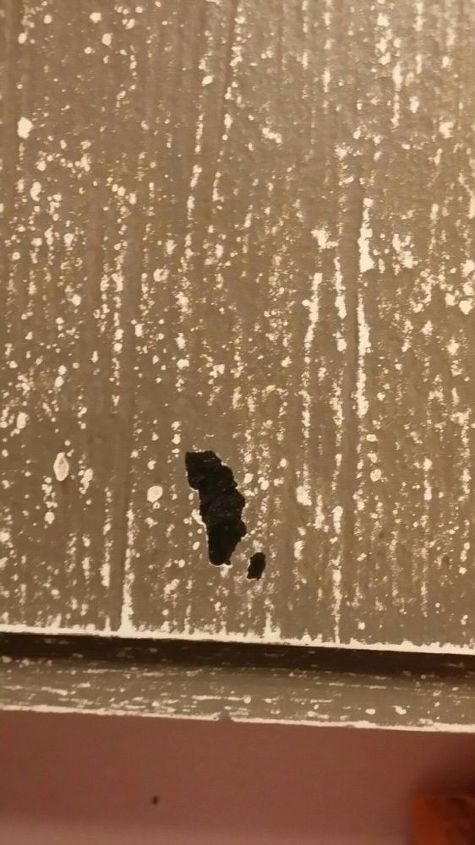
I had to go out of town for the weekend to go visit my grandmother in Solvang. I laid the biggest of the doors on the work area and proceeded to stack the rest on top. I placed them gray side to gray side and white side to white side alternating as needed. When I came home to finish my kitchen. All that was needed was waxing the doors and hanging them. I discovered some of the gray sides of the door had stuck to each other and pulled off chunks of paint. At first I was mad. But then I decided it only added to the rustic/weathered look I was going for. And I tried to chip off more on other doors. Yeah that didn't work.
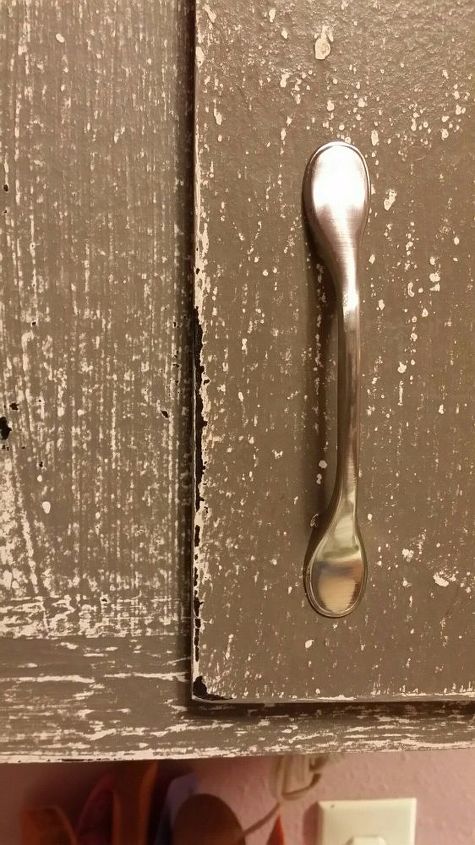
I forgot to take a picture of the waxing process. I used Minwax dark wax after sanding. I cleaned up the silver hardware and put it back on the doors and drawers and hung them all back up.
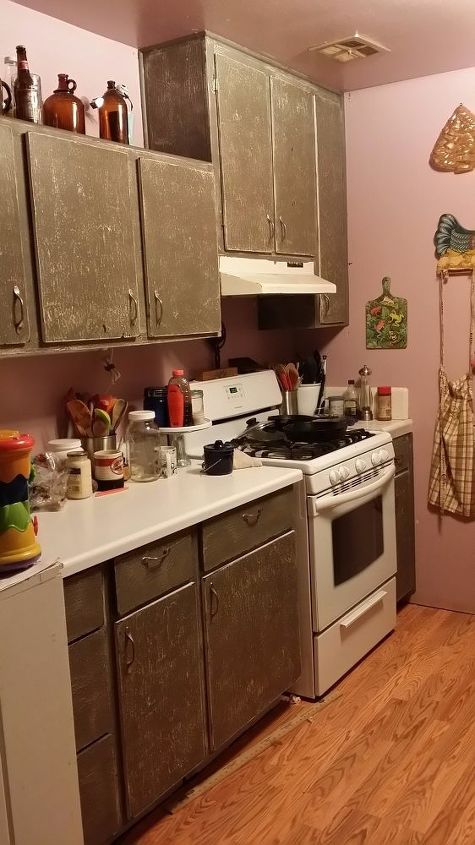
One side of the kitchen done. This was before I painted the walls. That stove has since broken and I got a new one that is black with stainless and it looks so pretty with the cabinets.
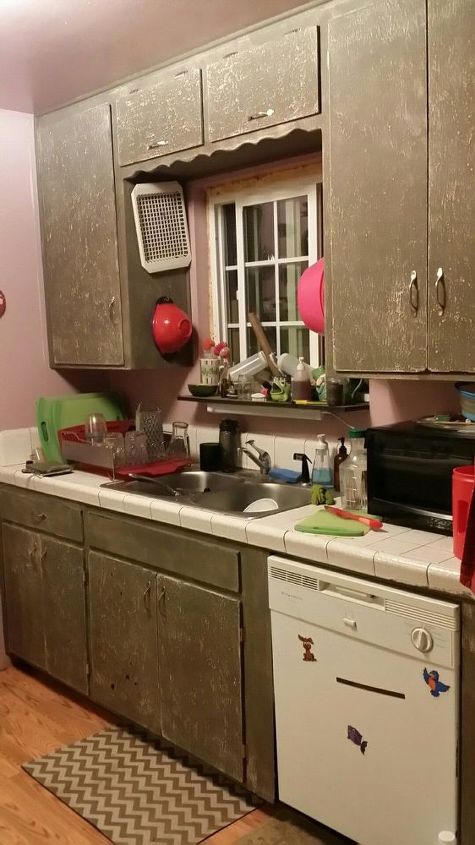
The other side of the kitchen. Since getting a new Stainless fridge and stove the dishwasher looks out of place. I am wanting a new one but since nothing is wrong with this one I am thinking I may just paint it. If I do I'll share my experience.
Here is a look at the cabinets after painted the walls. I went from a raspberry smoothing look to a blue icee look. LOL
Resources for this project:
See all materials


Any price and availability information displayed on [relevant Amazon Site(s), as applicable] at the time of purchase will apply to the purchase of this product.
Hometalk may collect a small share of sales from the links on this page.More info
Comments
Join the conversation
4 of 65 comments
-
Definitely, love the look!
-
Sorry....looks like old badly painted cabinets....I know the work...not pretty


Frequently asked questions
Have a question about this project?
I know you.used grey and white but it looks a biscuit colour why is this please
What? No photos of the pumpkin cabinets?