


DIY Clothes Hanger Christmas Tree
8 Materials
$7
1 Hour
Easy
Along with miniature ornaments and some festive tinsel, give an old metal clothes hanger new life as a whimsical, modern children's Christmas tree.

My childhood home is always decked out with Christmas spirit for the holiday. I feel that is one reason I have such fond memories of Christmas as a child.
My children are really starting to appreciate Christmas and it makes my heart so happy. We have been baking, making Christmas crafts and learning through advent calendars. I want to try to make Christmas as magical for them as it was for me as a child.
Last year, I created a felt Christmas tree (featured on the blog, link at the bottom of this page) for them. This year, I wanted to create a fun Christmas tree that matched their new colorful, whimsical room.
This is the perfect Christmas tree if you are tight on space, or if you have young children or pets who may get tangled in all of the Christmas decorations. This project is also great because you will probably have most of the tools already at your house. I chose a wire hanger, because it is the perfect size and the perfect strength. You can take stock of the decorations you already have and get creative with the colors and design.

To make your own clothes hanger Christmas tree, you will need:
- Wire Clothes Hanger
- (Affiliate link) Miniature Ornaments . Ensure they are plastic and lightweight. I purchased mine from Hobby Lobby during their half off Christmas sale.
- Tinsel Garland
- Pliers
- Hot Glue Gun with Glue Sticks
- Decorative Bow for the Top of the Tree
- Measuring Tape (not pictured)
- (Affiliate link) FrogsFeet Suction Cup Hooks or another hook to hang the tree. I used the FrogsFeet hooks to hang all of our outdoor Christmas wreaths (visit my blog post to see the picture of my outdoor wreaths, link at the bottom of the page) and for this tree since I attached it to a mirror. I have been very pleased with this product.
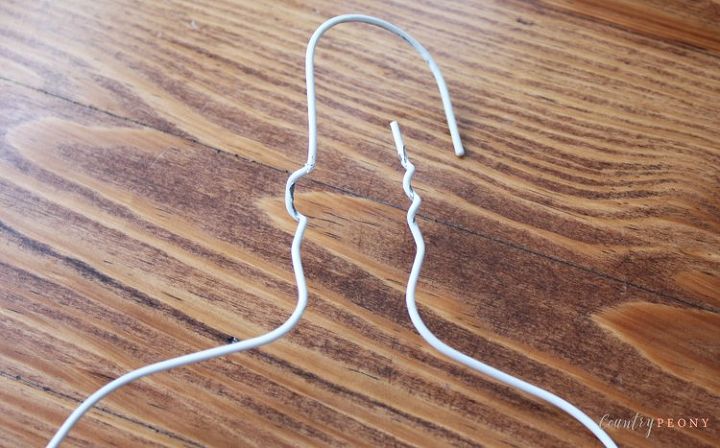
Step 1: Use the pliers to untwist the top of the hanger.
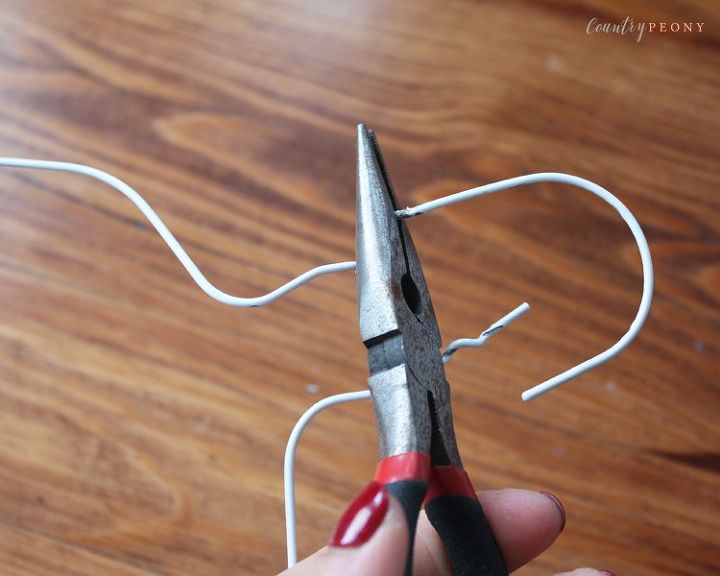
Step 2: Aside from the curve at the very top of the hanger, straighten the rest of top and the sides of the hanger out with the pliers. You will use the curve to hang onto the hook later.
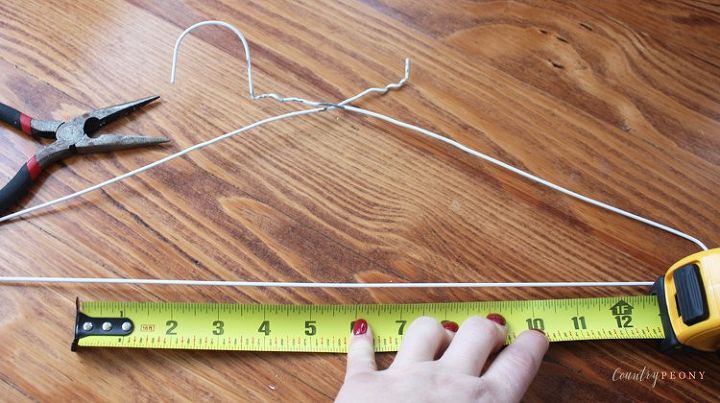
Step 3: Determine the width of the Christmas tree bottom. Measure and mark the wire at the bottom in the middle so that the wire is even on both sides. The mirrored door armoire that I placed my tree onto is 11 inches wide. So I made my Christmas tree bottom 10 inches wide.
Step 4: Once you determine the width of your Christmas tree bottom, use the pliers to form the two bottom corners of the triangle.
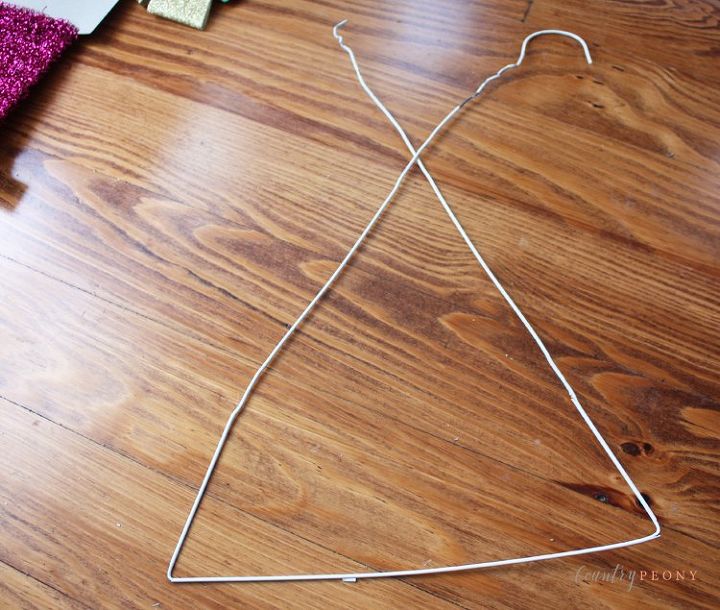
Step 5: Smooth out the wire on both sides so that you have a straight triangle.
Step 6: This step can go two ways depending on the type of tinsel garland you have.
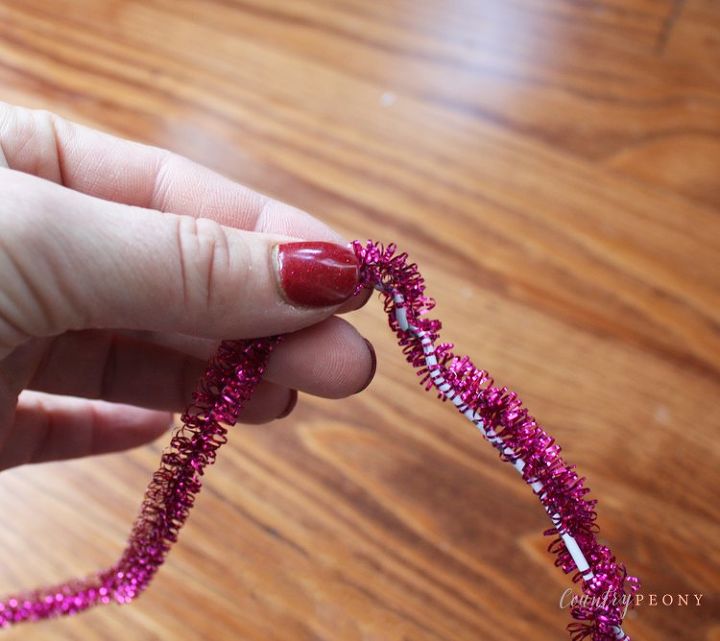
1. If you have a tinsel garland that is hooked like mine you can thread the wire hanger through the garland.
2. If you have the traditional tinsel garland that has straight edges, then you can hot glue the garland to the wire hanger.
I prefer to use the hooked tinsel garland, because threading it will make it pretty on both sides. This was important to me because I attached my tree to a mirror. However, if you attach it to a wall or window, it will not matter.
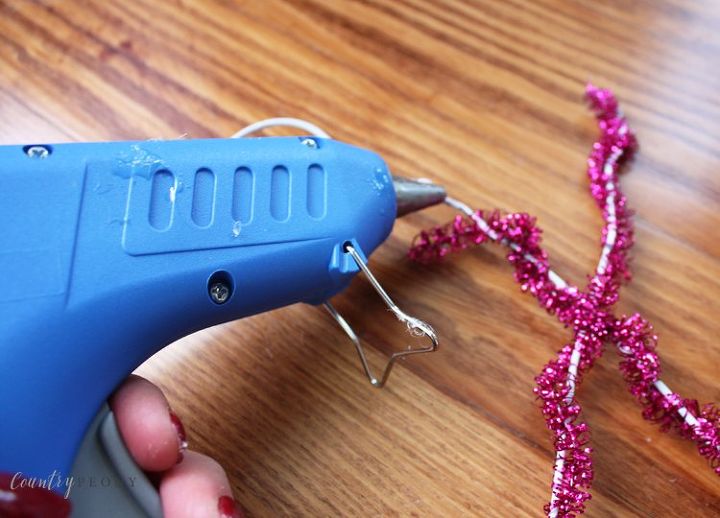
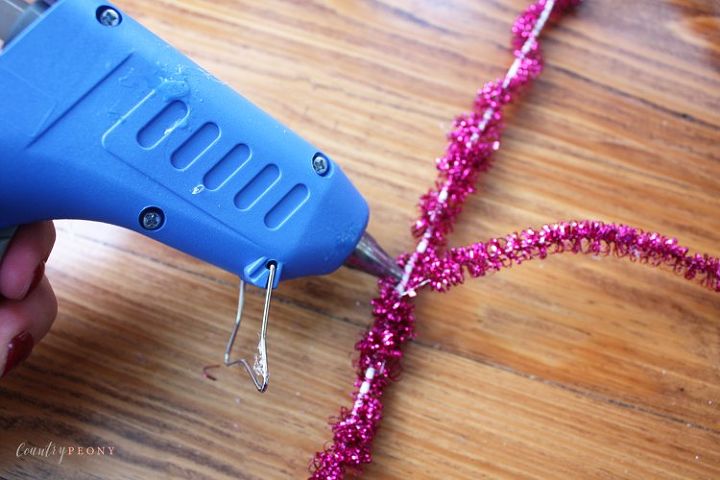
Step 7: Hot glue the ends of the tinsel to the wire hanger.
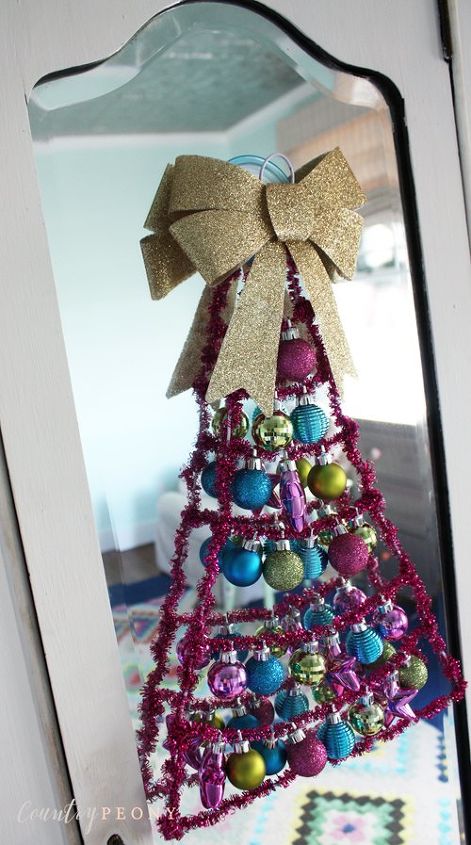
Step 8: Now it is time to create the center of the Christmas tree. Cut off a piece of tinsel (ensure it is long enough to cover the width of the tree) and tie it around the left side of the Christmas tree wire. Then hot glue the area to secure the hold. Once your hot glue is cool, string the tinsel through the miniature ornaments. When you like the amount of baubles, pattern and textures tie the same string to the right side of the Christmas tree wire. Reinforce with hot glue.

*Tip: It is helpful to add a little hot glue to the end of the tinsel to act as a pointed needle for easier threading.
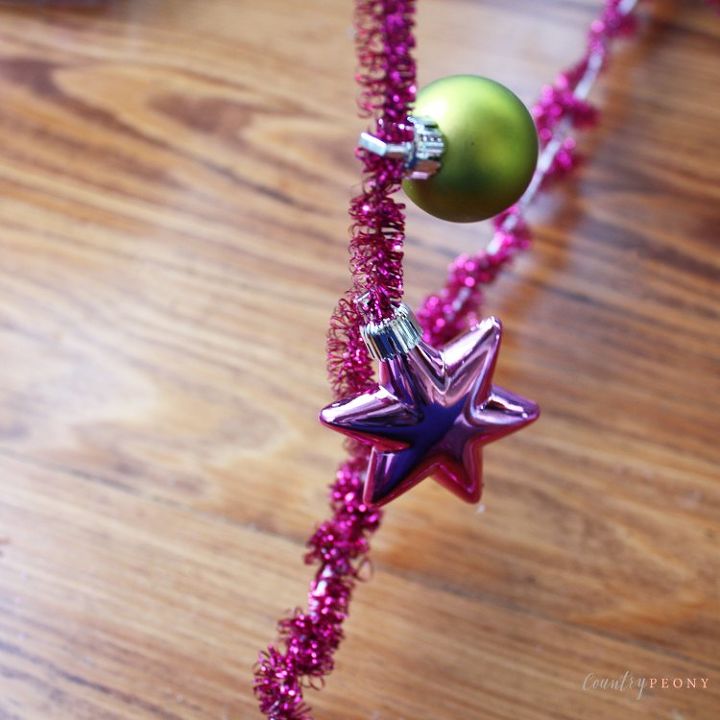
Step 9: Repeat step 8 until you have reached the desired levels and look that you are after. For reference, my tree has 6 levels and I used 24 miniature baubles. My levels were 2 inches apart from each other.
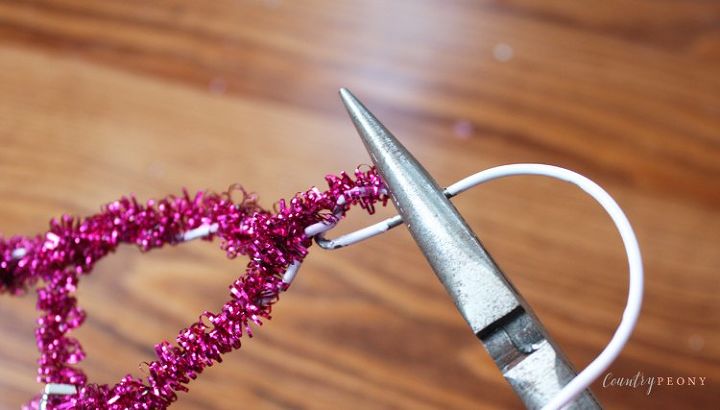
Step 10: Reconnect the top of the hanger with pliers. Then add hot glue to reinforce the connection.
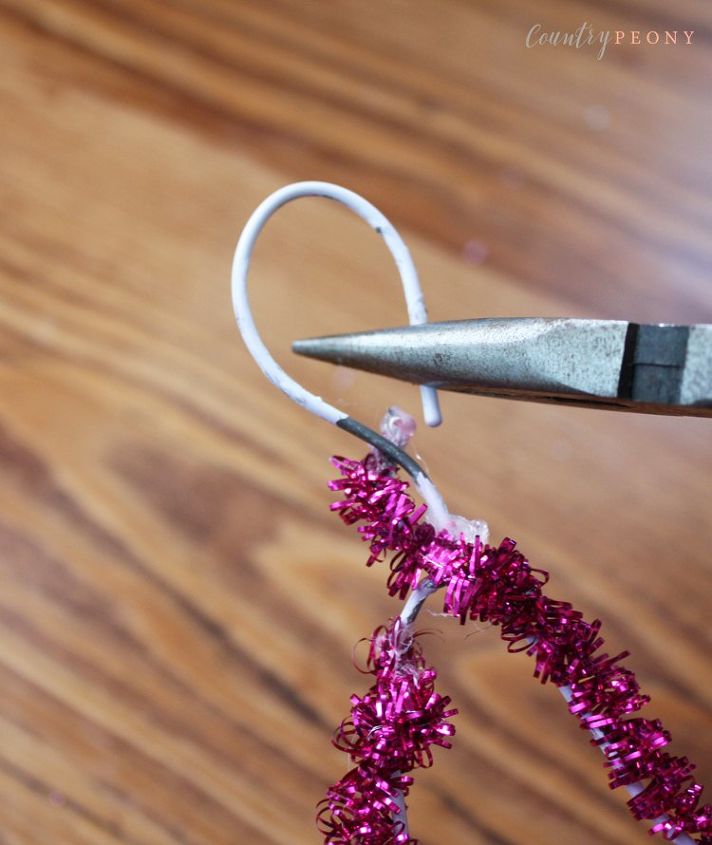
Step 11: Finish off the curve of the hanger by closing it with the pliers so it can hang nicely on the hook.
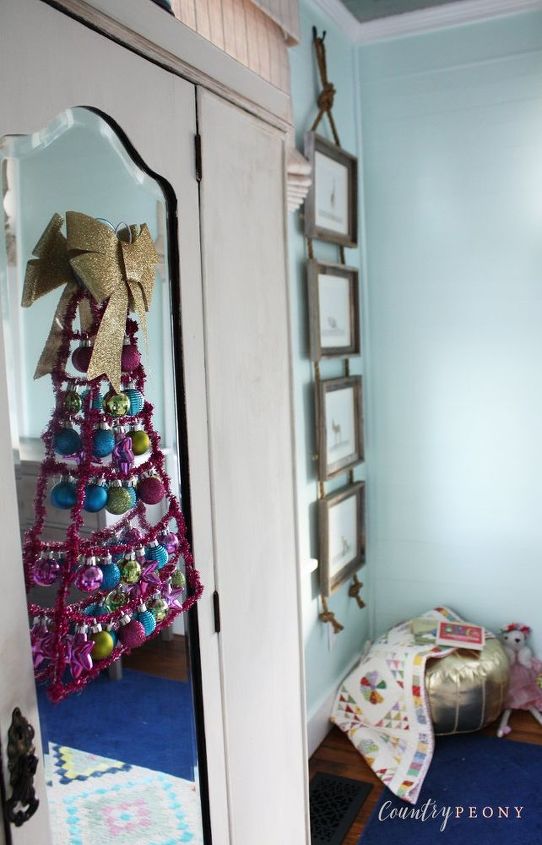
Step 12: Enjoy your whimsical, modern Christmas decor.
It fits perfectly in my children's whimsical and colorful shared bedroom. Their bedroom is still a work in progress. However, I plan to reveal the details of the room on the blog soon. So stayed tuned!
I truly hope you enjoy making this fun Christmas tree. Merry Christmas!
To see this full post, and for more fun projects please visit my blog, Country Peony. Link below. Thank you.
Resources for this project:
See all materials


Any price and availability information displayed on [relevant Amazon Site(s), as applicable] at the time of purchase will apply to the purchase of this product.
Hometalk may collect a small share of sales from the links on this page.More info

Want more details about this and other DIY projects? Check out my blog post!
Comments
Join the conversation
4 comments
-
It is adorable and very clever.....

-
that is really cute! over the last few years I have use different things to create Christmas trees this has given me another idea. I think I might try this by wrapping glitzy pipe cleaners around the coat hanger thank you for inspiring me


Frequently asked questions
Have a question about this project?
Why not go around the 3rd time for a tree??????????