


Rocking Chair Seat Replacement

by
Patricia
8 Materials
$30
2 Hours
Medium
I came across a wonderful antique rocking chair. It did have a few problems that I needed to address, but the main problem was a broken seat that needed replacement.
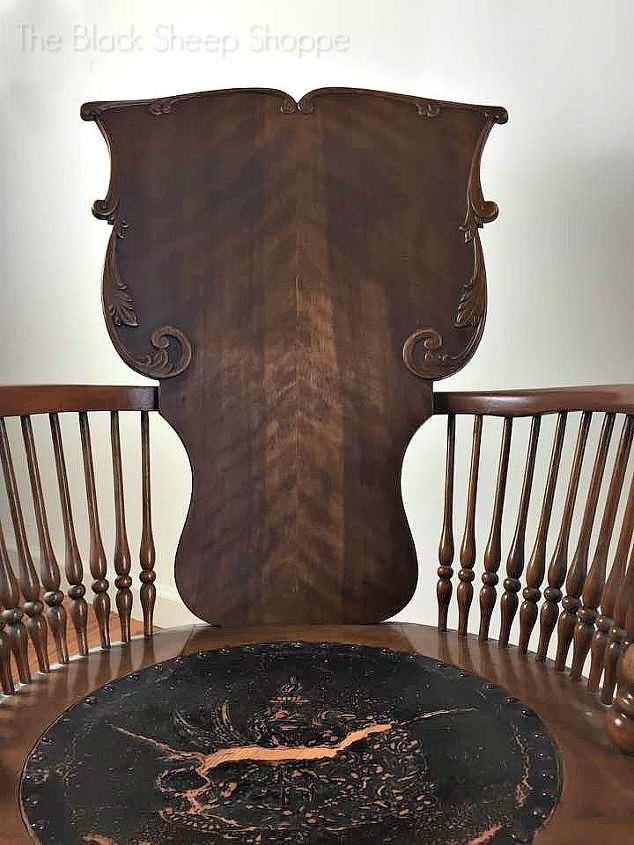
I believe the original seat was leather, but at some point in time it was replaced with a fiberboard seat.
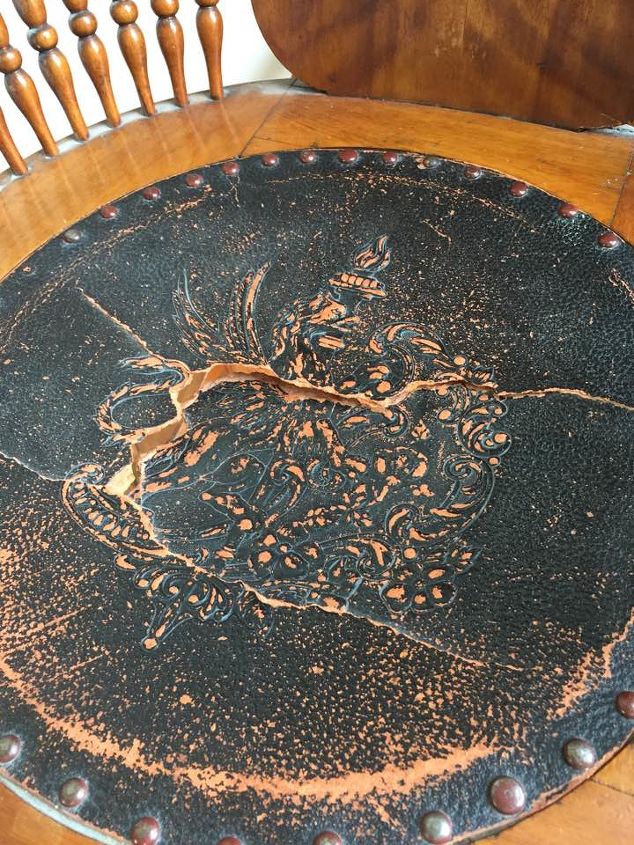
I considered replacing it with leather, but fiberboard seats are about half the price. Based on the damage of the current seat it raises the question on whether or not this is a good option. However, this was apparently damaged during a move and not from everyday use. So I felt confident that using another fiberboard seat would be a good alternative to leather. Plus even though it was damaged and torn, I was still able to sit in the chair (gingerly) without it tearing further.
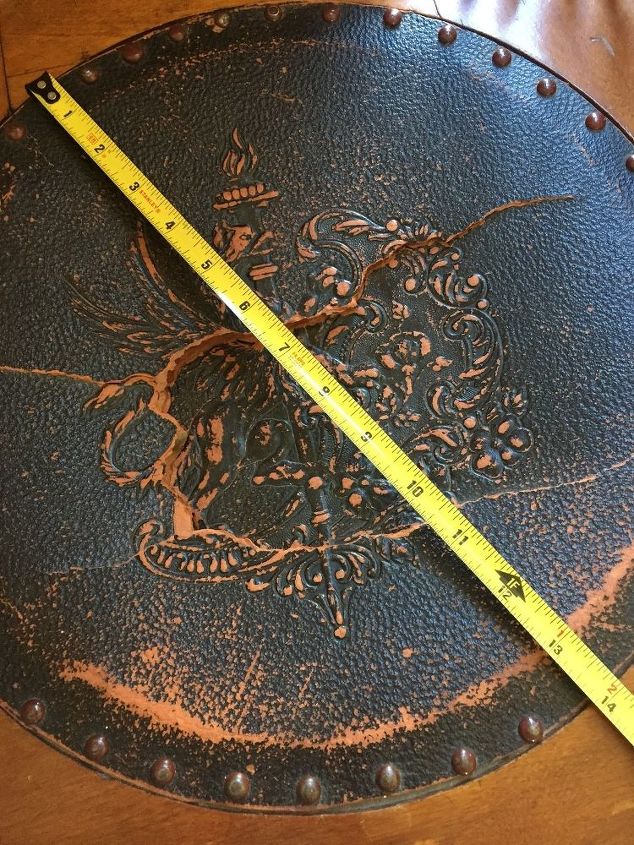
I measured the seat first and then placed an order for the replacement seat online making sure that the design of the seat would fit inside of the hole of the chair.
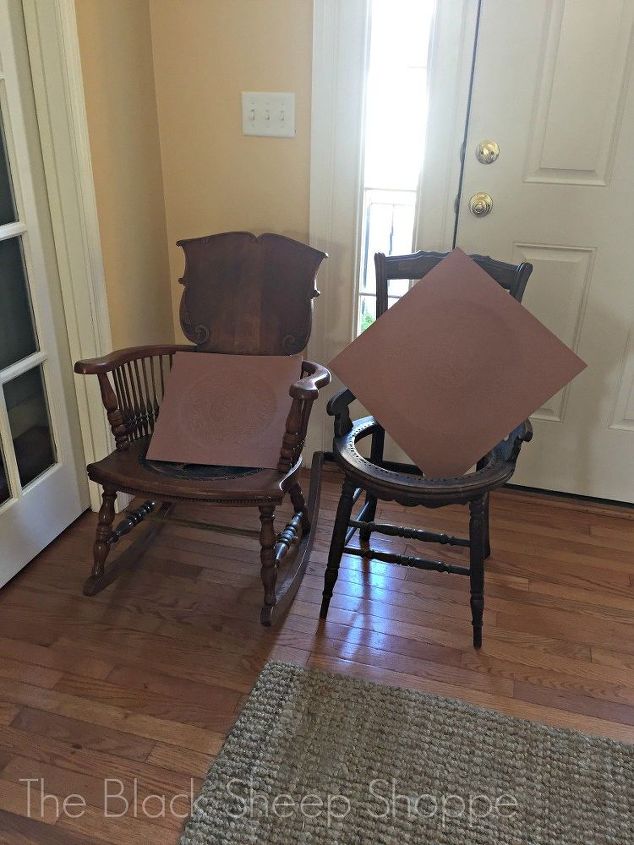
Once I received my order I was ready to begin. The fiberboard seats come as a square and need to be trimmed to fit. I had two chairs that needed new seats, but today I will work on the rocking chair.

The first step was to remove the old seat. I used needle-nose pliers to grasp the upholstery tacks and tugged them out. Most came out easily, but others put up a fight.
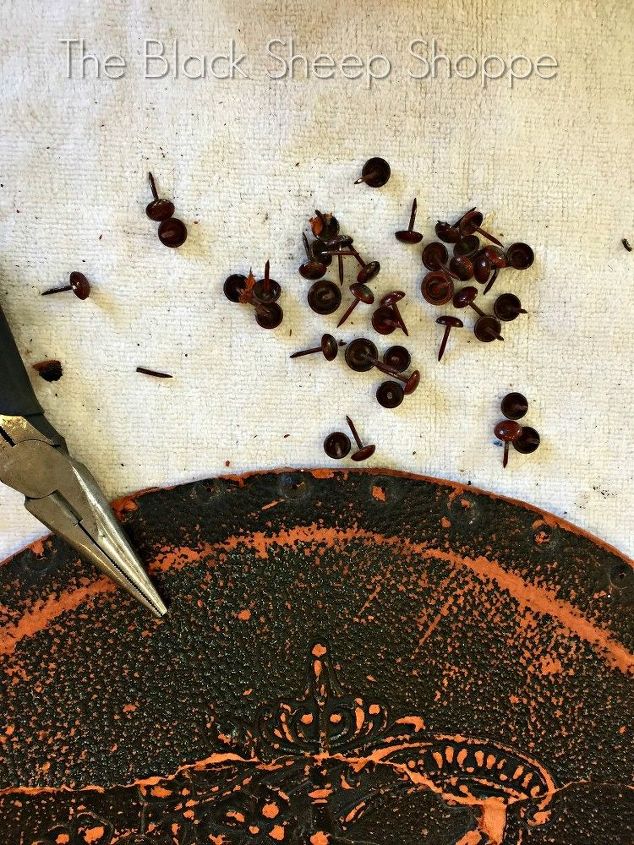
Eventually all the old upholstery tacks were removed.
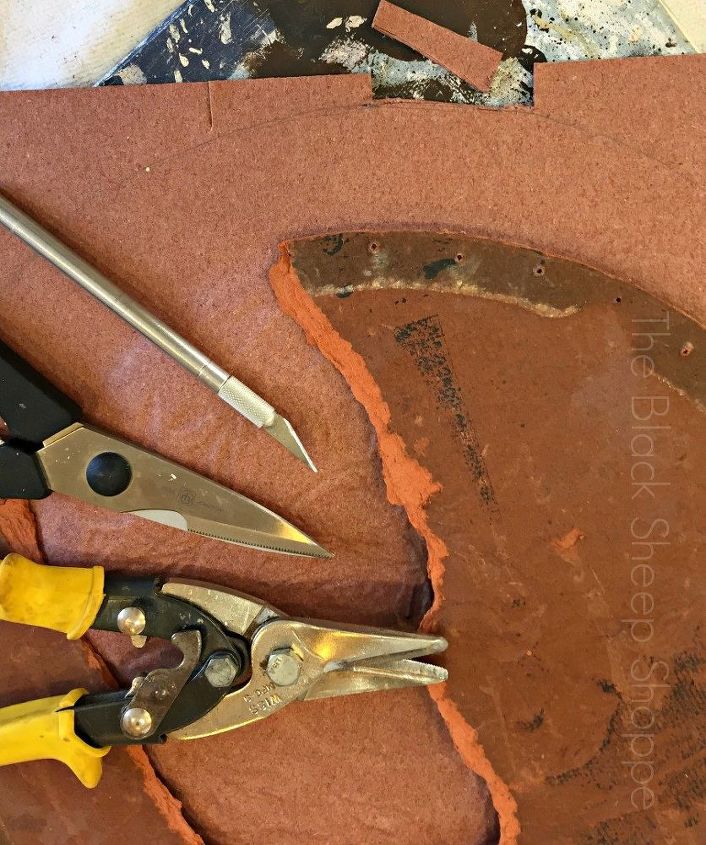
I used the old seat board as a template and traced the shape onto the new seat board. In hindsight I should have measured and traced my own circle as the original seat wasn't a perfect circle.
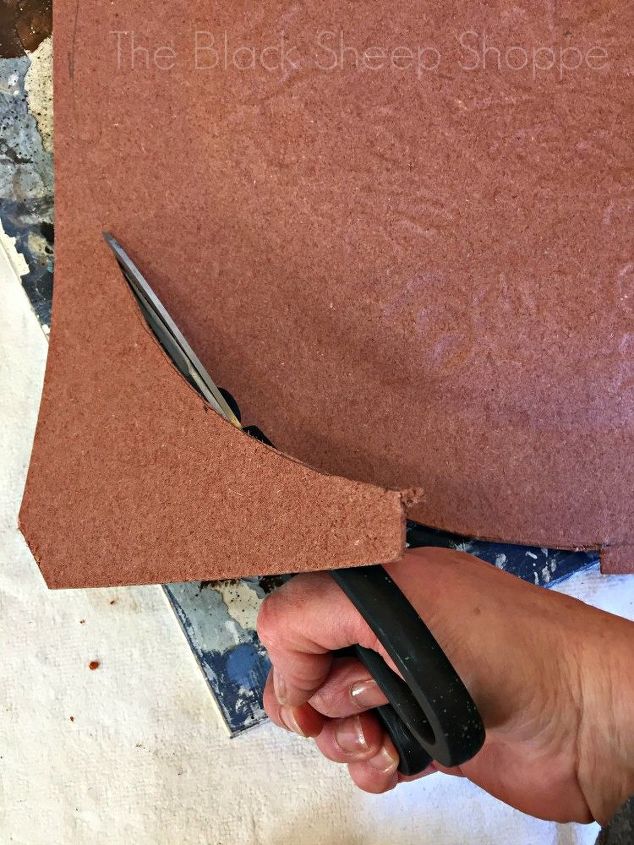
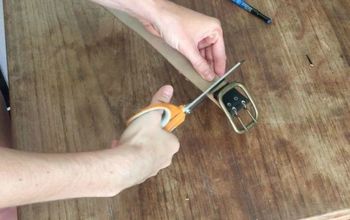
The seat board has to be sturdy enough to hold the weight of someone sitting in the chair, but pliable enough to cut. I initially tried using metal clippers which cut through easily, but they were harder to control a precise circular cut through the thick board. So I switched to my kitchen scissors. These allowed more control but were harder to cut through the thick material.
I just took my time and eventually got the job done. If you look closely you'll notice a few gaps, but hopefully the upholstery tacks will hide that.
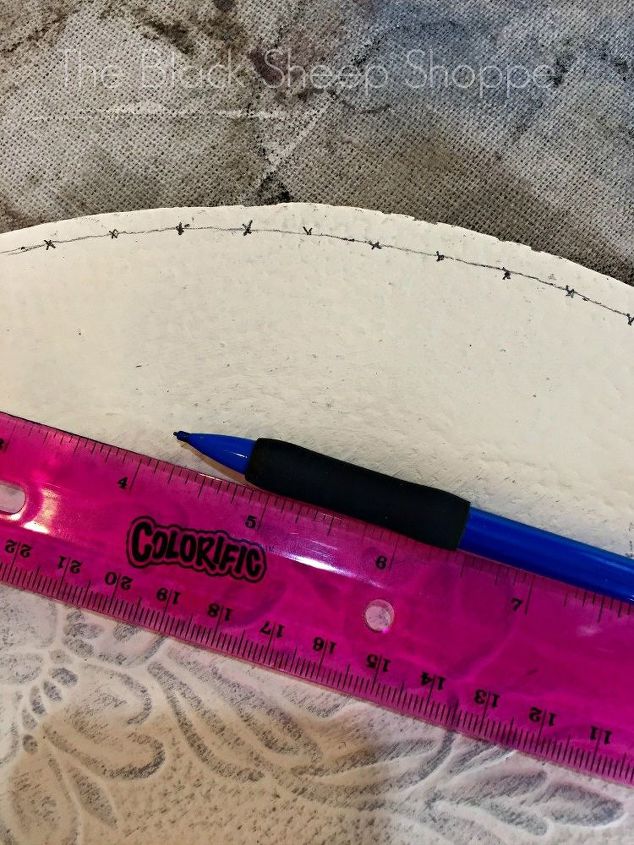
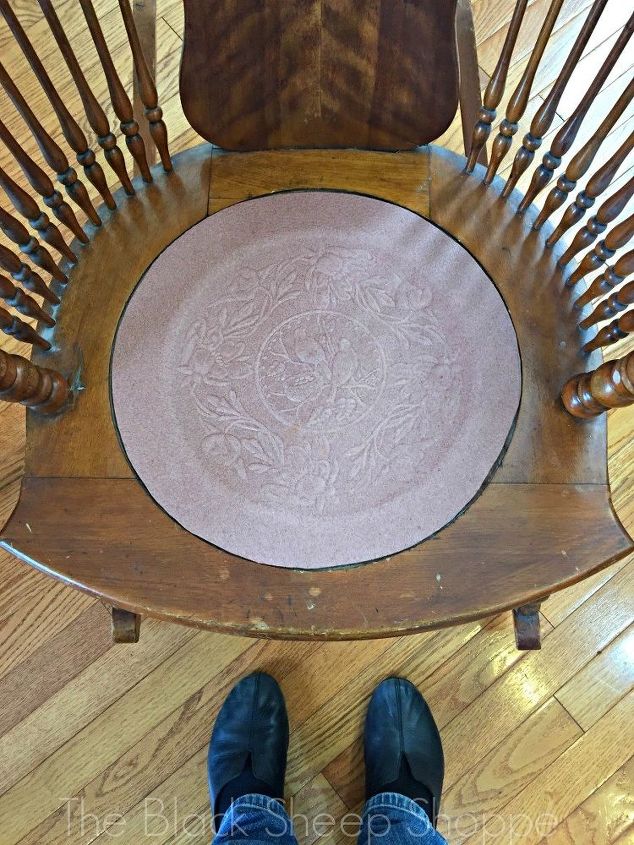
The seat board can be either stained or painted. Now that I had my seat cut to fit, I went ahead and painted both the chair and the new seat board. Next it was time to attach the new seat. I drew a border line with a pencil as a guide and then marked off where the upholstery tacks would go with a small "x".
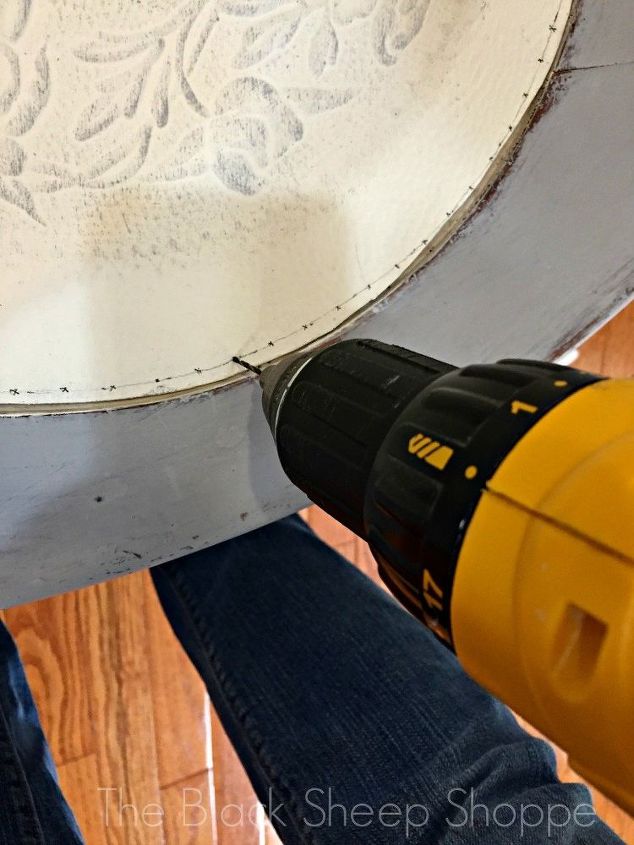
The most important step is to pre-drill holes for the upholstery tacks. Before working on the rocking chair I practiced this technique on a cheap thrift store chair and learned this tip the hard way! Otherwise you end up with a bunch of broken and bent tacks. You don't need to drill much. In fact don't drill all the way into the wood beneath the seat. At a minimum, just drill enough to get a hole started to accept the upholstery tack.
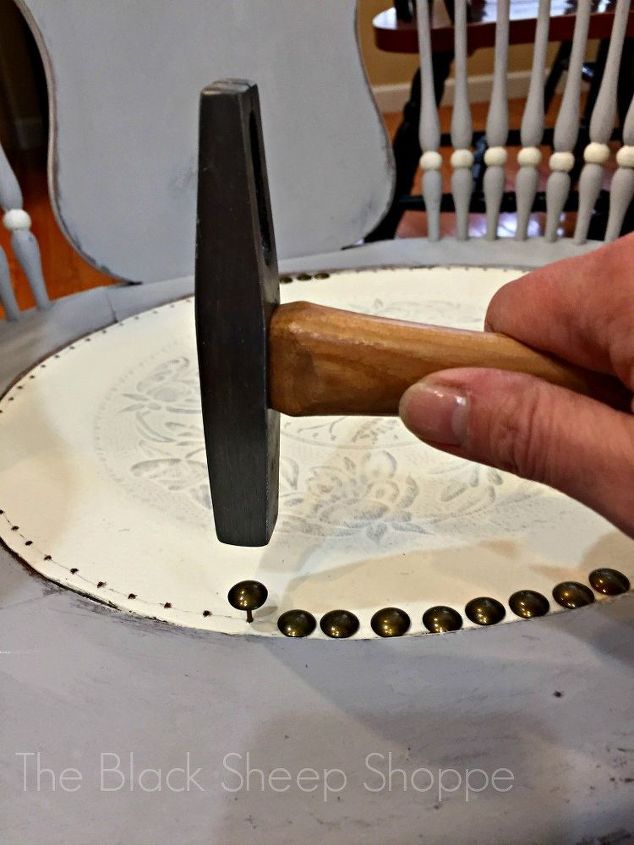
Next I used an upholstery hammer to tap the tacks into the pre-drilled holes.
I was going to paint the tacks grey to contrast with the seat. But decided at the last minute to paint them white to coordinate with the other trim work that I painted.
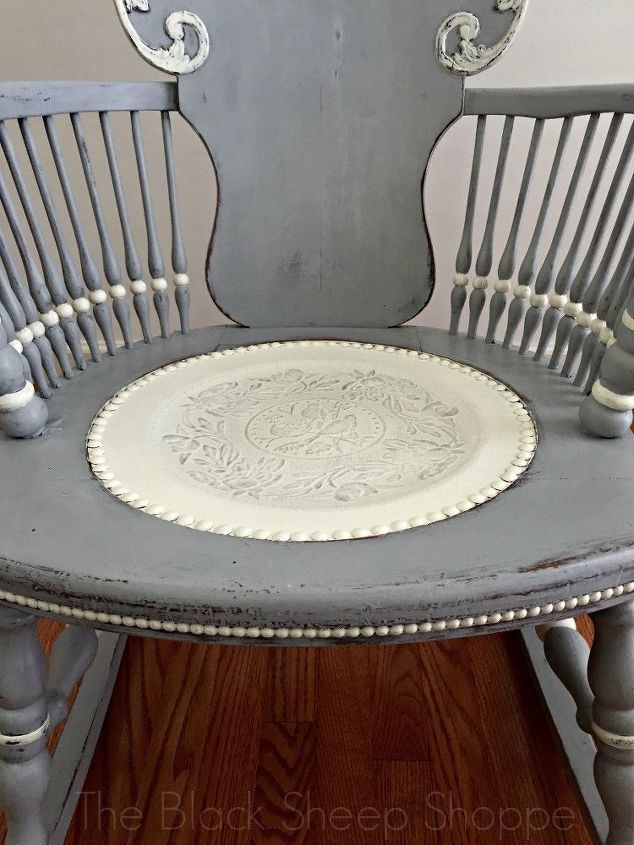
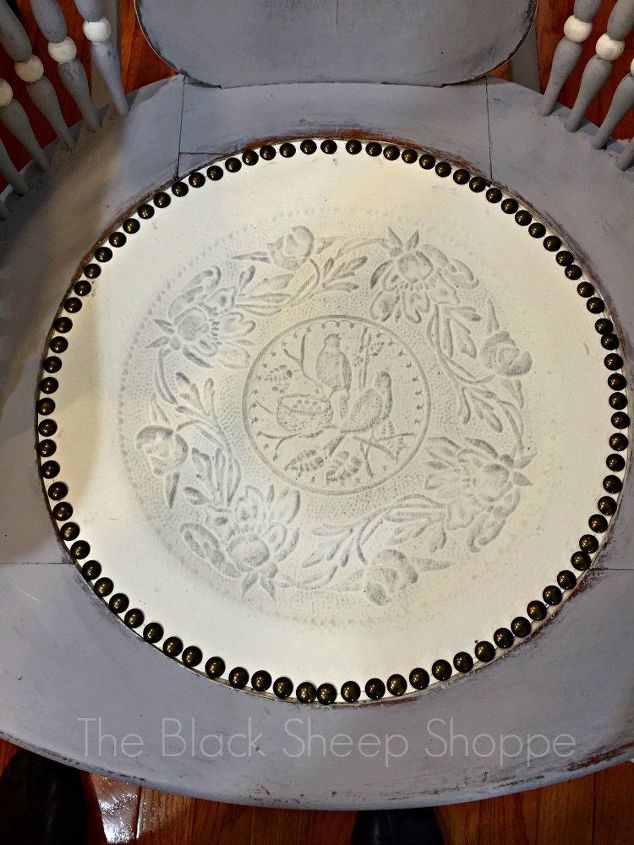
The chair is now nice and sturdy and safe to sit on once again. If you would like to see the entire project from start-to-finish, please stop by my blog The Black Sheep Shoppe.
Resources for this project:
See all materials


Any price and availability information displayed on [relevant Amazon Site(s), as applicable] at the time of purchase will apply to the purchase of this product.
Hometalk may collect a small share of sales from the links on this page.More info
Want more details about this and other DIY projects? Check out my blog post!


Frequently asked questions
Have a question about this project?