


Kitchen Cabinet Remodel

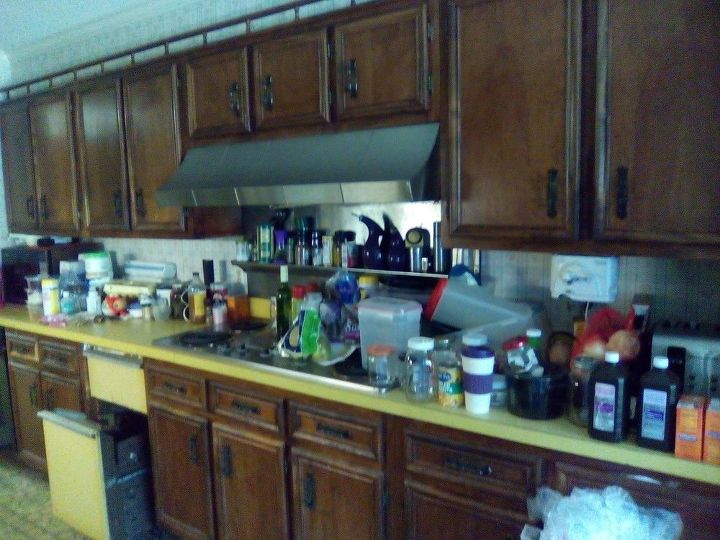
We bought a fixer upper and oh the job ahead. Everything was original from 79 and additions to the home in the 80s. The kitchen had mahogany cabinets that had a smell I couldn't get out. The bottom and inside of drawers were covered with roach feces. Gloves, masks, brushes, cleansers cleaned the wood and back walls behind cabinets but wouldn't erase the smell. I looked into refacing with solid maple (new drawers, doors and veneer over the base cabinets). I about choked when told by Home Depot rep that the cost would be $33,960 for my 72 linear feet of cabinets...what? (yes I checked to make sure she didn't add zeros to the estimate). So we opted for DIY. The first two photos are BEFORE we bought for perspective. We argued for 3 months before closing about my wanting this house! But it had great bones!
When the agent had the home on the market, there were no photos of the inside of the home....here's why. This was from when I walked through the home viewing it for the first time.
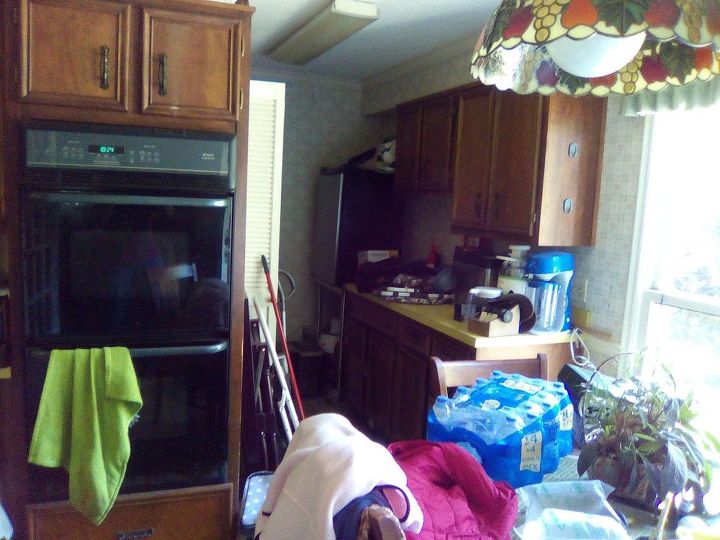
Keep in mind this is prior to buying the home!....the end of the kitchen had a butlers pantry, and 2 cabinets behind the ovens you can't see; food had exploded in the cabinets, the ovens were self cleaning but had not been cleaned, both convection. The sink was turned off because it spewed water under the cabinet when on.
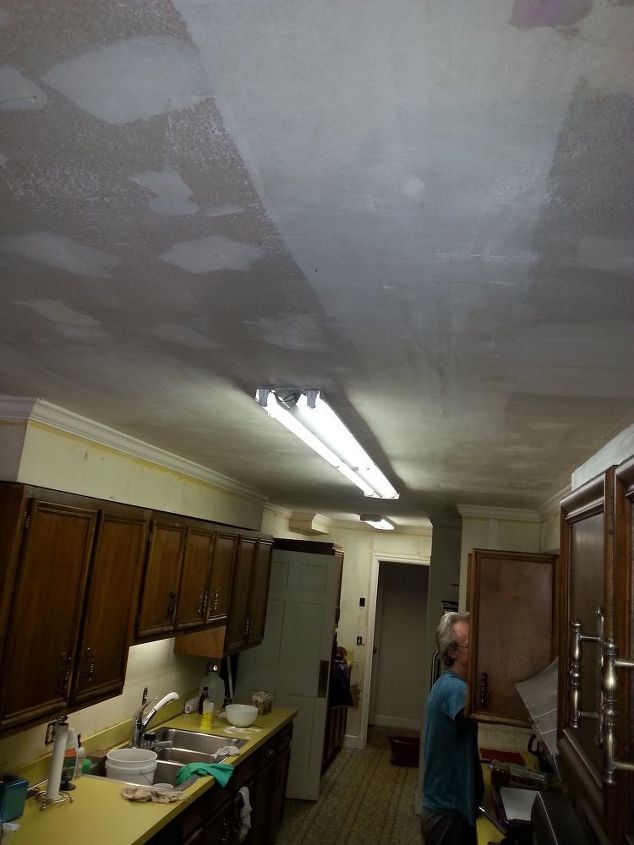
We removed the wall paper (2 layers in many places) and popcorn ceilings after having the texturizing tested for abestos. I removed the trim from the cabinets, we pulled out the ice maker and 1980s rusted out trash compactor. One burner on the 60s model 54 inch stove worked. We had a plumber clear all the cat and dog hair from the plumbing lines which all backed up shortly after turning on water. The double convection ovens we salvaged. Although they hadn't been cleaned, they were self cleaning and after removing an inch of ash after cleaning, both are clean and usable. We cleaned the refrigerator to use until we bought our own.
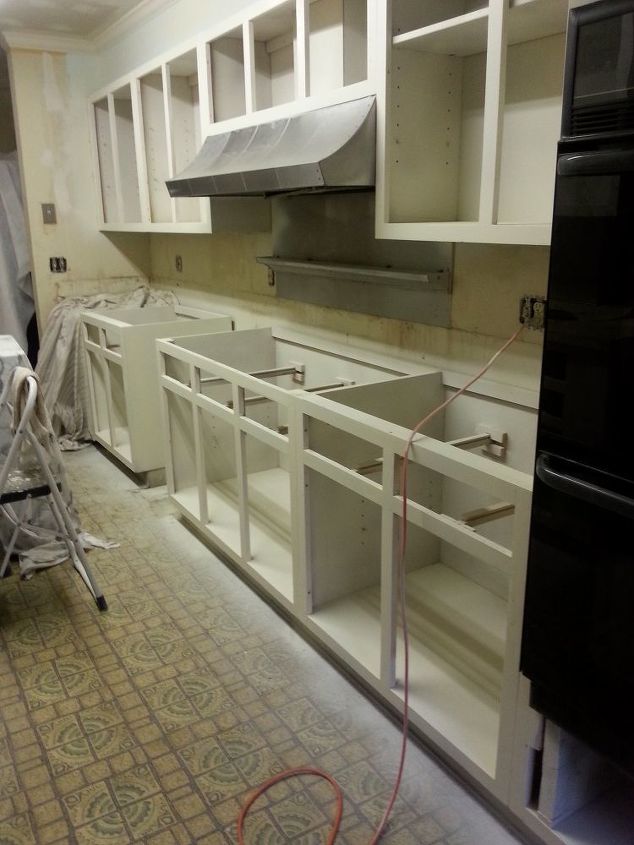
I have a co-worker whose occupation is painting, and hired him to paint the cabinets off white; he only charged me $700 for the entire kitchen. First coat was oil based Kilz to seal the wood, he took the cabinet doors home to complete in his work shop.
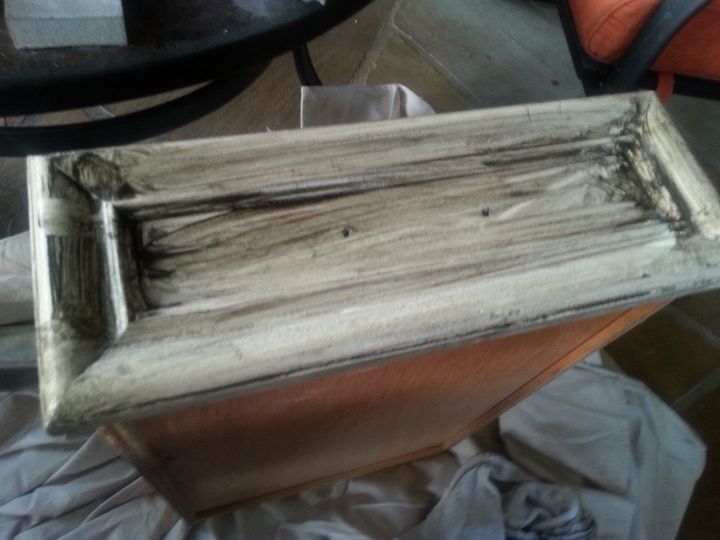
Doors and drawers were returned. Some of the paint had been pulled off by doors being stacked before the paint cured totally, which added to the antique look I wanted anyway so I didn't fuss. I bought Valspar antiqueing glaze and played with the first drawer to see how I liked the look. You wipe on the Valspar with a moist lintfree cloth (like old t-shirts) and then wipe off what you don't want with a dry cloth. Lesson learned, you can remove more of the glaze if it is slightly moist. I didn't realize this till near the end of the project and my larger pieces are too dark to this day.
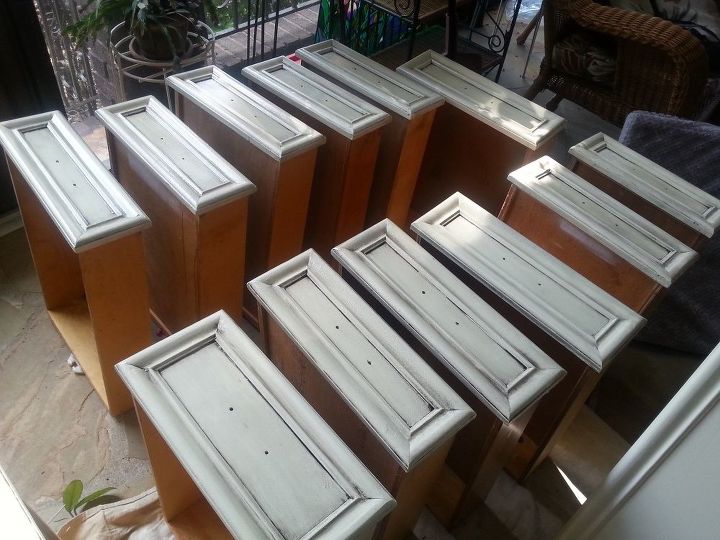
I liked the look, so I antiqued all the cabinet bases and ordered all new hardware after a couple of weeks of trying to refurbish and renew the old with CLR, metal brush drill bit, anything we could think of short of spray painting them. We chose copper highlights on the hardware. Here the drawers are lined up drying after antiquing. After drying, I put a coat of polyurethane on it. It added a mellow color to the antiquing, which in hindsight I'm not fond of. I like the cleaner, lighter color of just the antiquing, but they recommended sealing it. Should have used a different product.
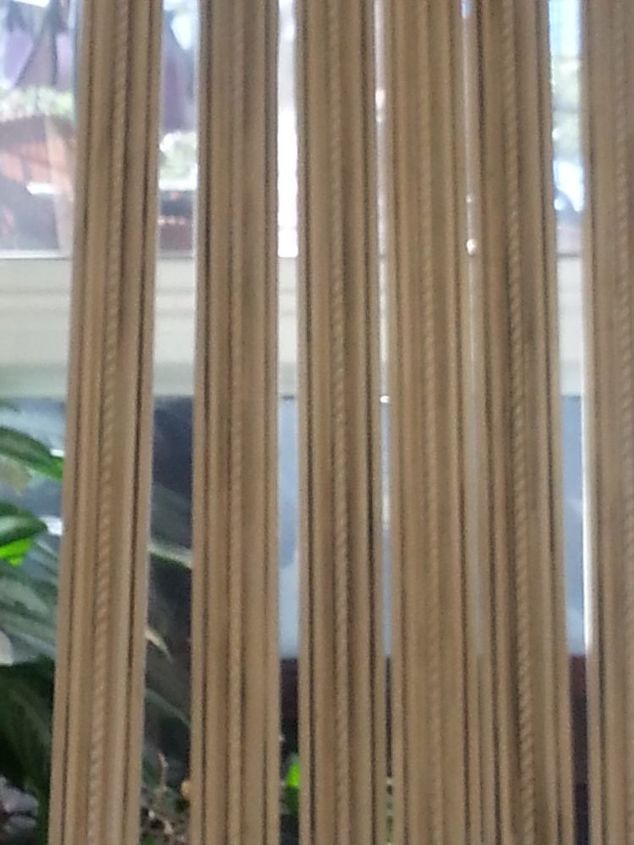
I wanted trim at the top of the cabinets so bought the roped wood trim to show off the antiquing, painted it white, and used the Valspar glaze. I attached a small backboard behind them to attach them at the top of the cabinets.
Painted the stainless steel above the stove copper, and then began to paint the kitchen.
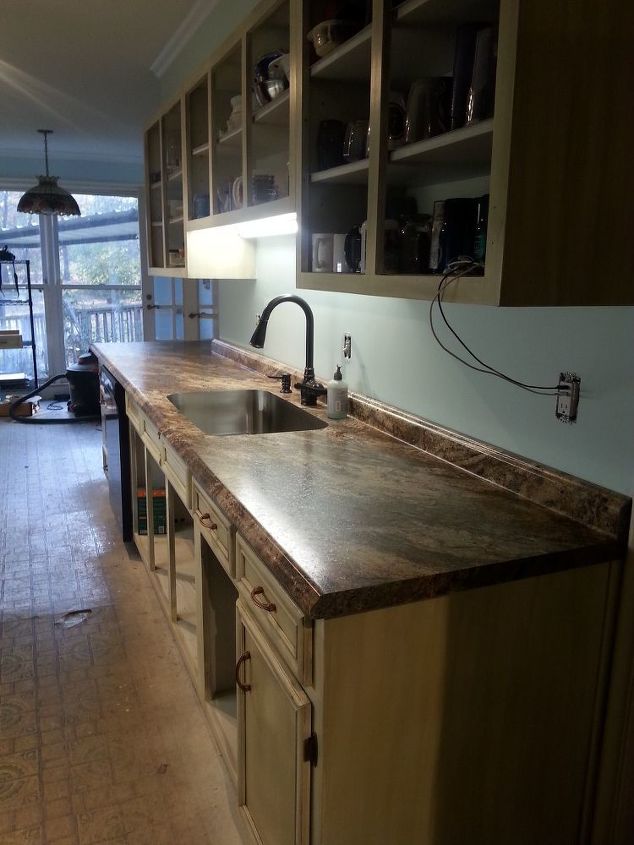
We hired a contractor to professionally install the counter tops. We used laminate after having the support under the kitchen inspected to see if it would support the additional weight of granite (answer no; we got 3 bids from $3500 to $16K to install additional supports.) We opted for laminate, which was $2500 installed with a built in sink. I had bought a copper sink and couldn't use it because I wanted an undermount sink; they only install their own specially made sinks with no edges; it is built in when the laminate is made. New faucet and insinkerator garbage disposal installed. I replaced the fluorescent under cabinet fixtures with new fixtures and LED lights.
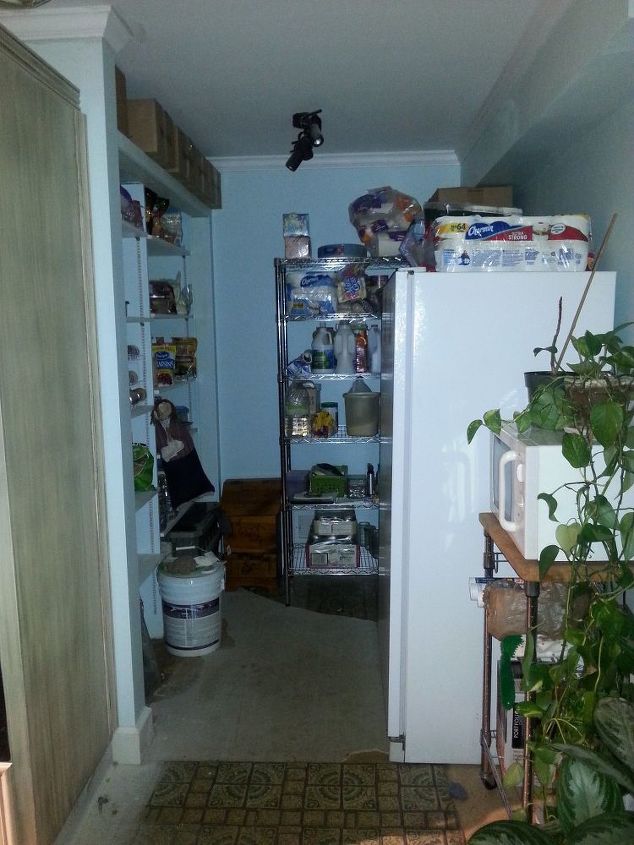
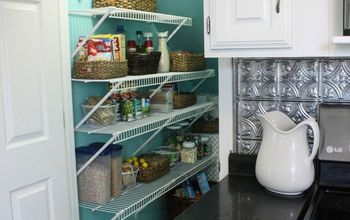
Pantry, I had a dream for a wall here with a barn door....I had no use for 2 sinks, so I moved the bottom cabinets to the garage, the top cabinets went above the washer and dryer, antiqued, which reside in a closet at the end of the kitchen, across from more cabinets. This kitchen is 35 foot long from wall to wall. We painted the wall behind the shelf's with oil based Kilz (2 coats) and installed bead board over that. It was easier than pulling the wall board out since the food stains came through the paint. Cleaned and painted the shelving, and reinstalled. Hired a friend to move the water pipes to an outside cold water faucet and capped the hot water and the drain. Painted the walls and trim, installed a new light fixture. Moved in the freezer. Now for my idea for the wall.......
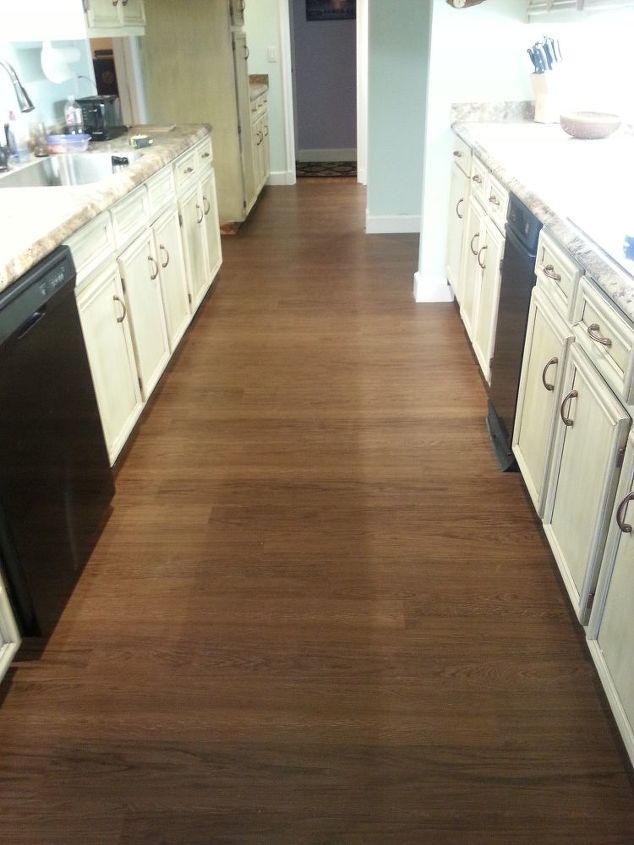
But first, new vinyl plank flooring installed. Bought the flooring (pet friendly) on line. It has a layer of cork on the bottom, the hard center, another layer of cork and then the vinyl. Makes the flooring very warm in the winter, doesn't transmit the cold due to the double cork layer. Seals very tight, nearly waterproof. No underlayment needed, cleaned the edges of the vintage vinyl floor and laid it right on top. We did need some underlayment in the pantry area due to pulling up some of the nasty vinyl under the shelves.
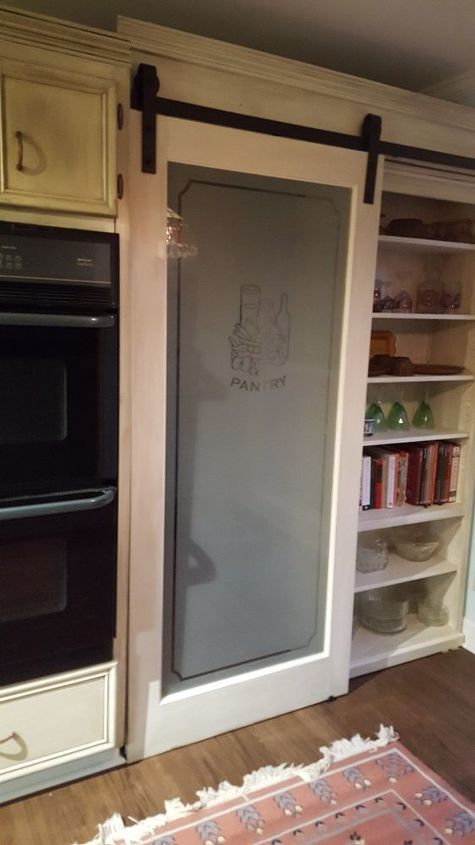
I ordered an oak cabinet (hated painting it to match but...) that was the exact size I needed for the pantry "faux wall" and we anchored it to the wall. A friend helped me design the top wood edging to support the pantry barn door I selected. When opened, it slides in front of the wood cabinet. I installed a motion detector on the light so when the door opens, the lights come on.

The light stays on 10 seconds and goes off. Our next project was the penny back splash, found on the site here in an earlier post.
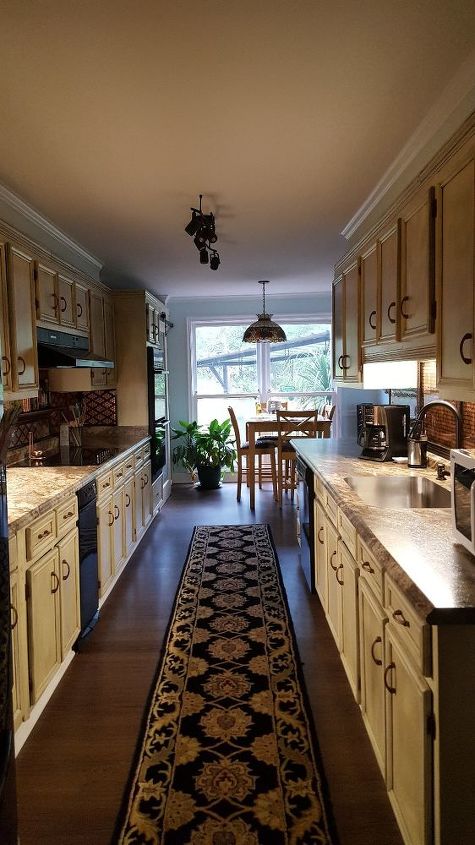
Installed a new under cabinet range hood and the glass top 5 burner Jenn Air stove top, and ordered the runner. Finished project. Kitchen completed. Total cost around $7200. Start to finish time wise: 7 months including Penny back splash.
Comments
Join the conversation
-
INGENUITY and SWEAT EQUITY!! You are to be complimented on BOTH!! Looks great!! franki
-
Beautiful! Thanks for pointing out some of the things you weren't quite happy with as it gives one time to pause and think when in the same situation! We can always learn a lesson!


Frequently asked questions
Have a question about this project?
Really nice redo! Looks like all the DIY hard labor was worth it. What is a penny backsplash? Can we see it?
I see that you added a backsplash as well what is that looks beautiful... can you send pics of that
Beautiful! Do I see 2 dishwashers?