


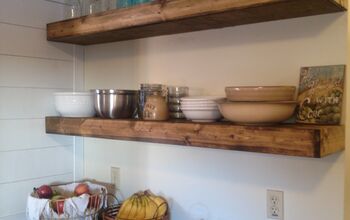
DIY Dining Room Shelves

by
Lindsey
2 Materials
$150
6 Hours
Medium
What is it with “open shelving” that makes it so popular? I knew I had to have some DINING ROOM SHELVES.
I have been wanting to make some FLOATING SHELVES for a long time now, and thanks to Shanty-2-Chic for their great free DIY plans, I decided to build their plans. I made a few modifications, and some of the instructions were a little difficult to follow, so follow with me while I try to explain all my steps.
I had Home Depot cut the wood for me (it really wasn't that many cuts) so all I had to do was assemble.
Tools used: **this is for 1 shelf only***
Drill,Stud finder,Tape measure,Pencil,Drill bits (including the "counter sinking drill bit)
Steps:
1. Build the "Frame" that sits inside the actual shelves: Use a 2 by 4 by 71.5" and screw quantity 6 of the 2 by 4 by 9 and 3/4" into it.
2") to attach this to the wall by drilling into the studs. You could use as many as you want, but since I was drilling into 2 studs, I used 2 screws per stud.
Since these shelves are "floating", you want to make darn sure nothing (not even an earthquake) will make these shelves fall.
3. Once you have attached the frame to the wall, stain or paint the wood that will create the "shell" that fits around the base.
After you are done staining the wood, it's time to assemble the wood.
4. Use the counter sinking drill bit to counter sink the 1 by 1/4" screws into the wood where any two pieces would meet.
5. Next, finish the wood by adding a small amount of wood putty on top of all the screws.
6. Final step; attach the "outer shell" to the frame.

For more details and progress pictures head to my blog post below.
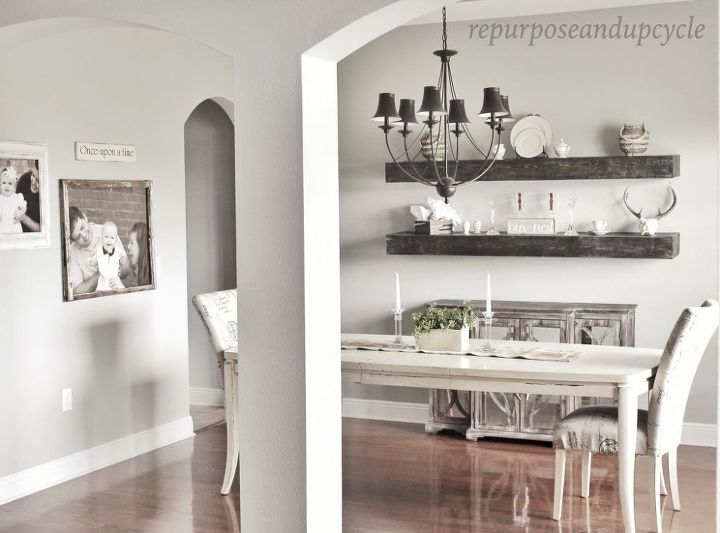
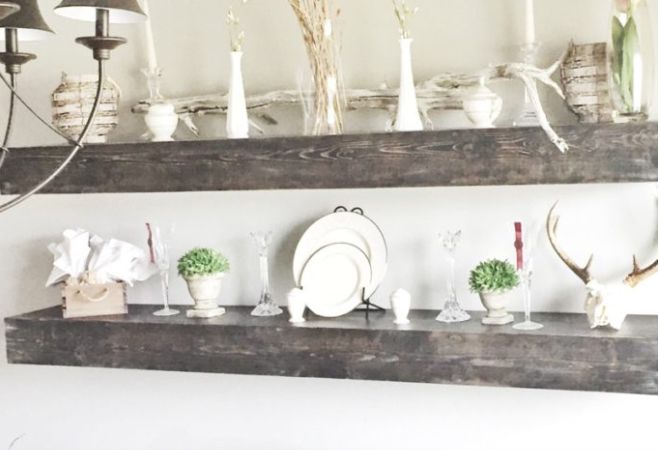
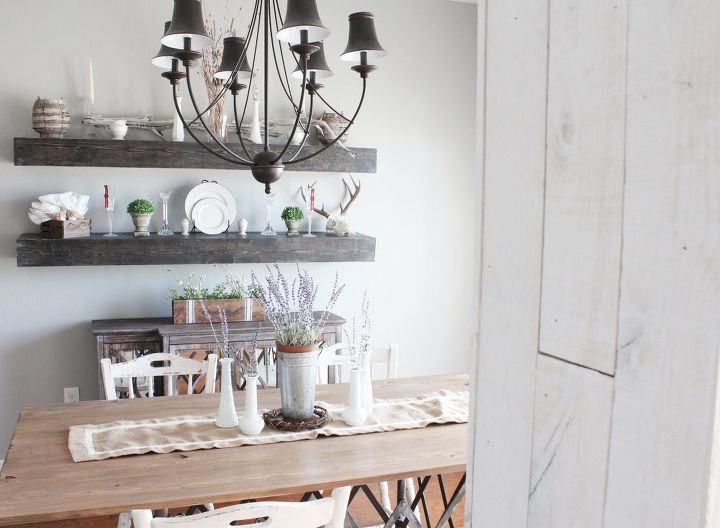
Here are my DIY dining room shelves mounted on the wall.
Speaking of Industrial Open Shelves, you can see a quick tutorial I created for another set of open shelves HERE.
Want more details about this and other DIY projects? Check out my blog post!
Comments
Join the conversation
1 comment
-
Awesome. Looks great and a great tutorial as well. Thank you for sharing.


Frequently asked questions
Have a question about this project?