


How to Build a Portable Free Standing Decorative Faux Fireplace
So excited to share my favorite project of all time: a DIY faux fireplace! I've always dreamed of having a fireplace but my rental apartment doesn't have one. I was determined to change that and I finally did it ! I'm absolutely in love with it and It's amazing how it completely transformed my living room - it's like I moved to a new apartment!
***Do keep in mind that this project is for decorative purposes only and is not to be used as a heater***
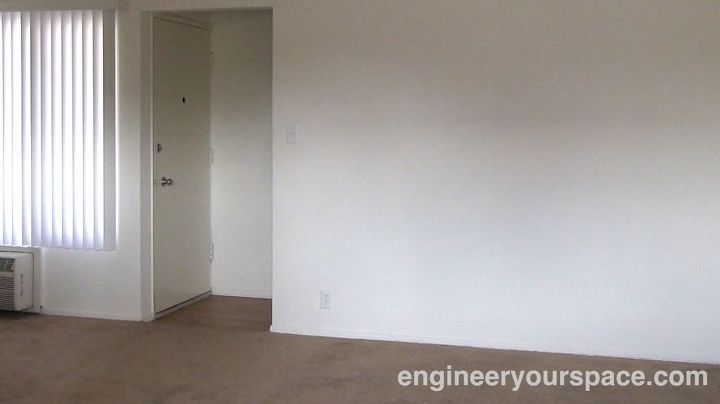
This is what my apartment looked like when I moved in - very boring and zero character.
I used 2"x3" (but you could also use 2"x4") , 1"x12" pine boards (but you could also use plywood) and 1/4" thick plywood.
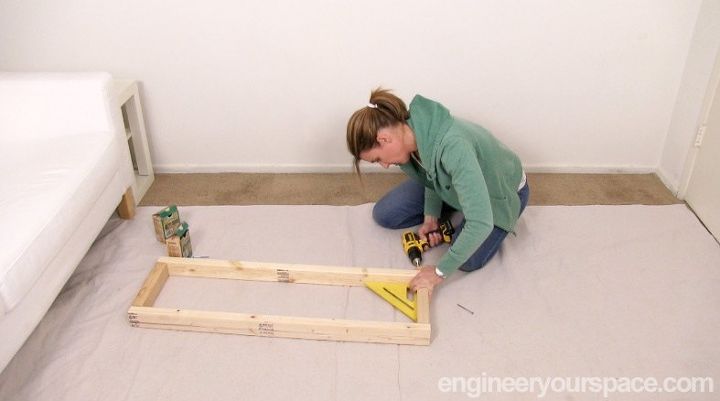
I started by building 4 supports using the 2"x3", using a speed square to make sure that every corner is at 90 degrees.
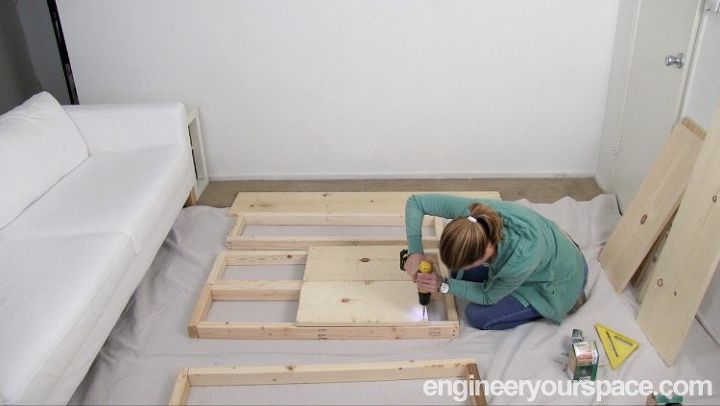
Then I made the firebox by attaching the 1"x12" pieces that make the sides of the firebox to 2 of the supports and then attaching the top and bottom. Then I attached the 1"x12" piece that make the base, attached the remaining 2 supports at each end and then I attached the 1"x12" to the top of the supports.
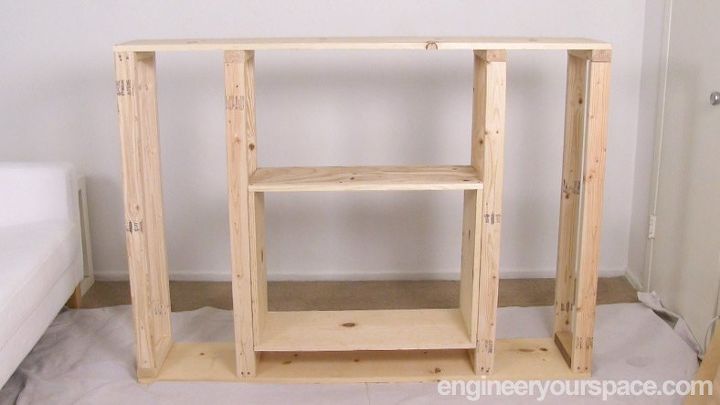
This is the structure of the fireplace surround before I attached plywood to it. You can easily customize the dimensions to suite your space.
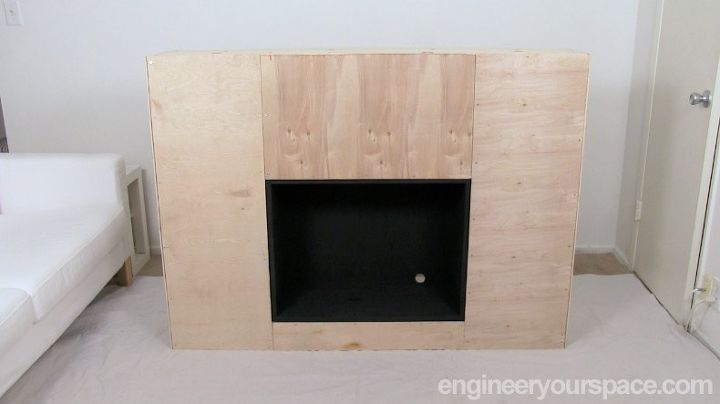
I covered the structure with 1/4" thick plywood and painted the firebox with black chalk paint. This entire structure only cost $65 to build and then can be customized with any mantel, finish and fake fire log insert.
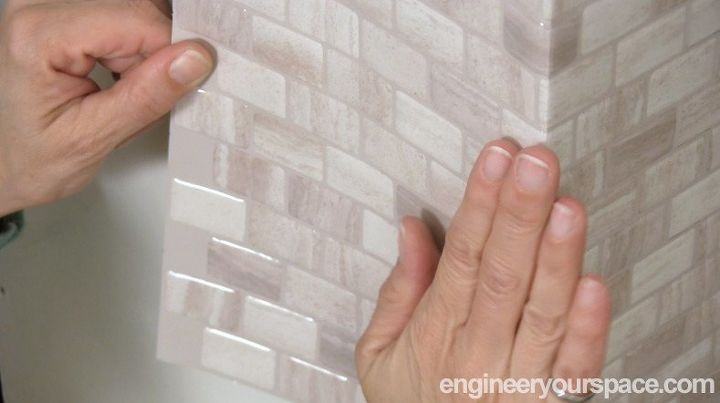
I wanted my fireplace to have a modern yet soft beachy look so I decided to cover the surround with easy to install peel and stick Smart Tiles that have a beautiful stone finish. They are easy to cut with a utility knife and ruler and there's no grouting so there's no mess! And it also made tiling around the corners much easier than having to cut real tile.
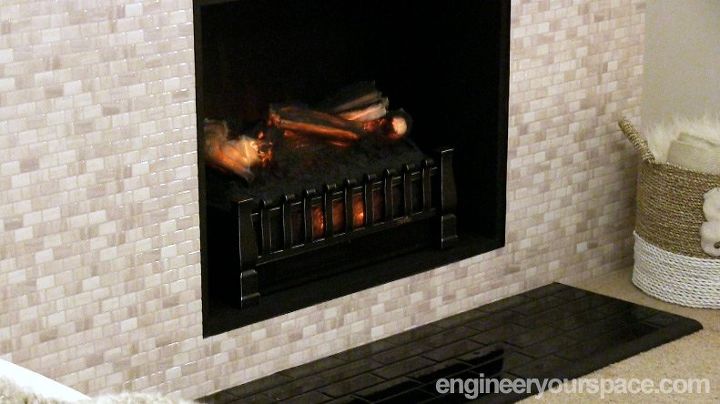
After tiling, I installed a mantel that I made with 1"x2"s, 1x"4"s and plywood that I had on hand. It was a bit of a frankenstein but once I installed it and painted it, it gave the desired effect of having a nice thick mantel. I added a mantle. Then the final piece of the puzzle to make this look like a fireplace is an electrical log insert that has surprisingly real looking flame!
*** I only use it as a decor item and NEVER use the heater function as it is not recommended in this type of application ***
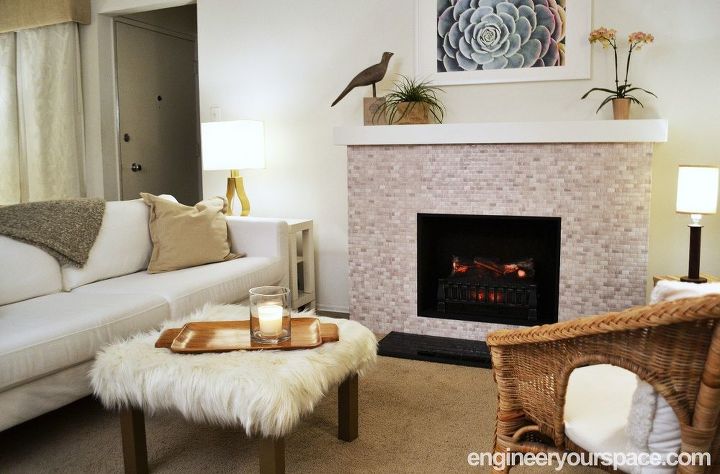
And voila! My dream of having a fireplace has come true! It has truly changed the entire look of my living room and apartment and since this is essentially like a piece of furniture, I'll be able to take it with me when I move out!
This was a really fun project to build and I made this video of the building process showing all the steps in more detail. Hope you enjoyed this project as much as I did!
Resources for this project:
See all materials


Comments
Join the conversation
-
Very nice!
-
Glad you posted that only for decorative use not space heater of any type. Open invitation for fire. As is very warm and welcoming look. And your Choices look very realistic, you can almost smell the wood burning


Frequently asked questions
Have a question about this project?
Did this have to be attached to the wall? I'd love to do this in my apartment, but we can't attach structures like this to our walls. It looks amazing! I really love the pearly tile look. I get so inspired by all of these beautiful DIY projects! Thank you for sharing this!😁😁😁
It looks really nice. But does the peel and stick really stay around the corners? I didn't think the adhesive would be that strong to bend around corners? Thank you.
I have one question what could I change so I could use the heat part? I see a ton of people making built in fireplace and they use the heater part.
this absolutely amazing. I’m going to watch the YouTube video, and hopefully I can have my wood pre-measured, and fallow along with you.
Thank you for posting.