


How to Build a Large Built-in Desk for Under $75

by
Jenni Ingram
6 Materials
$75
4 Hours
Easy
The basement in our new house is half finished space, half storage - which means the kids have claimed this as their official playroom ... and then requested a big desk: one for play-dough and crafts now, and a homework station as they get older.
The only problem with a big desk along a 14' wall is that supplies for a desk this large are EXPENSIVE!!
Then I had an idea for a built-in desk from repurposed hollow doors and filing cabinets from my local recycle/home supply store!!!
Read on to see what I created....
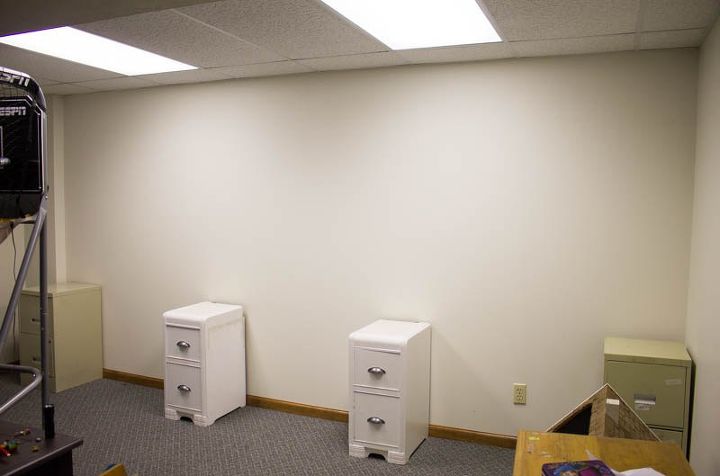
I found some file cabinets and hollow core doors for next to nothing. You can also check yard sales and thrift stores, especially for the filing cabinets. We are going to paint them so who cares if they don't match in color and style ... and if they aren't all the same exact height, I've got a solution for that too!
My first step was to space out my cabinets evenly along the wall.
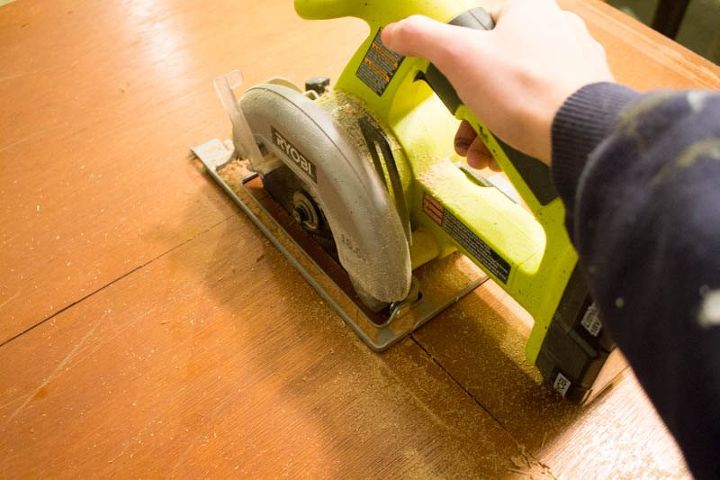
I measured the space between the cabinets and cut the doors. I made these the depth of the filing cabinets.
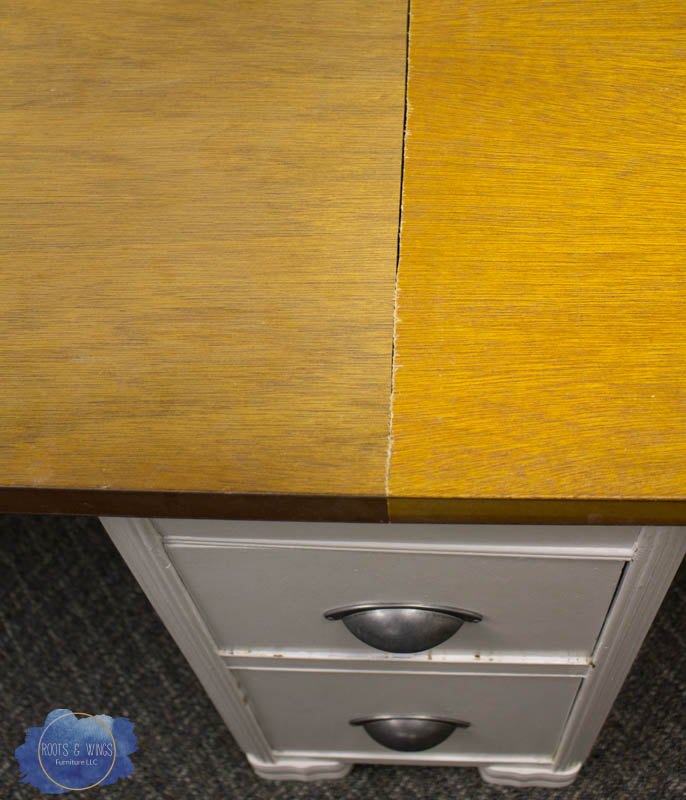
I wanted the seams of the doors to be resting on top of the cabinets so it would have proper support. I didn't feel the need to screw the top down to the bases, but you certainly could at this point if necessary. Here the seam is very visible, however once everything is stained, I didn't notice the seams at all. You could also place a small piece of wood trim here as a desk divider.
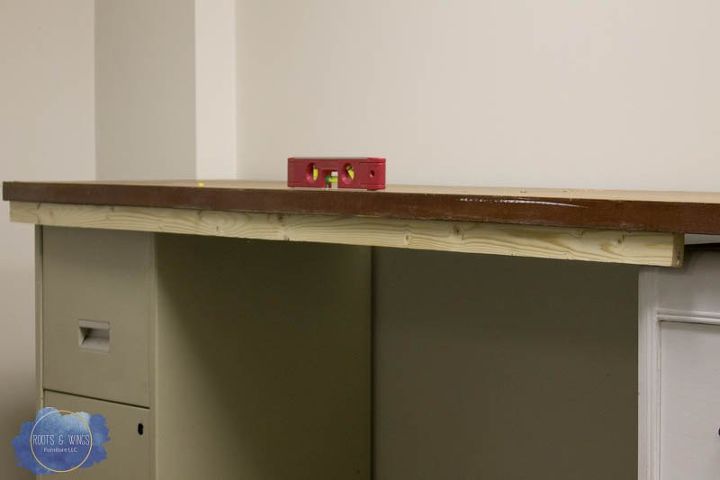
If your file cabinets are different heights like mine were, my blog has a workaround to keep the desk level. I then used a bead of wood glue and screws, attach a 1x3 to the underside of the desk top - this made a trim piece and hid the shims (which made the cabinets equal heights.)
It also gave it a nice finished look.
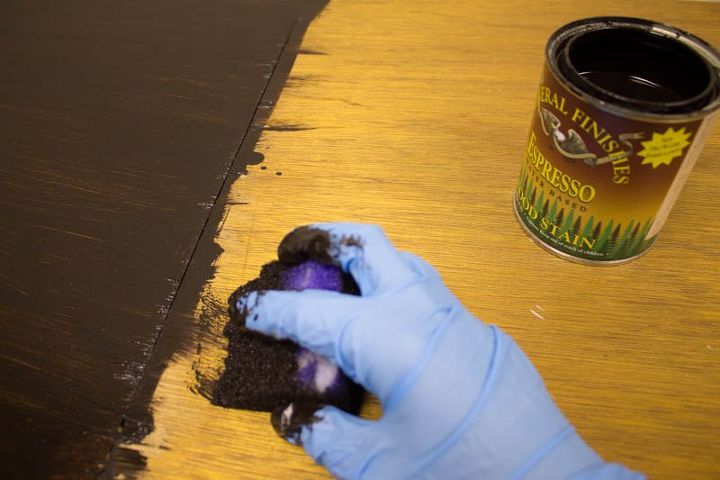
Once the desk is all built, it was time to make it pretty!! I chose to use a dark wood stain - I love the dark wood top, and this dark stain makes everything look fancier than it actually is! I applied it with a sponge. I also painted the bases black. My blog post has links to these paint & stain products.
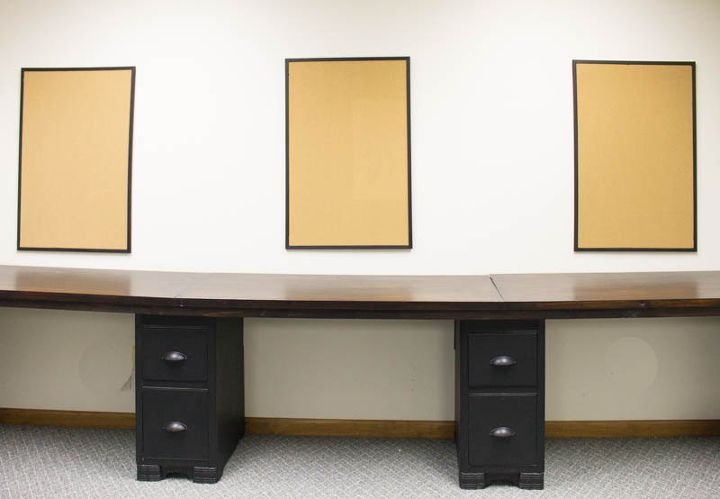
Now each kid gets their own cork board to decorate/hang art as they please. I still need to find 3 matching chairs, but for now they use chairs we already had. They love the space!! And let me tell you, it will never be this clean again.
I love to build projects and share my plans. Please sign up for my blog directly to get my latest projects in your inbox .
You can also find me on Facebook @rootsandwingsfurniture -- sharing painting tips and DIY inspiration and doing Facebook lives of my project!s!!!
Of course, can also click on the blog link below to see more photos and a few extra tips for this project....
Thanks for stopping by!
Resources for this project:
See all materials


Any price and availability information displayed on [relevant Amazon Site(s), as applicable] at the time of purchase will apply to the purchase of this product.
Hometalk may collect a small share of sales from the links on this page.More info
Want more details about this and other DIY projects? Check out my blog post!
Comments
Join the conversation
2 of 12 comments
-
This is a great idea for anyone needing more work room. It looks so modern!
-
This turned out great!!


Frequently asked questions
Have a question about this project?