


Painting Our Laundry Room Cabinets

by
DeeDee
8 Materials
$45
4 Hours
Medium
We built these cabinets ourselves and it was our VERY first time ever to try this type of project! For someone who's never even attempted building cabinets before, I think my honey did an awesome job assembling these cabinets!
I noticed recently that I never got around to making a post on how I painted almost every cabinet in our home. The following post will now get me back into good standing with all who've ever asked me how I painted our cabinets and of course I told them that the post was coming soon, but it never did, eeeek! Sorry guys, here it is now!
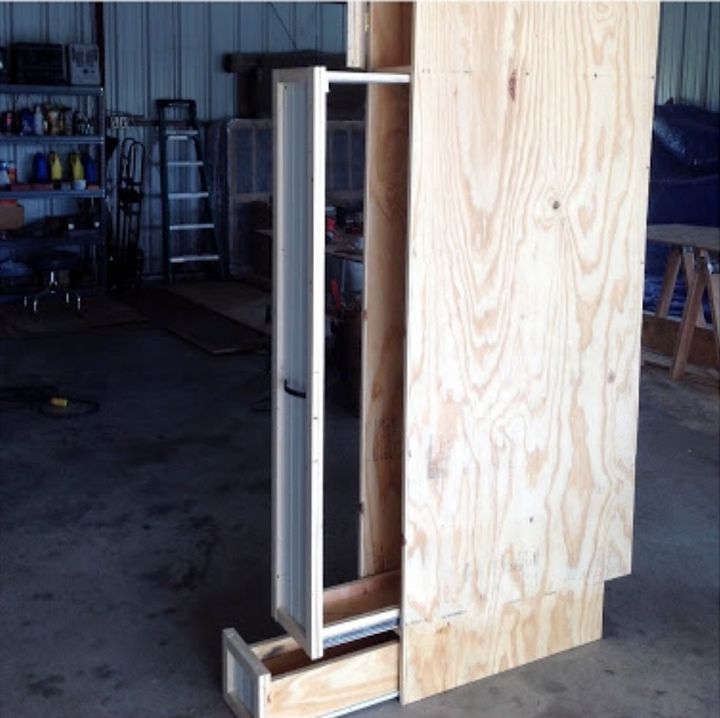
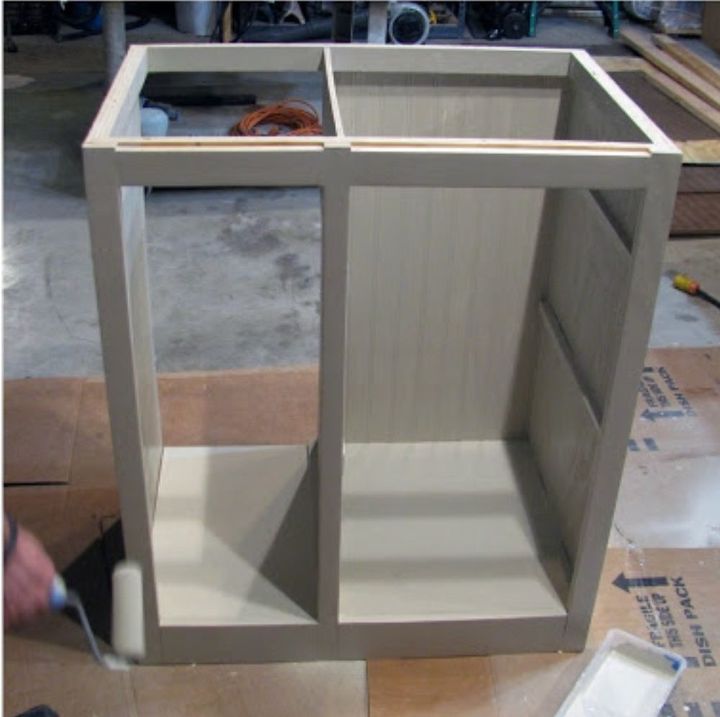
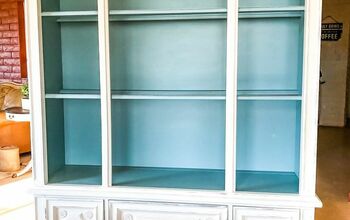
For the tall cabinet, we started by building the structure. Then he added the drawers and the doors. This unit which houses my broom, mops and electric sweeper (all in a handy slide out compartment) measures 10" wide x 34" deep x 84-1/2" tall. The top cabinet is 25" tall, the broom storage section is 60" tall and the bottom drawer is 5" deep.
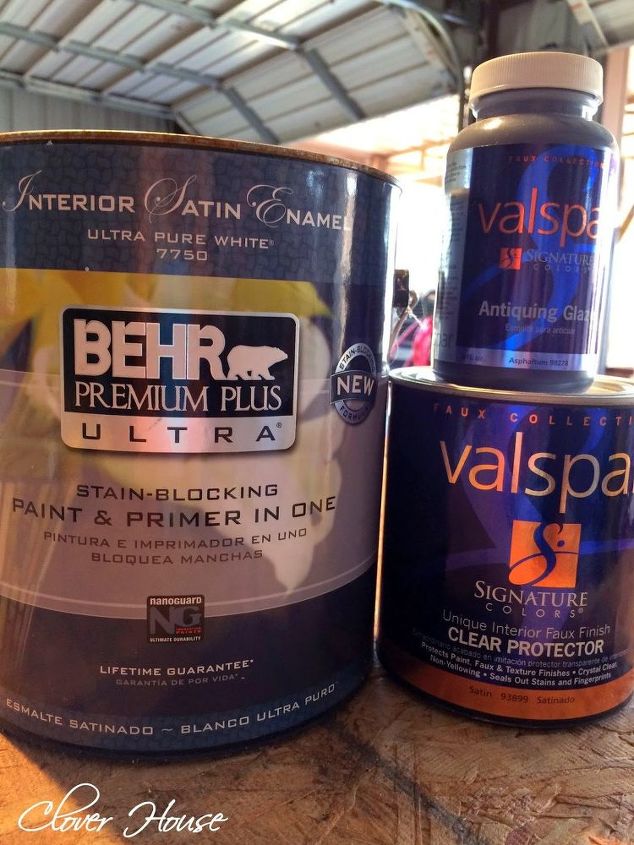
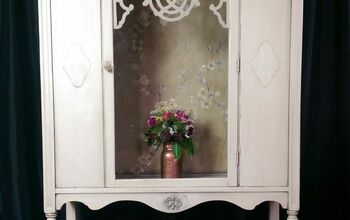
For the rest of the cabinets in our home, these are the base paint, glaze and sealer we used. The base paint is Behr Premium Plus Ultra in Creamy Mushroom from Home Depot. The glaze is called Asphaltium 98278 by Valspar from Lowes. I sealed everything with the Valspar Clear Protector also found at Lowes.
With that being said, on these particular laundry room cabinets, I decide to use stain to get the antiqued look I was going for this time. I'll tell you about it down below.
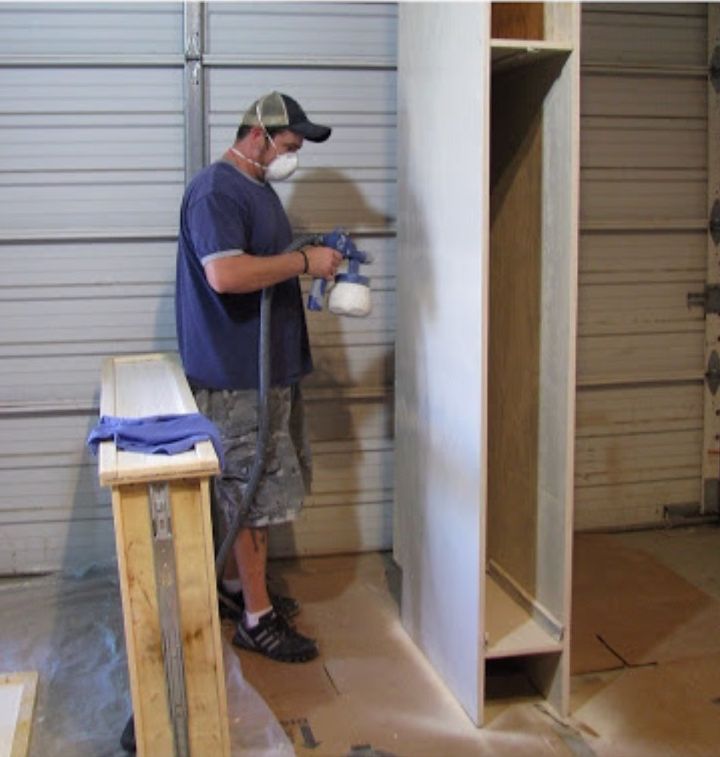
After assembling the cabinets together, he used the mushroom colored base paint and our hand held paint sprayer to give the whole base unit a good coat of paint.
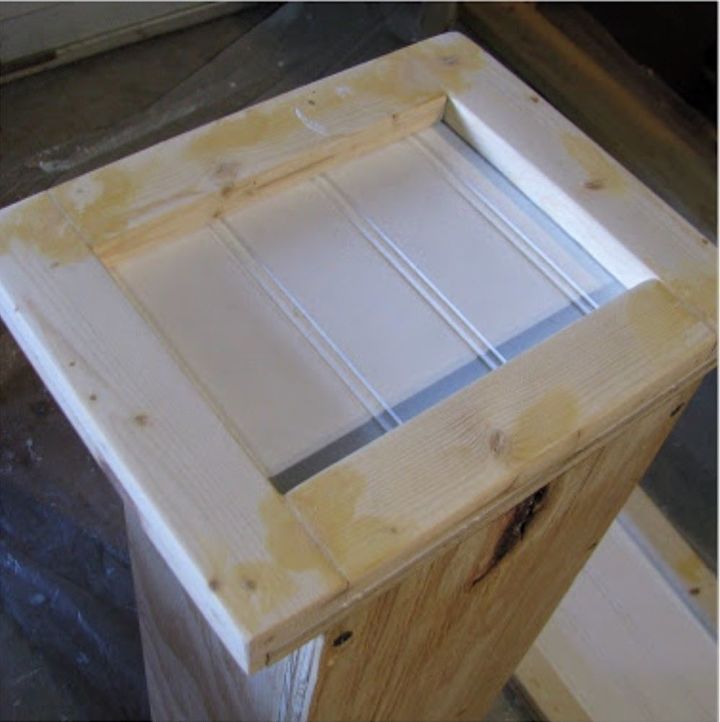
Wood filler is your friend! Next I filled all the holes and extra spaces with Elmer's wood filler. I found that to get a good smooth look, you just keep pushing the filler into the hole until it doesn't accept anymore. Let it dry and then sand smooth with low grit sand paper. I like to use Elmer's Wood Filler.
NOTE: Always remember to use spackling or wood filler before you paint to get a nice smooth finish. Next up I painted and stained the whole unit to give it that vintage look we both love.
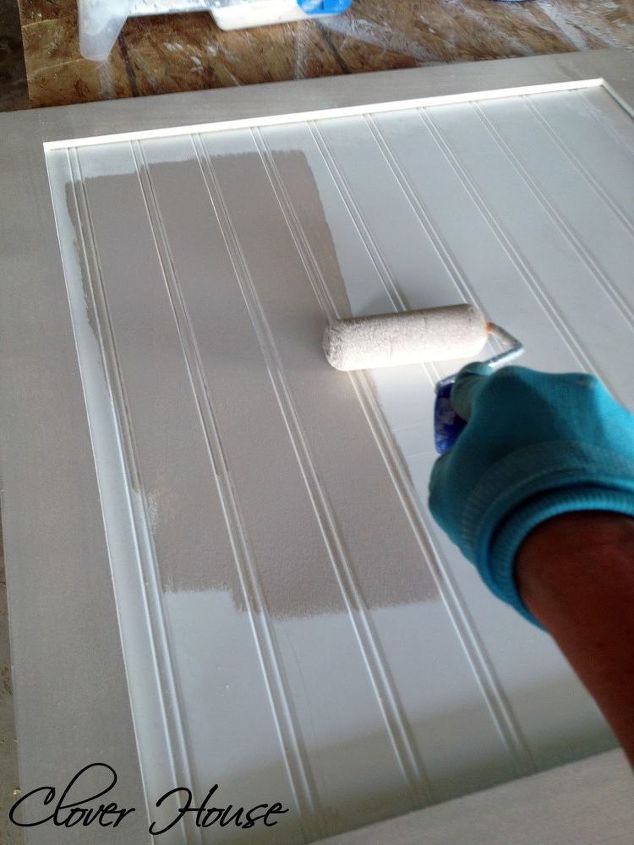
I like to use a foam roller and spread thin even coats of my base paint making sure that each coat is good and dry before I add the next. I recommend using an all in one paint and primer so that way you only really need two good coats.
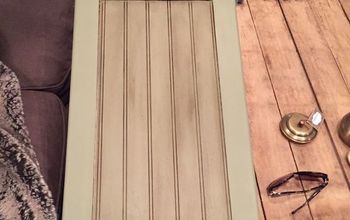
NOTE: You caught me, this door is too big for these cabinets! That's because its another larger door from the kitchen. I forgot to snap a picture of me painting the laundry room cabinet, but the method is all the same throughout. *wink*
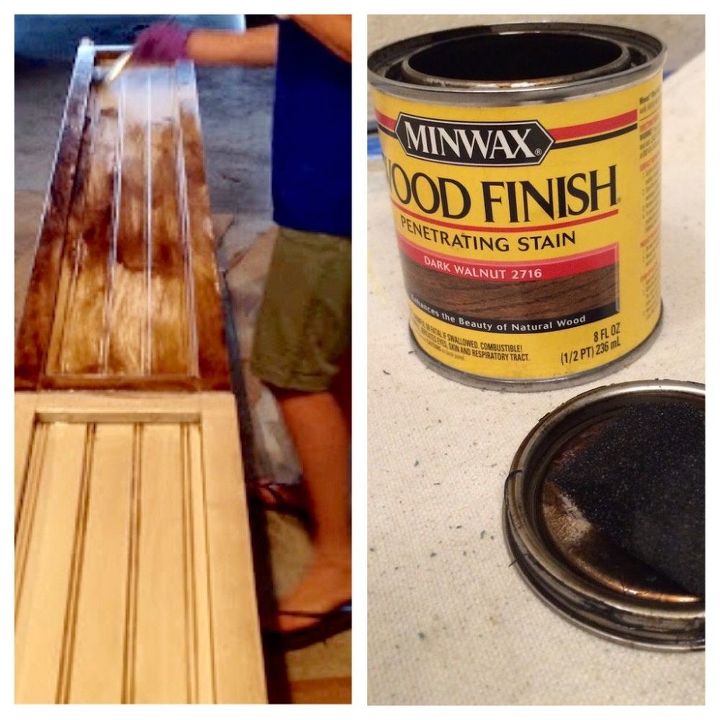
Next is the antiquing. My favorite part!
Make sure your wear rubber gloves! I grabbed my Minwax Stain in Dark Walnut 2716 and a foam brush.
1. Generously apply the stain to the base coat. Do not let the stain dry!
2. Using a clean terry cloth towel, wipe off the excess. The stain will settle into every crack and crevice it can find. Keep wiping until you get the look you want.
3. Work in small sections so you don't get too far ahead of yourself. If you happen to let the stain dry too much in one spot, use a damp terry cloth to try and remove it.
4. After you've wiped off all the stain you want removed and you like how it looks, let it dry completely before using the Valspar Clear Protector to seal it all. Follow directions on the can.
Next is the folding station. This unit measures 32" wide x 33" tall x 21-1/2" deep. Shelves on the right are top to bottom, 5" tall, 12" tall and 12" tall. These will house two wicker baskets. The Cabinet on the right side is 13" wide. It houses my homemade laundry soap and homemade softener and lots of other goodies I use in the laundry room.
I used the same techniques as above to paint this unit too.
Here they are installed in the laundry room.
Here they are all dolled up with decorations. Touches of red throughout, my favorite color!
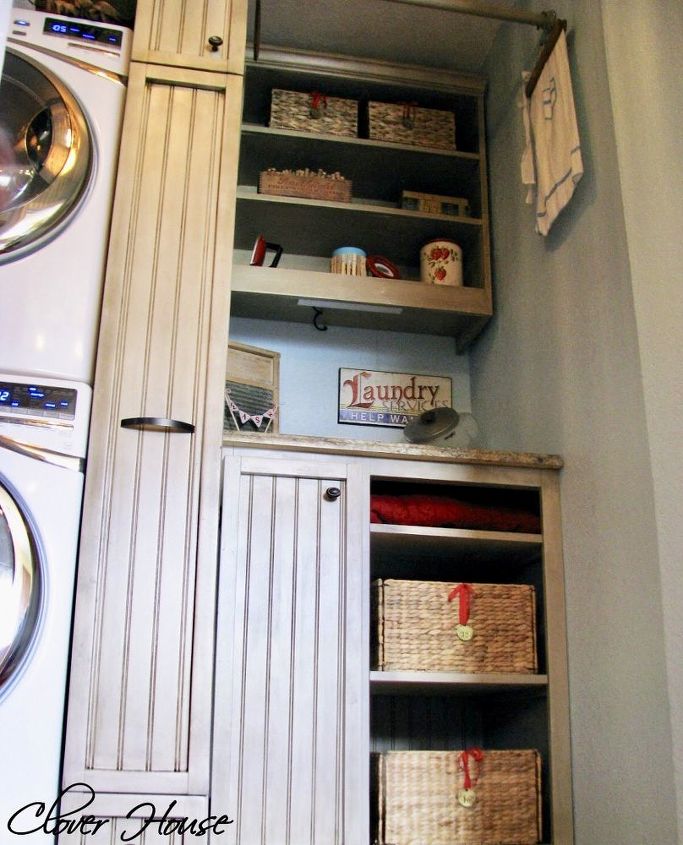
Here they are installed in the laundry room.
My honey added a much needed light under the shelves for my clothes folding pleasure. Ha! Speaking of the shelf, it was one of the original cabinets that we cut down and added a crown trim to the top of and then reinstalled so I would have a place to display all my little vintage goodies as well as storage of the normal laundry room items. He also added a new outlet above the counter top in case I need to oh you know plug up the iron and iron something. 
If you want to see what else we've done in our laundry room, please visit our blog at the link below where I will have each project linked for you.
Thanks for looking! 
Want more details about this and other DIY projects? Check out my blog post!
Comments
Join the conversation
4 of 24 comments
-
Very nice looking cupboards!! Your Husband did a great job and like your decor placed in it. Love it!!
-
It looks great!! You both did an awesome job!


Frequently asked questions
Have a question about this project?
Do you have directions on how the cabinets were built?