


Brown Paper Floor Covering- Frugal and Fun

When we built my craft room in our basement I had a lot of unique ideas I wanted to incorporate into the project. One of those things was to try this technique of using brown paper to create a faux finish for my floor. Shown below are the items you'll need for the first portion of the project.
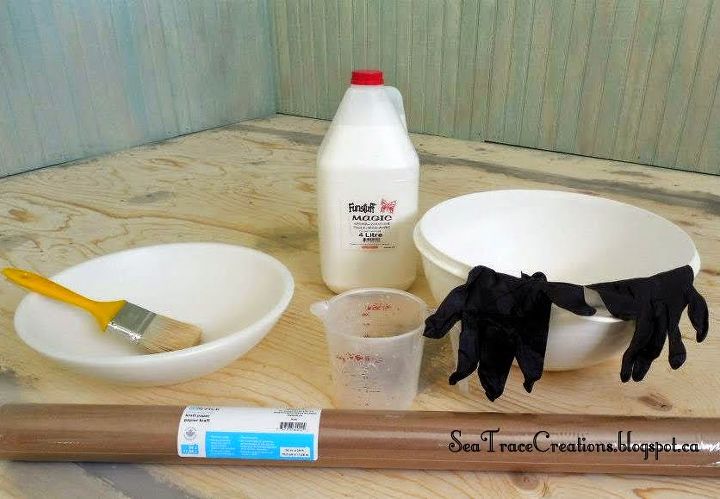
A bowl for the glue and water mixture, a bowl to drain and hold the paper that has been soaked, a brush to apply the glue mixture to missed areas. You'll need several rolls of brown paper, latex gloves, white school glue, water and a measuring cup.
* Note that floors were prepped beforehand with wood filler in the areas where the screw heads made indentations. Complete sanding is necessary, for any raised edges making sure to vacuum the floor afterwards.
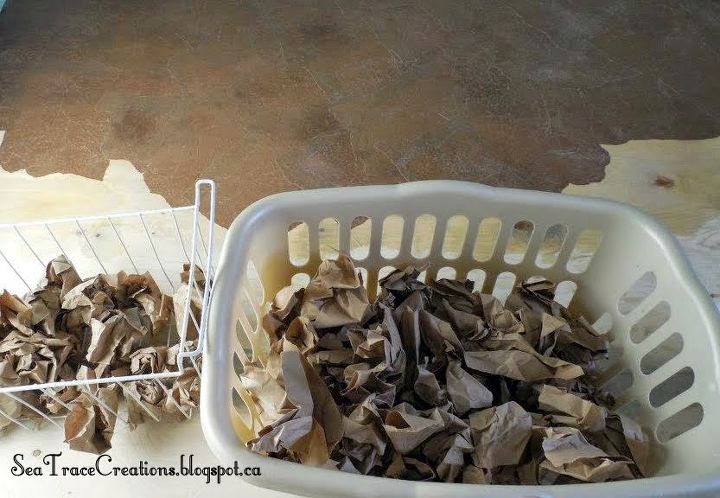
*Also the brown paper can be prepped ahead of time by tearing the rolls into 8- 12" size pieces and crumpled into balls and set aside for later.
Mix together your solution in the larger of the two bowls, your mixture ratio will be 3 parts water: 1 part glue
Seen below here are the prepared paper pieces, torn and crumpled and placed into my laundry basket for easy maneuvering.
I found it best to just wet about 6 pieces in the glue solution at a time and once wet I'd let them rest in the shallow bowl seen above until I was ready to piece them in. I found it was a little like puzzle piecing and I would overlap about an inch over the previously laid pieces. Continue working in this way, use the paint brush to add glue mixture to any areas of paper that were missed. I used my gloved hands to spread the pieces completely flat to the floor sub-floor.
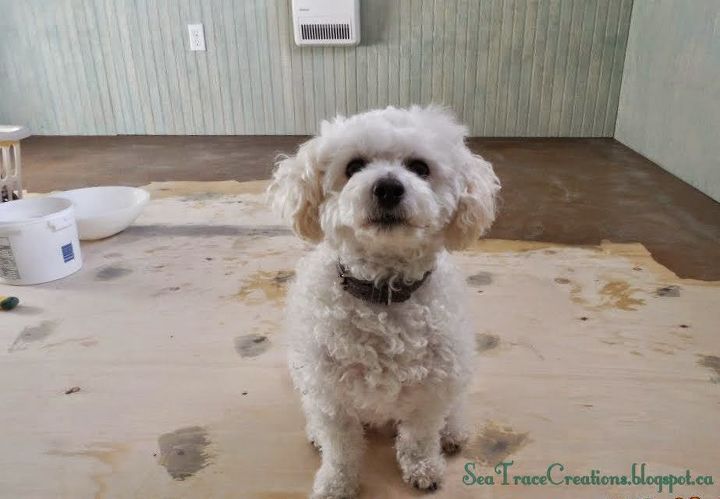
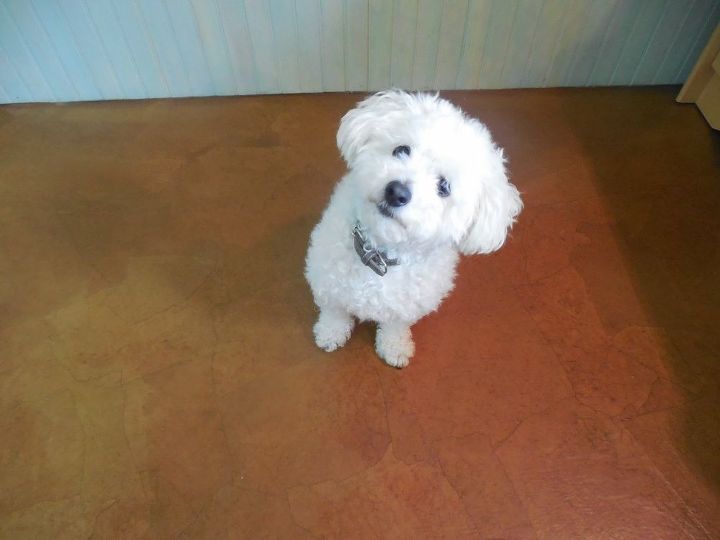
I did have an inspector for quality control...my shadow of course!
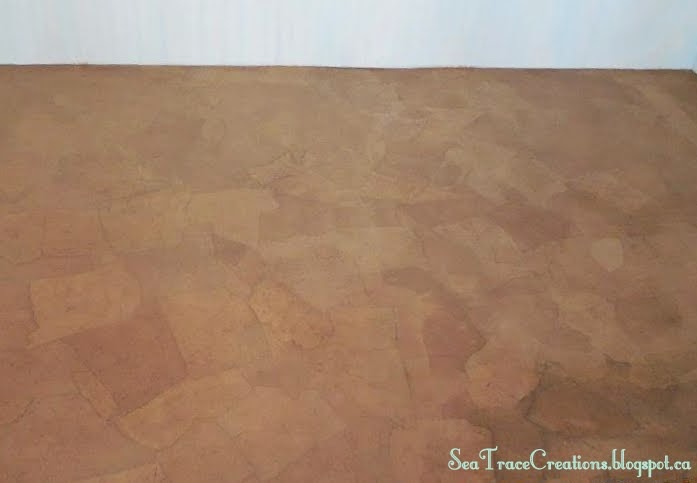
Once the floor was completely covered with paper I allowed for a drying time of 12 hours at least before moving to the next step. Here's how it looked all wet, not impressed yet? Just wait a minute and you will be, well I was anyhow.
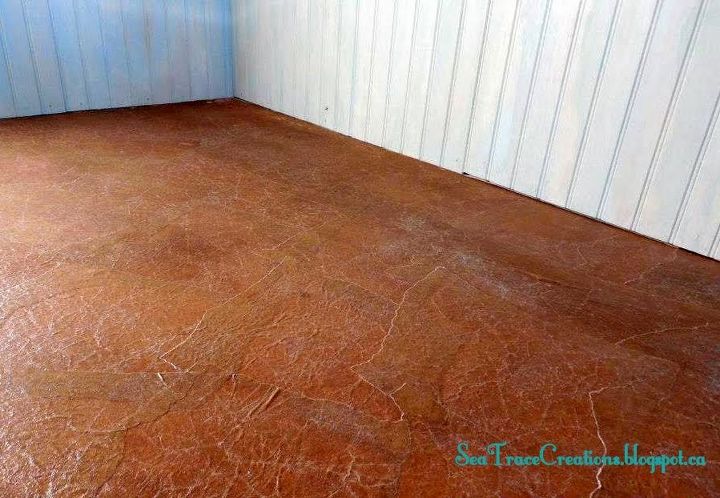
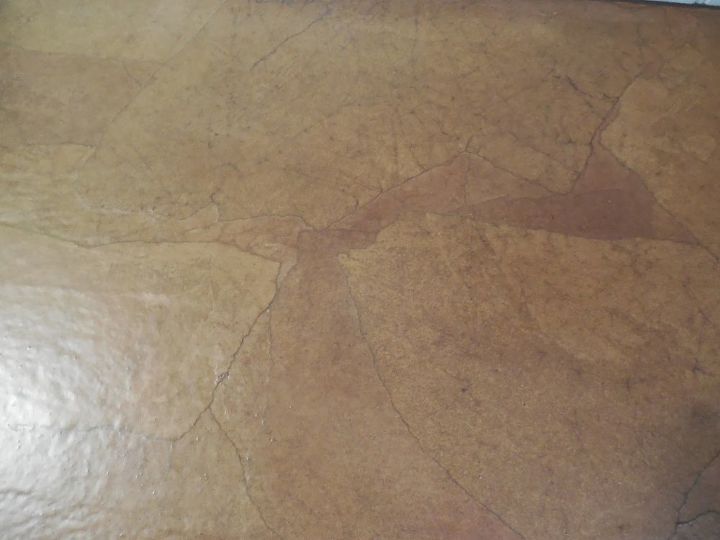
The next step at your own choice of course is to choose a preferable stain color for your floor. I chose an oil based Miniwax stain in the color of Fruitwood and applied it lightly with t-shirt rags (lint-free). DO NOT overlap staining, blend lightly as you work to cover the entire area. It absorbed very well into the paper treatment and concealed small imperfections. In fact the ragged paper edges now began to look like torn leather patches.
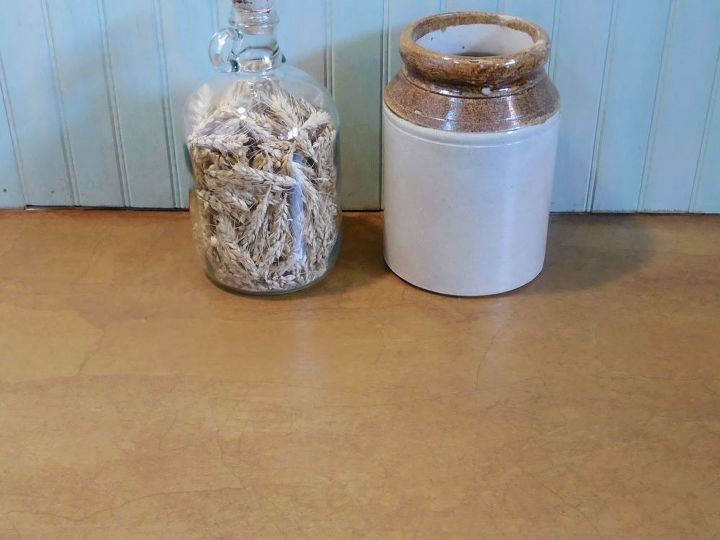
The last step I started 24 hours after the stain was applied, this step was to apply a protective top coat of polyurethane. I applied an oil modified floor grade polyurethane with a roller brush and tray, in total I applied 6 coats with a dry time of 2 to 3 hours between each one. Here's the closeup look of the finished look.
Once this was completed I let the floor rest another 24 hours before moving furniture into the room. I was super impressed with the final results, I read that it is durable but I added a rug to protect it from the wheels of my office chair
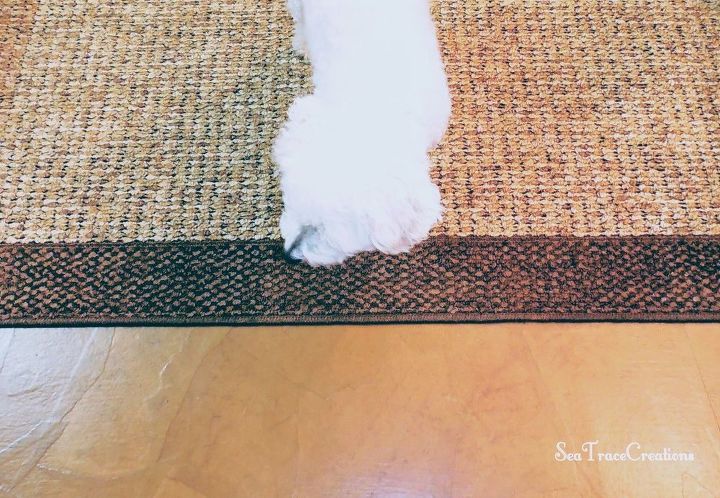
Best of all the inspector approved, the finish has been able to withstand his playing and running around on easily enough. It was economical to install, it's tough and durable, easy to repair if necessary and easy to clean up with a little soapy water.
So all that's left to ask is, "Are you going to try it?"
Be sure to check out other custom ideas we created in my craft room, see link below for a great idea to make a small window look large!
Resources for this project:
See all materials


Comments
Join the conversation
-
I wonder if you could use paper wallpaper from a thrift store to do this for a different look. Hmmm...
-
Wonderful! I did this on a wall in a bathroom. Bath had shower & hot water heater in it...After 10 years it was still perfect. Going to pull up the stained carpet at my front door and do this to the plywood floor.


Frequently asked questions
Have a question about this project?
Would this work to seal concrete?
This is awesome!
Can this be done over floor tile?
Can tji9 be done on wood floors?