


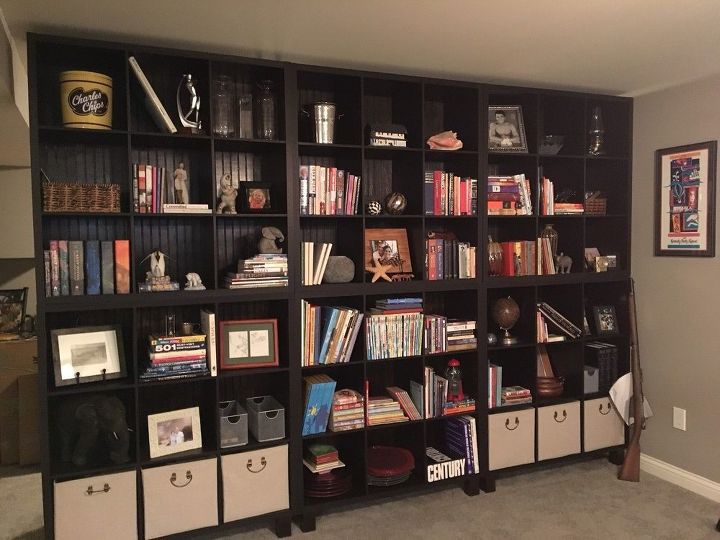
A Wall of Shelves Using Store-bought Shelf Organizers

2 Materials
$400
3 Days
Medium
The builder who built my house finished the entire basement. While it's nice and one huge room, it left no storage. I needed storage. I also love bookshelves and always dreamed of having a wall of shelves. They are very expensive to have custom built. So I figured out a work-around.
The beauty of this wall is that the next owners can just take it down if they don't like it. But, for me, I love it!
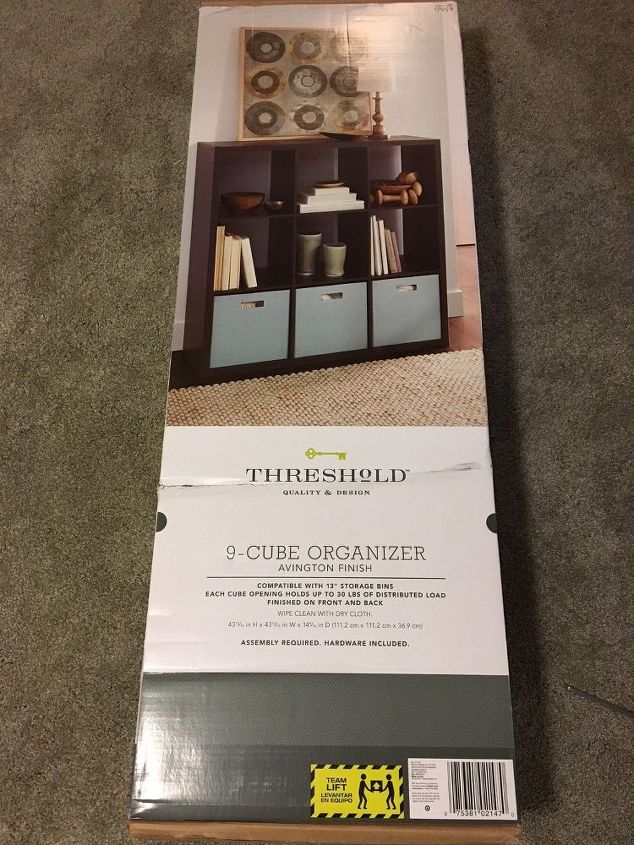
Step 1: I measured my space then spent hours on the computer trying to find "store bought" book shelves that I could configure to fit into the space. I ended up finding exactly what I wanted at Target.com. I figured that 6 shelf units would fit almost perfect. I ended up with 6 of the 9-Cube organizers. My plan was to arrange them 3 across and 3 on top of that.
Step 2: Assemble all of the organizer units exactly as they describe in the instructions
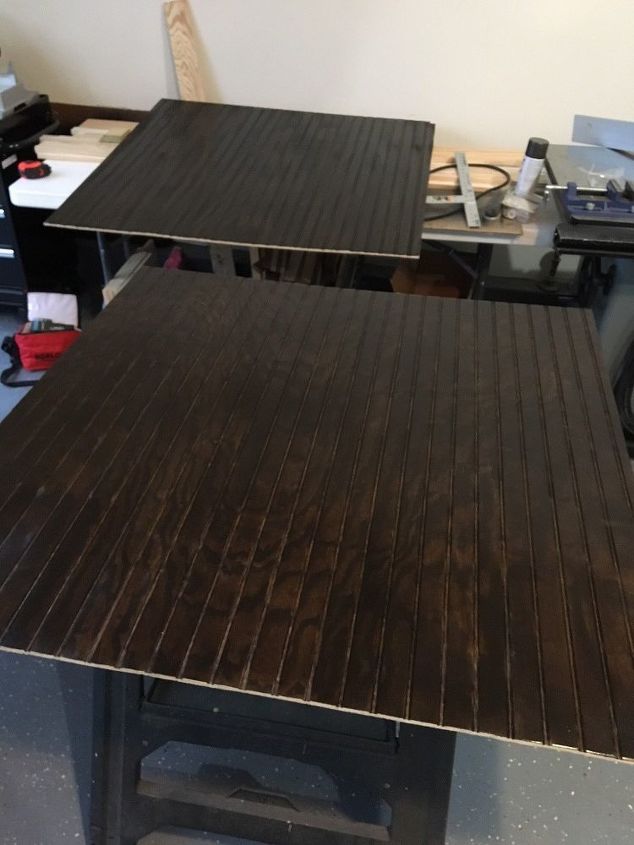
Step 3: I purchased 6 sheets of standard 4' x 4' bead board from my local home store. I had to cut it down to fit the back of each unit. I actually cut it just a tad smaller so they wouldn't overlap since the units would be screwed together.
Step 4: I sanded and stained one side of the bead board
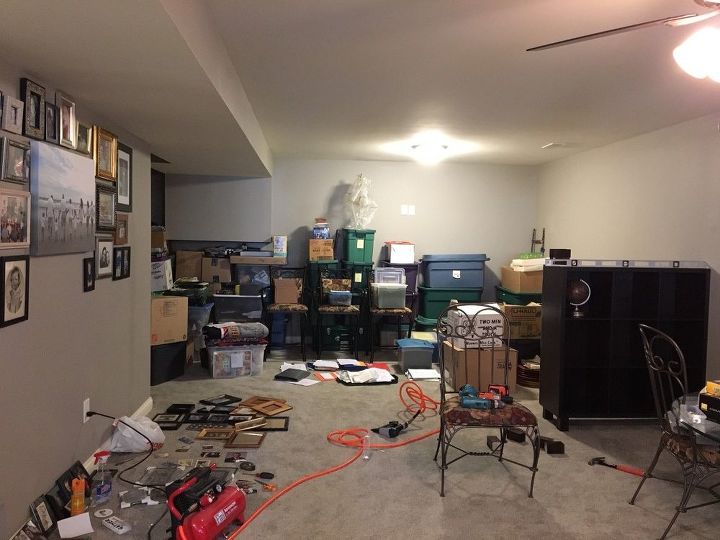
You can see my messy storage area here!
Step 5: I installed the bead board on each unit using a finish nailer. This made the units very strong and stable and easier to move around without being wobbly.
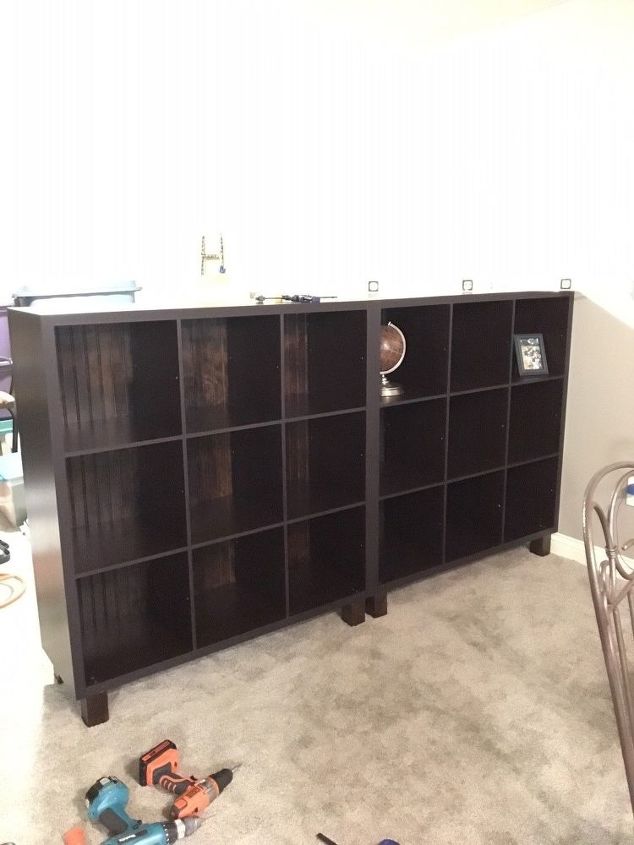
Step 6: The bookcases were not quite the right size to fill the height space. So I made 4 little feet for the bottom of each unit that sits on the floor and stained them the same color as the shelving unit. You could even go to your big box home store and buy some fancy furniture feet, but I decided just to make simple ones. The book shelf material is not solid wood, so I attached the feet using 2 L-Brackets and small wood screws.
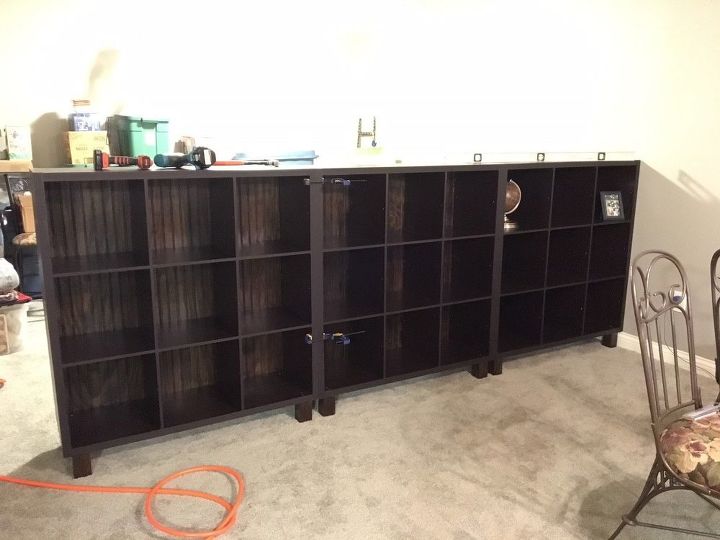
Step 7: I started with the 3 across the bottom. In order to make them stable, I used long wood screws to connect the units together, then I took another L-Bracket and screwed the one unit that is against the wall into a stud. Oh - that's a good point I missed. When I was deciding on where to put the wall, I made sure that the back of the unit against the wall was very close to a stud.
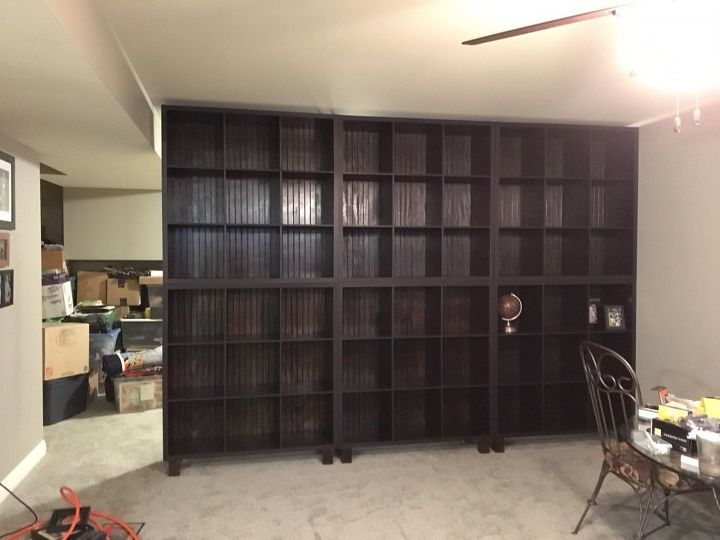
Step 8: This part was tricky! I had to lift the next 3 units (one at a time) on top of the first 3 without hitting the wall or the ceiling. I would suggest getting help with this part. Then I screwed the other units to each other using long wood screws - Voila! Now I had a wall of shelves!
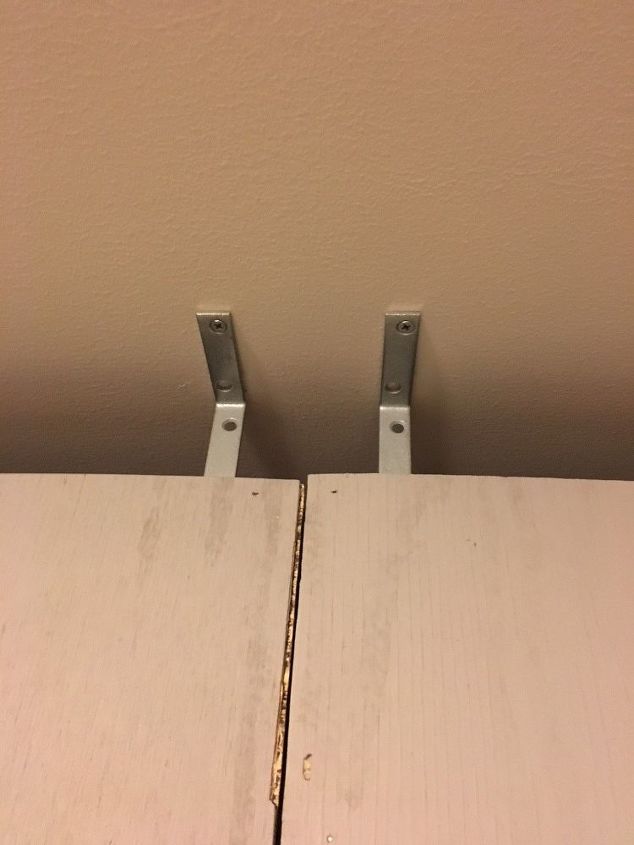
Step 9: I screwed the top right unit against the wall into a stud using an L-Bracket on the back side and using L-Brackets screwed each top unit to a stud in the ceiling. .
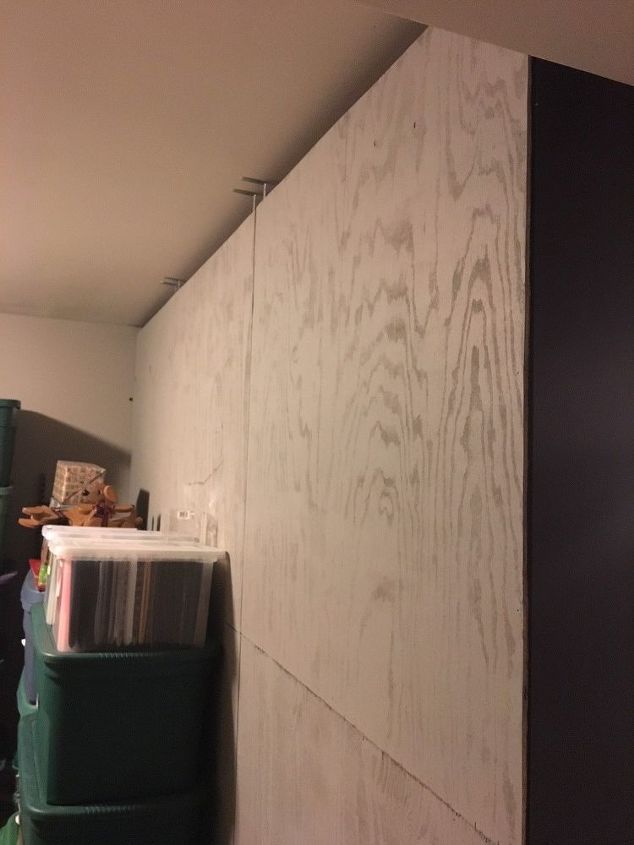
Step 10: Since the back of my shelf wall is exposed in the storage area, I decided to paint the back of the bead board the same wall color.
DONE and BEAUTIFUL!
I still have a small space at the top of the wall up next to the ceiling. I will probably add some crown molding there someday. But, I think it turned out pretty great.
Comments
Join the conversation
2 of 50 comments
-
Great idea! I love the storage feature of this project!
-
Thank you !


Frequently asked questions
Have a question about this project?
Total cost?