


Give an Old Table Another 20 Years....

by
Lisa L Hall
12 Materials
$70
4 Days
Medium
For any of us old enough to remember buying furniture that was made from solid wood, you know how rare that is. You don't want to just give it away or sell it for $10 at a garage sale due to something getting old.
I've had this coffee table for 20 years...yes I got it as a baby gift. Ha Ha.
It's solid wood and I couldn't part with it....but I just couldn't stand having to tighten striped bolts and nuts every other week any longer. It's in our game room so I was racking my brain how to make this a game room table. One day it hit me...It needs storage added to it...why can't I make storage areas the new legs?
Well I can. So now the labor of love....and necessity...begins. It did take me a while to find the parts that I wanted. I could have settled for the parts that were at the store when I went but that was not the look or durability that I wanted. This room houses up to 15 boys (not all mine) on a weekend, so I needed something that will withstand that type of use.
I already made a TV stand out of wooden crates so I wanted to keep with that them...country industrial is what I call it. Hopefully no one else has called it that and trademarked it...
So this is a weekend project for sure as there is a lot of staining and drying time involved. The best part is since I'm not going to be using the old legs for the new table....oh yeah... 4 more items to repurpose into something new.
My total cost for this is just under $70. Find me a solid wood table with large storage for $70....
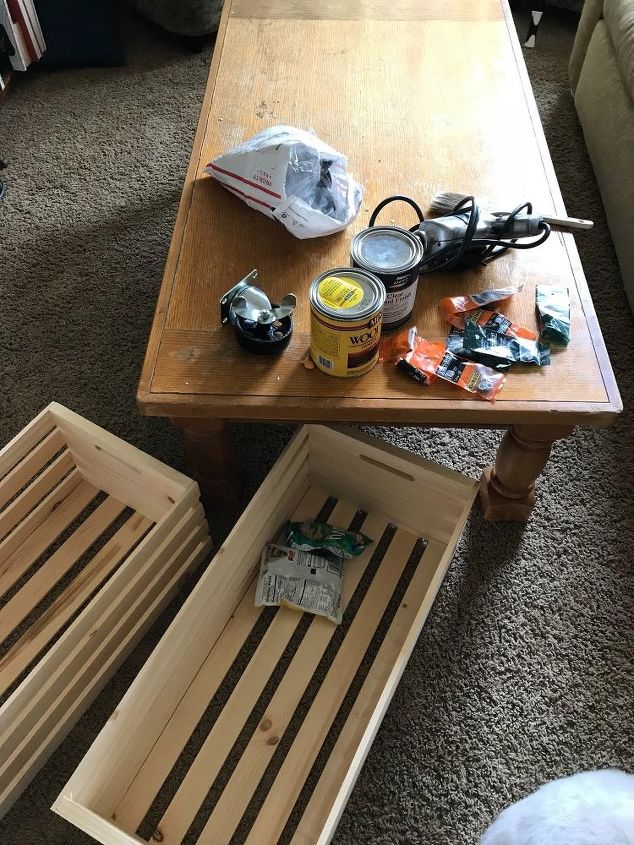
Here is my starting point. You can see I have heavy duty casters, that was my most expensive part ($40 for 4). If you don't need that heavy of a caster, I'm sure your cost will go down. The large crates are hard to find but easy to order. Walmart had the best price on those ($18 each). to round off my purchases Home Depot had everything else; stain, bolts and clocking nuts. I highly suggest getting the locking nuts. You won't have the issues of things loosening up over time that you do with a regular nut.
the bags of chips were my treat to keep me going for an hour. Ha Ha.
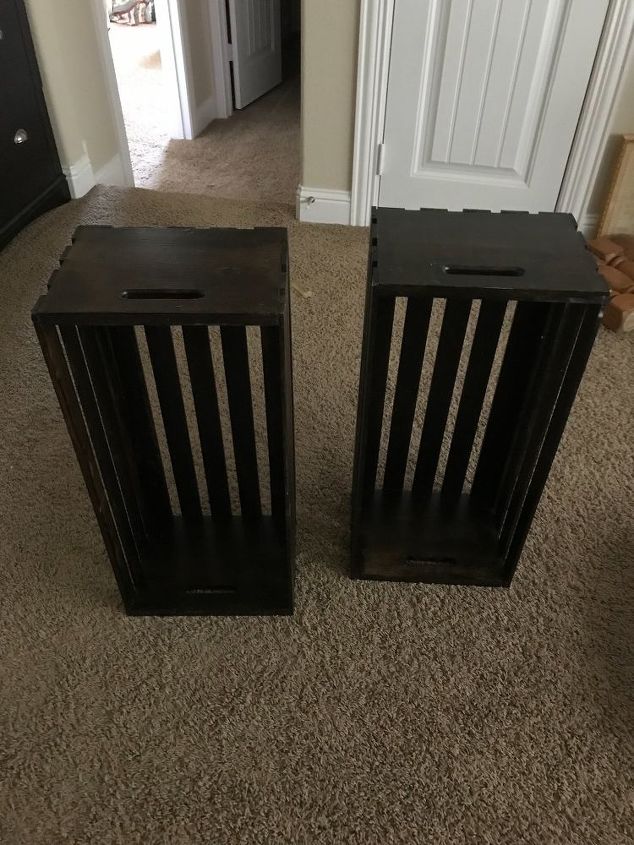
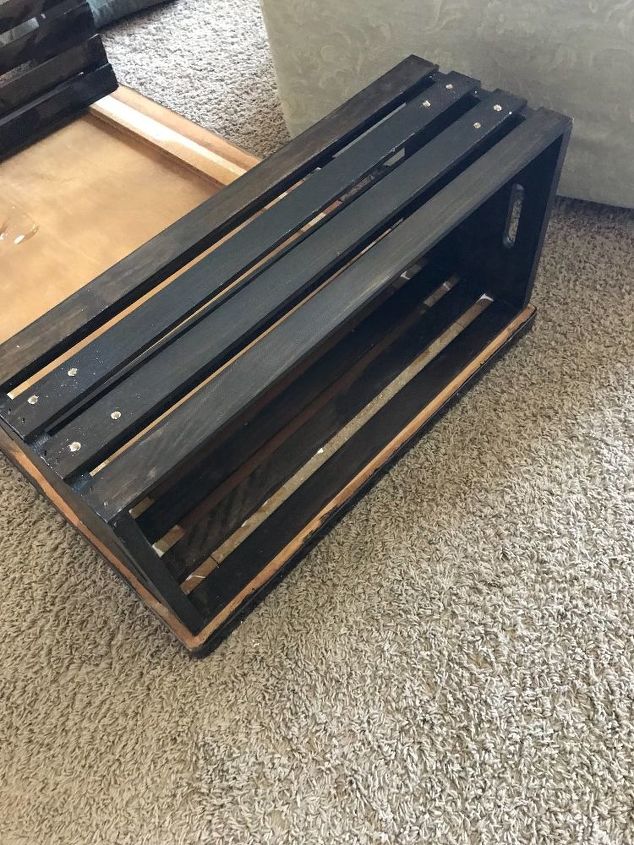
So I started with the easier pieces, plus it would give me time to get the casters on while the table top is drying. These will become the legs/storage for the table. The stain is a very nice rich color. Not an exact match to the bookcase I already built but a nice compliment. Now to add the casters.
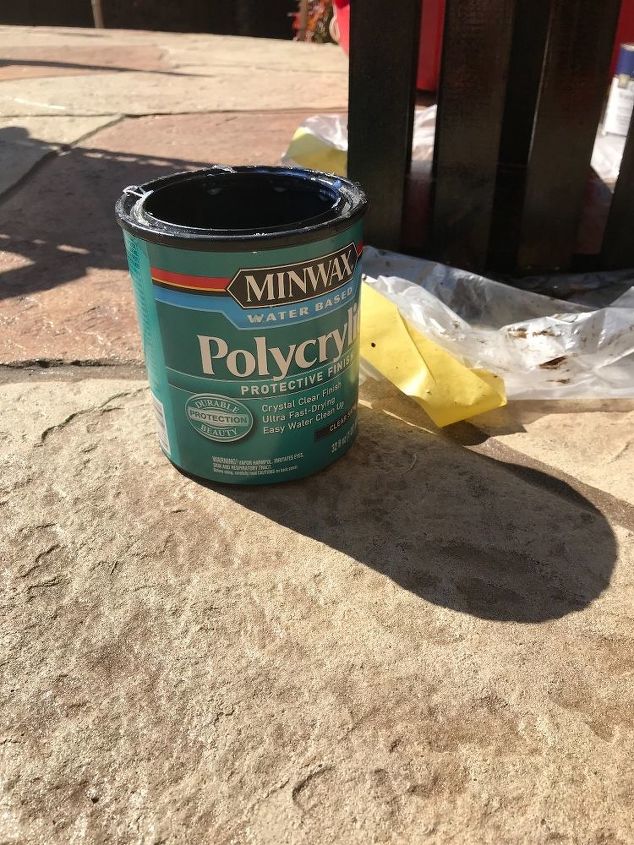
I love this stuff. It dries super fast. About 2 hours and you are good to go. Plus the finish is a nice shine and now I don't have to worry about cups and glasses leaving a ring. It does need to be updated yearly, in a high use area. You can get away with a longer time if the table is not heavily used. Mine is in a game room with kids in it constantly, so once a year is when I check to see if I need to do a quick touch up.
I put it on the storage crates as well as the table top.
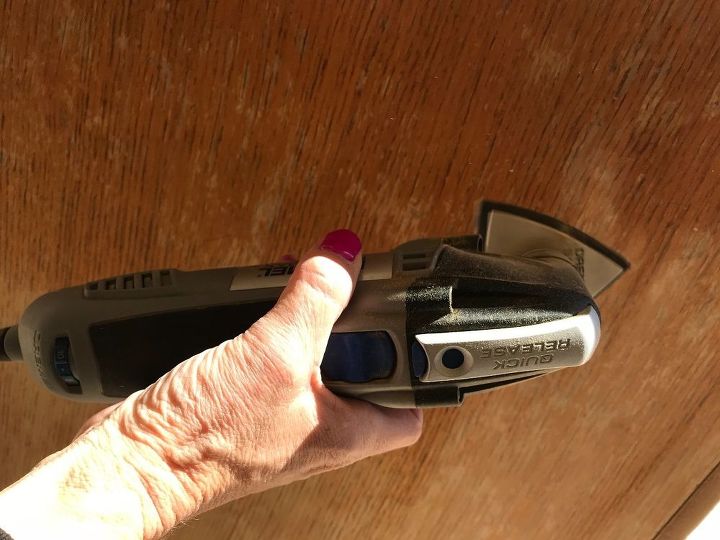
The table top was a disaster to stat with from water marks to wore varnish. So a good sanding was in order. A belt sander would have made really quick work of it, but my little sander worked just as well, it just took a bit longer.
Most of the time on this project is prep and drying time. Prep for the table took about an hour.
I wanted a hint of the honey color to remain on the table so I just sanded it enough to the stain to penetrate and dry.
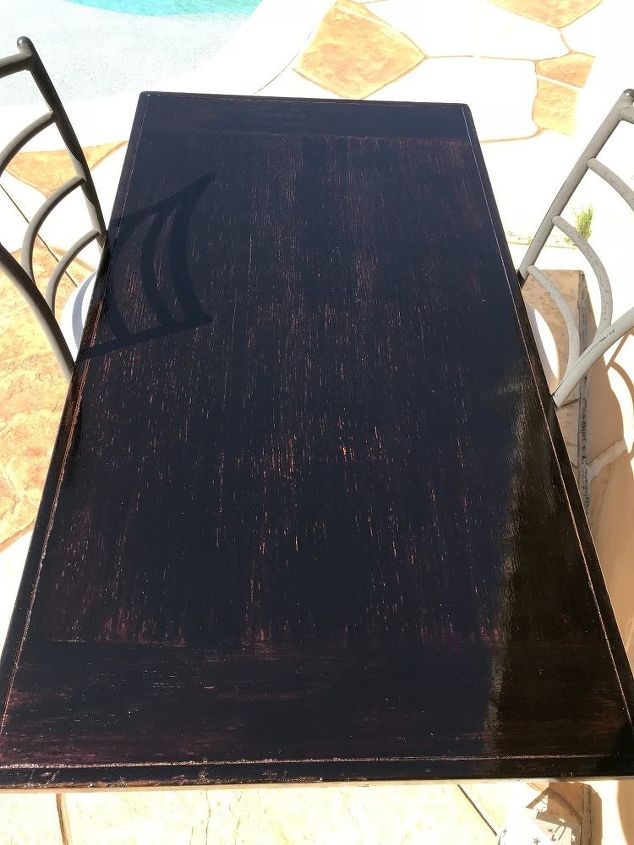
here is the finished table top. You have too look really close for the honey color but it's just enough for what I want.
now this beast did take two coats of stain. Some of the wood was very damaged and the stain soaked in a lot and made the color look ashy. The second coat did the trick.
Again....this is what added extra time to my project...I had 2 days worth of drying time.
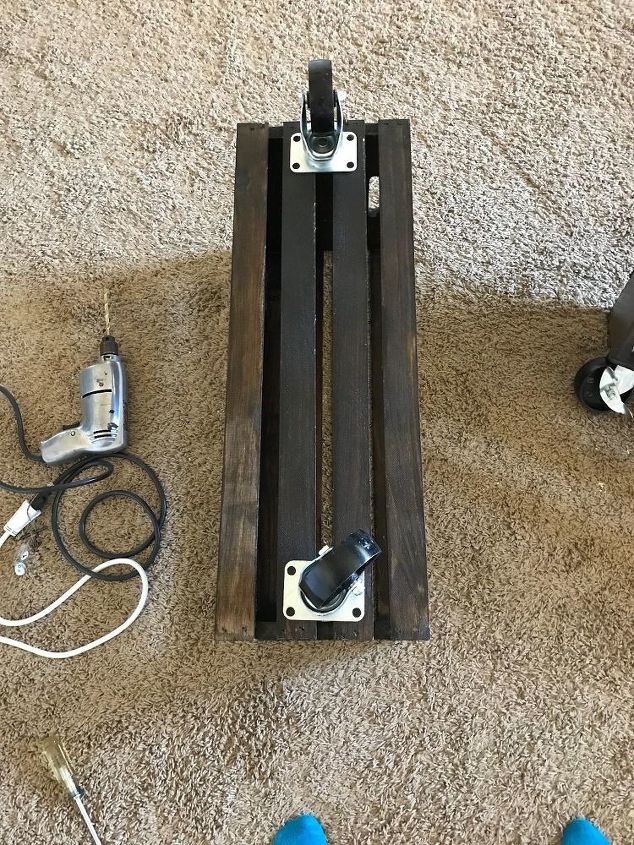
So to prep for the wheel installation I set the wheels on the crate. I made sure they are equally spaced on each side, top and bottom so the weight will remain equal once flipped over.
NOTE: your casters will have one locking and one regular in your set. Make sure to put a locking one on each side unless you want the table to be able to be rotated.
Drill your holes before attaching the crates. Always double check which side you want toward the table top before drilling. Don't attach the casters until you have put the crates on the top.
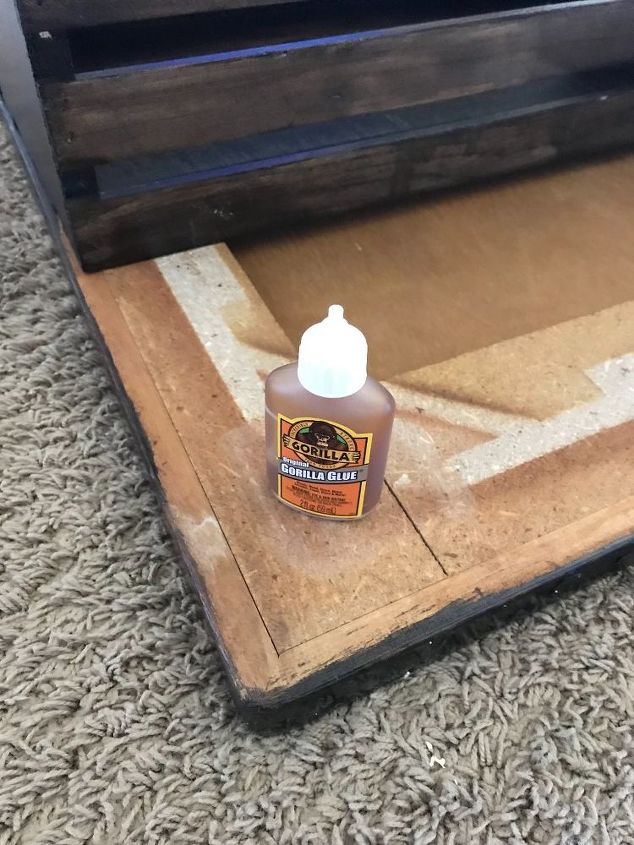
I used a bit of Gorilla glue just for added security on the crate. This glue dries quickly so by the time you have glued both crates in place, it is set enough to start putting in the wood screws.
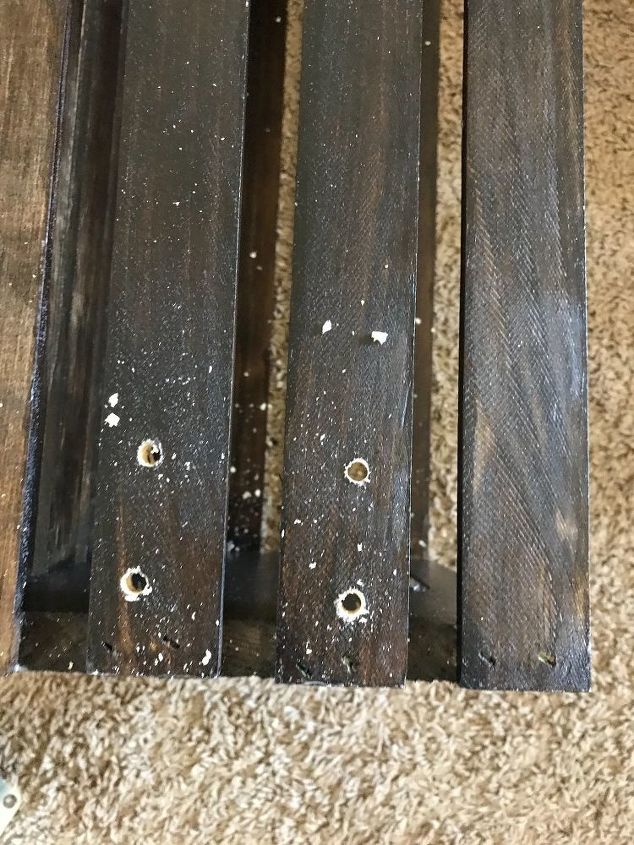
Always measure your wood thickness. Make sure your wood screws will go through the crate but not all the way through the table top.
I drill a small pilot hole through the crate and into the table top so the screw would go in easier. My drill bit was just big enough to make a small nail sized hole. Nothing bigger.
I used 5 screws for each crate. The four corners and then front center.
Remember you are looking at the underside of the table so it is not completely covered in stain. No one will every see it unless they are under your table.....I'd be asking some questions for sure. Ha ha
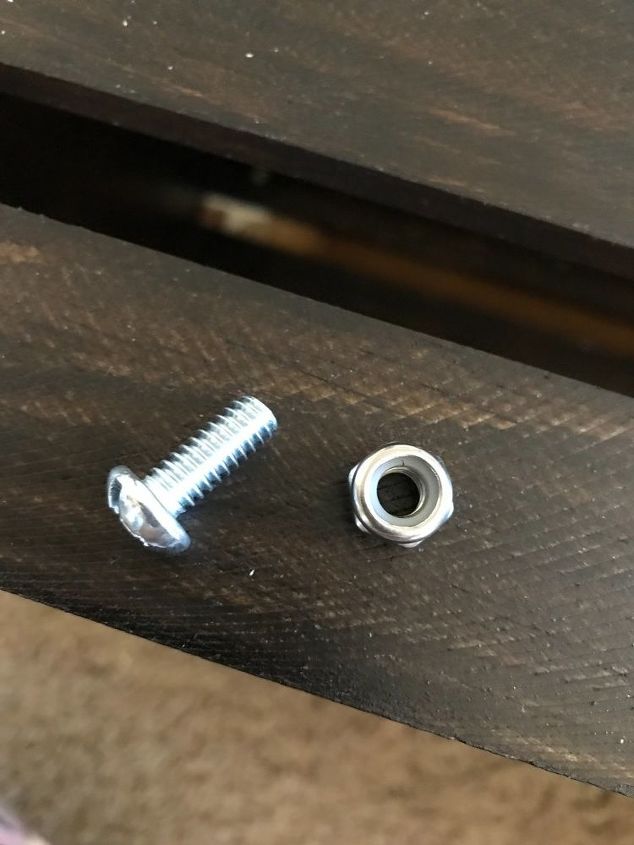
Here is the bolt and locking nut I used for the casters. I highly suggest the locking nut for all projects so they never loosen over time.
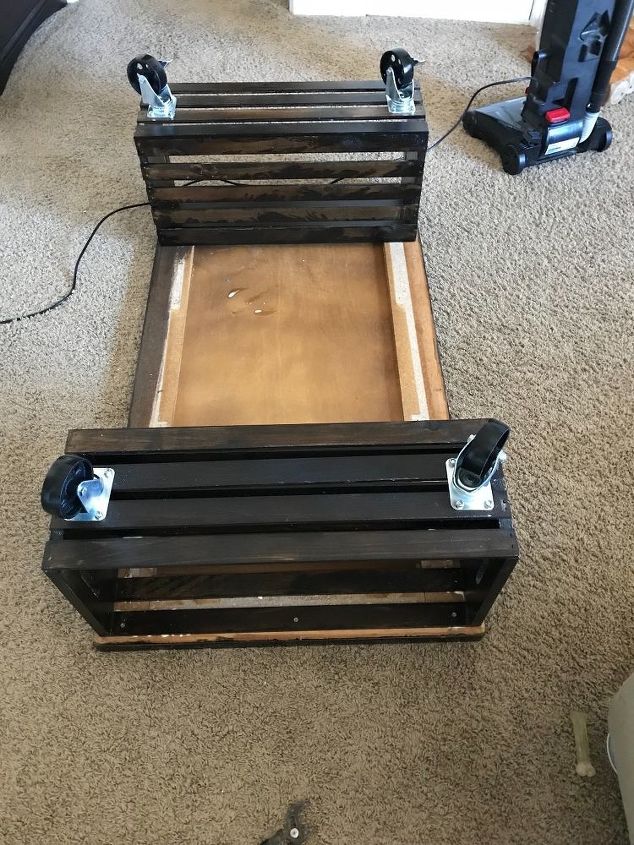
The casters are on and I'm ready for the flip. The table is pretty heavy so if you are not comfortable lifting 50 or more pounds yourself, get a helper.
I was so excited at this point to see what would happen after the flip.
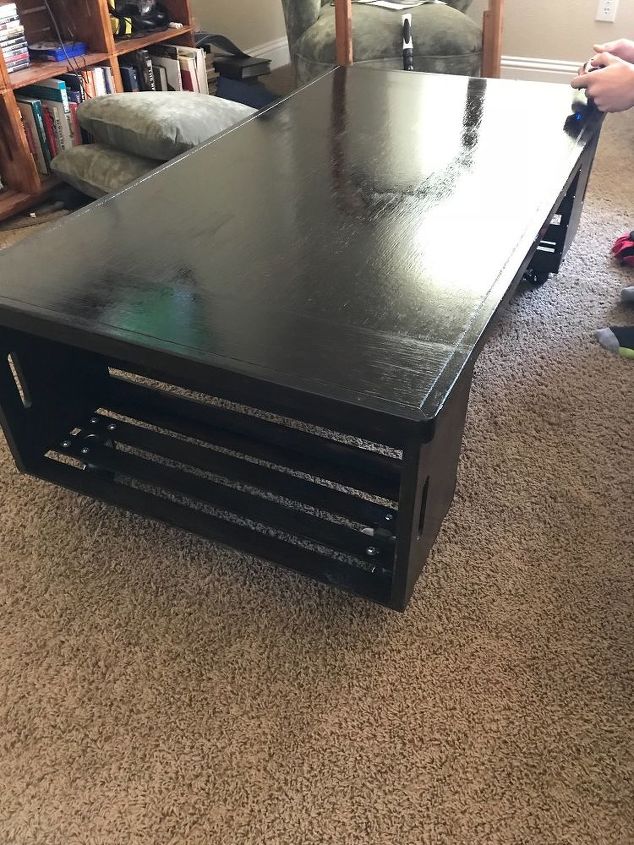
I was ecstatic. I have a new table and storage on both sides.
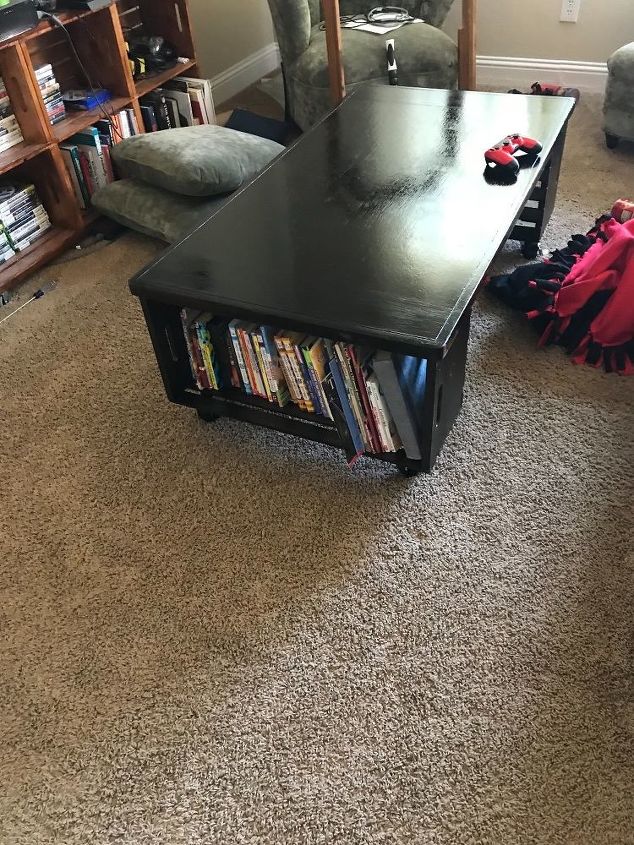
It actually got all of the books left on my floor on just one side. I still have the other crate that can be used.
Give it a try. Well worth it. I've never seen a table like this in a store.
Resources for this project:
See all materials


Any price and availability information displayed on [relevant Amazon Site(s), as applicable] at the time of purchase will apply to the purchase of this product.
Hometalk may collect a small share of sales from the links on this page.More info
Comments
Join the conversation
2 of 109 comments
-
Simple and very smart!
-
The table top is gorgeous. When you add casters and storage, great! A great idea.


Frequently asked questions
Have a question about this project?
I am definitely going to make this👍 what size were the crates? I k is you said large but i would like the inches please.
Can you stack 2 crates on each side to make a desk?
This was amazing! I love how this looks. What a great idea! And even storage. Wow!