


Create a Blooming Basket for Spring or Easter!
6 Materials
$25
1 Hour
Easy
A blooming basket for spring or Easter is easy to create with flowers from the grocery store and can be enjoyed as a centerpiece for your table for several weeks with a few tips and tricks!
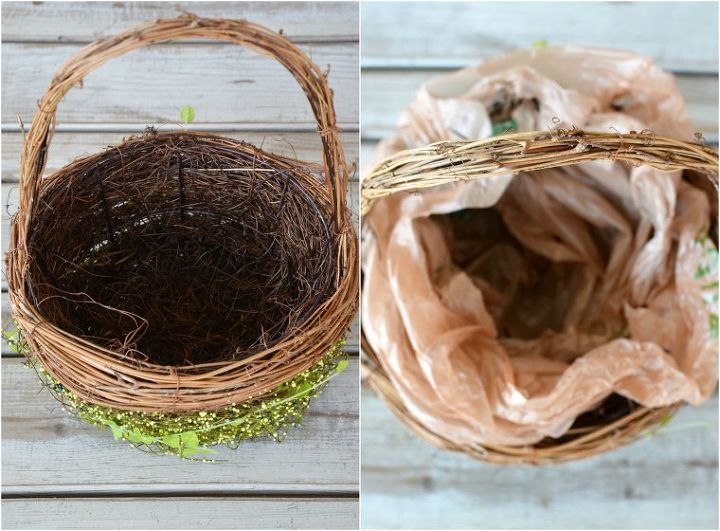
To build a blooming basket, start with a basket of your choice. I lined my basket with a double layer of plastic grocery bags as a precaution. Brown grocery store bags provide a little camouflage and blend with the weave of the basket, but a kitchen trash bag would work and provide some protection from any unexpected spills or leaks.
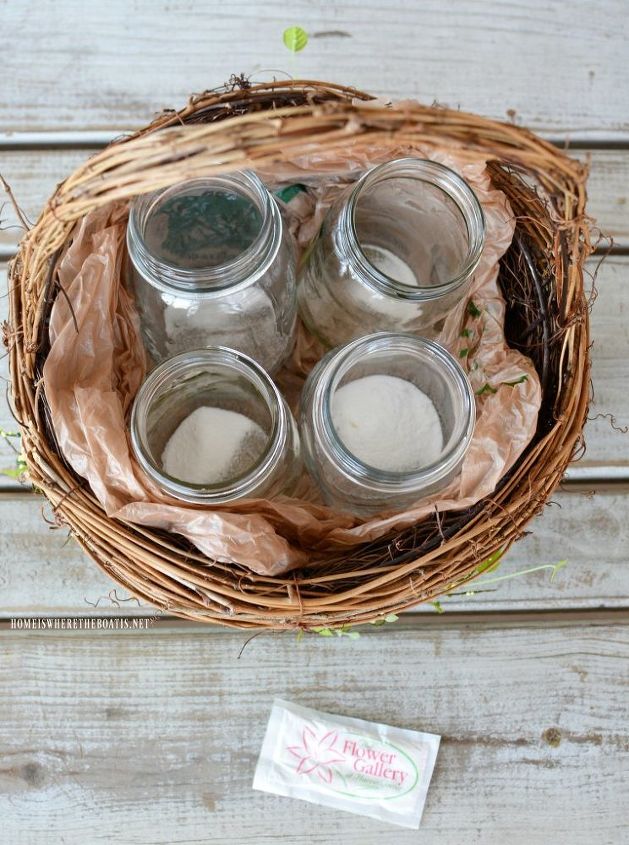
Instead of using wet floral foam to hold my flowers, I used jars as vases to tuck in the basket. The individual jars are easy to remove to refresh the water and change the flowers as they fade, so you can enjoy your basket arrangement several weeks until Easter.
I added a packet of floral preservative to the jars that comes with your flowers from the grocery store. Make sure your jars are clean and fresh from the dishwasher so they don’t introduce any bacteria to your flowers.
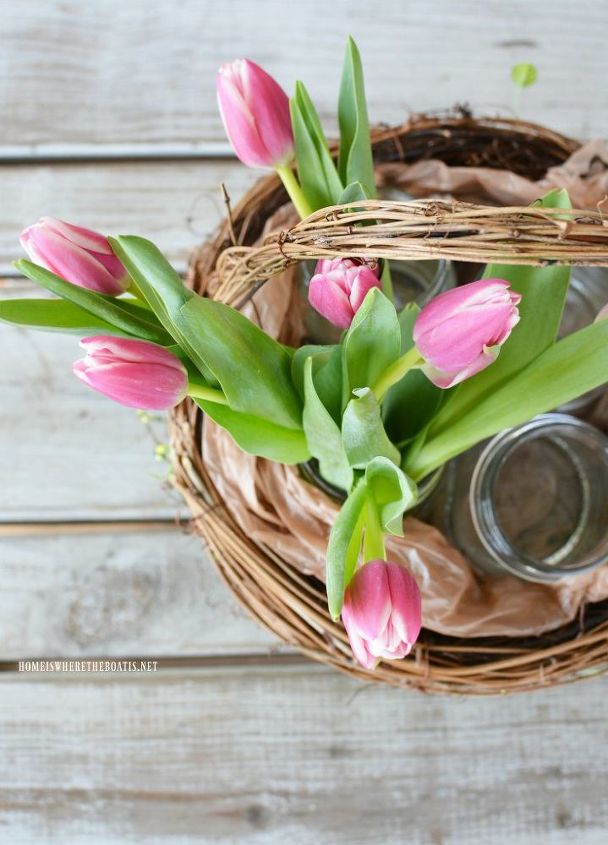
Strip any leaves from your flowers that would be below the waterline, removing the excess foliage and recut the stems, removing about one inch from the bottom. Cut your stems at a 45 degree angle for maximum water uptake. Add water to your floral preservative, stirring until dissolved. Use room temperature or lukewarm water for maximum absorption for your flowers except for your tulips. Tulips last longer and prefer cold water.
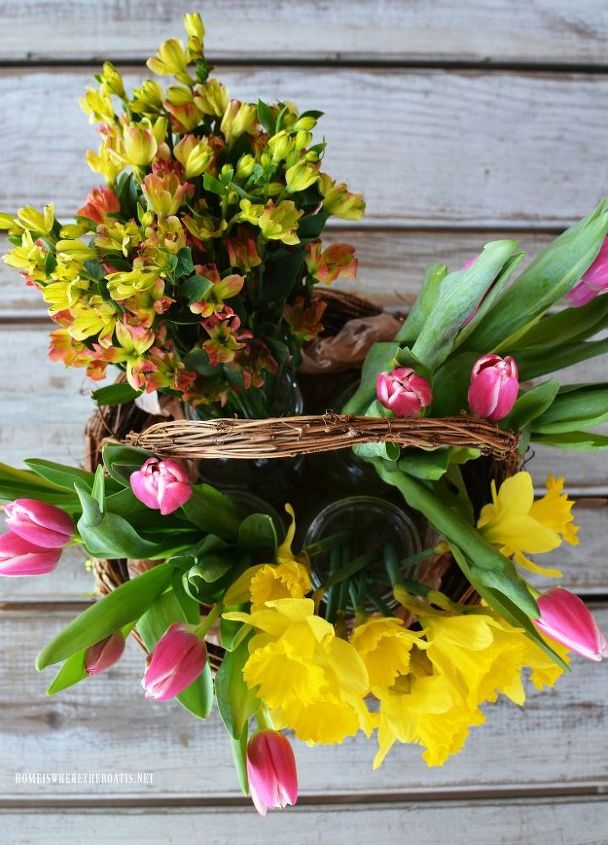
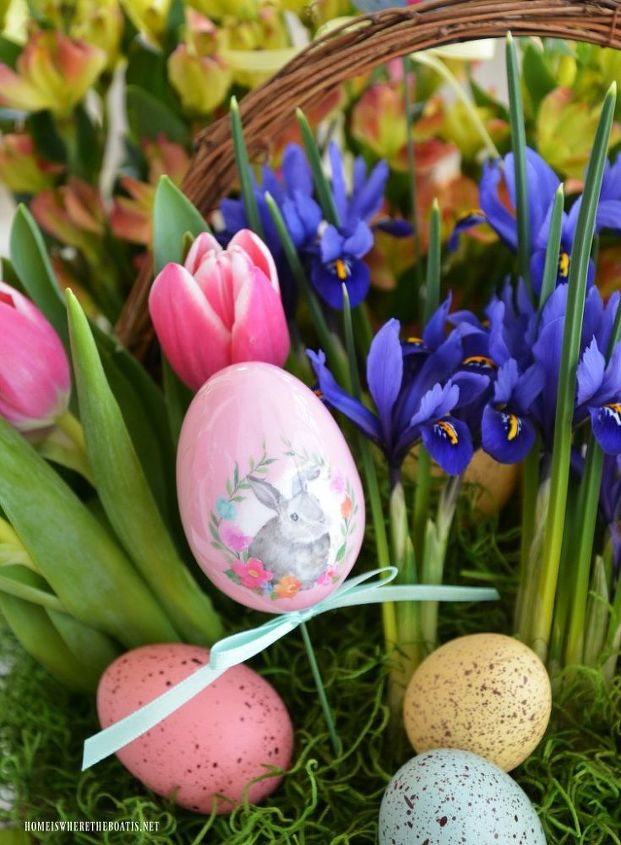
I used a combination of daffodils, tulips, Charmelia, from the grocery store for my basket. Daffodils secrete a sap after they’re cut that can shorten the vase life of other flowers so keep them in a separate jar instead of mixing them with other flowers.
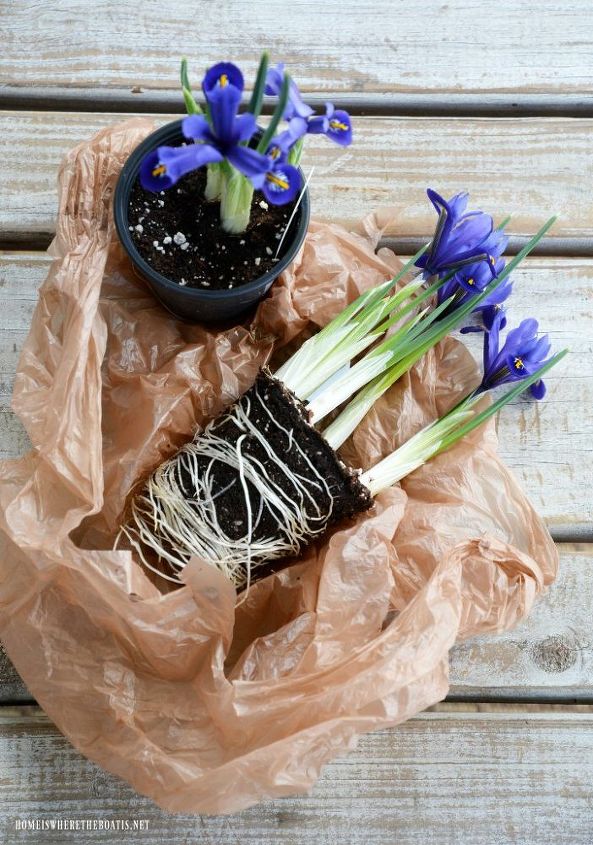
Mini pots of $1.00 iris were blooming at the garden center at Walmart. I watered them thoroughly and then removed them from their pots and wrapped them in plastic bags, tucking them in between the jars in the basket (if you have room in your basket for the pots, feel free to keep them potted). The iris can be planted in the garden after the flowers fade and enjoyed next spring.
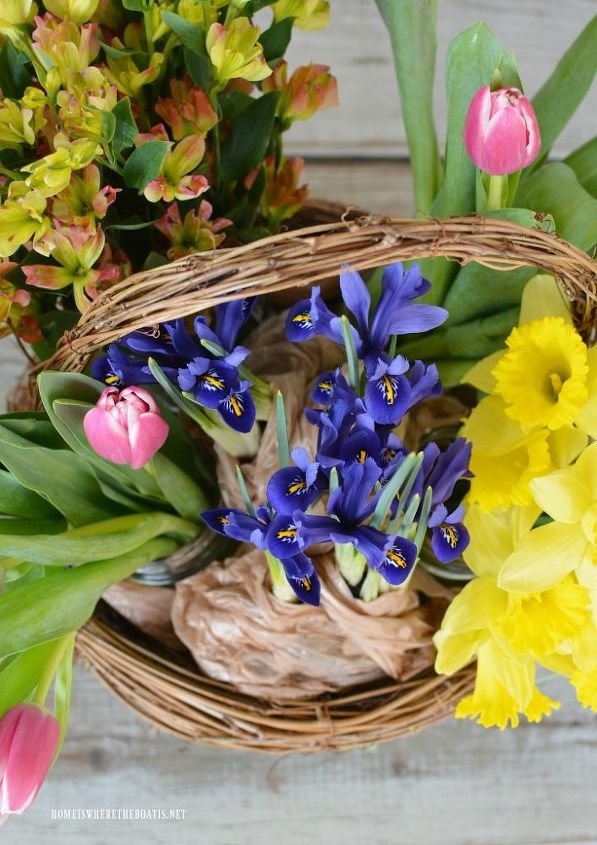
You can tuck in as many additional flowers or pots that your basket will allow. Pots of trailing ivy or flowers that would cascade or spill over the edges would be a pretty addition to your basket. Add some newspaper or additional plastic bags to fill in the empty spaces between your jars and the edge of the your basket so everything fits snugly and jars don’t tip or spill when you move your basket to your table to enjoy as your centerpiece.
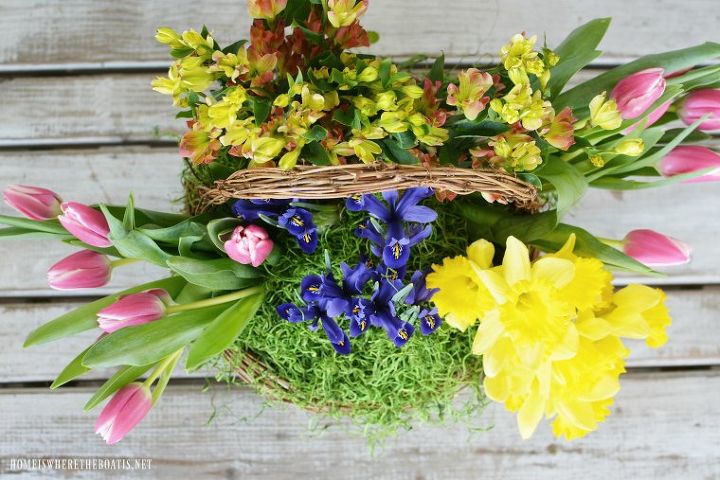
Top your basket arrangement with moss to conceal your mechanics and as a finishing touch your arrangement. I used green preserved Spanish moss.
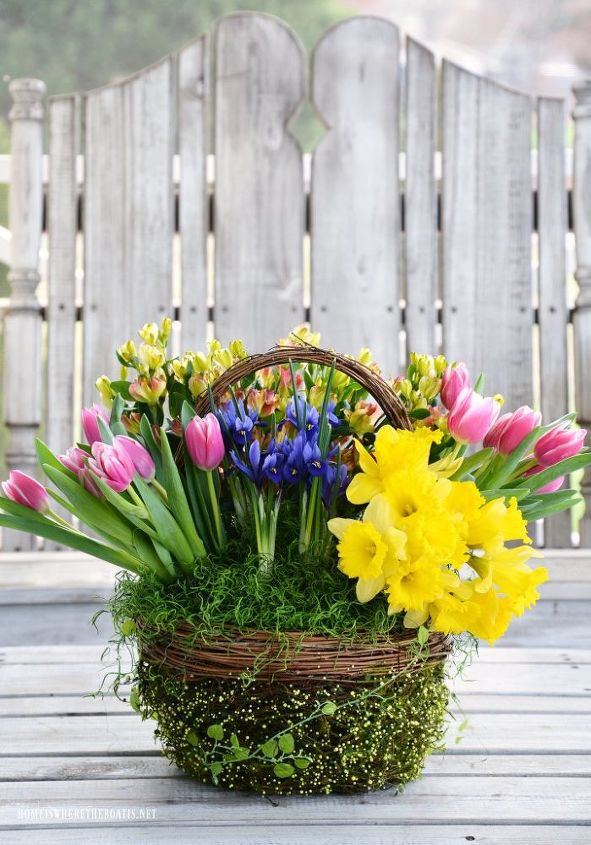
Your basket arrangement if ready to enjoy for spring. You can easily replace the flowers in the jars as they fade.
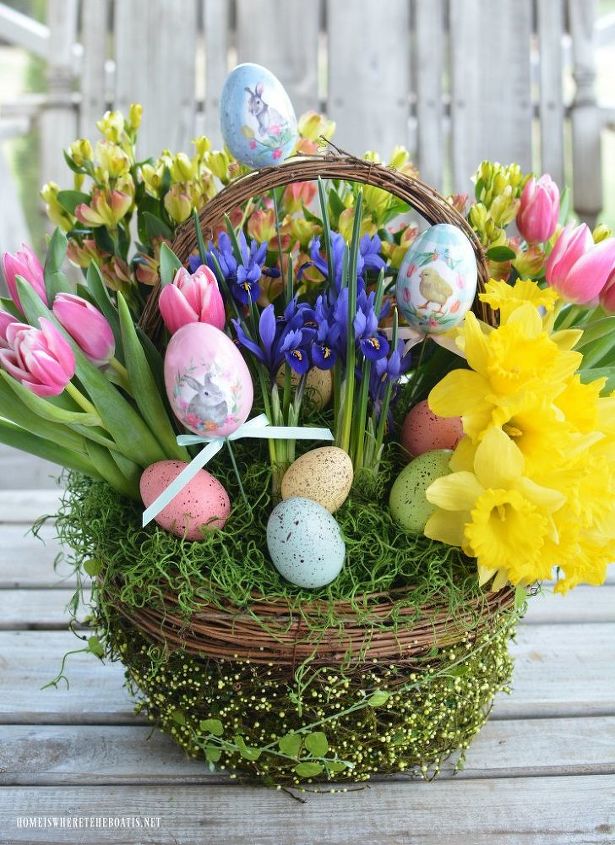
Faux Easter eggs and decorative egg picks fill in the spaces among the moss for an Easter embellishment in the basket.
More photos and details at the blog link below!

Want more details about this and other DIY projects? Check out my blog post!


Frequently asked questions
Have a question about this project?