


Rolling Manicure Rack, Scrap Wood and Dry Erase Board!
7 Materials
$25
2 Hours
Easy
I don’t know about you, but I’m assuming if you are reading this, and are a woman, or a man who has a wife or girlfriend, you know that people “like us” use our hands... a lot! If we went to the salon, each time we “messed up” our pretty manicures, the money we spent fixing them would by far exceed any money we save by all of our DIY projects!!! I have nail polish. Lots of it! I have files, base coat, top coat, remover and every color of the rainbow. I have gel polish, gel powder, cuticle oil and all kinds of little bottles. Until I made myself this rack, I would find these little bottles, everywhere! Junk drawer, medicine cabinet, Car console... hell I even found a bottle in the refrigerator!! (It must have been placed there late at night during one of my “projects”, while I was waiting for paint to dry! Lol I am by no means, a nail expert, but every time I do make it to the salon, I enjoy choosing my color. I like standing back and analyzing each color, usually organized by shade... and I wanted a rack! After my last couple of projects, I had scrap wood laying around. A lot of it. My Brad nailer wasn’t put away yet, i had leftover white paint from the cabinets i had just finished, so I decided I would Make an attempt at building my own rack! After looking around for a good wall to hang it, I realized our home didn’t have a place where it would work- besides... I never do my nails in the same spot, so I decided to make something big- (an excuse to by massive amounts of new polish!) so wheels/casters made perfect sense! (I had some of those leftover as well!) this project was dirt cheap and took a couple of hours.
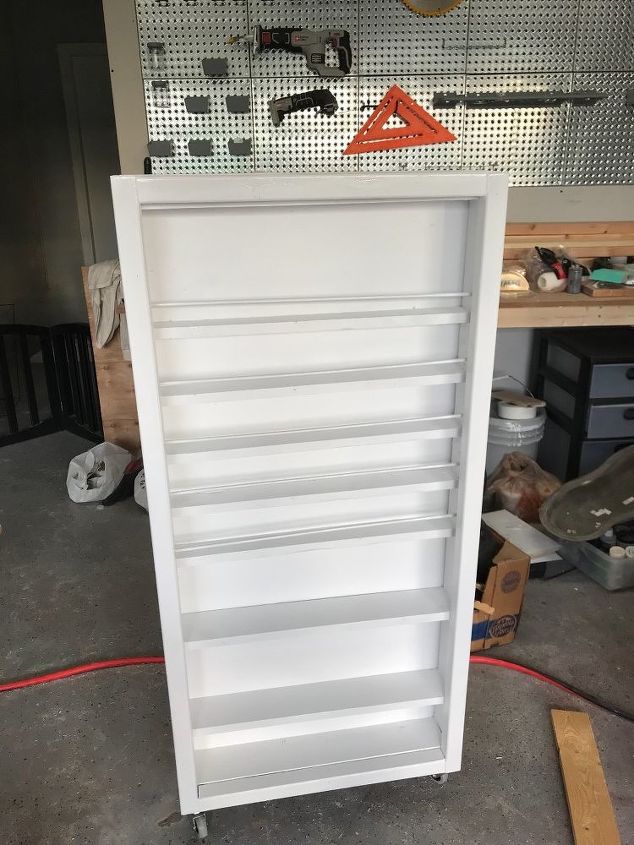
I cut a few pieces of my leftover wood into 2ft pieces and after laying those out, trying to determine how many, what height I wanted my rack, it made sense to make this 4ft high. It seemed like it would be huge, but I knew i had a lot of nail polish. Our table saw it down right now and I remembered seeing 2x4 peg board, plywood and dry erase board, All under 10.00 at Home Depot. At the time I wasn’t sure what I wanted to use for the back, but making it this size would be a simple solution, whatever I decided, there would be no cutting and it would be cheap. So I cut two of the boards at 4ft high.
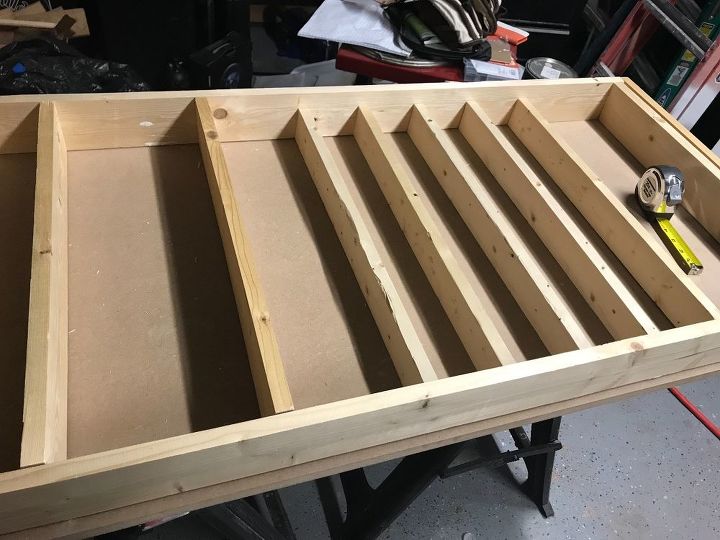
I chose to make my rack 2ft wide by 4ft high. I wasn’t sure what I was going to use for the back, but I remembered seeing peg board, dry erase board and even plywood for less than 10.00 a sheet, at Home Depot. My table saw wasn’t working, so I didn’t want to have to deal with cutting. It also would give me plenty of options.
Dry erase board
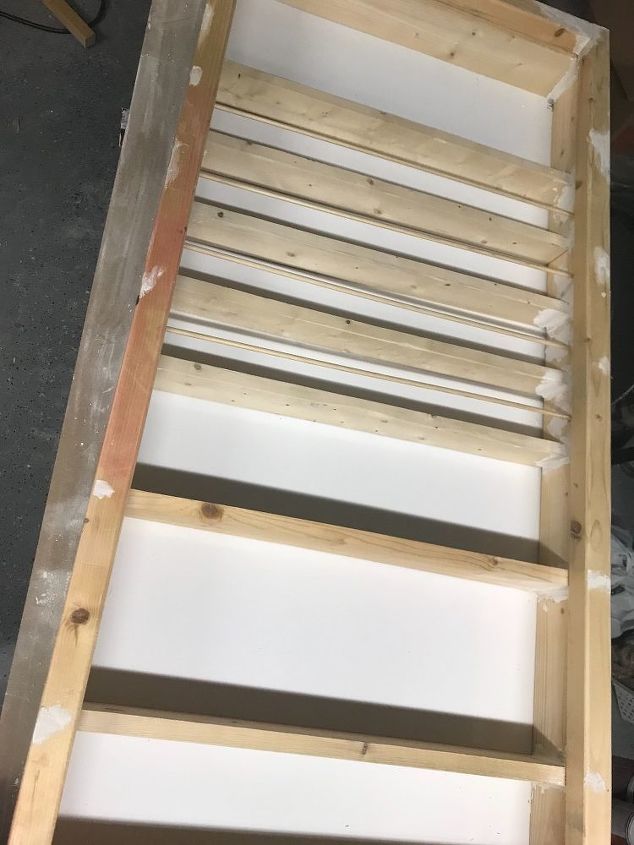
outside of the 2x4 pieces I cut, eyeballing everything else, I glued and used the Brad nailer to join the pieces. No square, no measuring tape and no level. I just wanted to get it done! I chose dry erase board... not because I wanted to actually use dry erase board, but because it was white- which meant I would have one less step!
I grabbed my biggest bottle of nail polish, a bottle of remover and some other random supplies and laid them in it, to see how much space in between the shelves, would make sense.
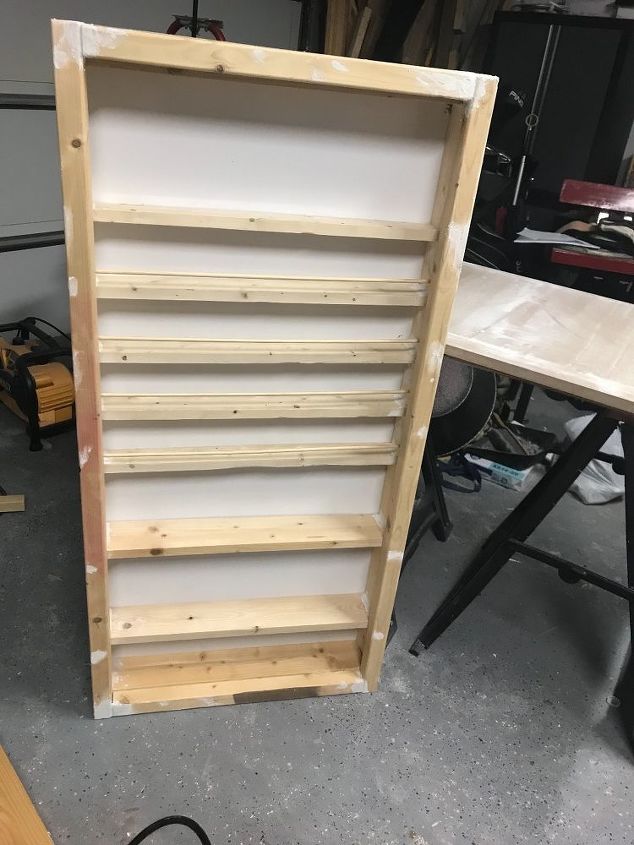
Shelves and back/board attached
After putting this together, (which took about 15/20 minutes, I stood it up to try it out. Slightly lopsided, but not horrible! It was good enough!
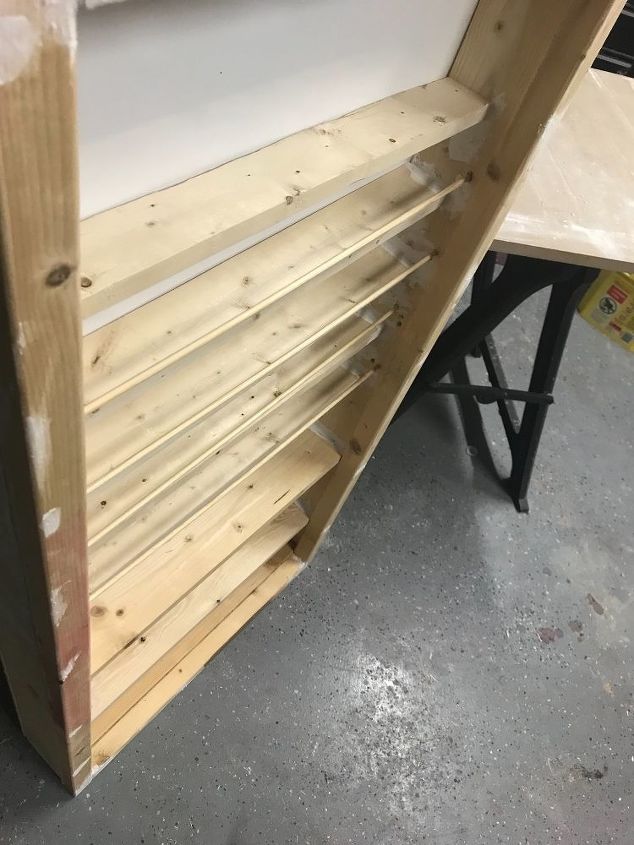
Small wood dowels
When I placed the nail polish on my shelves I realized since this would be rolling around, I needed to figure out how to prevent my little organized bottles from falling on the floor. I had some skinny little wood dowels left over from another project. I think these were aroind .50 each. I found a drill bit slightly larger than the dowels and drilled holes, to make a space wide enough to slide them through, from one side to the other. This took about ten minutes.
Painted white!
I started off using my leftover Benjamin Moore Aura (VERY EXPENSIVE) paint but got tired of all of the little spots I had to get into- instead i decided to run out and grab some white spray paint. (This was my only expense!) It took less than one can to completely cover my rack. I attached the casters.
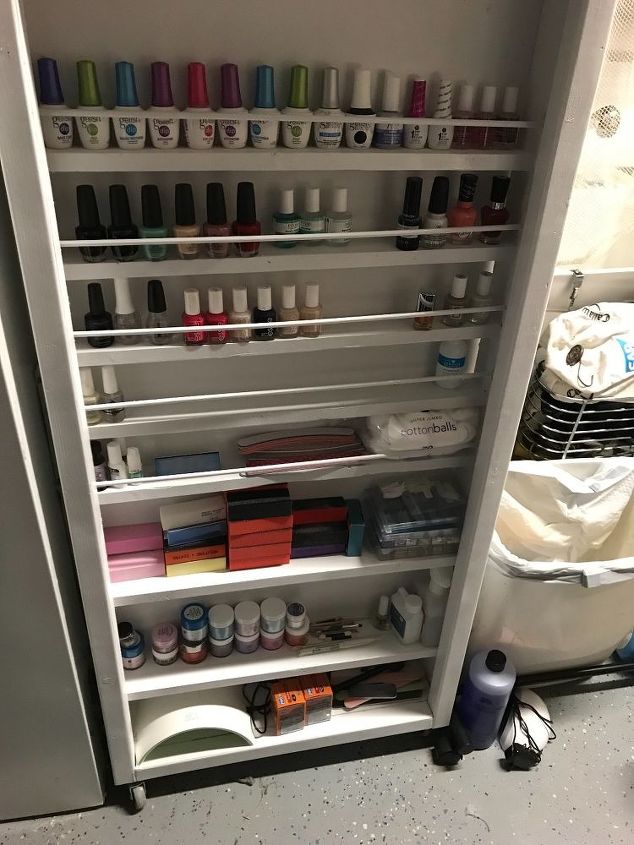
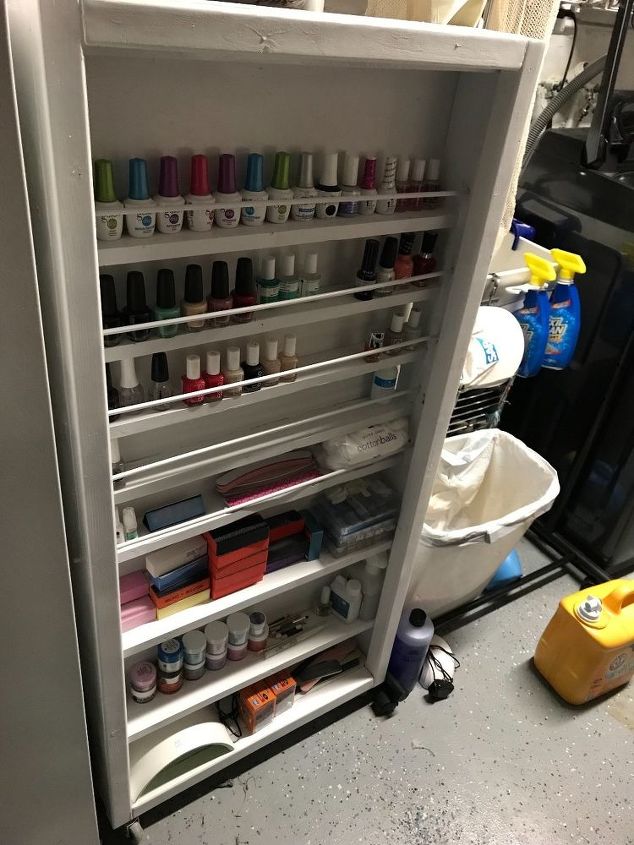
More polish than I realized!
That’s it!! It dried in less than 15 minutes and it was ready to stock! I had no idea I would nearly fill it! I actually should have made it bigger!! I love it! My friends love it and my bottles finally have a home of their own!! Now I just need to make myself a rolling manicure table, find a cute chair on wheels and I will have myself a complete nail salon!! Maybe i should start looking for one of those massage pedicure chairs!!! 
Resources for this project:
See all materials


Any price and availability information displayed on [relevant Amazon Site(s), as applicable] at the time of purchase will apply to the purchase of this product.
Hometalk may collect a small share of sales from the links on this page.More info

Want more details about this and other DIY projects? Check out my blog post!
Comments
Join the conversation
2 of 3 comments
-
My family loves it too! They were finding my little bottles everywhere! I think my next project will be a manicure table, to match!
-
I just found what I was gonna do today! Thank you 😂♥️‼️


Frequently asked questions
Have a question about this project?