


House Number Sign

6 Materials
$13
5 Hours
Easy
We had our house sided a few years ago and couldn't decide on a house number and where to put it. I really didnt want to nail anything into the siding. I recreated a project I saw on Pinterest and painted our house number (17) on a large clay flower pot and then stacked 2 other smaller clay pots on top. Every Spring I add new flowers, etc. I love it! But I recently saw another idea on Pinterest and decided to add another #17 to our house!
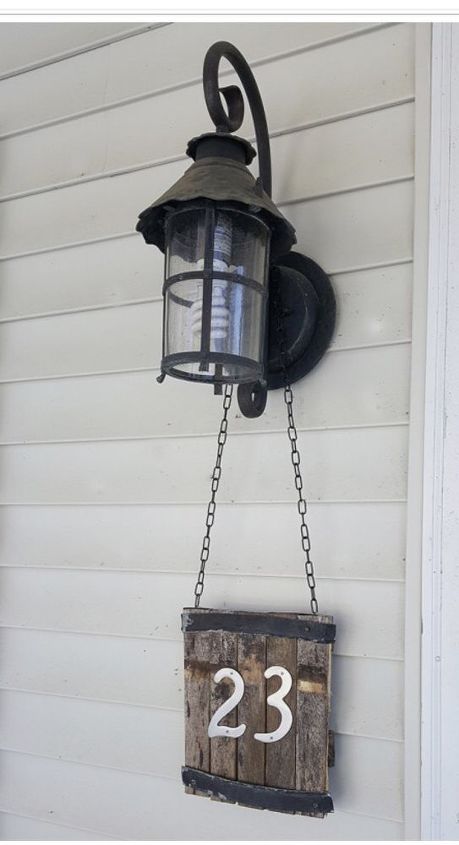
So this is the sign I saw. Thank you cooldiyideas.com!
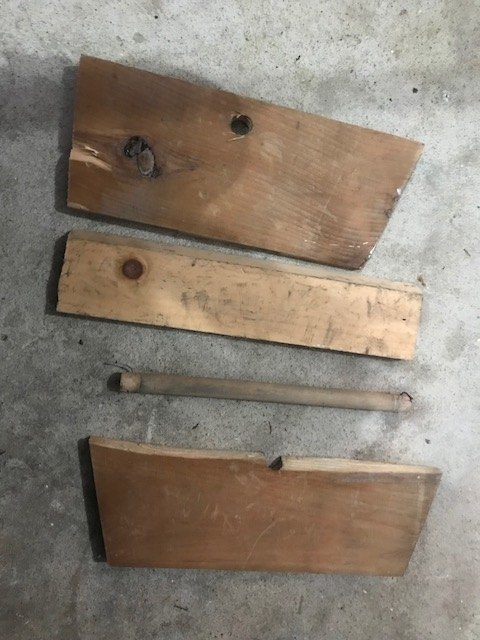
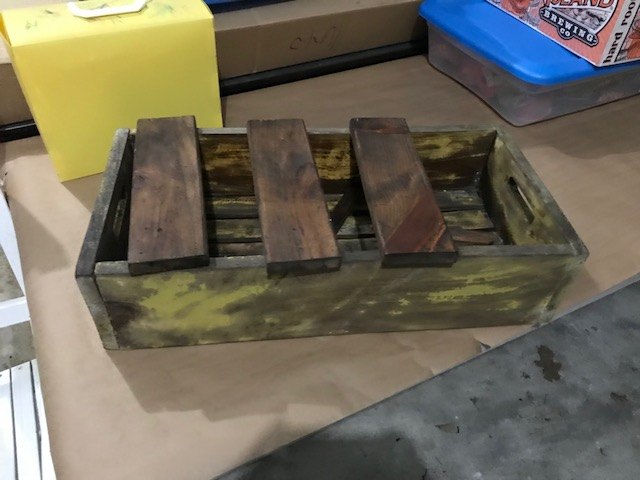
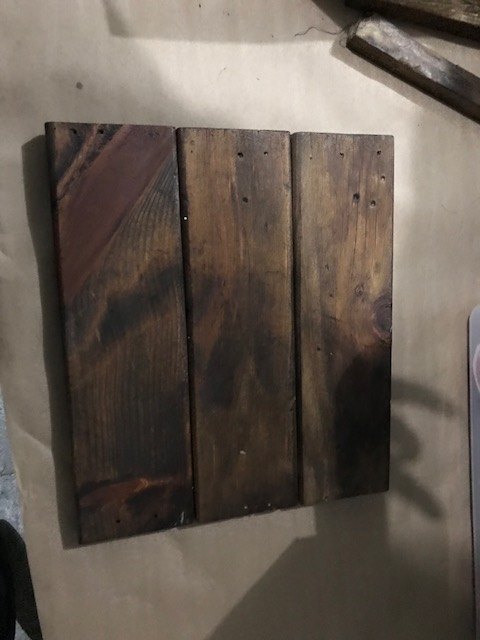
This WAS a step stool....I didn't take a before pic. I got it at the local Good Will Store for free! In this picture, it's missing the 3 slats of wood that were the top of the step, that I used for my sign.
I sanded the 3 pieces of wood with a hand sander and stained them.
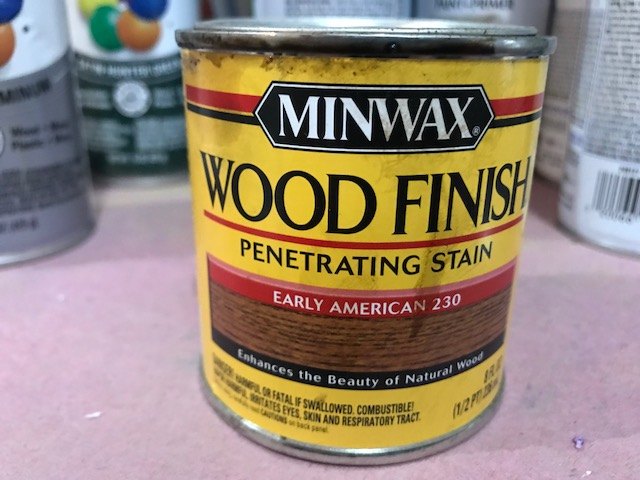
I used Minwax 'Early American Wood Finish' that I bought at Walmart for less than $3.
After drying, I laid them out this way. I took one of the other pieces of the stool (it was one of the legs of it) and sawed a piece in half to nail to the back of the 'sign' to keep all 3 pieces together.
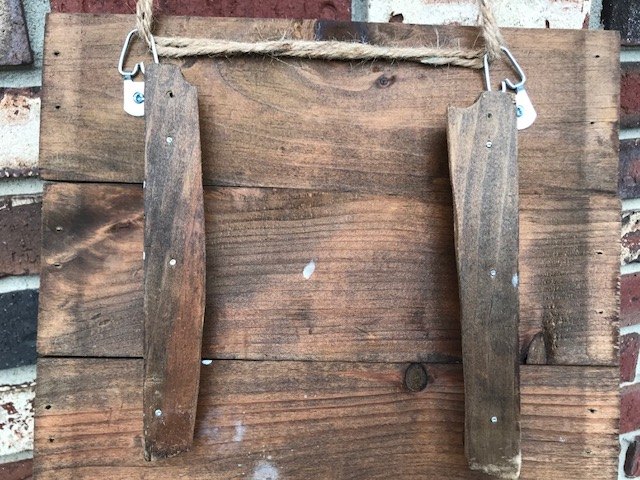
I know they are not perfect in size, but I thought it added character to it!
I used small three 1 inch nails in each piece as you can see from this photo. I then added picture hooks that I had in the house. Both the nails and hooks I originally bought at Home Depot for less than $10 (when you buy a pack that has mutiple picture hooks in it).
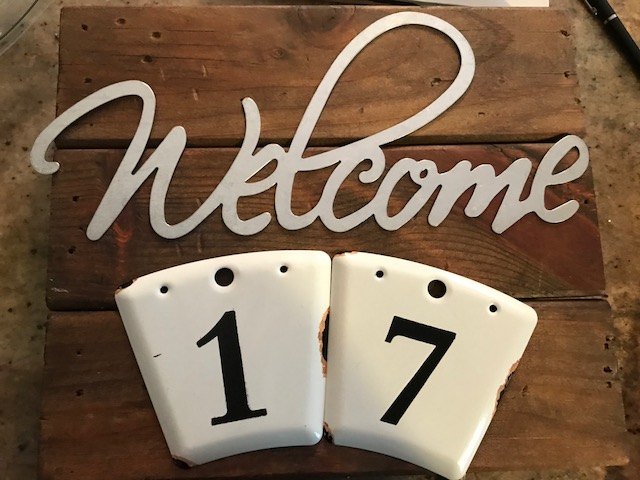
So for about 2 weeks I bought and returned different size wood, and metal numbers. My original thought was to just have the 2 numbers...maybe an an "S" for our last name...but I couldn't find what I wanted. Until...earlier this week, I stopped Hobby Lobby to buy wooden numbers I saw ealier....and instead I found this metal 'Welcome' sign and these white metal numbers! They were less than $3 each and the Welcome sign was under $5. I went back and forth on how to lay them out....got some opinions from friends and family members and ultimately decided on putting them together the way it is in this photo! I used 2 1/2 inch screws to secure the numbers and drilled 2 small holes into the Welcome sign and then used 2 small nails (the kind you use on the back of picture frames). I also used twine that I purchased at AC Moore for less than $6.
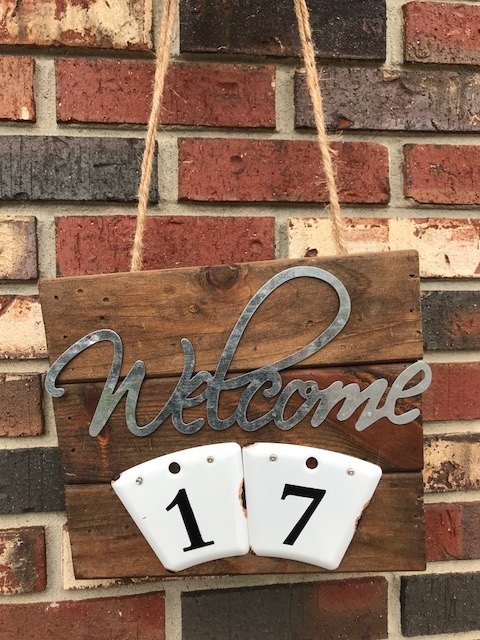
And here is the finished product!
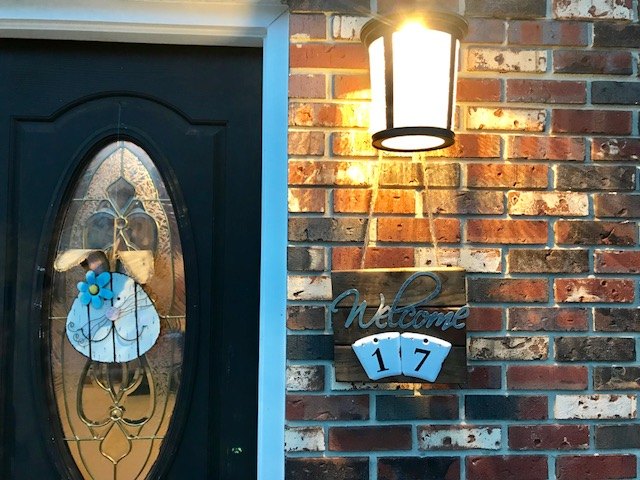
I love the way it turned out!
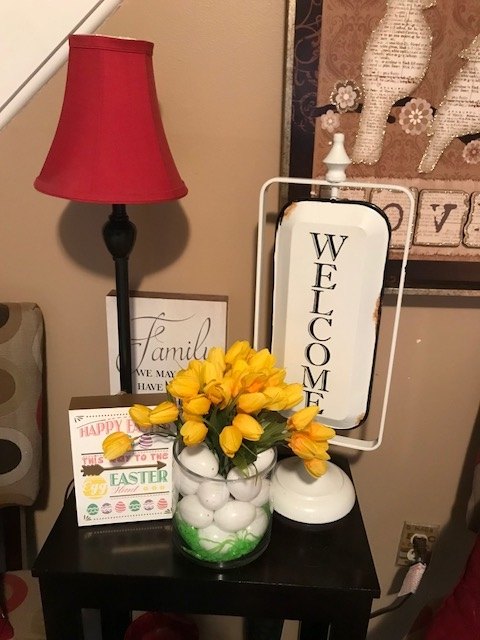
I realized after I made the sign, that I had purchased this 'Welcome' sign at Hobby Lobby a few weeks prior! It's metal as well. This is in our foyer when you in through the front door.
Have a wonderful DIY day!
Resources for this project:
See all materials


Any price and availability information displayed on [relevant Amazon Site(s), as applicable] at the time of purchase will apply to the purchase of this product.
Hometalk may collect a small share of sales from the links on this page.More info
Comments
Join the conversation
2 of 3 comments
-
Good idea, if you don't want to add more holes! I may just do this.
-
Great idea! So cute!


Frequently asked questions
Have a question about this project?