


Caulking Made Easy

8 Materials
$10
2 Hours
Easy
Here are some tips to make caulking easier. Also some good lessons I learned along the way doing our bath. Such as, I tried using a small squeeze tube on this job and can tell you not to waste your money on a tube! It popped the side seam and I ended up with all of the caulk in my hand. That is why there are no pictures of me actually applying the caulk with the tube...Lesson learned. Thankfully, our hands and fingers are wonderful tools.
Main tools needed for this job are simple. Hair dryer, putty knife, caulking gun, painter's tape, Alcohol, rags, and a utility knife. Both a mask and safety glasses, you really don't want that stuff in your eyes. I also used vinegar to clean in between steps. Choose the right caulk for the job, I used one formulated for the kitchen and bath.
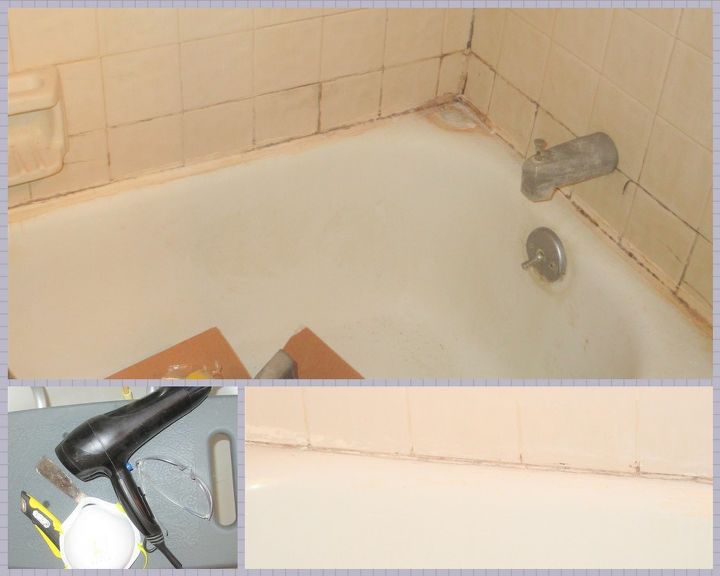
To remove the old caulk, use the hair dryer to soften the old stuff. Just hold the dryer on a small area (around 10 inches) for a few minutes. Use the utility knife to cut down the center of the old caulk. Then using a putty knife, scrape the softened caulk from all surfaces. After you have done this, use the rubbing Alcohol and a rag to clean off any residue.
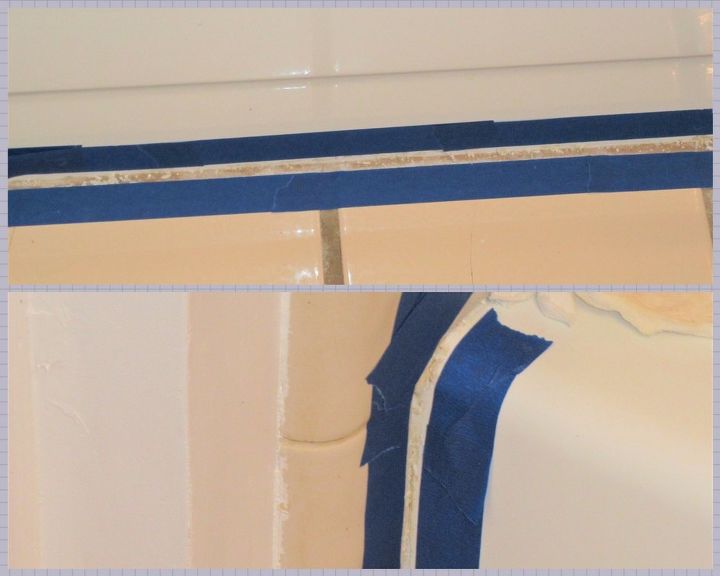
If you do this next step, you will have very nice lines, even if you have never caulked before or you end up using a finger and hand full of caulking  Tape it up, every place you plan to caulk. It doesn't have to look perfect, just make sure the strip you are going to caulk is strait between the tape. Once you have taped it and you are ready to start, cut the end off your caulk tube at an angle and start applying. Use your finger or a tool to smooth the caulking down and in after you lay down the bead of caulking. As soon as you finish remove the tape. Do not let the caulk set with the tape! Pull the tape off carefully and slowly, lifting it and the excess caulk off. Leave it to cure for the time recommended for the caulk.
Tape it up, every place you plan to caulk. It doesn't have to look perfect, just make sure the strip you are going to caulk is strait between the tape. Once you have taped it and you are ready to start, cut the end off your caulk tube at an angle and start applying. Use your finger or a tool to smooth the caulking down and in after you lay down the bead of caulking. As soon as you finish remove the tape. Do not let the caulk set with the tape! Pull the tape off carefully and slowly, lifting it and the excess caulk off. Leave it to cure for the time recommended for the caulk.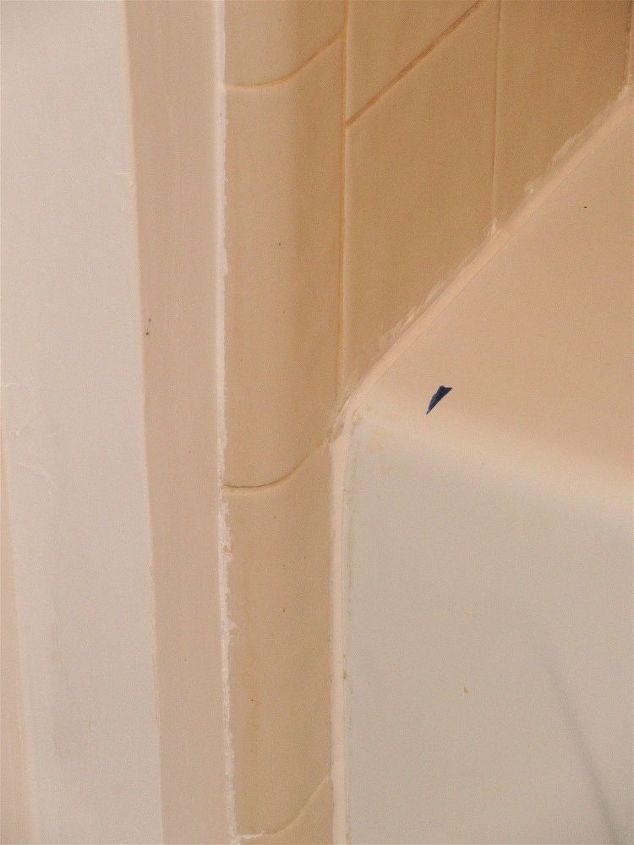
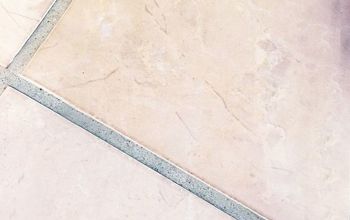
This is a picture of mine after removing the tape and before clean up. If you have spots that look messy, carefully rub with the Alcohol and cloth before it cures.
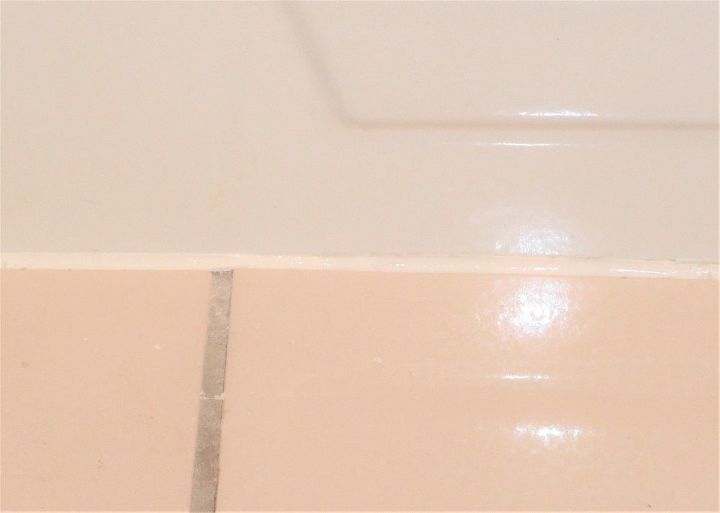
If you use the taping method, it is an extra step and a bit more time. The results will be well worth it and you will be pleased with a job well done.
Resources for this project:
See all materials


Any price and availability information displayed on [relevant Amazon Site(s), as applicable] at the time of purchase will apply to the purchase of this product.
Hometalk may collect a small share of sales from the links on this page.More info
Comments
Join the conversation
2 of 14 comments


Frequently asked questions
Have a question about this project?