


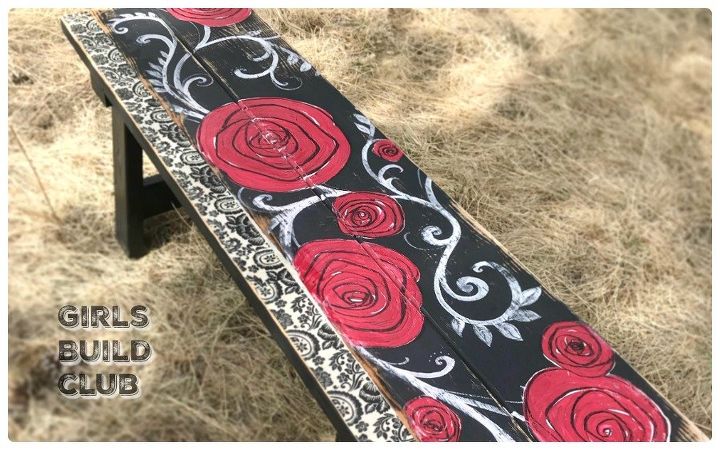
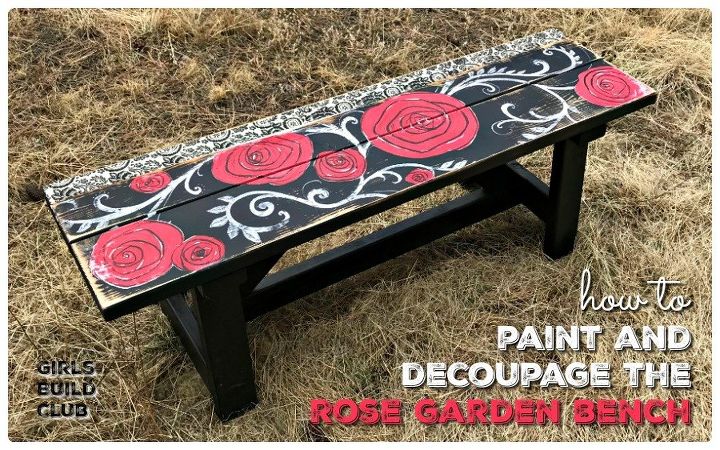
Painted and Decoupaged Rose Garden Bench DIY
6 Materials
$30
4 Hours
Medium
This tutorial will describe how to hand-paint and decoupage this rose garden design on a bench or whatever piece of furniture you have in mind. It's a real statement piece of furniture for anyone who loves colorful, one-of-a-kind pieces. It may look complicated, and it does take several steps, but I'll show you exactly how I got this look. You can do it!
First I built the bench. You can, too, or you can use some furniture you already have sitting around. To see how I built the bench, check out the blog post at Girls Build Club.

Okay, now that we have a bench, let's paint it black. The entire thing! The base and the bench seat. In this photo, only the bench seat is black, but you'll see that by the end I have painted the base black, too. So you might as well do it all at once. I didn't use any special kind of paint. I literally used a $0.99 bottle of craft paint for this.
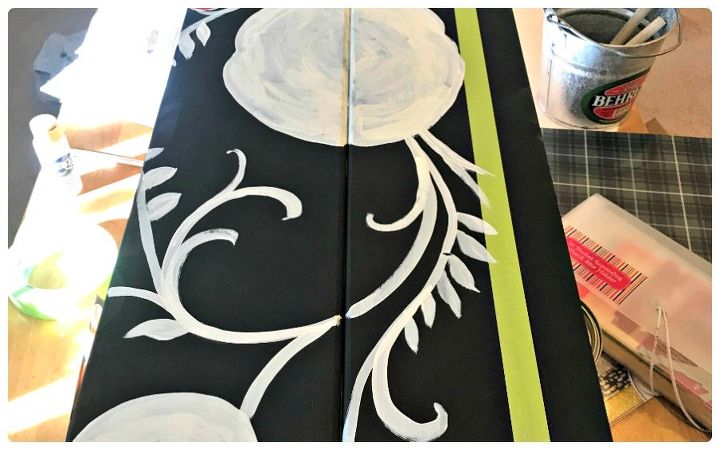
I taped off a border on the edge of the bench seat, so it didn't get painted any further. Then I started painting white blobs, which would eventually be red roses, and the white vine and filigree. I did sorta-kinda sketch this out to begin with so I had an idea of how it would play out on the bench. But trust me, it never turns out like my sketch!
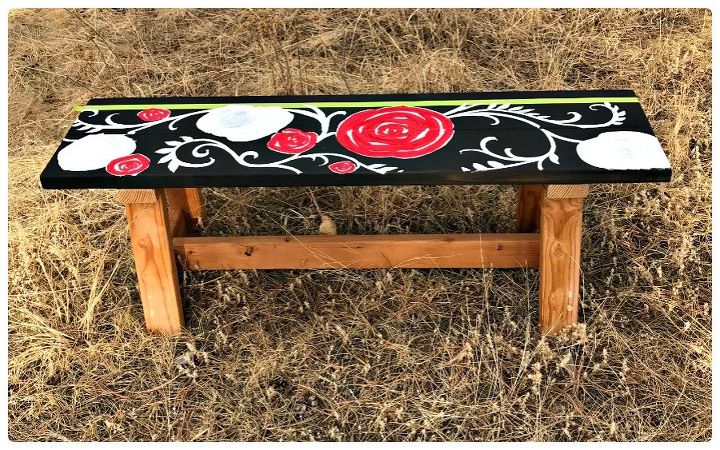
Once I had the white design painted, I painted over all the white circular blobs with red paint. I painted the red in a messy spiral pattern, leaving bits of white unpainted.
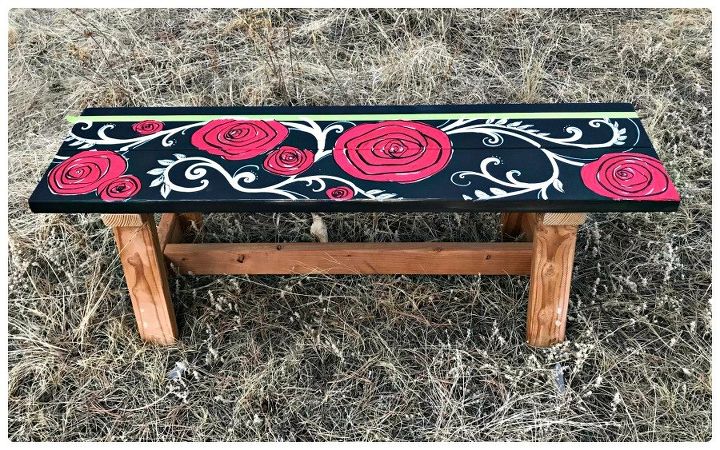
Then, with a black paint pen, I went over all the red roses and drew in a messy black spiral on top of them. I also went over all the white filigree vines and leaves and added some leaf vein lines and details. Almost done!
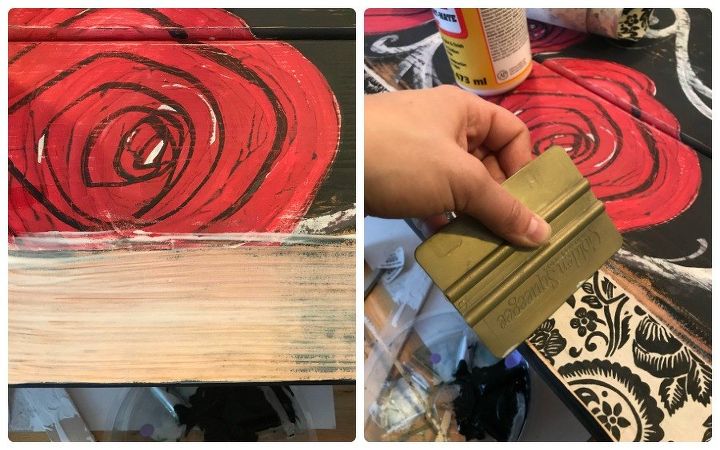
For that border we had taped off, I ended up sanding off the black paint along that edge of the bench and decoupaging a border of decorative paper. I think the black and white floral paper really complements the hand-painted portion well.
Of course, per usual for me, I went over the whole thing with a sander and distressed it. :) I just love how distressing furniture softens the details, and hides mistakes. Makes it look like a well-loved, well-worn piece of home.
If you'd like to receive updates of when I post similar projects, head on over to Girls Build Club and sign up for the newsletter. I'll keep you in the know. :) Thanks for reading!
Resources for this project:
See all materials


Any price and availability information displayed on [relevant Amazon Site(s), as applicable] at the time of purchase will apply to the purchase of this product.
Hometalk may collect a small share of sales from the links on this page.More info

Want more details about this and other DIY projects? Check out my blog post!
Comments
Join the conversation
3 of 41 comments
-
Awesome! Hope you have fun with it. Would love to see pics

-
Outstanding


Frequently asked questions
Have a question about this project?
I have a cement bench in my garden, to heavy to move, could I do this on the top and what would I use to start and end this project. Must last through our winter months
Love love love this!!! beautiful job! did i understand correctly that you used black bottled craft paint?