


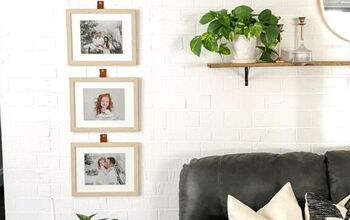
STENCILING A FAUX GALLERY WALL USING BOTANICAL STENCILS

What better way to start the weekend than an awesome DIYFaux Gallery wall for you to try! A typical gallery wall can have several photographs, wall stencils, and framed signs placed at random upon the wall. In this case, we will be using our ever-so-trendy ! Frames can be SO EXPENSIVE, why not paint your own for way cheaper? Cutting Edge’s stencils are reusable so you can repeat the same design in different canvases! This DIY project to create a Faux Gallery wall has several steps but is rewarding in the end! Grab some wall stencils, blue painters tape, your DIY mindset, and lets get started!
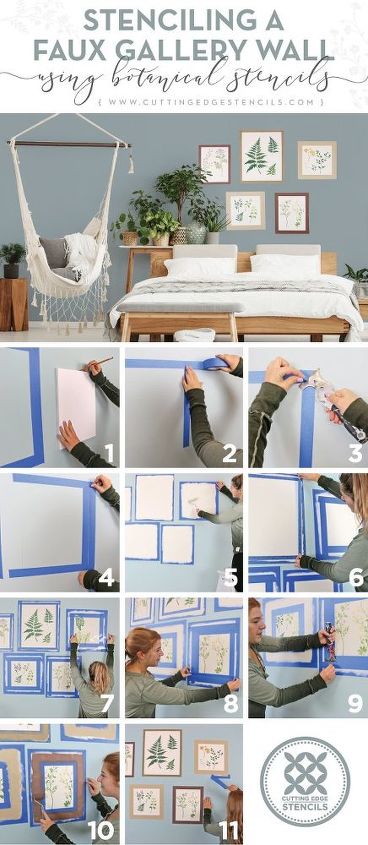
Step 1: Decide which sizes you will be using for your Faux gallery wall. It can be the size of frames or canvases you have on hand. The beauty about a gallery wall is that it is meant to be random! Trace each canvas against the wall in the size and placement you desire with a pencil!
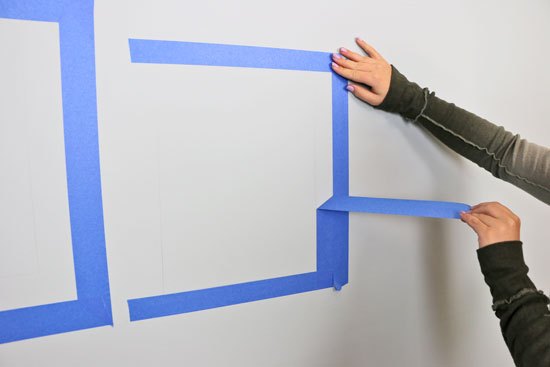
Step 2: (Pro tip: we recommend using Blue Painter’s tape for all of our stencil projects!) Use that tape and place it on the border to layout faux canvas. The bottom of the tape should be touching the pencil tracing. Make sure to to prevent any paint seeping out.
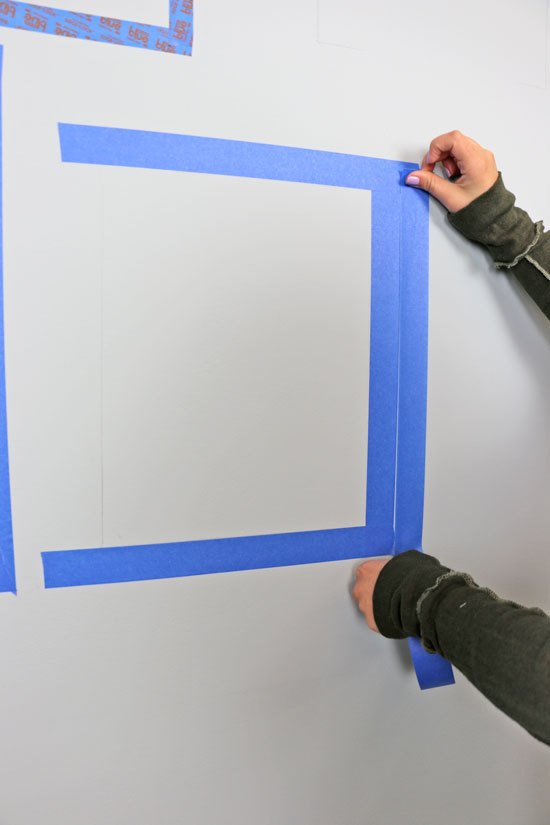
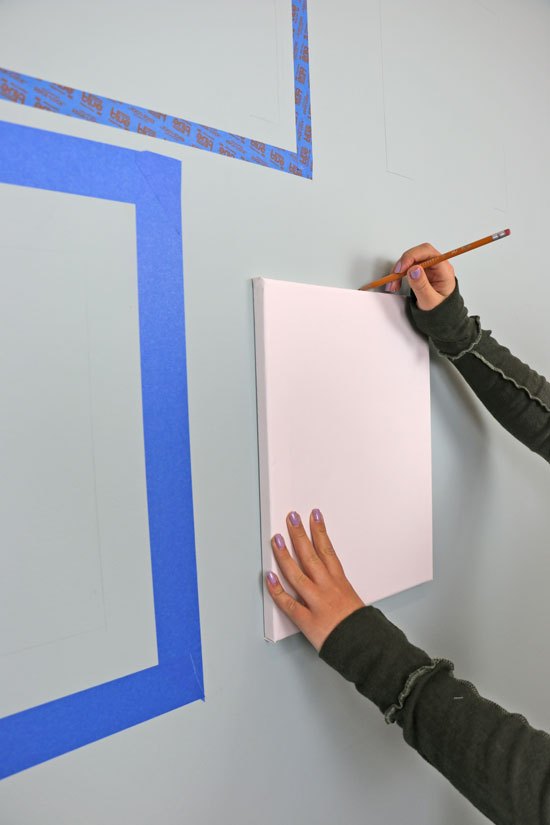
Step 3: Take more blue painters tape and apply it directly around the the first layer of tape! You are basically creating an outside boarder for it! Be sure they are side by side because it is important for everything to remain straight and even.
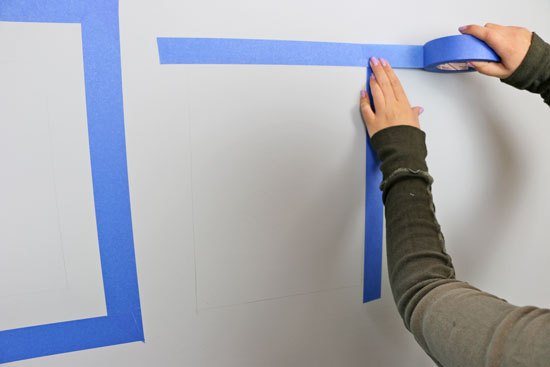
Step 4: Once the outside border is created, you can go ahead and remove the inside tape. Now you should be seeing the pencil marks from the outlined canvas with a little bit of space in between and then the outside boarder. The reason for the first tape placement is so we can paint a base for both the faux canvas and the frames.
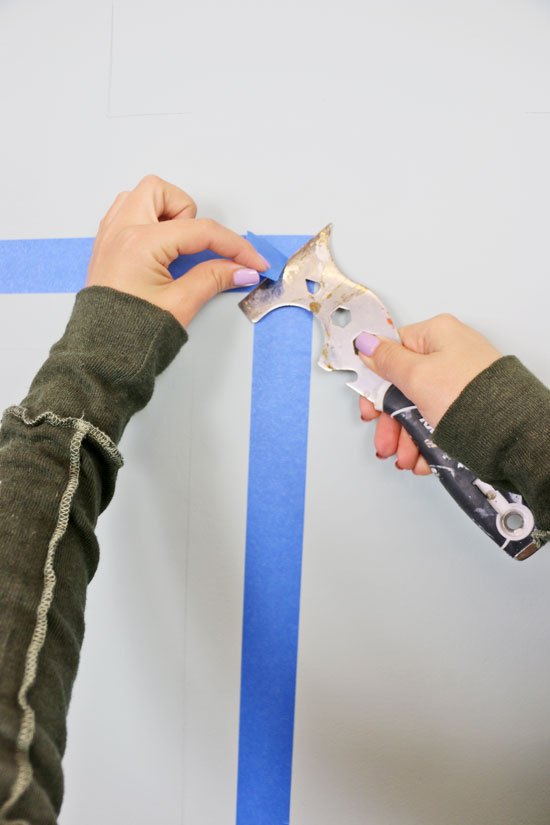
Step 5: Miter corner with a putty knife. Tear away the excess tape so that you have visibly straight and crisp corners.
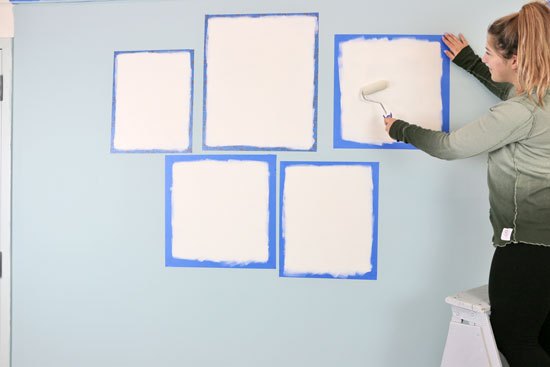
Step 6: Begin painting inside the blue painter’s tape. This will be the color for the basecoat of your stencil. Erika painted her faux canvas Navajo White to match the look of an actual canvas. Do not paint outside of the blue painter’s tape!
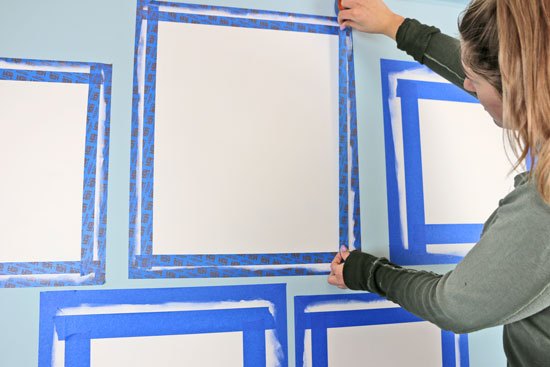
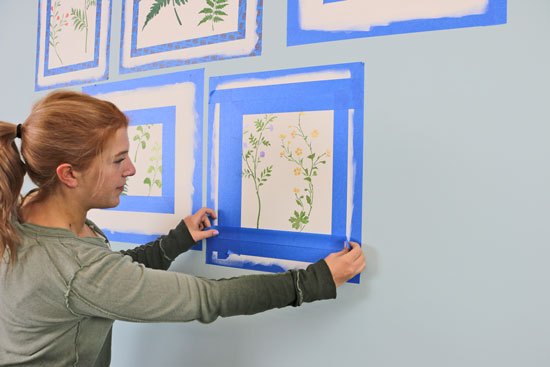
Step 7: Mask off inside edge of frame. Align the inner pieces of tape directly against the outside tape border. The purpose of this is when you begin stenciling, you do not accidentally stencil over the tape that is covered in paint!!

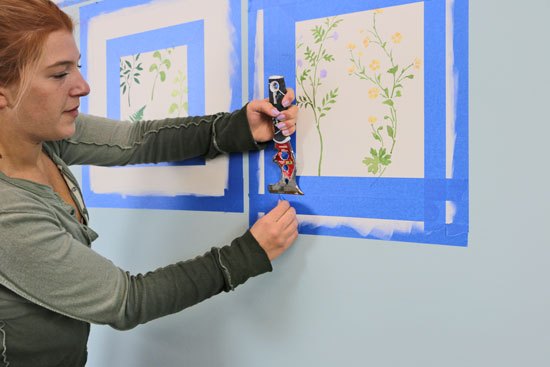
Step 8: You can now using your desired wall stencils! Erika chose to use a variety of our from Cutting Edge Stencils. Botanical stencils are a huge trend right now and the best part is you can mix and match the stencils however you want! We love adding a touch of the outdoors into the home in a fun and gorgeous way!
Step 9: After the stencil dries use tape to layout frame width. Use the blue painters tape and place each piece around the inside border!
Step 10: Again, miter corner with a putty knife. As you do that and shape the inside border, you can begin to remove the other tape next to it! The reason for the placement of this inner border is so that you can create outlines for your frames.
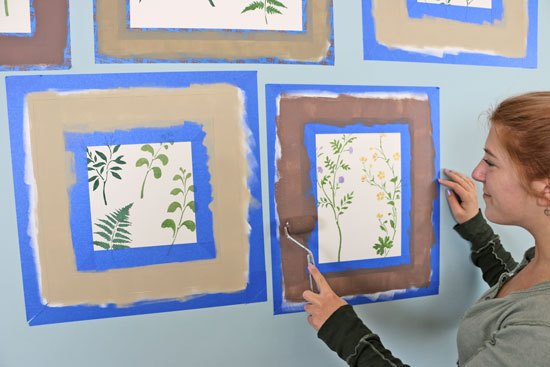
Step 11: You can finally paint your frames! Erika used several browns to mimic different wooden frames! You can have fun with this and play around with the colors to match the rest of the decor in your room. Be sure to paint inside the lines!
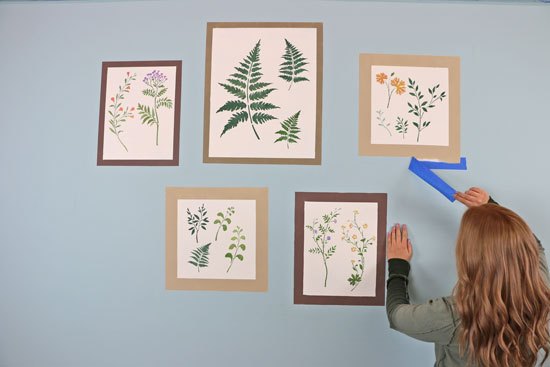
Step 12: Gently remove the remaining tape from the borders! If you aligned your tape properly, you will have clean lines for the frames without any bleeding! How gorgeous does this look?


Comments
Join the conversation
-
Beautiful, I love it!
-
Fantastic!


Frequently asked questions
Have a question about this project?
Beautiful!
Did you measure fro ceiling to ale sure the frames come out even?? I know I would have to!?
What happens when you get tired of the stenciled prints or want to change things up?? Seems to me it would be a lot easier (and faster!) to hang Botanical prints on the wall, that you could replace later on with different prints (hung in the same frames in the same spots) ???
Sorry to be so thick, but why do you have to miter the corners with the tape?