


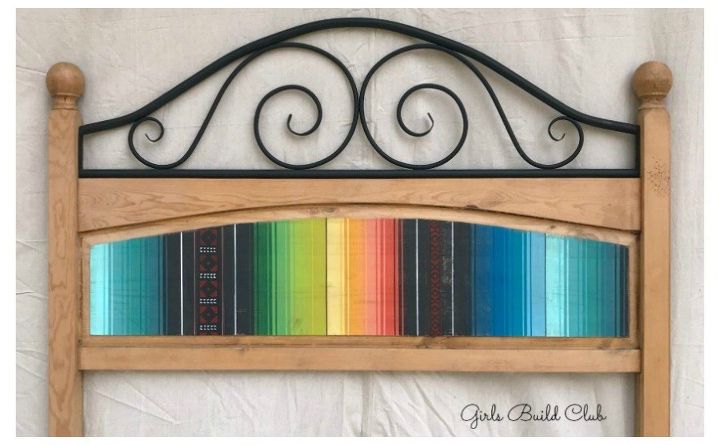
How to Paint the Mexican Serape Painted Headboard
5 Materials
$25
8 Hours
Easy
It looks difficult, but I'm going to show you step by step how to paint this colorful headboard. You'll end up with a beautiful hand-painted piece of furniture, that people won't believe you did yourself! The painted design is inspired by Mexican woven blankets. If you head over to the full blog post at GirlsBuildClub.com you'll get extra tips and information - like the exact list of paint colors I used.
The hardest part about this project is taping straight lines! I'm pretty good at making it all straight and even by eye, but if you are concerned, then you can always measure it out. You probably don't need to measure every single tape line. But you could measure out some guidelines every so often to make sure you stay on track keeping those lines perfectly straight!

This is a serape blanket, my inspiration for the painted design on the headboard. Isn't it pretty? I love all the colors.
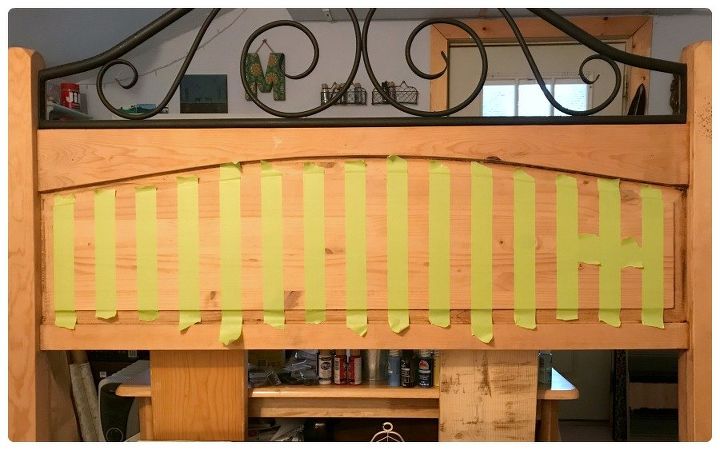
I started by taping stripes onto the headboard. I used little bits of tape as spacers so the bare wood stripes are the same width as the tape itself. Then I painted in the bare spots of wood.
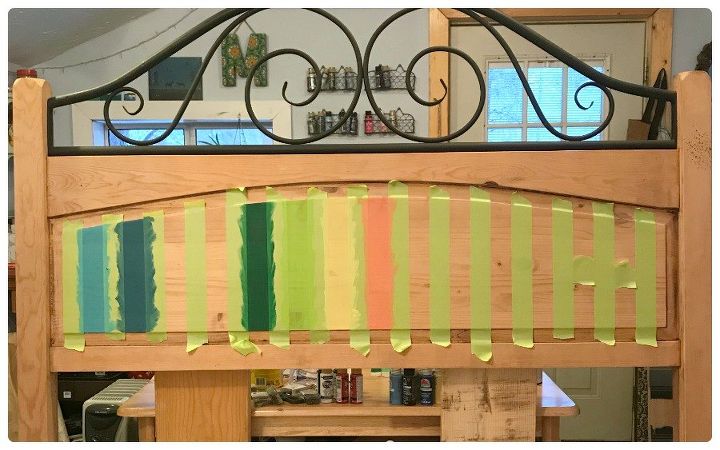
After filling in all the bare spots with paint, I removed the tape to see colorful stripes...
I left a few areas totally blank because they will be large areas of black paint. Then I taped over the colored stripes and painted the new bare spots. I always try to remove the tape before it's dry. This will help keep the tape from taking paint with it when you rip it off.
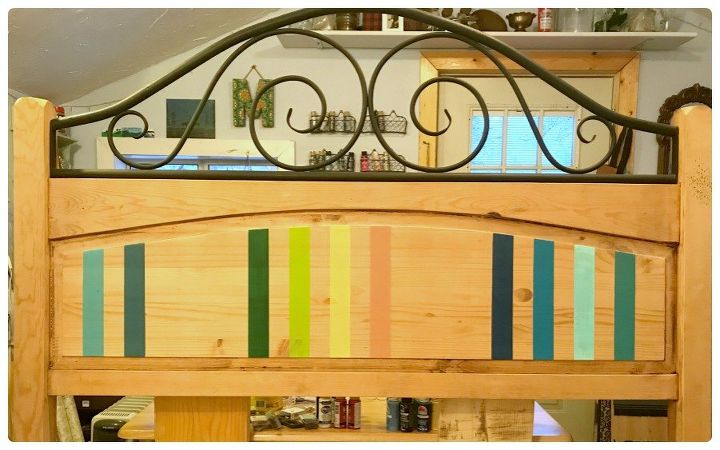
After the second round of taping and painting you'll get this...
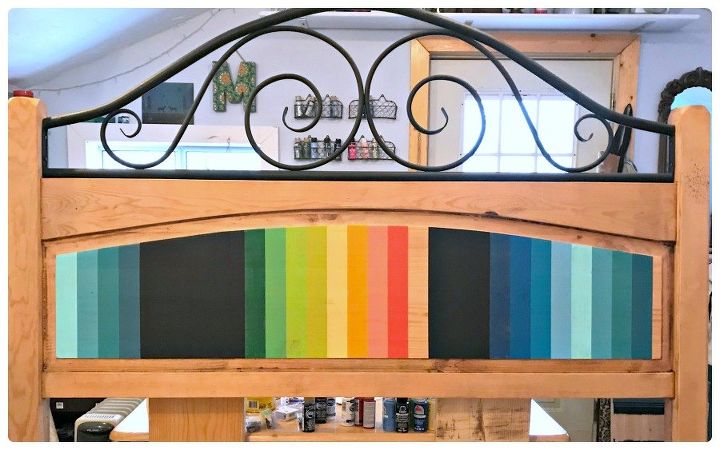
Starting to look pretty! Oops, there's a little bare spot that still needs black paint. These are what I call the base stripes. Once you have the base stripes painted, then you'll add some tiny, high contrast stripes to help define the sections.
Tape off the tiny stripes. In between the tape lines I painted some bright white paint and removed the tape.
The black areas are now defined a little better with those tiny white stripes and are starting to draw your eye in! These black areas, between the white stripes is where I put some stenciled designs later on. For now I continued working on the base stripes...
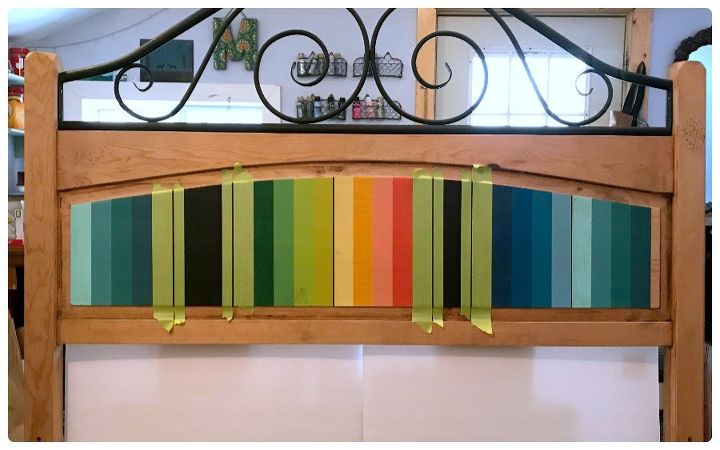
The next step is to add small stripes of paint over the base stripes. Once again, I use the tape as my guideline, aligning it to the edge of the base stripe. Then I add a border piece of tape and paint between the lines! Does this make sense? If you need more detailed instructions, they are on the blog post at GirlsBuildClub.com
I kept taping and painting small stripes until I had one small stripe done for every base color. Now you'll go back and add a second small stripe on the other side of the base stripe.
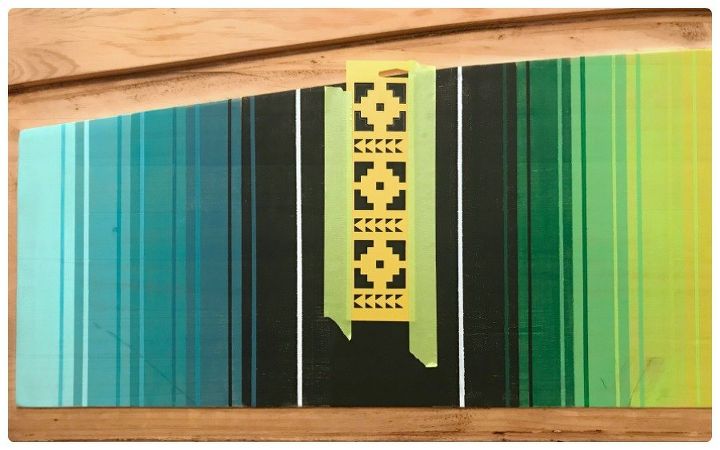
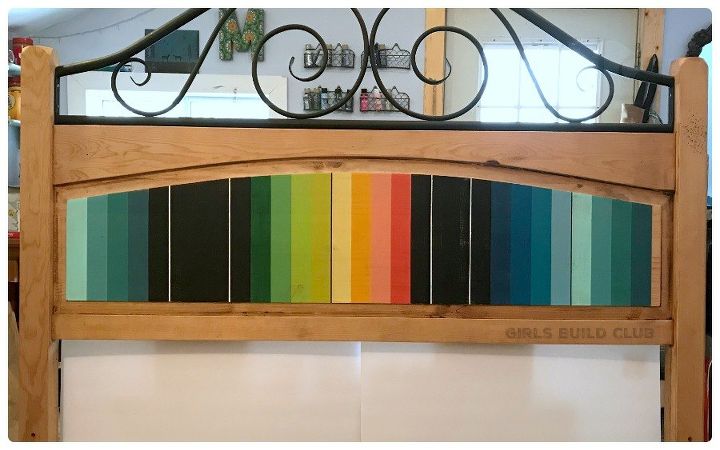
When I finished all the stripes I added some stencil elements in the black areas. These become a place for your eye to rest, a focal point. If you don't add the focal point you can sit there staring at the stripes, back and forth, back and forth, forever! It's quite hypnotic! :)
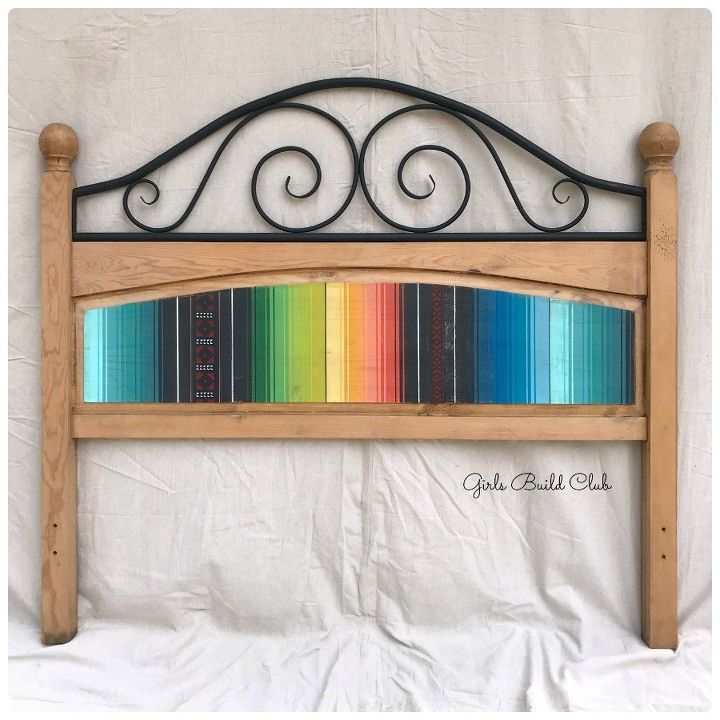
I distressed the stripes lightly with some 120 grit sandpaper, and the added a clear coat to protect it and keep the paint stable. Some clear coats aren't recommended to put over paint. But polyurethane is usually safe for paint. Just remember that oil-based paint has a golden hue and will make any white paint like a tad bit yellow-ish. You can use water-based poly if this is a concern.
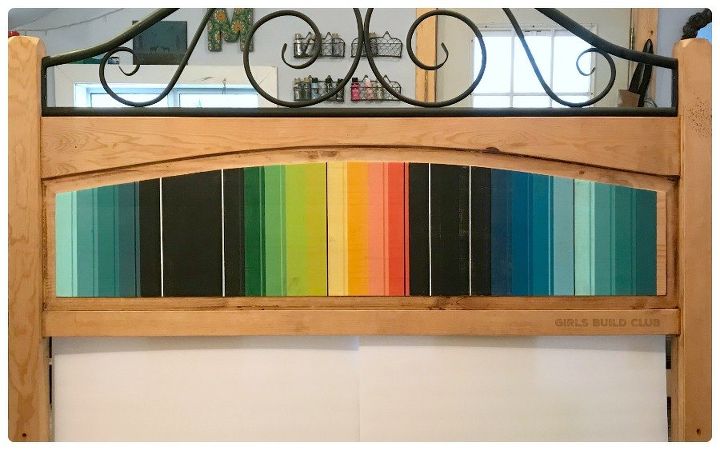
Remember to PIN THIS for later! For more photos, check out the full tutorial on the blog. I'd love to see photos of your version of this project. Thanks for looking!
Resources for this project:
See all materials


Any price and availability information displayed on [relevant Amazon Site(s), as applicable] at the time of purchase will apply to the purchase of this product.
Hometalk may collect a small share of sales from the links on this page.More info

Want more details about this and other DIY projects? Check out my blog post!
Comments
Join the conversation
4 of 25 comments
-
You did a great well thought about job. Wonderful and very patience job.
-
Beautiful and thank you for the detailed instructions.


Frequently asked questions
Have a question about this project?
Really, really pretty. Does the rest of your bedroom match the headboard? I can imagine how pretty it is.
where did you go to find southwest stencils?
About what doed it cost