


How to Make Candlestick Holders From Old Spindles
5 Materials
$15
2 Hours
Easy
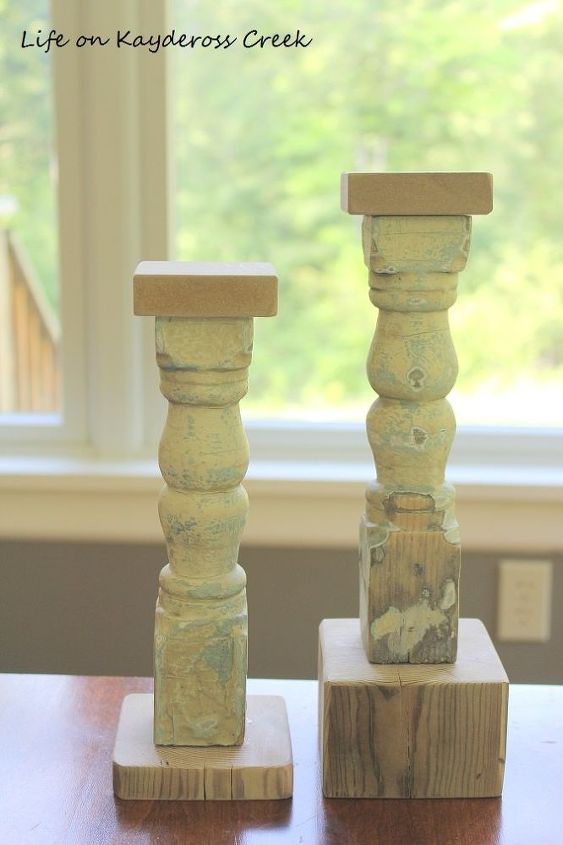
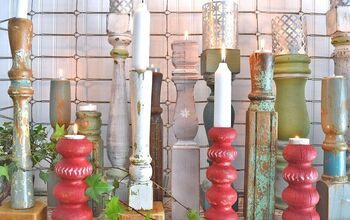
I picked up these old spindles at a flea market for next to nothing. I really loved the shape and immediately thought candlestick holders. They were pretty dirty and had some holes.
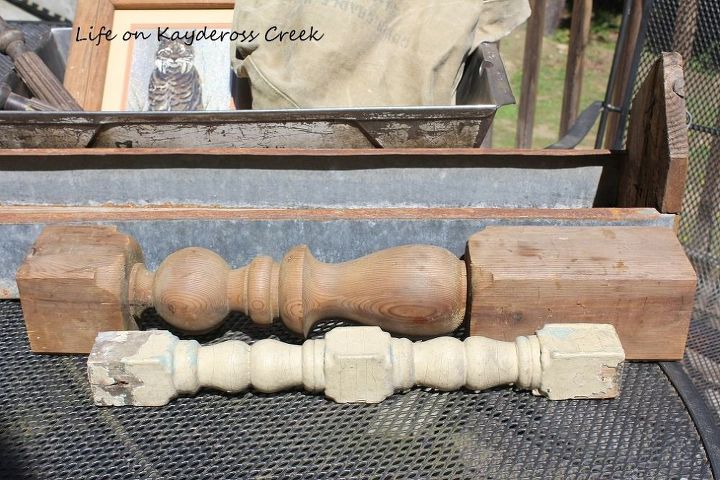
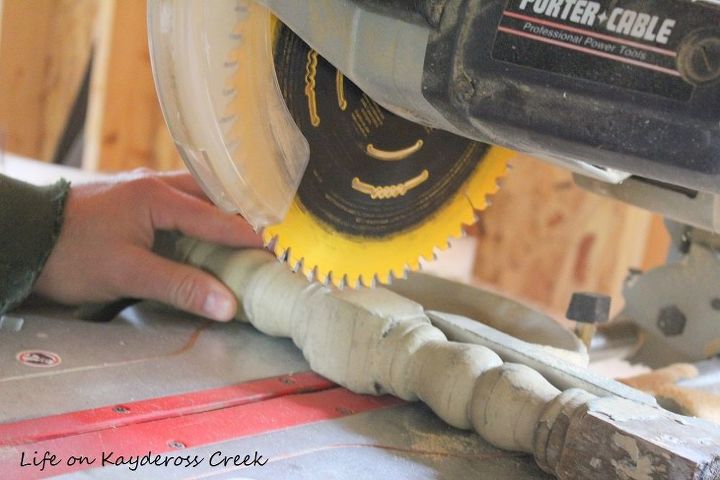
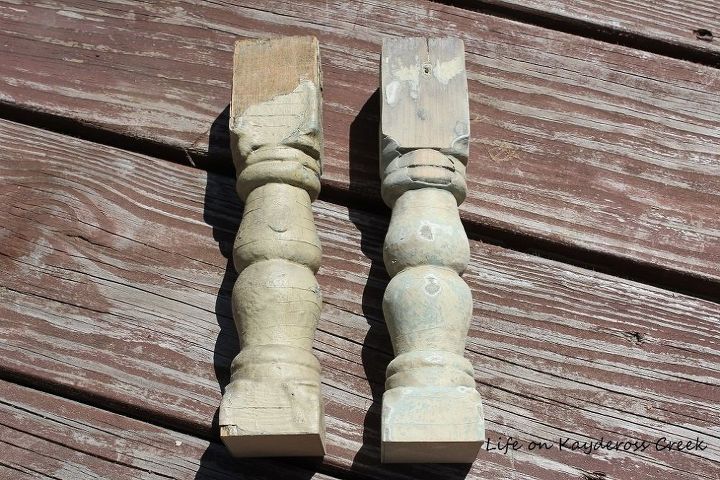
We'll start with the big one because it really didn’t need much work except for a good cleaning. It also already has a great base and is nice and solid. The one end was cracked a little bit, uneven and it was a bit tall so we took a little off each end using the chop saw. We’ll hang on to those scraps because they’ll come in handy later. Here it is after I wiped it down with soap and water and gave it a good sanding.
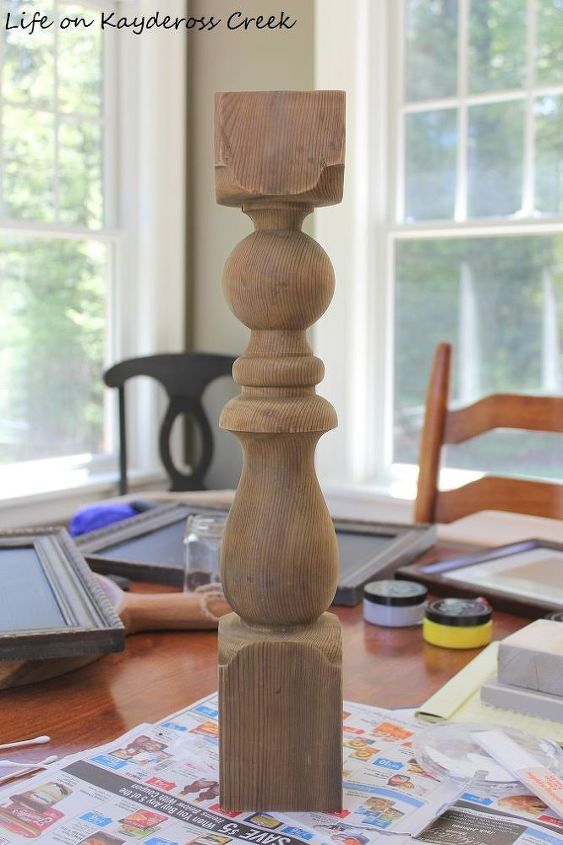
Once we had the right size, it was time to paint. I used homemade chalk paint with plaster of Paris and went with my go to white because it goes in any room and for any season. I didn’t put the paint on really thick and even used some 120 and 220 sandpaper to distress it a little bit and get a worn look. I love it!!
Once we had the right size, it was time to paint. I used homemade chalk paint with plaster of Paris and went with my go to white because it goes in any room and for any season. I didn’t put the paint on really thick and even used some 120 and 220 sandpaper to distress it a little bit and get a worn look. I love it!!
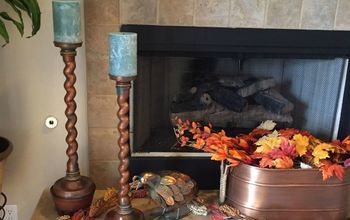
I’m sure I wouldn’t be able to find a candlestick holder this size and with this much detail for just $10. It was so worth the little time and paint it took to re-imagine this old spindle.
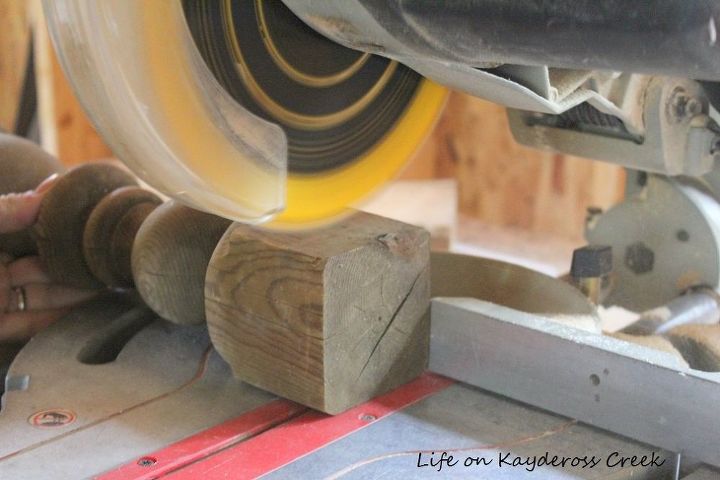
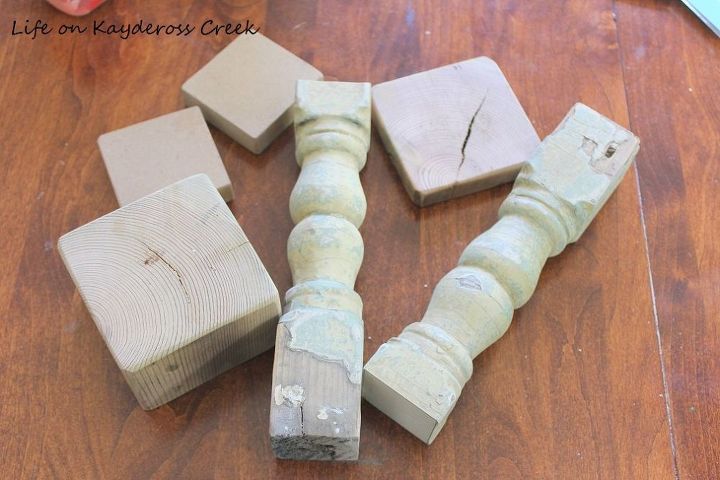
Easy peasy. The smaller one was a bit more work. This one needed some extra help. It was too narrow to stand on it’s own and definitely too long. We headed for the chop saw again and cut it in half.
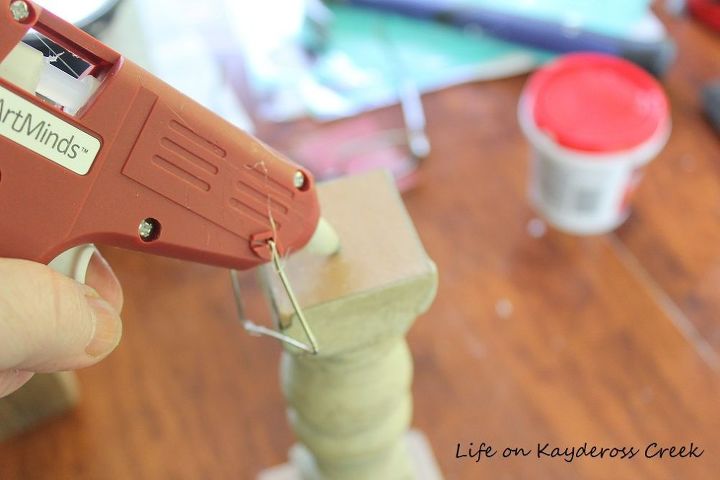
This is where those scrap pieces come in that we cut off of the larger spindle. I wanted to add some extra layers and definitely a base to each of them. I used the leftover pieces we cut off of the big one and some other pieces of MDF we had laying around.
I used the glue gun to attach the pieces together.
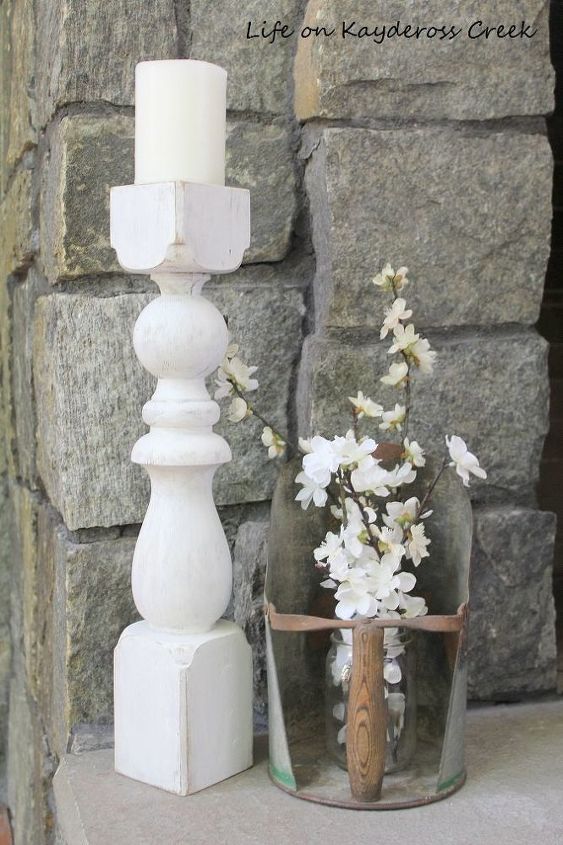
I eventually decided to add another layer at the top so it would be large enough to hold a normal candle. I also filled in some of the holes, cracks and joints with spackle before painting with the chalk paint. I actually layered the paint on these and started with a coat of blue and then green and finally white. I hit them with the sandpaper to bring out the layers and age them a bit. Here’s how they came out…
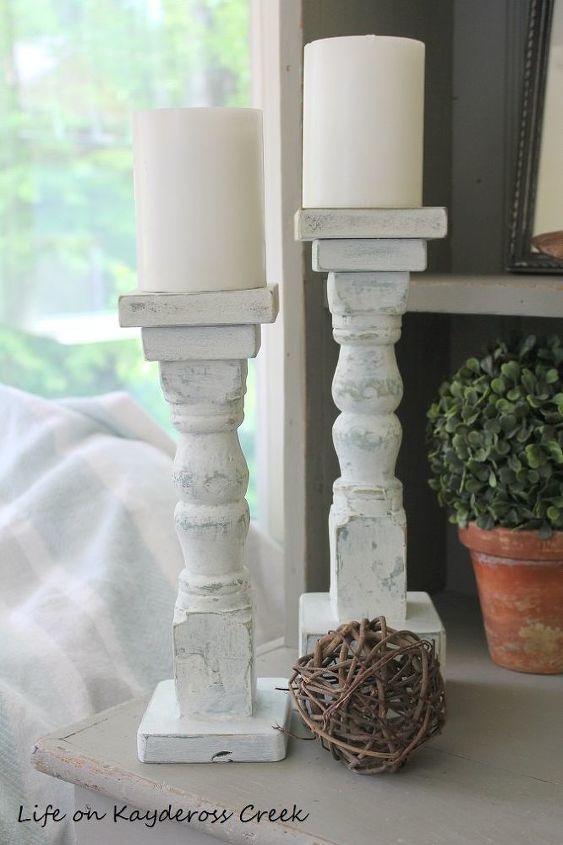
Imperfect, layered, chalky goodness! I think these DIY candlestick holders are super cute and so unique. You can add as many layers and shapes as you want and paint them whatever color you want to match your decor. What a cool way to add some personality to your space that is budget friendly and takes no time at all.
Resources for this project:
See all materials


Any price and availability information displayed on [relevant Amazon Site(s), as applicable] at the time of purchase will apply to the purchase of this product.
Hometalk may collect a small share of sales from the links on this page.More info

Want more details about this and other DIY projects? Check out my blog post!
Comments
Join the conversation
2 of 20 comments
-
Lovely
-
You should put a short nail on the top so you can stick the candle on it to avoid it from tipping over.


Frequently asked questions
Have a question about this project?
Did you fill the cracks? I didn't see anything about that.
you mentioned home made chalk paint and plaster of Paris. Did that give it a texture or was it a smooth paint cover? Im a rookie at this stuff so Im a little confused.
Love love the idea and would like to try it. Does the candle just sit flat on top or is there a circle cut out for the candle to sit in?