


DIY Hammock Chair From An Old Swing Frame

3 Materials
$50
4 Hours
Medium
A while back Amy bought a hammock chair that was on sale at our local big box hardware store. We have been debating for some time how we wanted to hang it. After looking at our old rundown fixer-upper swing, we decided to dismantle the frame, trash the wood seat and shorten it up to make the frame for the hammock chair.
{
"id": "4915271",
"alt": "",
"title": "",
"video_link": "https://www.youtube.com/embed/5Ocm9h5nUi0",
"youtube_video_id": "5Ocm9h5nUi0"
}
{
"width": 634,
"height": 357,
"showRelated": true
}
Here is a video that summarizes how we did it. Check it out and then scroll down for the details and some images.
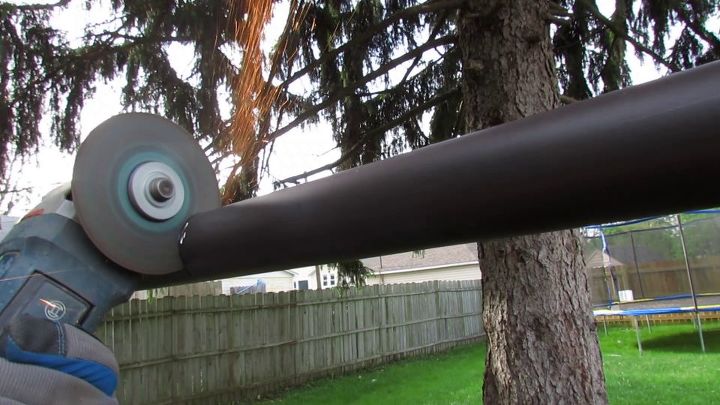
he swing frame was easy to take apart. We started by cutting out a section in the middle between 2.5 and 3 feet long. This was the amount that we needed to reduce it for it to work better for a tighter hammock chair frame. We held onto this piece to use as the coupler later on when bringing the saw back together.
We also removed the cross bars. This was as simple as removing the nuts and bolts that held them to the frame.
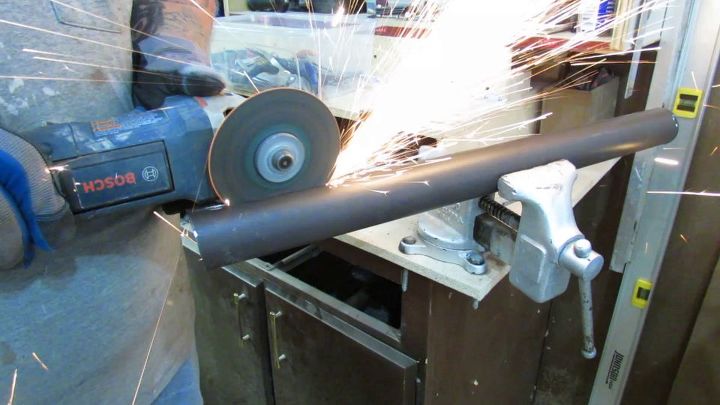
To create the new frame, we cut the piece of pipe we removed earlier (length-wise) to create two separate pieces. Again, these will be used in a bit.
We used the grinder to removed the painted coating that was on the pipes. We only removed it where we knew we would be placing future welds. This included the edges of the two lengths we cut in half and all of the places on the existing frame that those welds would be placed on.
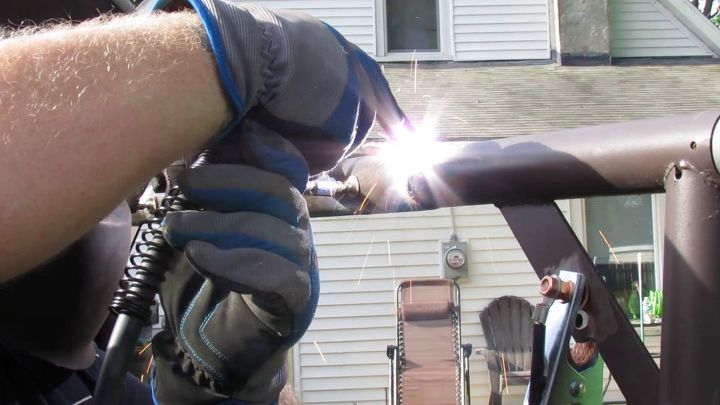
After everything was prepped for welding and cleaned up, the two half pieces were clamped to each side of the frame that were placed back together. We tacked them into place, made sure everything was straight and made sense, then laid down the longer structural welds. We are using a simple 120 v mig welder, running .30 flux-core wire, with no gas.
After all of the welds were in place, we ground them flat to beautify the top pipe of the frame. Then we coated them with an enamel primer and painted the whole thing hammered red.
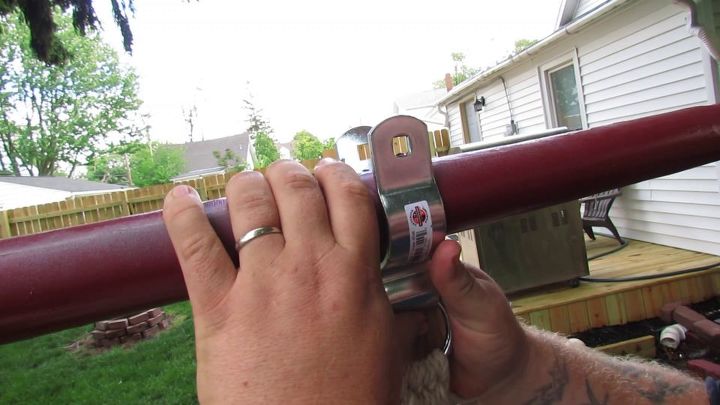
To hang the chair we used a chain link fence gate hinged bracket. This cost about $7 and was the cheapest alternative and one that made the most sense. We simply slid the bracket over the pipe (with the ring of the swing already inserted), clamped it down to bring it back together and then inserted the bold and tightened down the nut.
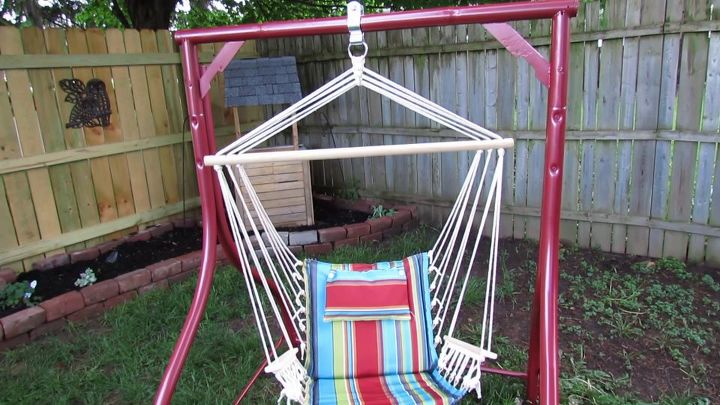
This was a pretty simple project as far as welding projects go. It was basically just shortening an already existing structure. It was a quick solution to a minor problem we were having. It was also much better than sinking a 4x4 post into the ground. Now we can move it wherever we like.


Frequently asked questions
Have a question about this project?