


How to Install a Bathroom Faucet
4 Materials
$150
3 Hours
Medium
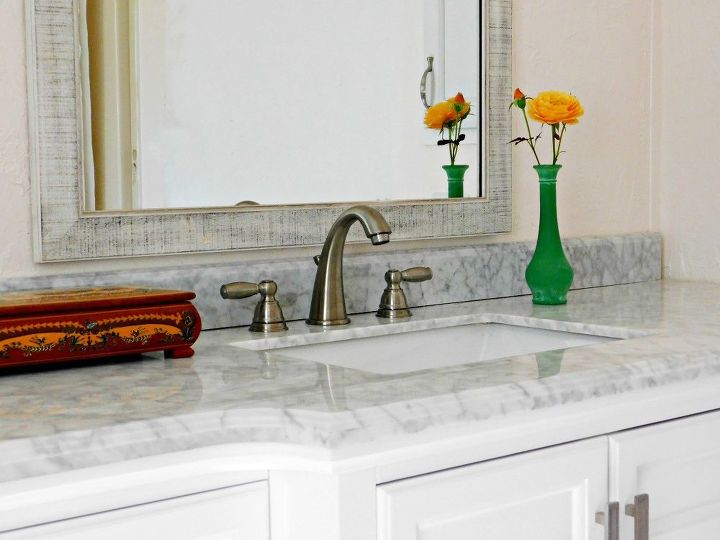
Learning to install a bathroom faucet is an easy project that will make a huge difference in your bathroom. Not only will it update the look of your vanity and sink but improvements like these increase the resale value of your home. This tutorial will teach you how to remove an old sink faucet and in install a new one. Replacing a faucet can be done in a few hours with simple tools.
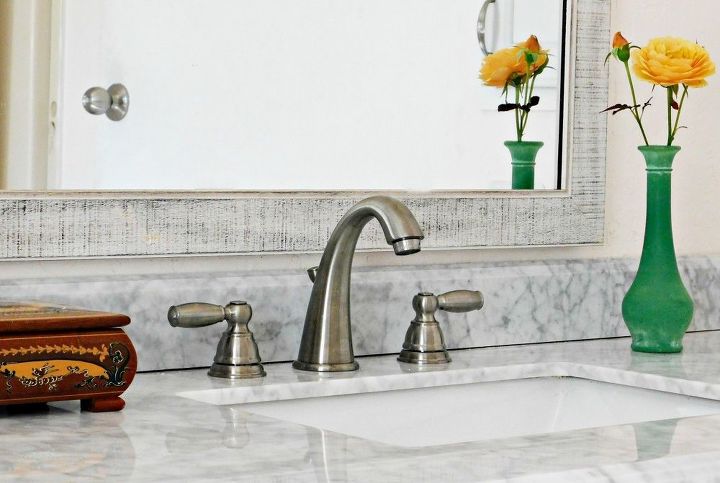
Step one: identify your current faucet
Before you buy a new faucet to replace the old one you need to make sure it will fit your sink. Your sink will have either one or three holes for the faucet. The holes will either be center set or widespread. The holes may be in the sink or in the countertop. Make sure you check and measure your sink before buying your new faucet.
In my case I have a three hole, widespread installation that will be going into the counter top.
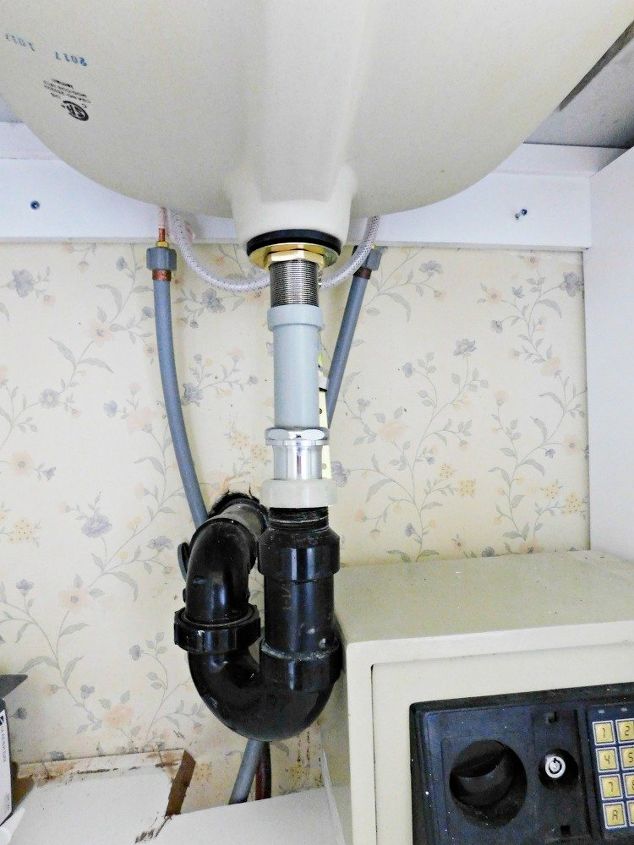
Start by shutting off the wall valves and turning on the faucet to drain out residual water in the pipes. You can also turn off the main water supply to the house if for some reason the valves won’t turn (but obviously none of the other water sources will work until you turn it back on)
Under the sink, there are typically nuts and washers securing the faucet. Remove any hardware in this area including the clamp bolt from the drain rod extension. Lift the faucet out from the top.
Use an adjustable wrench to loosen and remove the flexible extension from the faucet. Drain the remaining water into the bucket. Next, remove the flexible line from the shutoff valve.
Unscrew the mounting nut that is holding the flange and tailpiece onto the sink basin as far down as it will go.
Again, this may take an adjustable wrench
Disconnect the drain flange from the tailpiece.
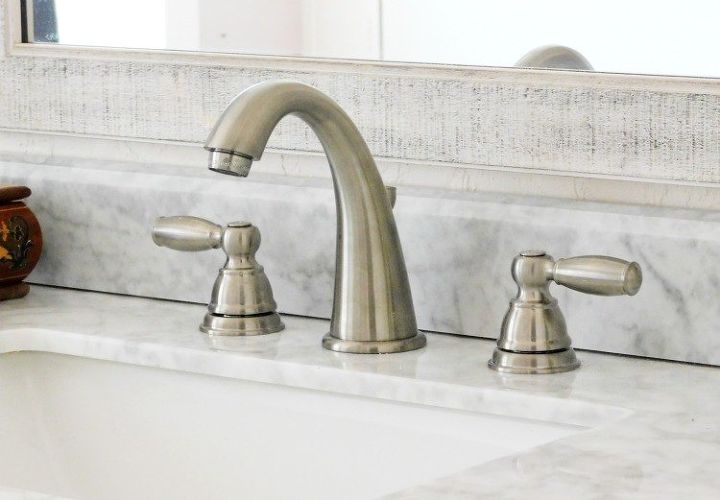
Depending on the type of faucet you purchased and whether it has three holes and the other factors we determined at the beginning the steps may vary slightly but in general installation is going to be the same.
Were are pretty much doing the de-installation, but in reverse.
Follow the manufacturer’s directions for specific installation instructions.
Unscrew the nuts and washers off the bottom of the spout and hot and cold water handles. FYI, hot goes on the left and cold goes on the right.
Place the spout and handles through the mounting holes and secure from underneath with the washers and nuts.
Align the tabs and quick connects and snap them into place on the receiving tube.
Apply just a little bit of silicone under the flange. Position the drain body on the bottom of the sink — making sure the pivot hole is facing the back — and screw the flange on from the top side.
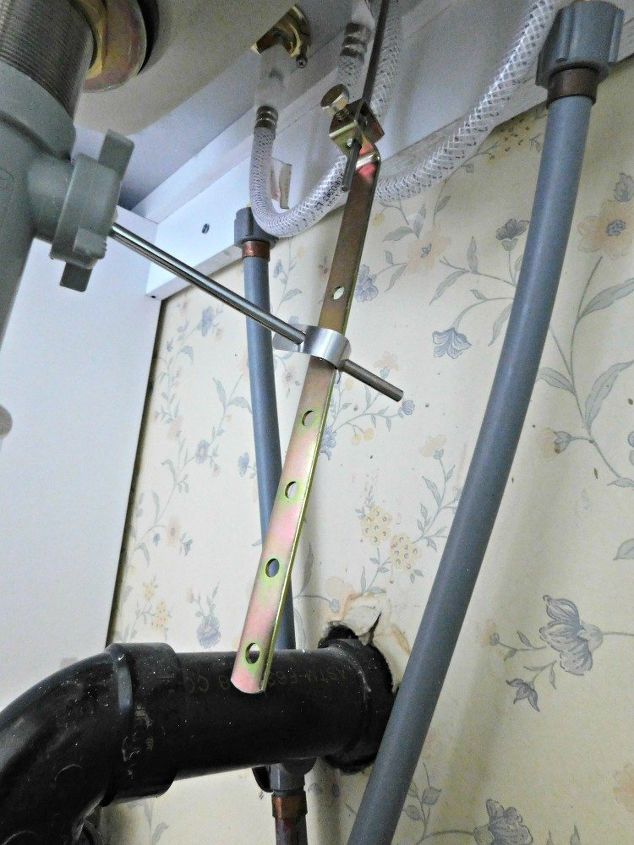
Underneath, tighten the nut and gasket. On the top, use mineral spirits to clean up any excess silicone. Install the drain rod next. Unscrew the pivot nut on the drain body, insert the horizontal rod through the hole in the stopper, and replace the nut. Push the horizontal rod down and secure the lift rod to the strap with the screw. Test the lift rod.
Reconnect the supply lines to the faucet.
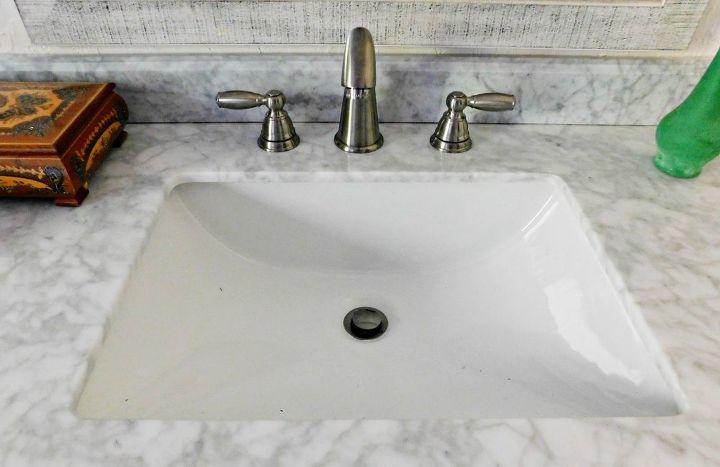
Turn the water on
Turn the water valve back on and turn the water on. Test the faucet.
Check for leaks. If something is leaking you probably just need to tighten it up.
{
"id": "4915825",
"alt": "",
"title": "",
"video_link": "https://www.youtube.com/embed/IWYqHVU_P6Q",
"youtube_video_id": "IWYqHVU_P6Q"
}
{
"width": 634,
"height": 357,
"showRelated": true
}

Want more details about this and other DIY projects? Check out my blog post!


Frequently asked questions
Have a question about this project?