


Old School Charm

Yard sale season happens almost year round here in NOLA. This works great for me, as I can always find something to "project" on. Last week, my son spotted this old desk at a neighborhood sale and he fell in love (so did I). It was only $15, and it wasn't the typical old, broken toy that he would usually covet from these sales...I can do that!

Before: It was dirty, but it had very little rust. It just needed a coat of rust inhibiting primer and some TLC. Check and check!
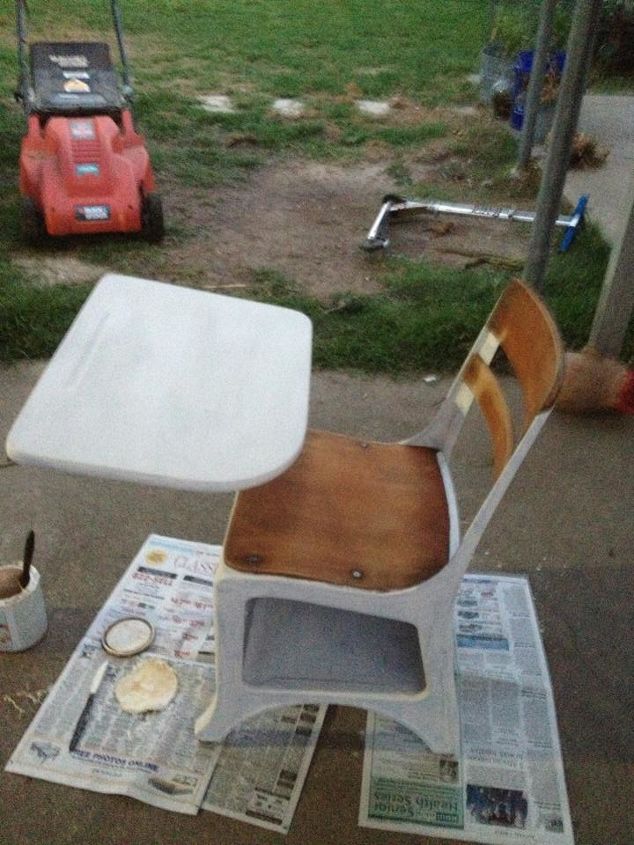
Cleaned up and primed. The top was in the worst shape, and I tried to salvage it, but I couldn't sand away the 60+ years of gouges and smiley faces carved into the veneer. My son really wanted chalkboard paint so, chalkboard paint for the win!
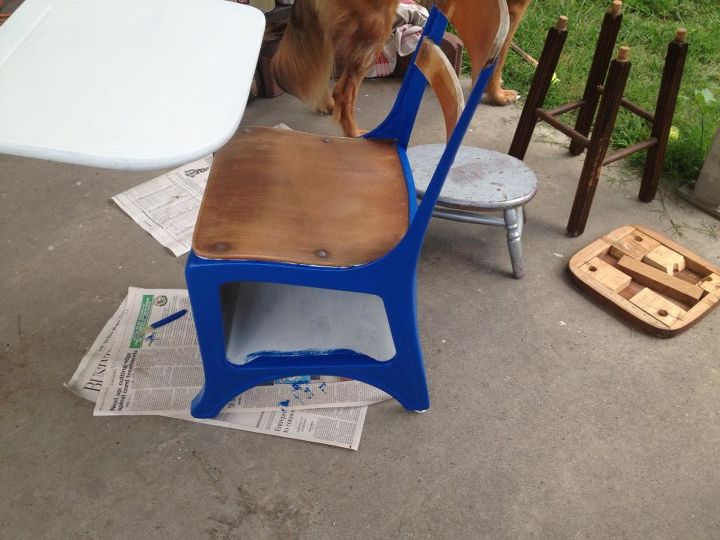
Base coat of paint: I already had this pretty blue paint, neatly stored with my "really small" collection of paints...I confess I hoard paint. In my defense, who doesn't love the mis-tint shelf at the paint store? I see a pretty color and I can't leave it on the shelf with all the ugly grays that should have been purple.
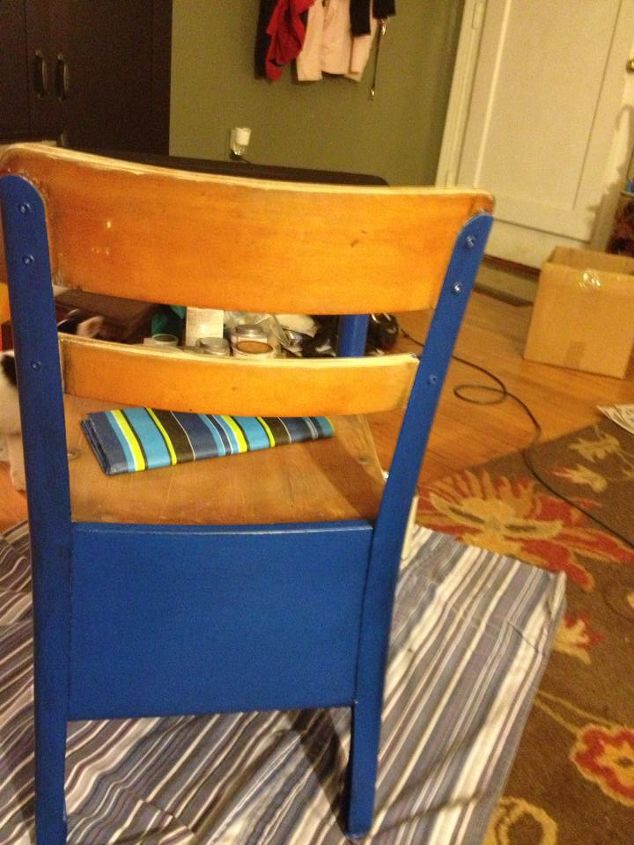
Special treatment.I used a dark tinted glaze on top of the blue. This gave it depth and made it look a little antiqued. Glazing is one of my favorite techniques to create deep looking finishes. Even better; you can by clear glaze and tint it yourself, another use for the hoarded paint  and it saves you money!
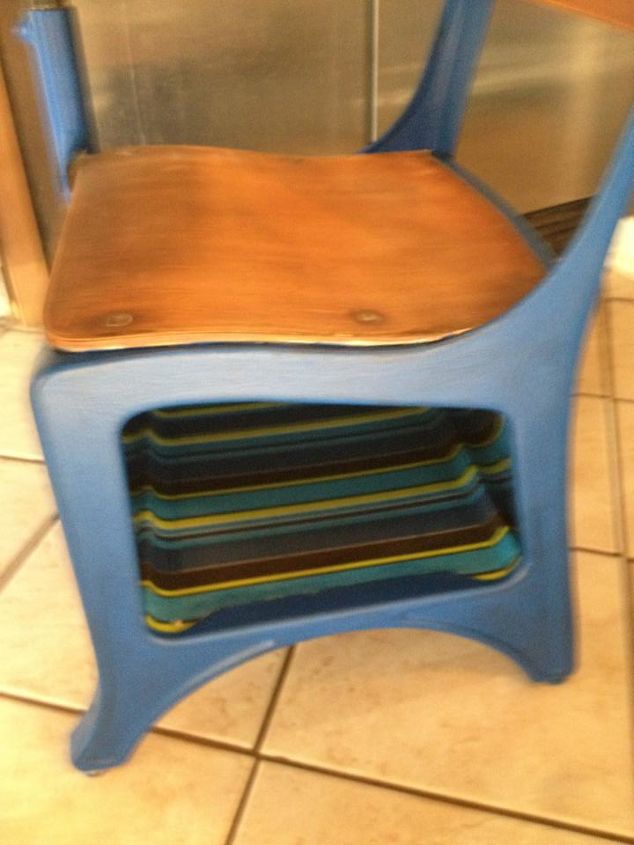
Highlighting functionality. I painstakingly lined the cubby with this great tissue paper. Mod-podge and a lot of patience, topped with some poly to seal it good. The hardest part of this was working in that small space. Sometimes being detail oriented is not my biggest asset. I'm pretty sure it was not necessay to cover every inch of the inside (including the top). Some of spots aren't even visible on the finished product.
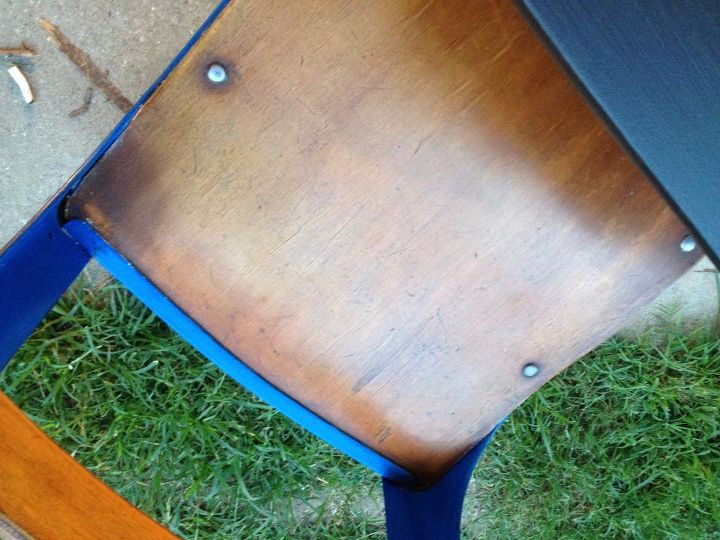
Preserving the old wood. I'm a fan of natural wood, so I did very little to the seat boards. I lightly sanded them, applied a light coat stain, and sealed it with wax. I love the "wear and tear" look that the seat already had. Over 60 years of childrens' butts made for a beautiful naturally distressed finish. I also love the buttery finish that waxing produces.
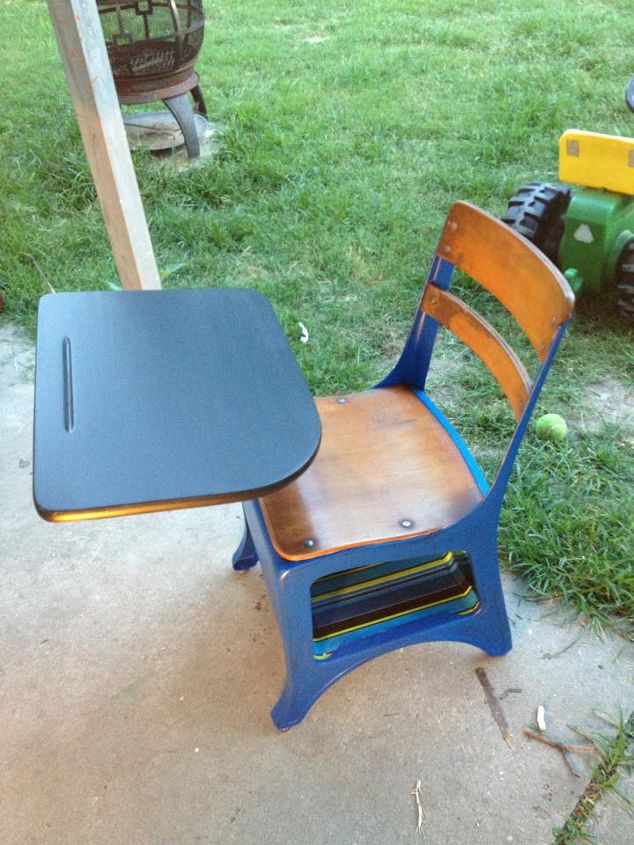
The finished product. The desk now sits in the corner of my son's room and he uses it to draw and play "school". This was such a fun and inspiring project, I've decided to find another to redux for my neice. In the meantime, I have an excuse to visit my local salvage shops.
Comments
Join the conversation
-
Is the top of the desk chalkboard paint? Looks like a different color than the chair.
-
I have two and think I'll do them in contrasting colors. If they turn out anywhere close to how good yours did, I'll send you a pic. The great tissue paper challenge!


Frequently asked questions
Have a question about this project?