


Give Your Kitchen Island A Stainless Steel Look

We needed a island in our kitchen and I wanted it to have a stainless steel top to match the rest of our appliances but stainless steel is not cheap. I had seen a post here, on Hometalk, that used EZ Faux Decor stainless steel film on a coffee table so I thought I'd give it a try for my kitchen island.
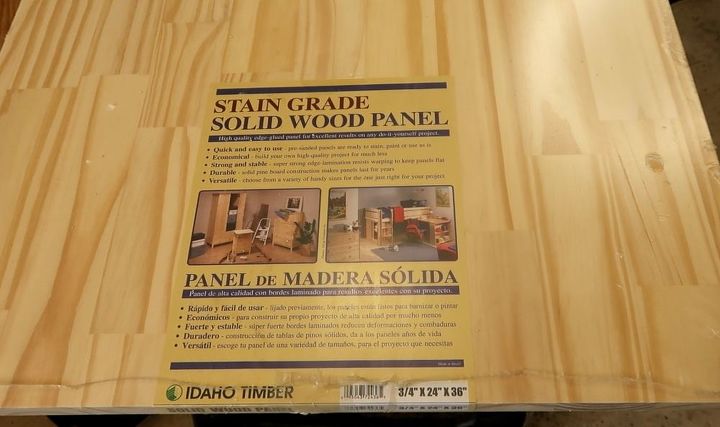
I purchased the EZ stainless steel in 26" x 36". I then went to Lowe's and bought this wood panel for the top of the island. I also purchased:
5 - 1"x 3" x 8' pine boards
2 - 1"x 3" x 6' pine boards
4 - 1"x 4"x 8' pine boards
1 - 1"x 4"x 6' pine board
4 - casters
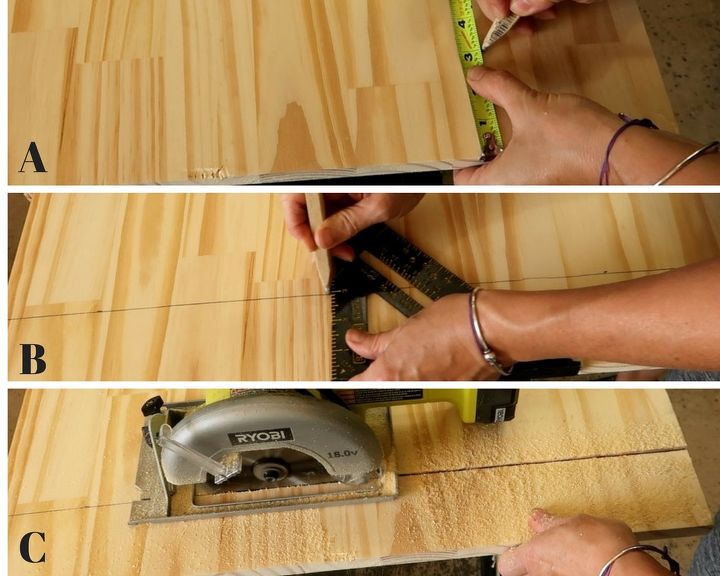
The panel that I purchased was a little longer than I wanted so I measured, marked and cut 3" off.
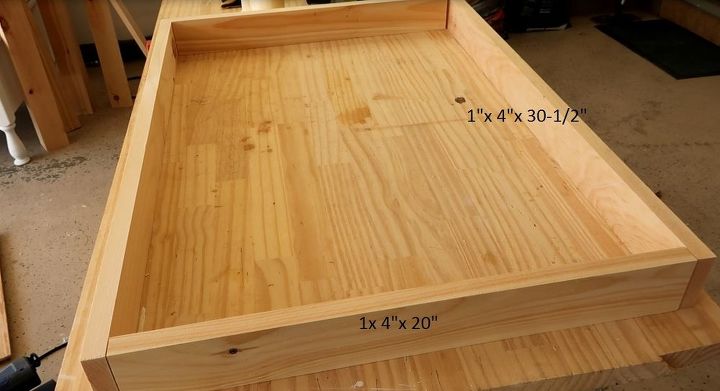
To make two shelf assemblies, I cut:
4 - 1"x 4", 20" long
4 - 1"x 4", 30.5" long
I lined two of the 20" pieces on the end and two 30.5" pieces on the sides. I attached the longer boards to the shorter boards using wood glue and 1.25" brad nails.
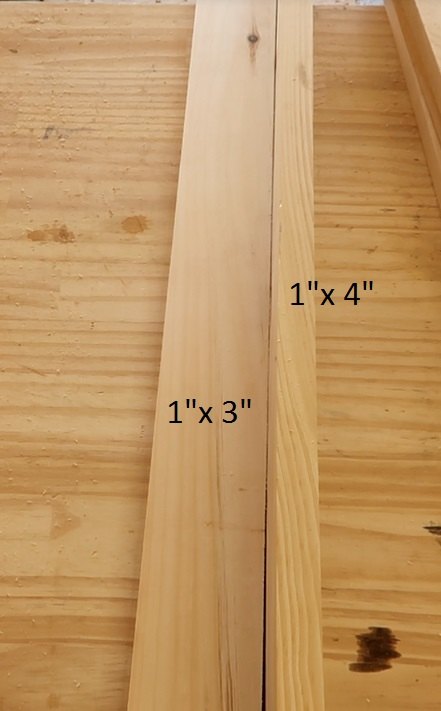
To make the legs, I cut:
4 - 1"x 3" to a length of 32.75"
4 - 1"x 4" to a length of 32.75"
I attached each 1"x 4" to each 1"x 3" using wood glue and 1.25" brad nails. I made four identical legs.
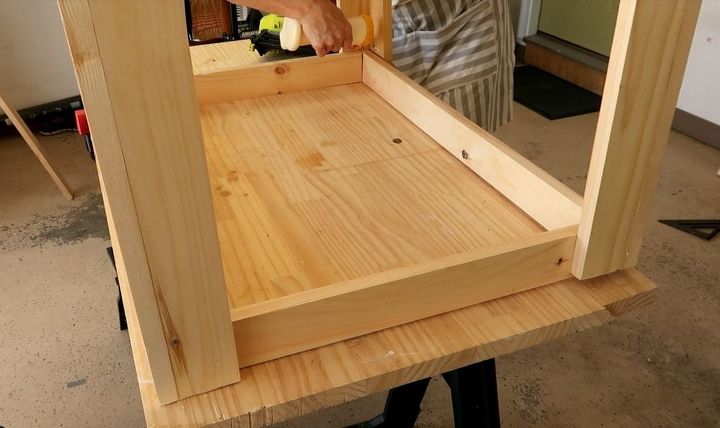
With one shelf assembly on my work surface, I placed each leg on the outside of the shelf assembly with the 1"x 4" facing the long side. I made sure the legs were flush with the shelf then used wood glue and brads to attach each leg.

I laid the second shelf onto my work surface and lifted the first shelf with the legs attached onto the second shelf.
I placed the legs on the outside of the second shelf, then attached them with wood glue and brads.
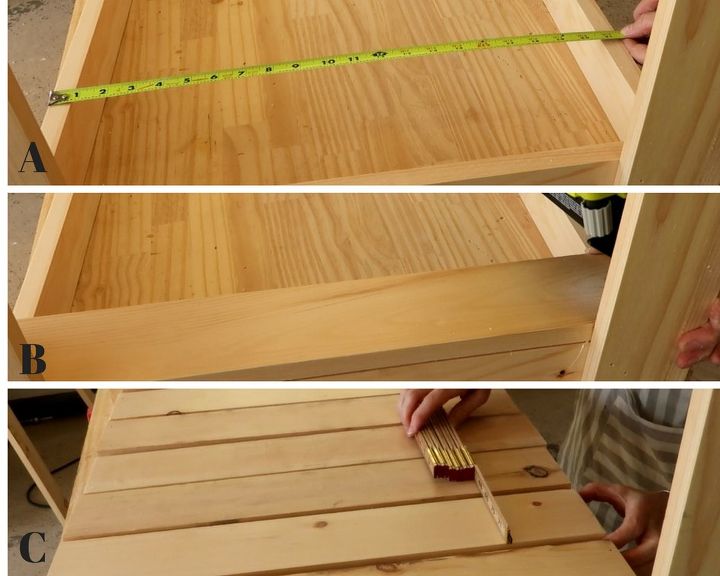
For the lower shelf,
A - I measure the width of the shelf and cut:
9 - 1"x 4" boards to a length of 21.5"
B - I used wood glue and brads to attach the boards to the lower shelf
C - I measured between each board to make sure the distance was the same before nailing the boards in place.

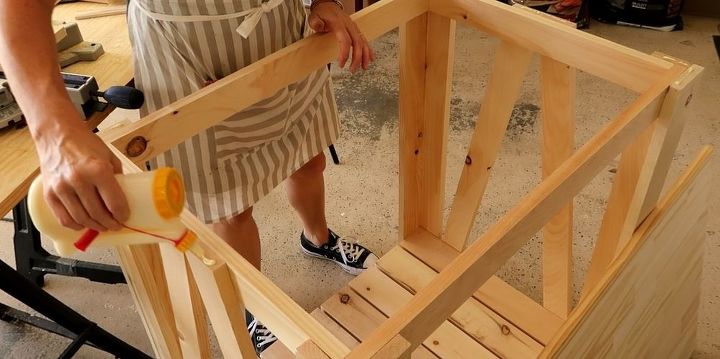
For each side, I made a "V".
I used 1"x 3" boards, marking them and cutting to length. I used wood glue and brads to attach.
For the casters, I cut 4, 3.25" x 3.50" foot pads. I screwed the casters to the foot pads and using wood glue and brads, I attached the casters to the bottom of each leg.
For the top, I added wood glue around the top of the frame.
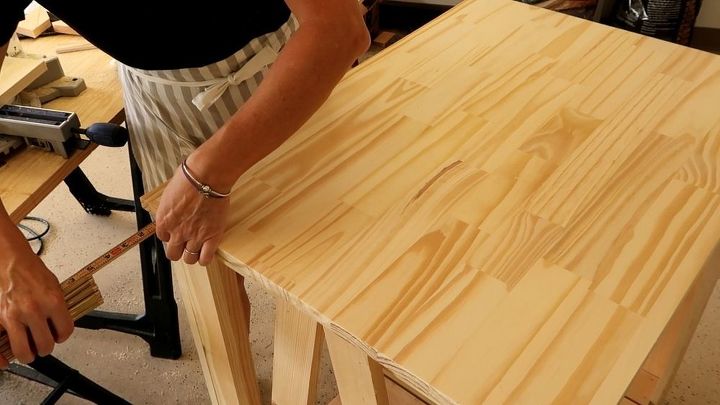
Then I laid the board on top. I measure all sides to make sure it was even all around then attached with 1.25" brads.
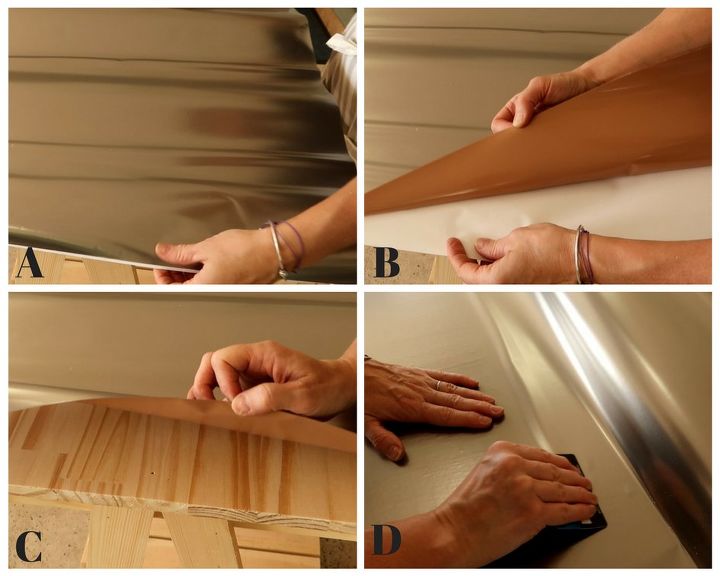
To add the stainless steel film, I made sure the top was free of dust.
A - I spread the film out onto the top of the island
B - Peeled the film from the backing, only exposing about 12" at a time
C - I laid the edge off the top (I wanted to wrap it around the board
D - Using a credit card, I smoothed out the film only removing about 12" of the backing at a time.
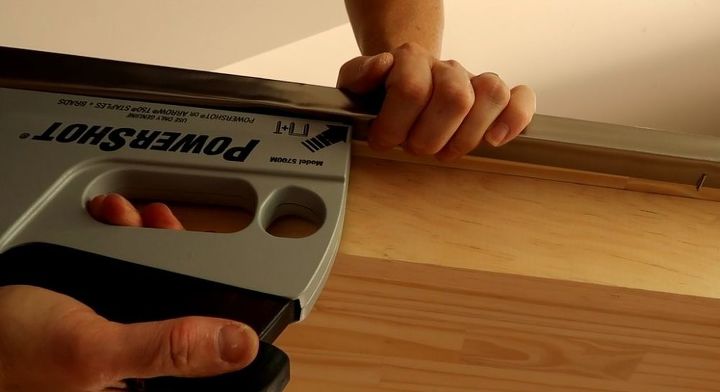
Once the top was complete, I wrapped the ends of the film over the ends of the board and used a staple gun to attach the film to the underside of the board.
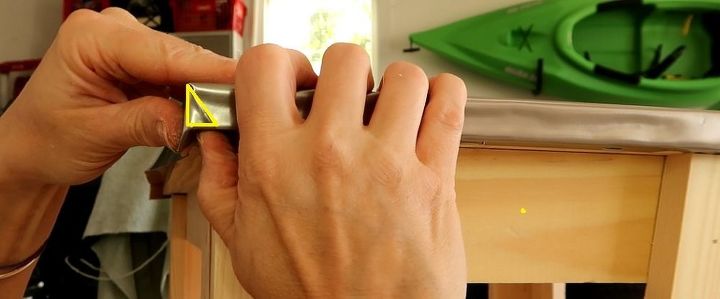
For the corners, I folded the film over to make a triangle (in yellow) as you would when wrapping a gift.

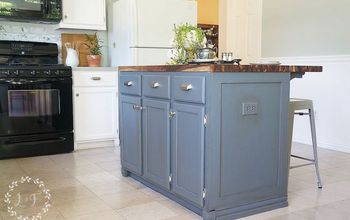
And here is the finished island. I stained mine then sealed it was a coat of wax.
The stainless steel film is water, scratch and heat resistant (up to 240 F); however, you cannot cut directly on it.


Comments
Join the conversation
-
This would look great on my expandable kitchen table from Ikea. Love the idea of stainless steel in my 50's kitchen!
-
Nice job! :)


Frequently asked questions
Have a question about this project?
Super job!! Congrats!! Love it!
How has it held up? I’ve thought of doing this but afraid it would scratch off too easily.
Is this like contact paper in any way?