


DIY Rope and Wood Nautical Shelf
At Remodelaholic, we are all about affordable and accomplishable (I don't think that's a word, but it's perfect here) projects! This wood and rope shelf is no exception! In this case, our contributor used an old Hurricane Harvey deposit to add some rustic flair.
Watch our tutorial to help you get started and for tips and helpful suggestions.
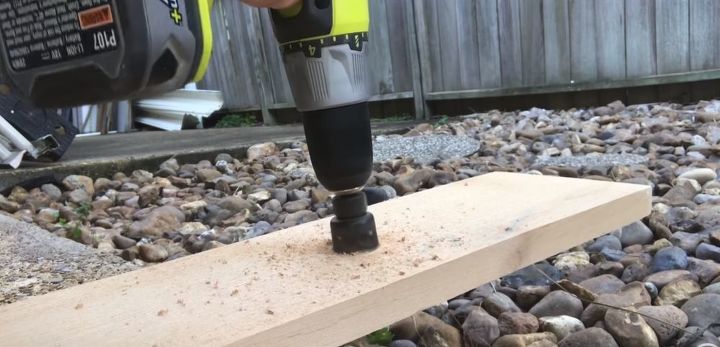
For details be sure to check out our post on Remodelaholic.com. Gather your materials and cut your shelf/shelves to the length you desire. Our contributor, Emily, used her shelves to create an office storage area. Measure and mark where you want your rope holes, then use a drill and hole saw bit to create the holes.
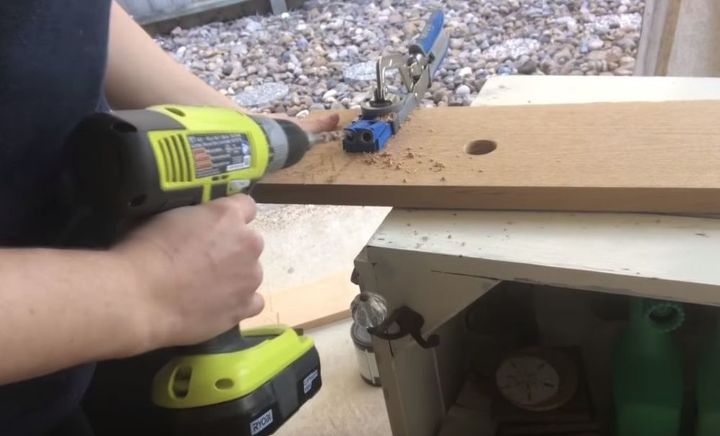
Because a longer width of bottom shelf was desired, Emily used a Kreg Jig system to join two boards together. The holes were drilled first before sanding, staining, and joining the boards together.

Install the rope wall cleats. If this isn't going into a stud, you will need wall anchors to support the weight.
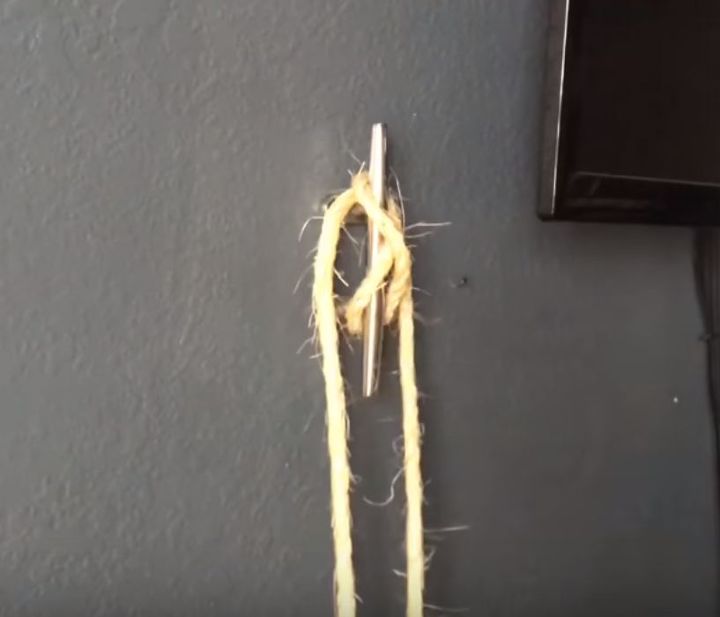
Tie your rope around the wall cleat and then thread from top to bottom through first board.
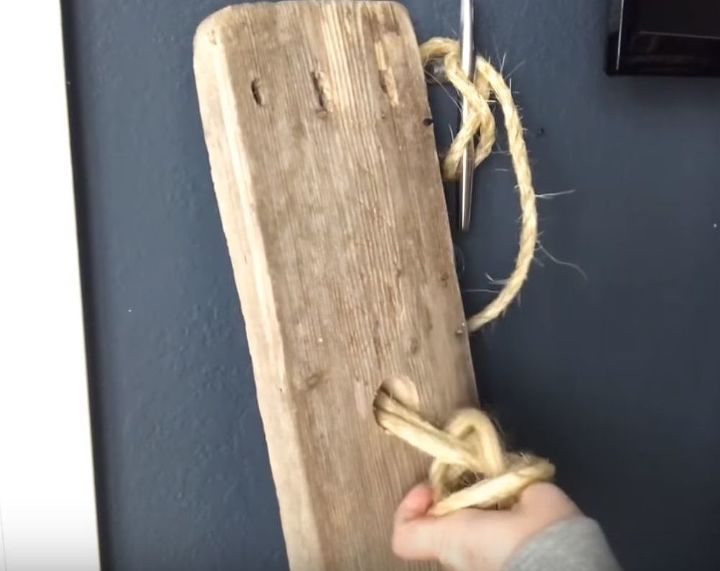
Once you have the rope at the desired length, tie off a double knot to support your shelf. Repeat for other hole, then add bottom shelf in like manner.
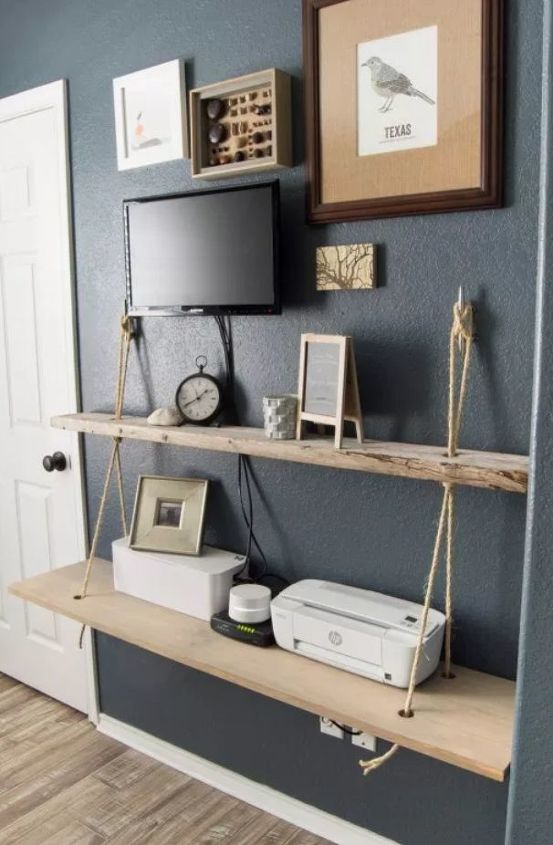
Finished shelf with a helping of office equipment! What will you use this nautical style shelf for?


Comments
Join the conversation
-
Nice, love the rustic look!
-
Wow, that's so cool. Looks great!


Frequently asked questions
Have a question about this project?