


DIY Perfect Pastel Tile Floor

Hello again! We have a stunning pastel floor for you this week using a tile stencil! Pastel colors never go out of style, especially in the summer months. Tile stencils are also great for renovating an out of date floor and they’re so easy to use. Pastel colors and tile stencils are a perfect combination! Let’s get stenciling!
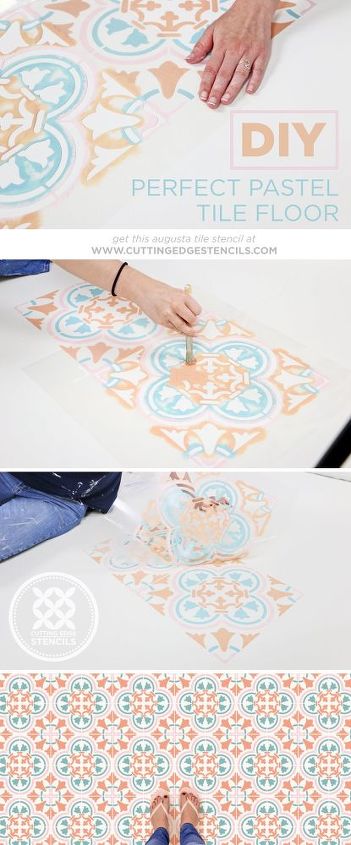
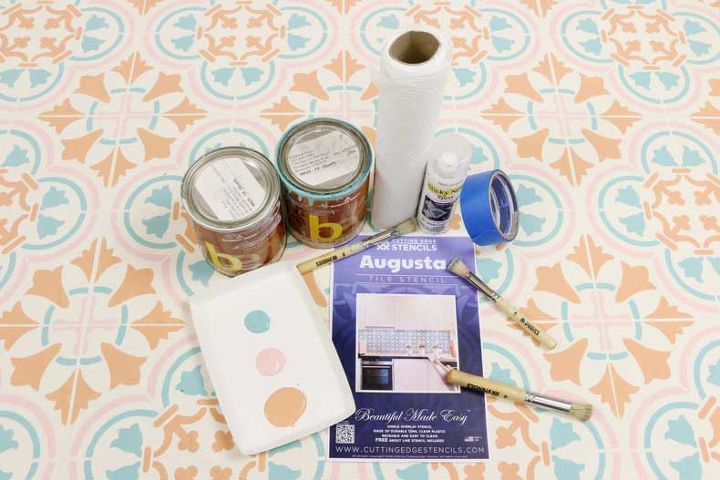
The stencil used for this DIY tile floor project was the our Augusta Tile stencil. The paints used were Benjamin Moore Spirit in the Sky, Fantasy Pink, and Myrtle Beach but don’t be afraid to come up with your own color combination. Spray adhesive is optional and can help reduce with paint seepage but, is not necessary. Because this floor has three different colors, you should use stencil brushes for each different color to avoid mixing colors! This makes your stenciling project super easy!

First, clean your floor and then apply two coats of STIX adhesive primer. (Any good adhesive primer will do.) Then, apply two coats of Benjamin Moore Navajo White. Now you’re ready to stencil!
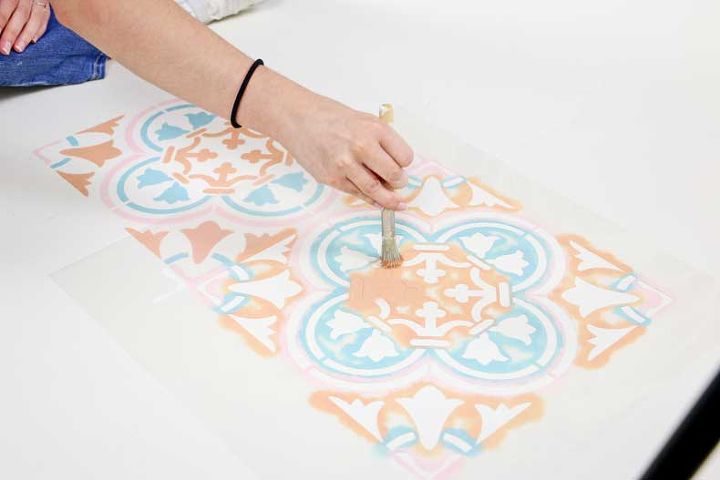
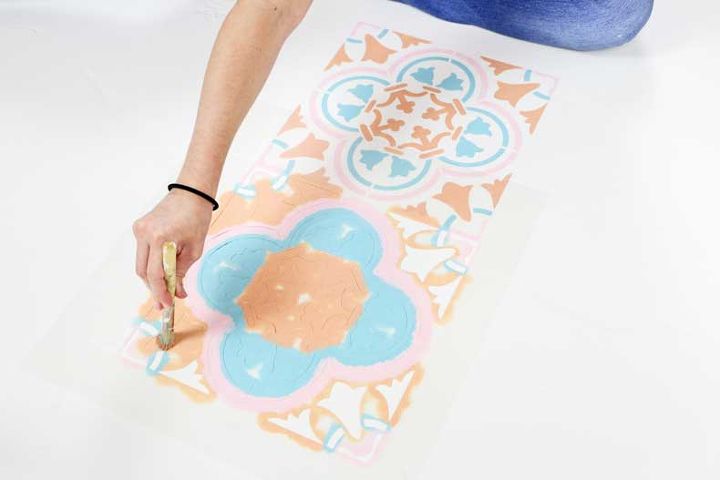
Start with your first color choice and stencil the innermost portion of the stencil. You can also start from the outermost portion of the stencil and work your way towards the center. There’s no wrong way to go about it! Pro tip: Make sure to not overload your stencil brush and use a gentle dabbing motion to avoid paint seepage underneath the edge of the stencil!
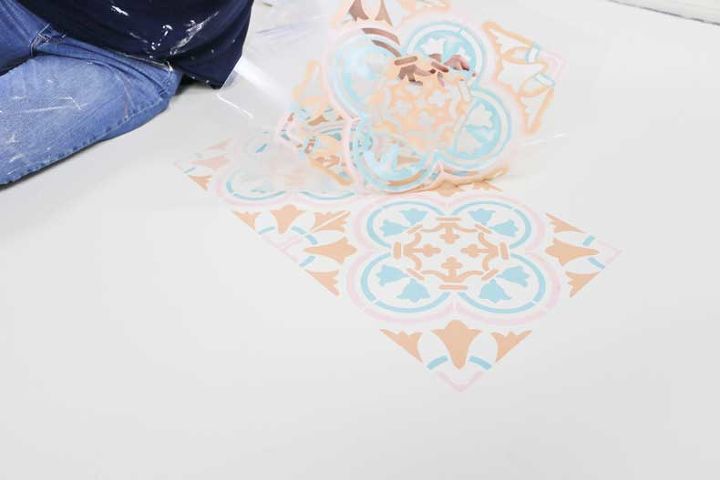
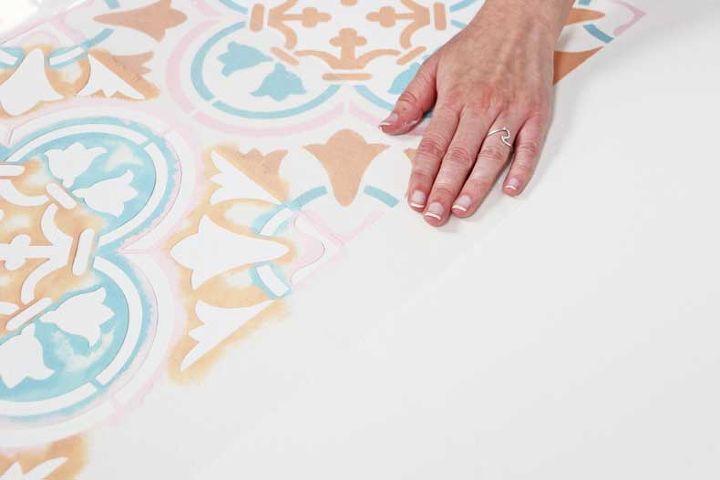
Peel back your stencil and admire the gorgeous stenciled tile you just created! To continue, simply align the tile stencil with the previously stenciled elements. This built-in registration system is so simple and will help ensure your rows and columns are straight!

Repeat until your stenciled tile floor is complete! Aren’t these colors gorgeous together?
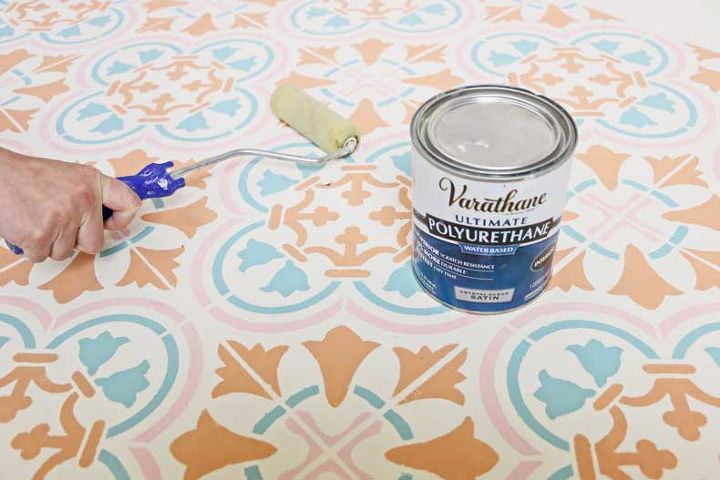
Seal your stenciled tile floor with a water-based polyurethane. A 4” dense foam roller and two even coats should provide years of durability!
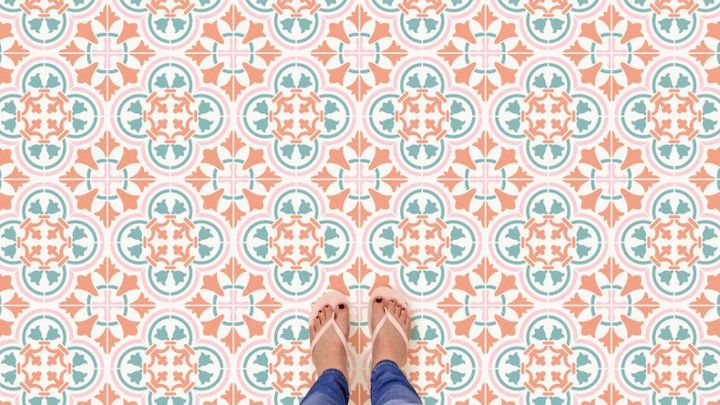
This pastel stenciled tile floor is totally fun! Does it remind you of a creamsicle or sherbet? Leave your thoughts in the comments below!
Resources for this project:
See all materials


Comments
Join the conversation
-
That is really beautiful ....I love the pattern and the choice of your colors ....Great Job !!!
-
Absolutely gorgeous!
Love the colors ♥️


Frequently asked questions
Have a question about this project?
Can this be done on “bobbly” wet room vinyl? Ours is a horrible builder grey non slip flooring and I’ve fallen in love with your pastel stencil work. AMAZING TRANSFORMATION, but do you think I could do this on a horrible bobbly surface? Inspiration needed 🤗
What if I remove my carpet and do this to a plywood floor will it work
Oh my goodness!!! I LOVE what you did! Was there an insane amount of prepping before the ‘tile’ was stenciled on? How long before you could walk on it? That was such a brilliant idea and job you’ve done!