


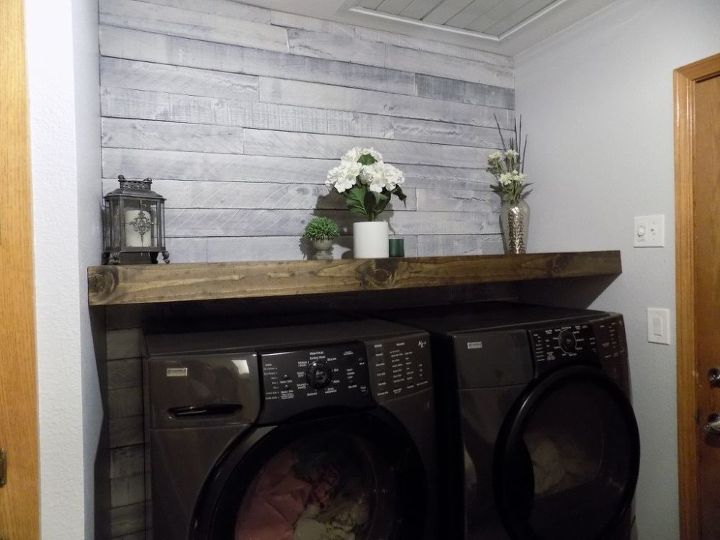
DIY Floating Wood Shelf - Laundry Room
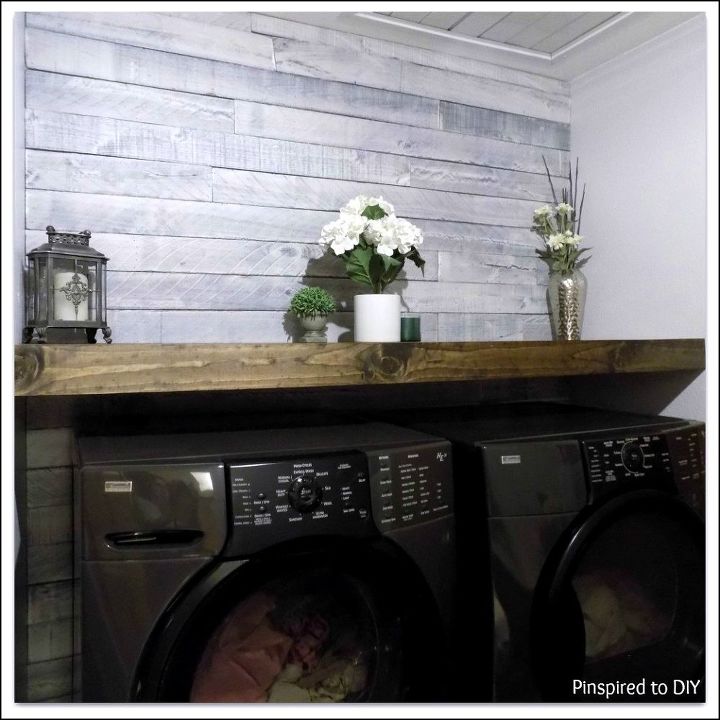
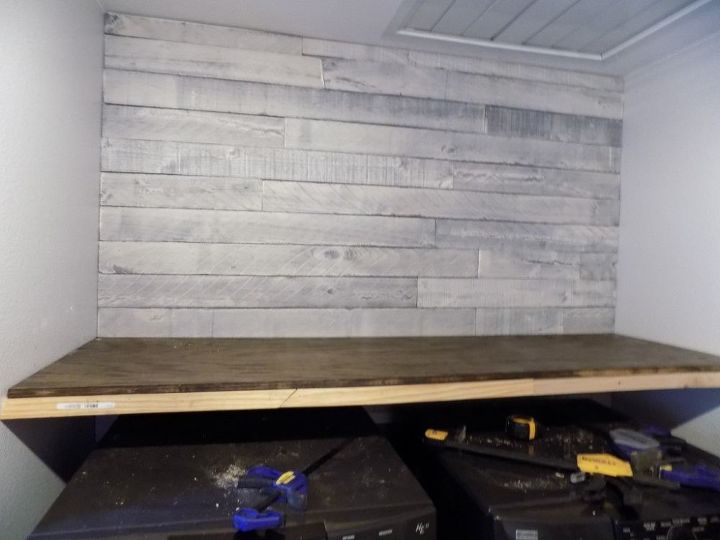
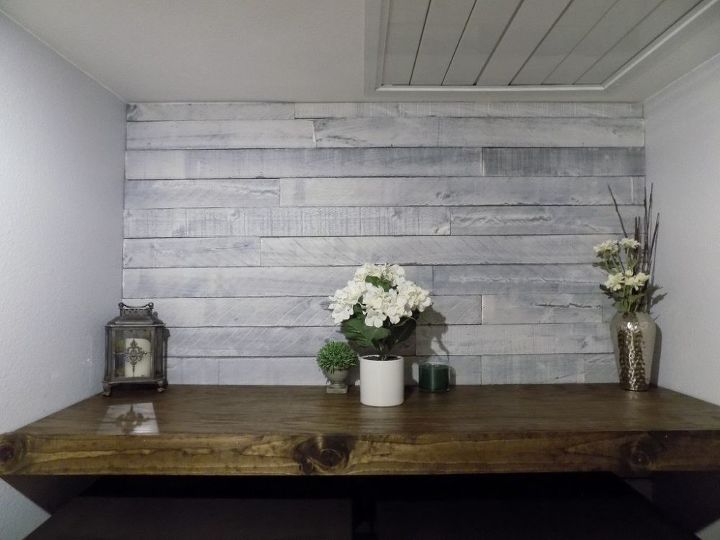
If you saw my last post, you'll know that I did a mini-makeover of my laundry room over the last couple of weekends. First on that project was a DIY Weathered Wood Plank Wall that I put up behind the washer and dryer. Second on that project list was to build a floating shelf above the washer and dryer to add some storage space.
Here are the abbreviated instructions for building my DIY floating wood shelf, for detailed instructions, please visit my blog at the link at the bottom of this post.
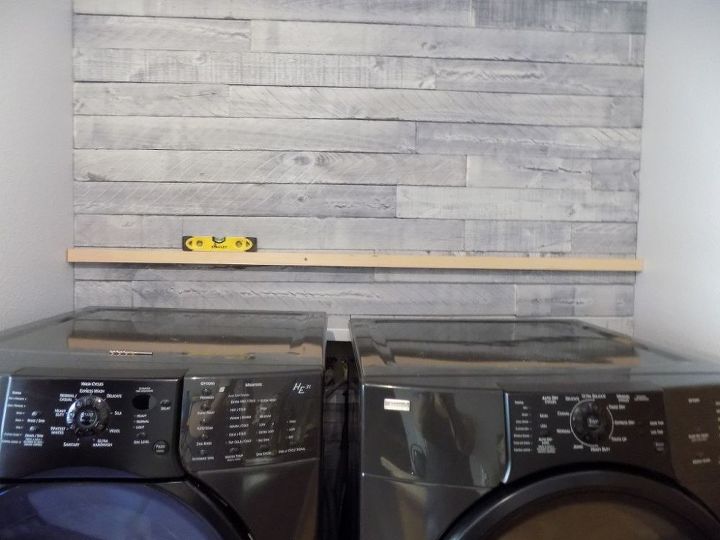
First, I used a stud finder to locate and mark the studs in the wall.
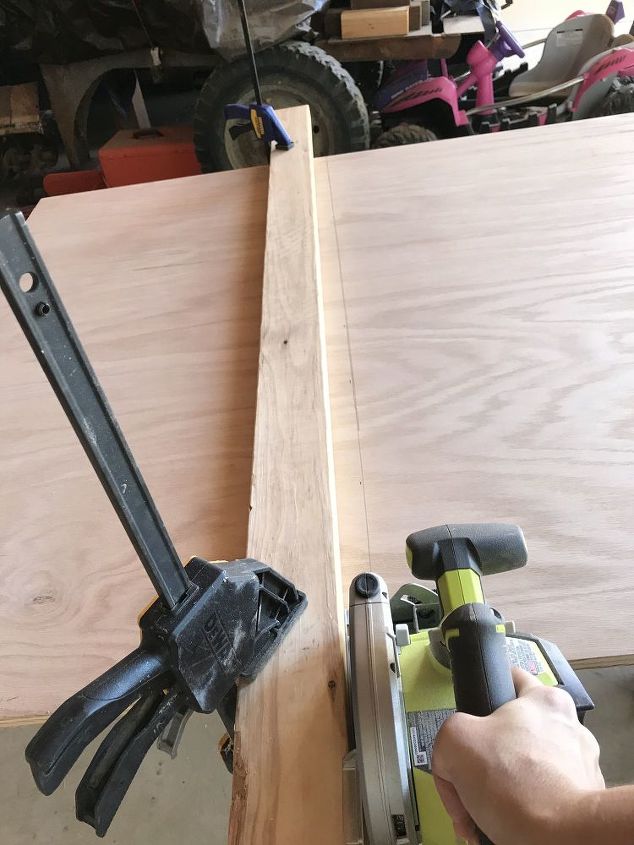
Next, I cut the boards that will be attached to the wall in the back and on the sides.
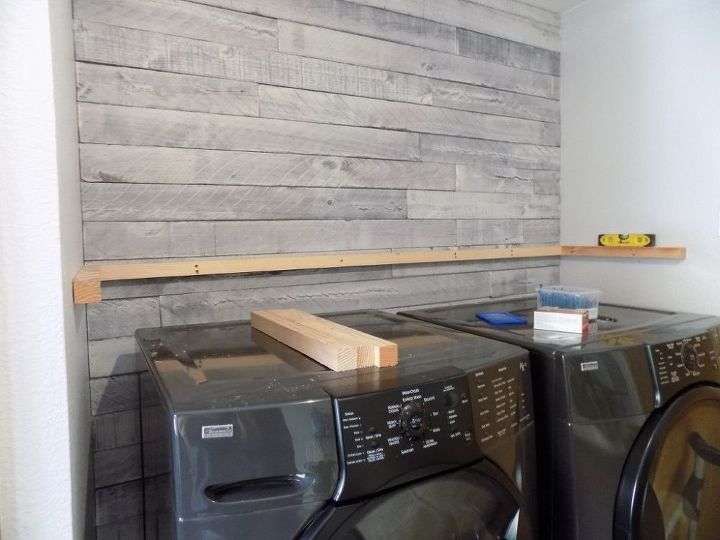
I then began attached the boards. I used a level to ensure the board was straight, and then I used brad nails to hold the board in place while I drilled screws into the boards over the studs.
I did the same thing with the boards on the side walls, attaching them so the top of those boards were flush with the top of the back board.

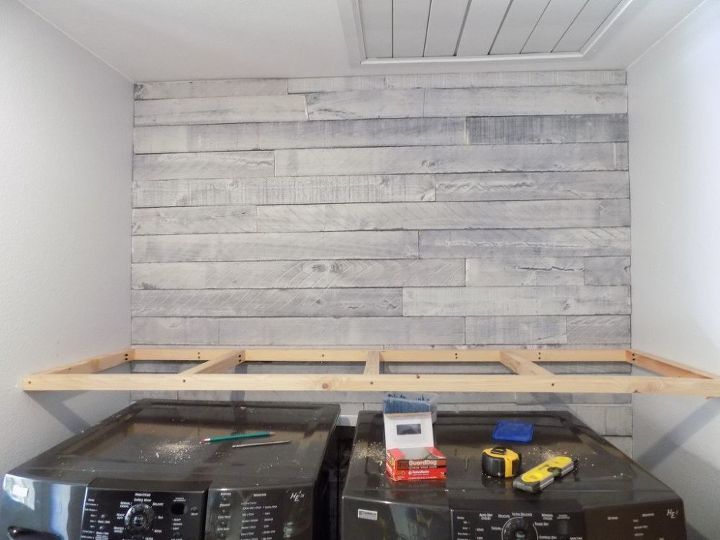
Next, I attached the center support boards followed by the front board to complete the framing for the floating shelf.
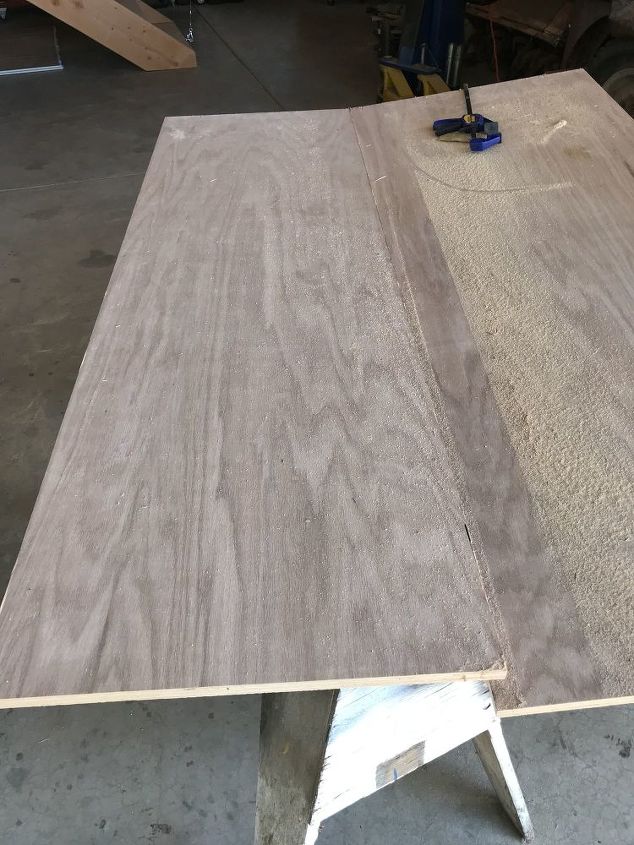
I then cut a plywood top for the shelf as well as the front trim piece.
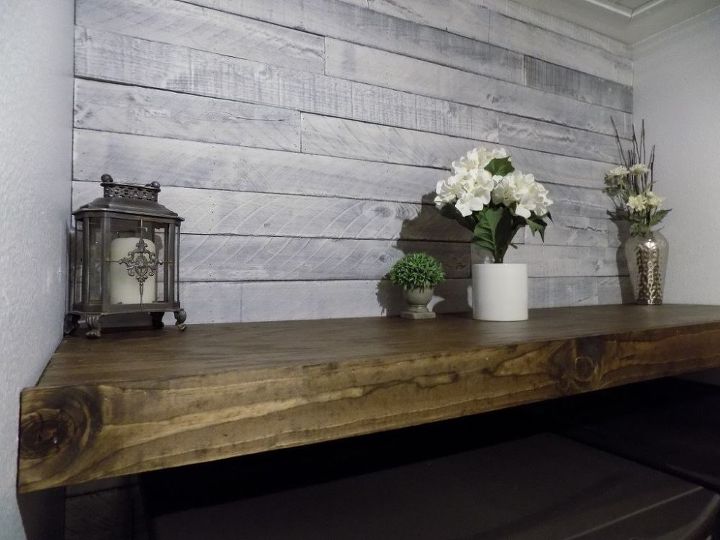
I stained the plywood top and the front trim piece with Dark Walnut stain and coated with polyurethane.
Once dry, I attached the shelf to the top of the frame.
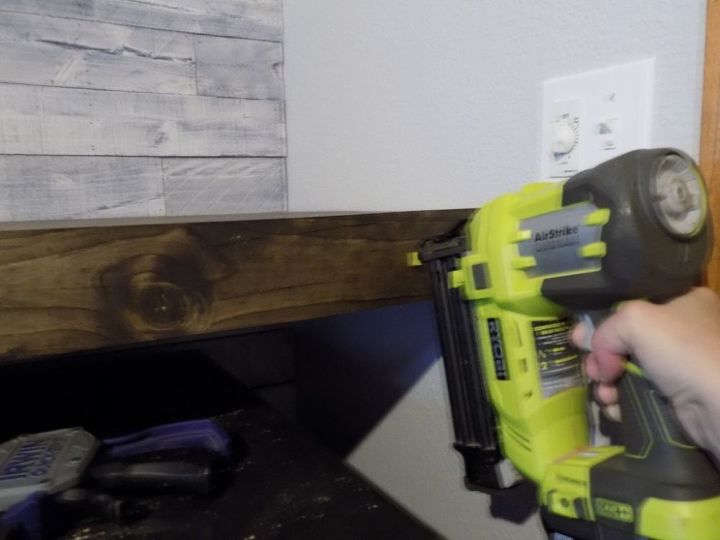
I then attached the front trim piece.
Lastly, I added some farmhouse decor on top of the shelf and smile everytime I walk by! The laundry room no longer brings a sense of dread! :-)
Resources for this project:
See all materials


Comments
Join the conversation
-
Wow! It all looks so good. Now I’m inspired. 😊
-
This is exactly what I want to do in a strange little book in my living room.
Thank you!


Frequently asked questions
Have a question about this project?
Is it still a floating shelf if it touches the two walls? not a killjoy question, I'm just curious...
Since there isn't much support on the front of the shelf is it mainly for decorative items? Or is it sturdy enough to hold weight? Looks nice 👍
What kind of material can you use around a lampshade frames