


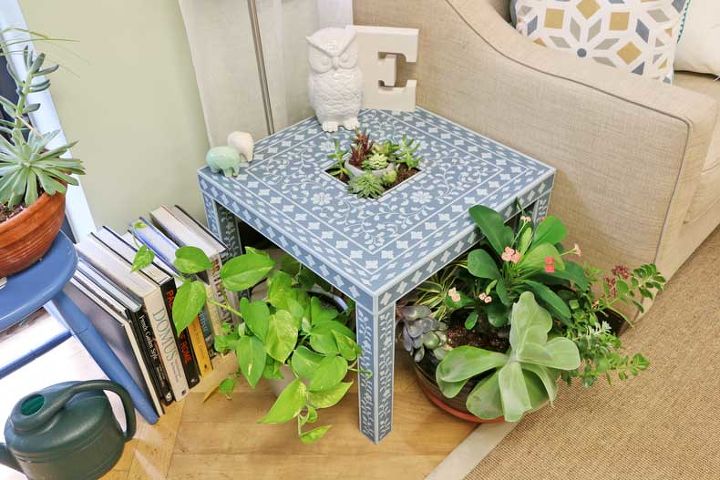
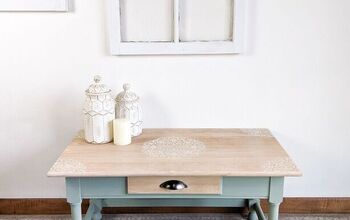
Ikea Lack Table Hack Using an Inlay Stencil

Hi there! Want to step up your DIY home décor game? Inspired by Nifty, we have the perfect DIY stencil project that won’t break the bank! Using an inlay stencil kit, we transformed this inexpensive Ikea lack table into a beautiful upcycled accent piece complete with succulents. Let’s get stenciling!
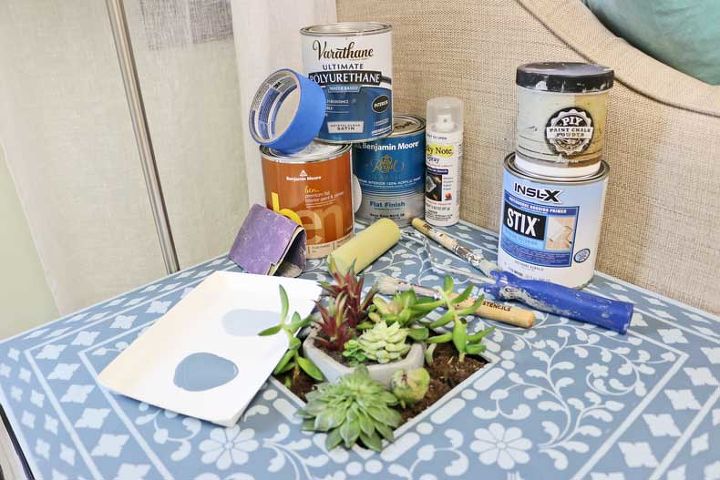
The stencil used for this DIY stencil project is the Indian Inlay Furniture Stencil kit by Kim Myles. The paints used were Benjamin Moore Philipsburg Blue and Nantucket Fog. Spray adhesive is optional and can help reduce paint seepage but, is not necessary. Because this stencil is all about the details, stencil brushes are ideal to pounce on the paint and help to create a clean, crisp design. Although this stencil pattern may look intricate, it’s super easy to use and the finished product looks like a professional did it!

First, sand your Ikea lack table with 120 grit sandpaper to ensure a smooth, even surface. Next, decide how big you want to make the cutout in the middle. Pro tip: Buy your succulents or other decorative plants in advance so you have a better idea of how big to make the square opening. Locate the center of your table using a T-square ruler. Make sure the T-square part of the ruler touches the edge of your table, so the line will be perfectly straight. Mark the middle of the ruler on the surface of the table and repeat the process on the adjacent side of the table. You will then know the center of the table. From the center, use the T-square ruler to draw four lines of the same length outwards towards each side of the table. Using those four lines and the T-square ruler, create a square.
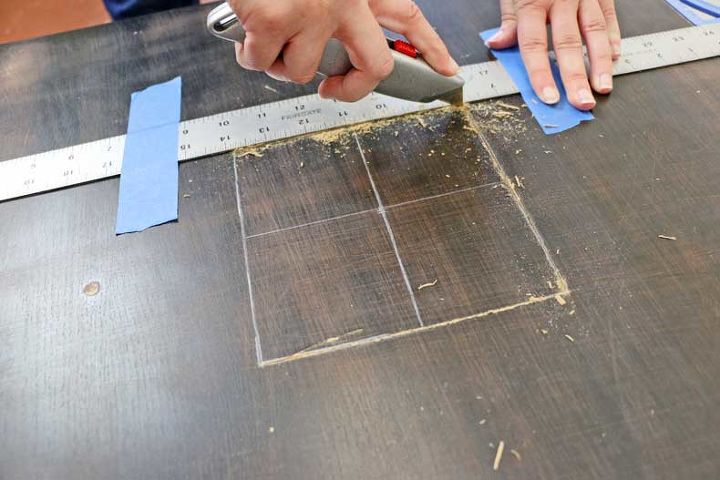
Now that you have your square marked out, tape down the T-square ruler so it doesn’t move and take a box cutter to start cutting your square. Keep going over the same edge until it feels as if the blade has cut through the table. Repeat this process until all four sides have been cut and the square can be removed from the table.
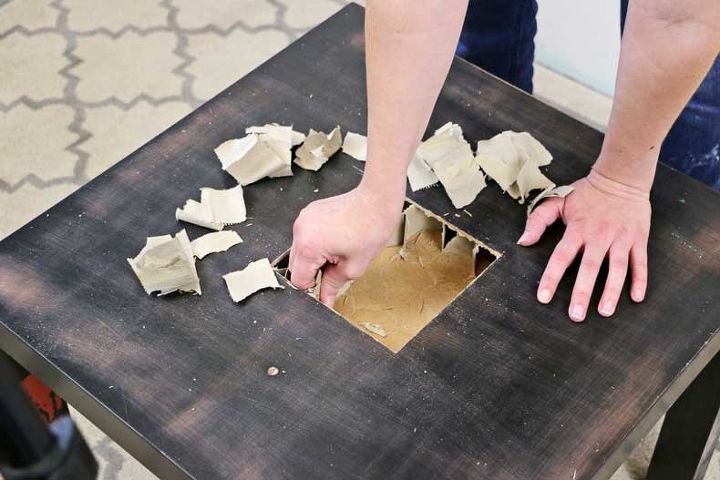
The material inside of the lack table is like cardboard and can easily be removed with just your hands. Scoop out any of the material inside of the square opening so that the plants can rest at the bottom of the table. Then sand the edges of the square opening you created so everything looks even and smooth.
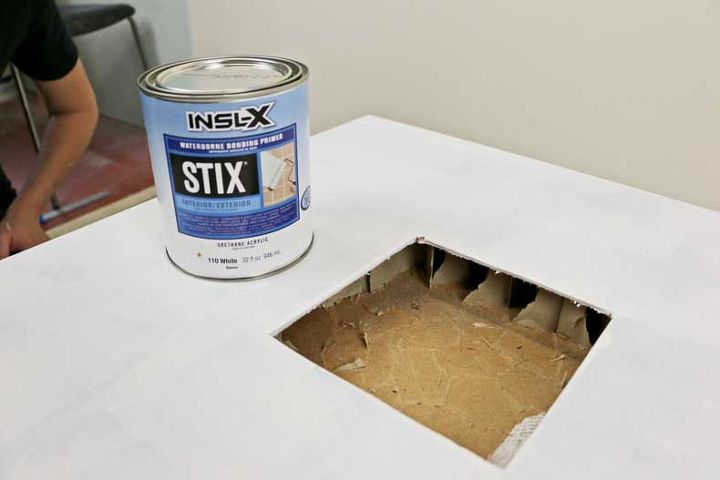
To make sure that paint will stick to the table, apply two even coats of primer. We recommend Stix primer, but any good adhesive primer will do. Make sure to coat the legs of the table too!
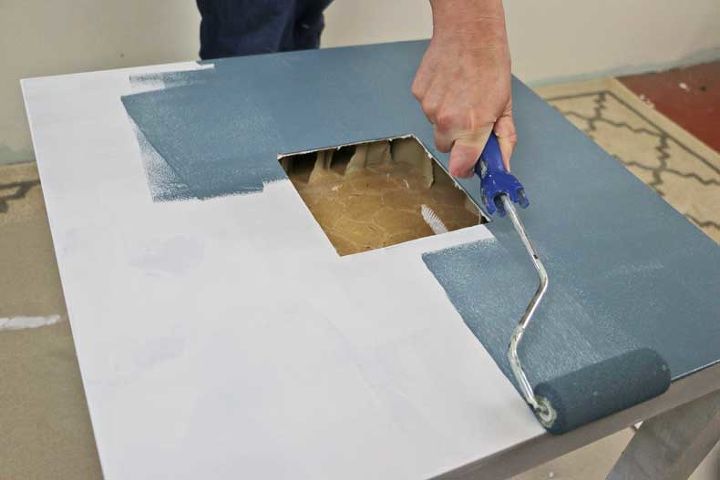
Wait until the primer has dried and then apply two coats of paint. Pro Tip: make sure you let the first coat of paint dry completely (about an hour) before you start the second to avoid the paint being pulled up by a roller. Now you’re ready to start stenciling!
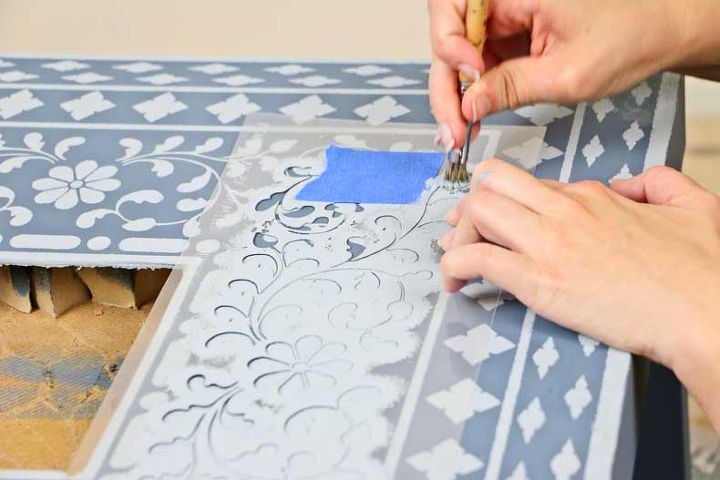
Start from the middle of the table and work your way outwards. This will make it easier to plan out the spacing in between each different stencil design. You can even take it a step farther and use a chalk pencil to outline specific parts of each stencil, so you remember where you wanted each stencil to go. The best part about inlay stencils is that the choice is all yours! You can mix and match different stencil patterns from the kit to suit your style and create a unique piece every time.
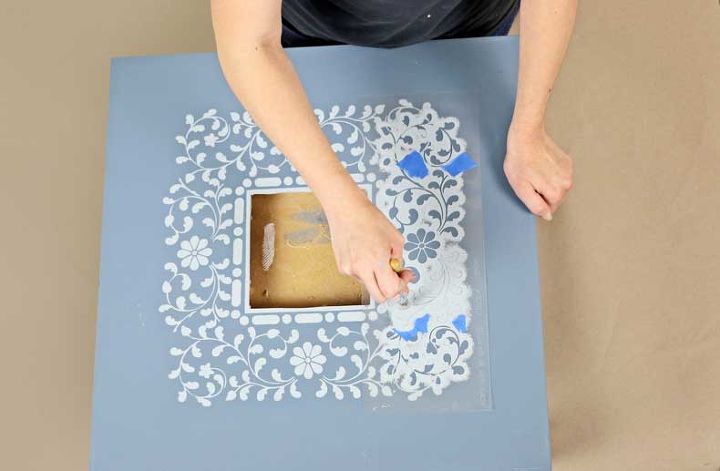
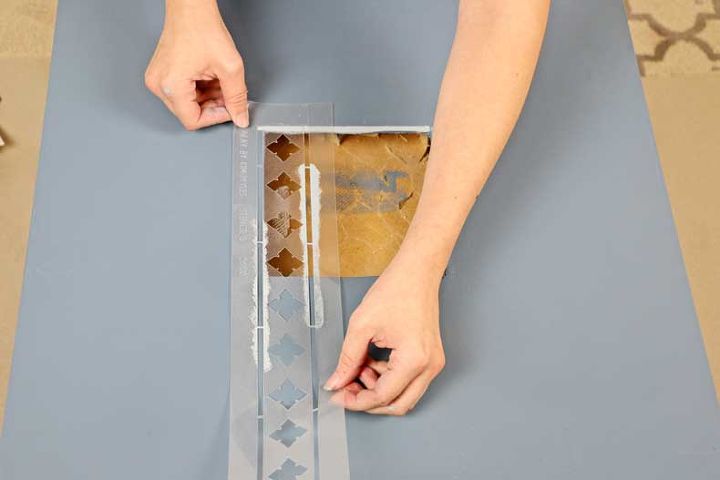
You can also tape off certain sections of the stencil pattern to fit in certain areas or to create your own unique stencil design. This is easy and only requires a small amount of tape. Just place the tape over the sections you don’t want stenciled and the tape will act as a mask covering that part of the stencil.
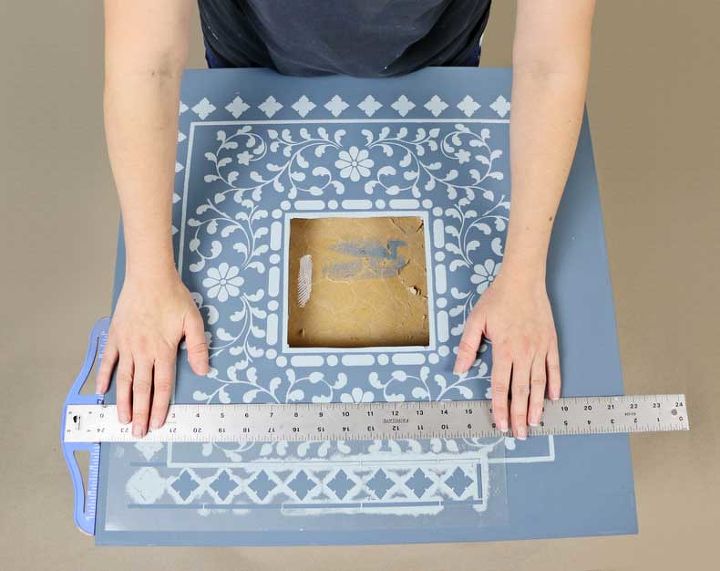
You can also use the T-square ruler to make sure your stencils are aligned straight! Put your stencil where desired and then place the T-square part of the ruler up against the edge of the table so that the ruler is next to the stencil. If the entire edge of the stencil touches the ruler, the stencil is straight and you can start stenciling! If not, simply readjust the stencil so that the edge matches up with the ruler and then begin stenciling.
Once you’ve finished stenciling the major elements, you can always go back and add small details to fill up any empty space! Just place the stencil in the desired space and tape off the sections you don’t want to stencil. It’s that easy!
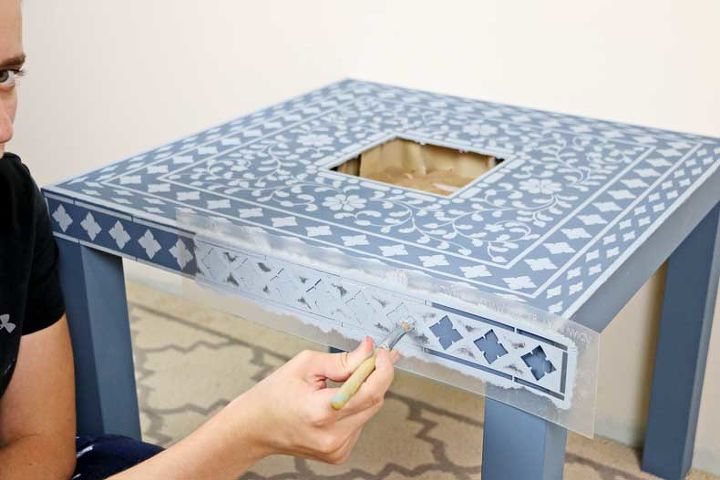
Once the surface of the table is complete you can move onto the sides of the table! Work your way around until you reach the first side you started with. You can even mix and match stencil designs so that each side has a different pattern!
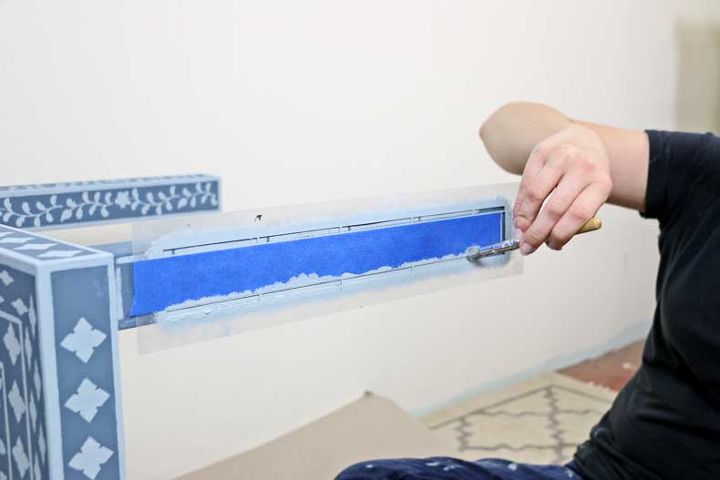
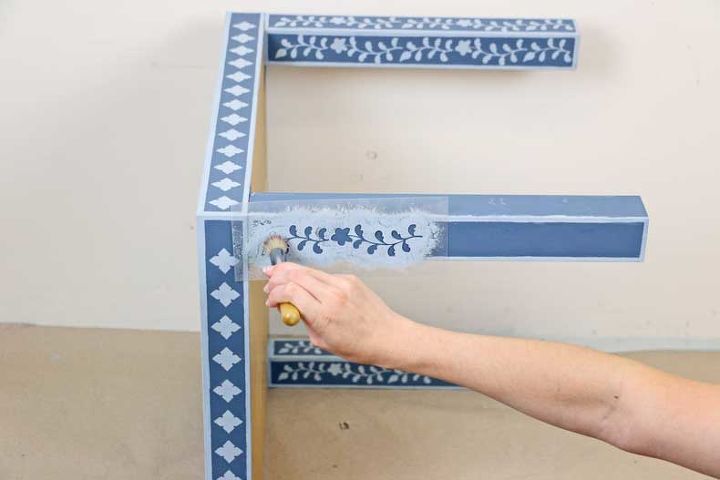
Now you can finally stencil the legs! Flip the table on it’s side to make stenciling the legs even easier. Pro Tip: If you want to stencil just a border, use a strip of blue painter’s tape to mask off the entire middle portion of the stencil. This will allow you to stencil the border in a breeze! Finish off the legs to complete the stenciling portion of this gorgeous DIY upcycled project.
Place a small plastic bag or some tin foil in the bottom of the square opening. This will create a barrier between the bottom of the table and the soil for the plants. Add your succulents for the finishing touch!
Resources for this project:
See all materials


Comments
Join the conversation
-
Beautiful upgrade from that boring old table. It is a simple but easy project. Your instructions were very clear and easy to follow!!!
-
Nice job definitely inspiring🤗


Frequently asked questions
Have a question about this project?
Very cute. To be on the safe side. A rubber barrier can be use in the middle of the table for the plant. Flex seal would work very well. Foil will RIP at one point. The table is so cute. All that work would be ruined by water damage. I didmt read any thing about you sealing the paint. Did you seal the table? Most people would seal a painted table. I was just wondering if you did or not. It's a really cute peice and I will do some thing similar. Great job. Thank for sharing.
Very pretty but I don’t know how you have the plants in it. I didn’t understand that part
Painting the legs last means resting the newly painted parts of the table on something, with the potential for damaging the paint. I would think that could be avoided by painting the legs first. How did you paint the white border surrounding the flowers on the legs and in other places on the table?