


How To Make a Simple Wired Ribbon Bow for Wreaths
3 Materials
$2
15 Minutes
Easy
Making a bow doesn’t have to be challenging. I’ve been making bows following a simple method for a long time. An easy way to make one is to start with wired ribbon. The method can be used for non-wired ribbon, but it doesn’t hold the shape as well. This easy step by step guide will have you making bows in no time!
Once I got the hang of this particular method, I’ve found it to be the easiest way to make a bow.
Sometimes I add more ribbon layers to to give it more volume and that means changing up some of the measurements.
The basic method is the same no matter how big or small you want to make the bow.
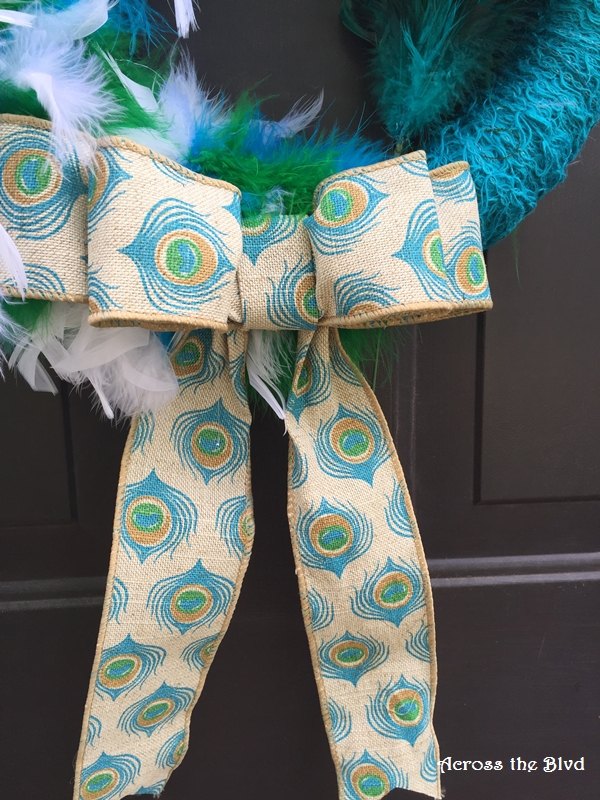
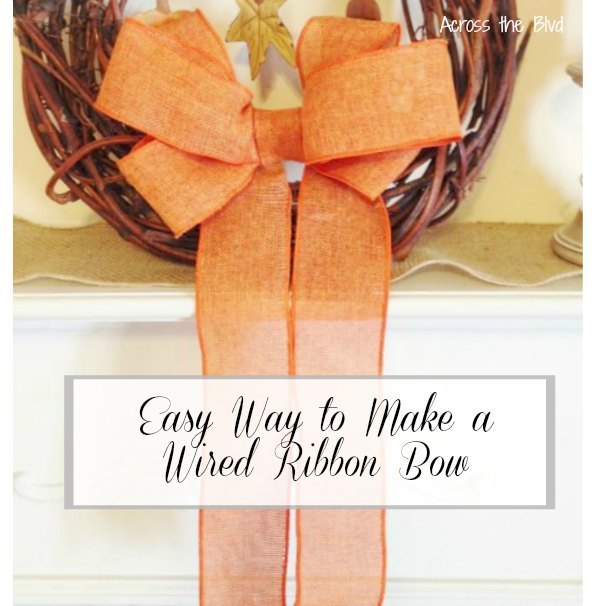
This peacock bow is one that I've used on a wreath.
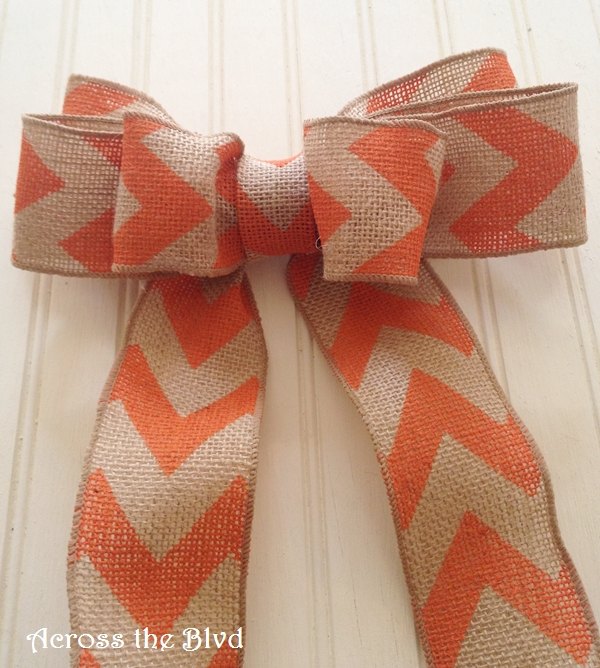
I've used chevron burlap ribbon to make one for a fall wreath.
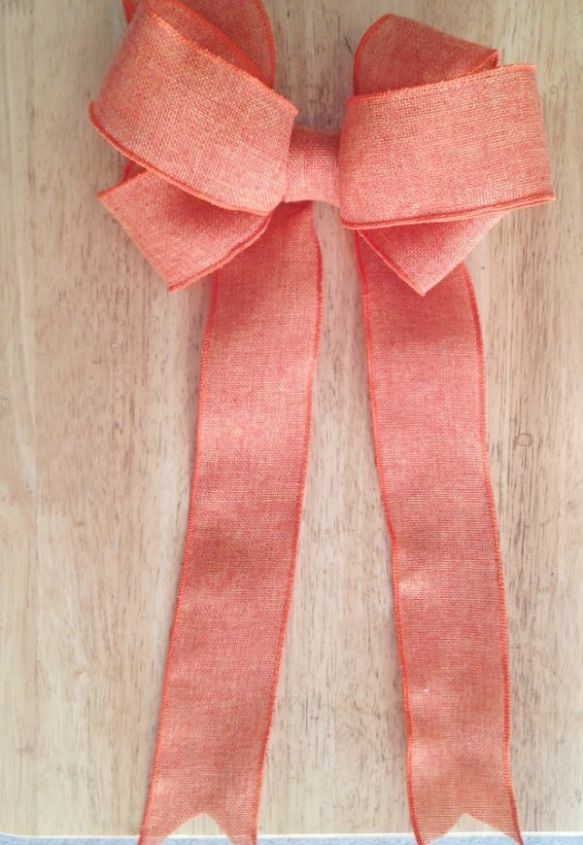
To make a bow the size of the orange one included in this post, before assembling the ribbon into a bow, measure and cut the ribbon into the following lengths: (1) 36″, (1) 24″, (2) 20″, and (1) 8″
Steps:
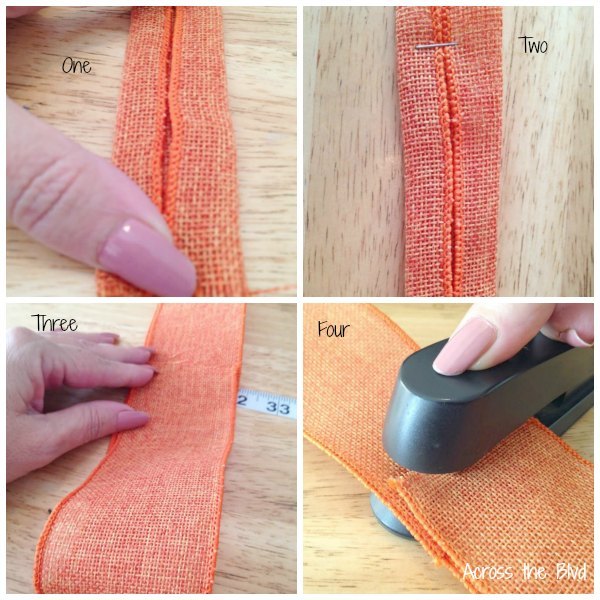
- Fold each side of the 8″ strip lengthwise to the center.
- Staple it together near each end of the ribbon. Set aside.
- Find the center point of the 24″ strip and bring each end to the center, allowing it to overlap just a little.
- Staple through both layers of ribbon.
- Repeat this for the 20″ strips
- Find the center point of the 36″ strip. Make an accordion fold in the center of about three inches long. Hold it together tightly and staple.
- Place the 8″ strip, stapled side up on flat surface. Place the 24′ strip as shown. Place the 20″ strips in an X over the top.
- Place the 36″ strip near the bottom of the 8″ strip. All of these pieces are staple side up. The staples won’t show when you’re finished.
- Pinch the 8″ strip around the other strips.
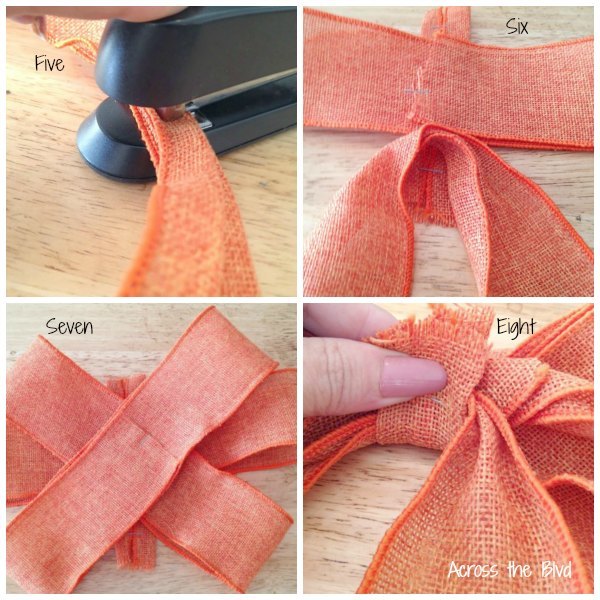
- Hold it tightly and staple together. Use at least two staples.
- Cut the ends of the ribbon into a V shape by folding the ribbon in half lengthwise and cut across the ribbon at an angle, starting at the folded point and cutting up to the edges.
- To keep the ribbon from fraying, hold the ribbon just above a tea candle. Make sure that the flame doesn’t touch the fabric.

While there are a lot of steps to take to make a bow, it’s not very difficult at all. The best part is that you can alter the measurements to fit your project.
I hope this quick tutorial will help you out if you're looking for a simple way to make a bow.
I'd love for you to visit Across the Blvd for lots of easy, inexpensive craft ideas!
Resources for this project:


Any price and availability information displayed on [relevant Amazon Site(s), as applicable] at the time of purchase will apply to the purchase of this product.
Hometalk may collect a small share of sales from the links on this page.More info

Want more details about this and other DIY projects? Check out my blog post!


Frequently asked questions
Have a question about this project?