


Paper Clay Brick Wall!

I love interior brick walls and this is how I made a realistic looking brick wall out of homemade paper clay.
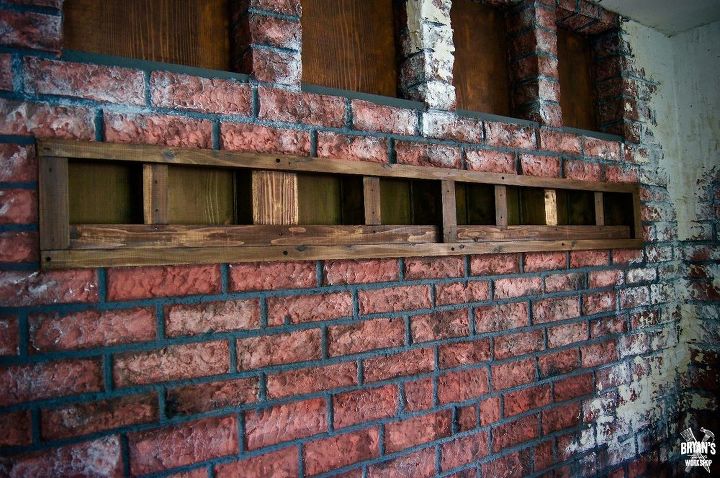
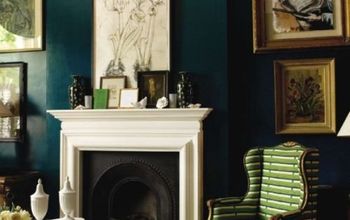
This is the finished wall with built-in shelves.
I built shelves between the studs of this non-loadbearing wall.
More on that later. 
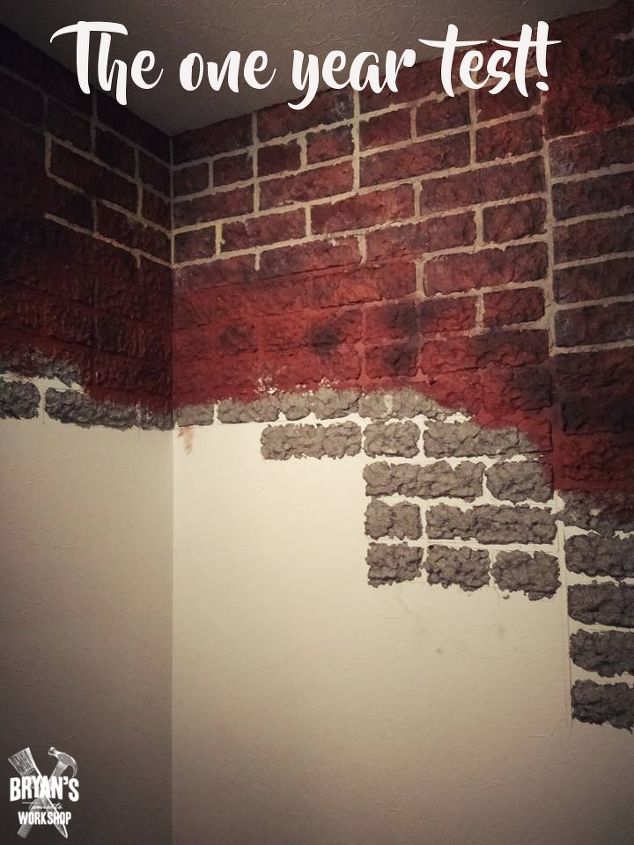
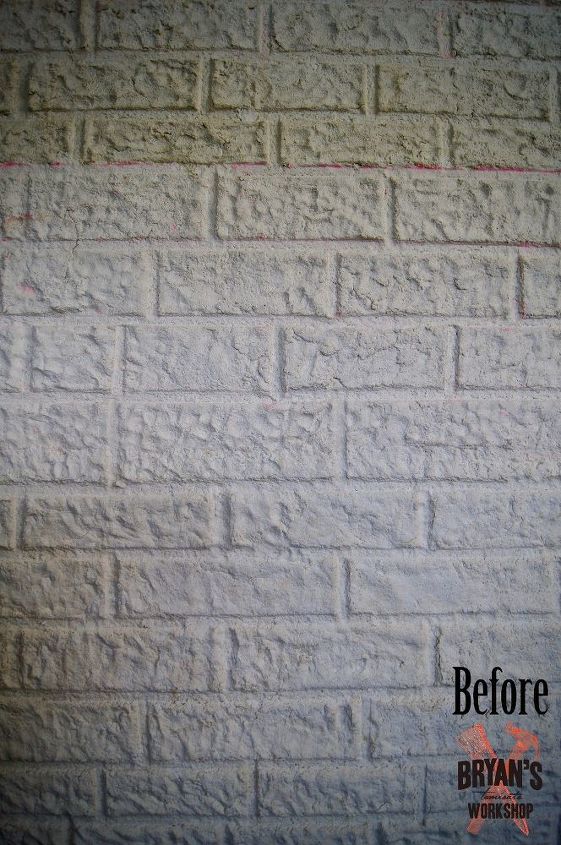
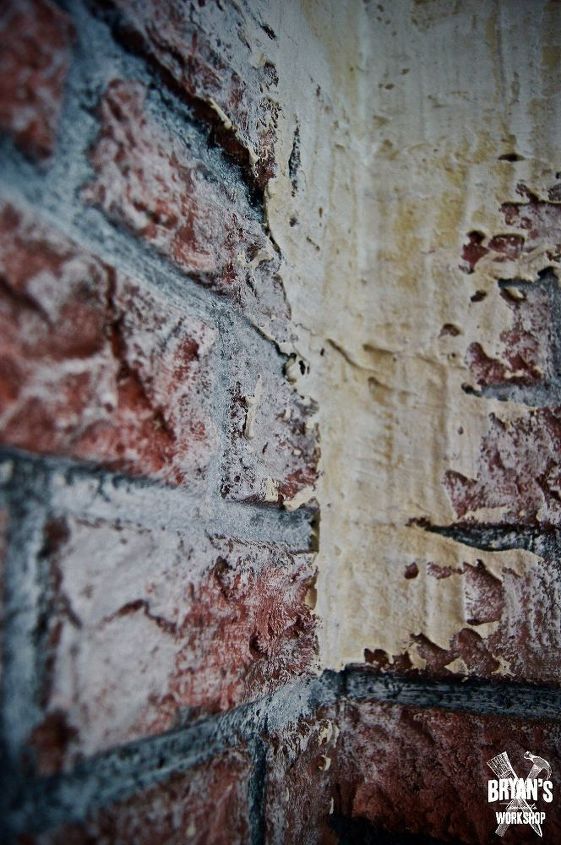
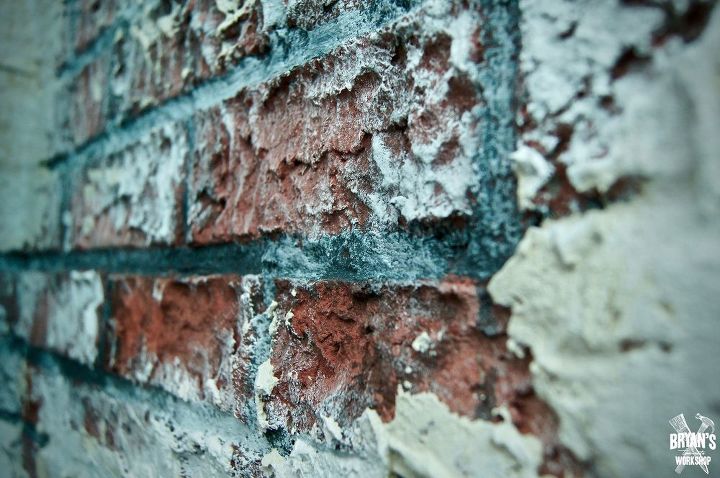
The final brick wall is paper clay over wallpaper. I tested it for a year first and let me tell ya' it was impossible to get off! My paper clay recipe dries incredibly rock hard and is pretty much indestructible!
The gray color paper clay is made with newspaper, but I found the toilet paper, paper clay to be easier to work with.
Before doing this over wallpaper, please consider:
-Is my wallpaper in good condition?
-Is my wallpaper easily removed?
-Will adding heavy indestructible paper clay make my wallpaper fall off?
-Why would anybody do this to their wall?
-I bet that Bryan is the coolest..
EDIT:
You don't need to do this over wallpaper. You can do it to a painted wall or over wood.
Please keep in mind that it will be extremely difficult to remove from drywall without damaging it. (Sheetrock is a brand of drywall)
Drywall is covered with a heavyweight paper or fiberglass matting. I tested it myself and the glue in the clay absorbed and dried into this making it almost impossible to scrape off. It's like the clay fused with the wall.
If you worry, consider doing this to something you can hang on the wall. Cardboard and thin plywood come to mind.
*I'm getting this question a lot.
The clay is not weatherproof. It needs to be protected with an 'exterior' water and UV resistant topcoat. I put seasonal paper clay props outside with a topcoat and have no problems. They're only out there for a couple months, so I'm not 100% sure. I'll need to test a forever outside project and make a post.
They actually sell sculpting concrete products that are designed to be outside if you don't want to chance it.
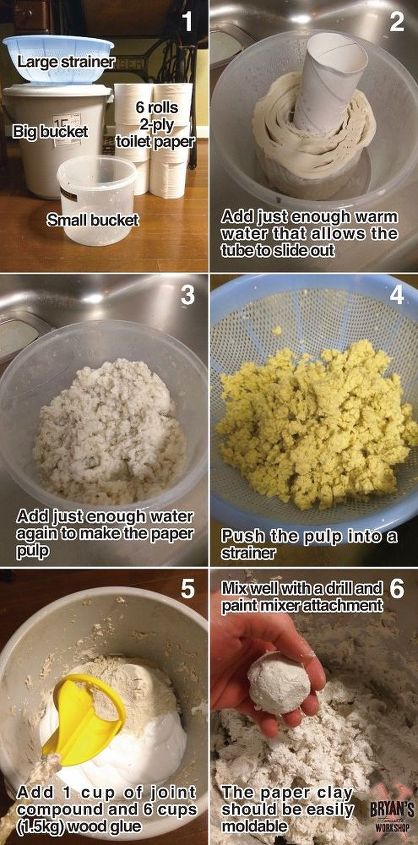
My paper clay recipe is
-6 rolls of unscented toilet paper
-6.5 cups of wood glue (1.5kg or 3.3lbs)
-1 cup of joint compound (dry wall mix).
1. Soak one roll of toilet paper at a time in the smaller bucket using warm water. The toilet paper tube will easily come out and the toilet paper will turn to pulp. Break up the pulp with your fingers and then dump it in a plastic strainer. Push as much water out as you can and then put the pulp in the big bucket. Do this for each roll of toilet paper.
2. Add the wood glue and joint compound.
3. Mix carefully at first, so the joint compound doesn't fly up in the air. Mix it thoroughly until it becomes paper clay.This is my paper clay recipe.
For me it took 21kg of wood glue, 14 cups of joint compound and 147 rolls of toilet paper.
Kind of felt embarrassed going back to the same place buying so much toilet every other day. "Ewww, it's that toilet paper guy again!"
This project was time consuming, but easy. I know that there are easier ways to make a faux brick wall, but I wanted to do the entire thing with my hands. I love artistry and the process. It's the best part of every project for me.
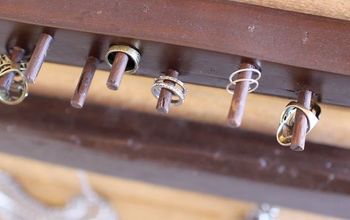
Anyway, I only used my hands, a spirit level and a piece of wood. I eyeballed the brick sizes and simply pushed the wood into the paper clay while balancing the level on the wood. That is it.
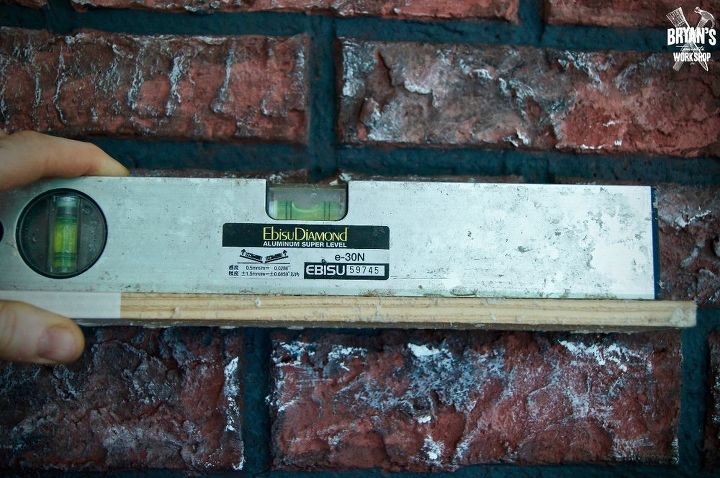
Here's a picture of how to do it. Just find a piece of wood the thickness you want your mortar and wide enough to set a spirit level on and you're golden.
You'll often get clay sticking to the wood. I tried putting painters tape on the end of the wood and it helped a little. You'll need to be constantly pushing the clay with your fingers. You'll also use your fingers to shape the front of the bricks.
I occasionally rubbed a red whiteboard marker on the painters tape I put on the wood, so it would come off in the clay. This is a good way to keep track of progress on big projects.
The paper clay will take a couple days to dry.
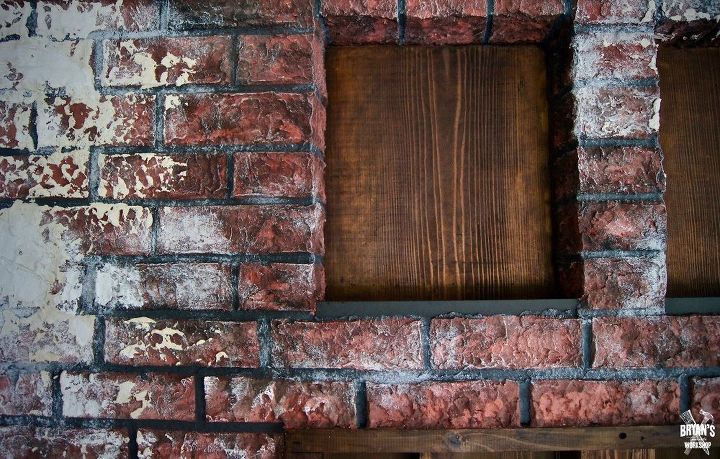
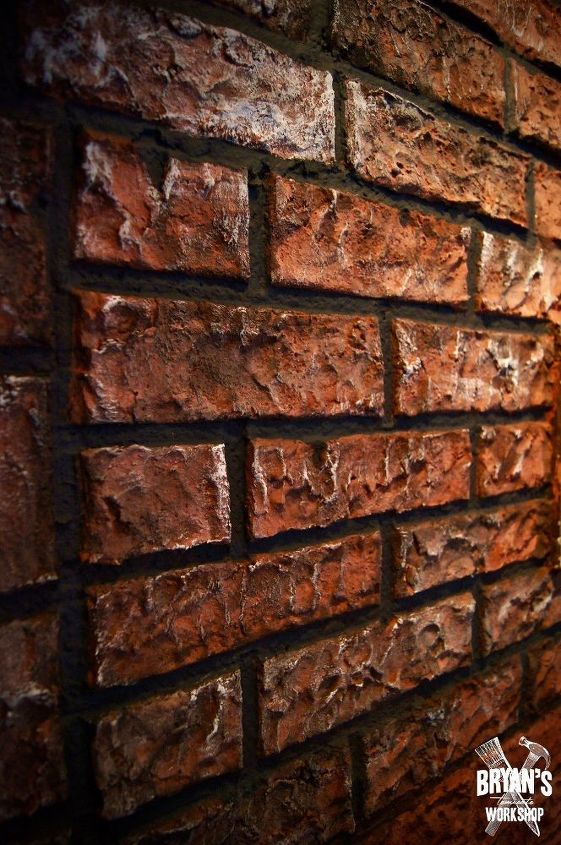
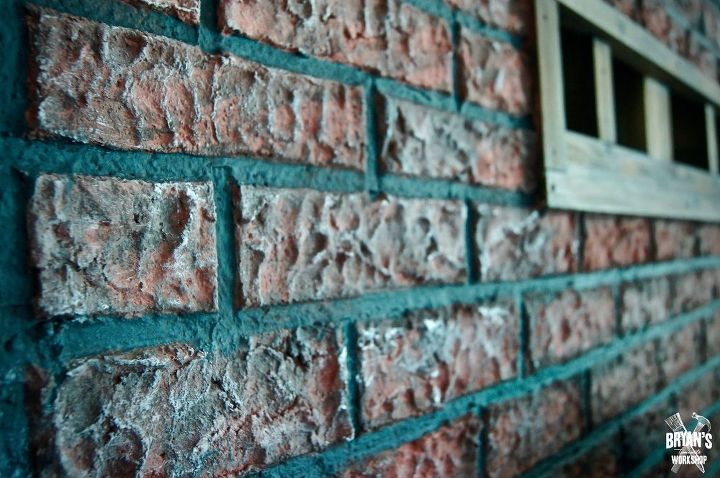
I painted the bricks with a matte red wine and I mixed my own mortar color. The black color is just diluted black paint and the white is dry brushing.
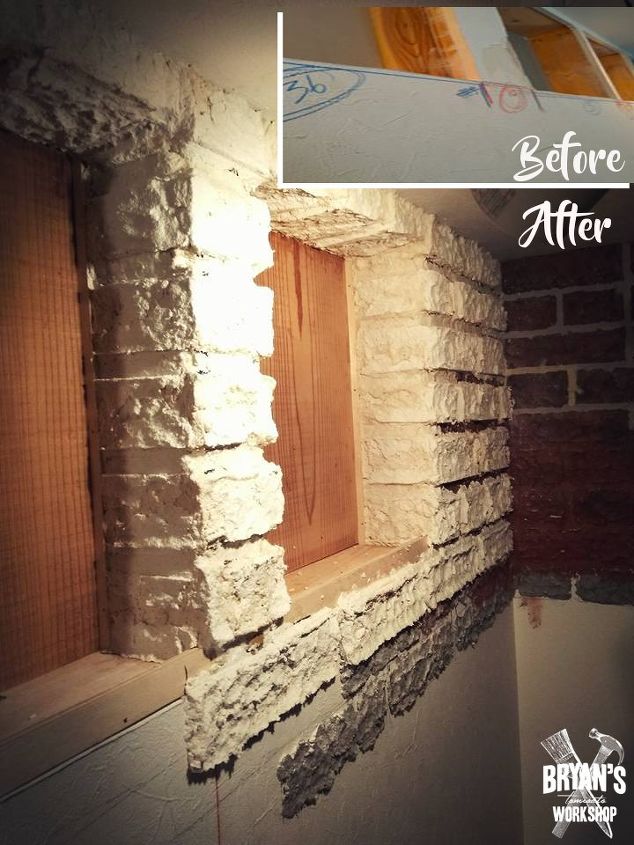
These are the built-in shelves. I made 12 and you can see how by checking out my built-in shelves post.
https://www.hometalk.com/diy/build/shelves/built-in-kitchen-wall-shelves-12444913?r=2
*Be extremely careful opening up your walls.
I mixed up some joint compound and smeared it over the bricks in a couple spots. I love how it looks!
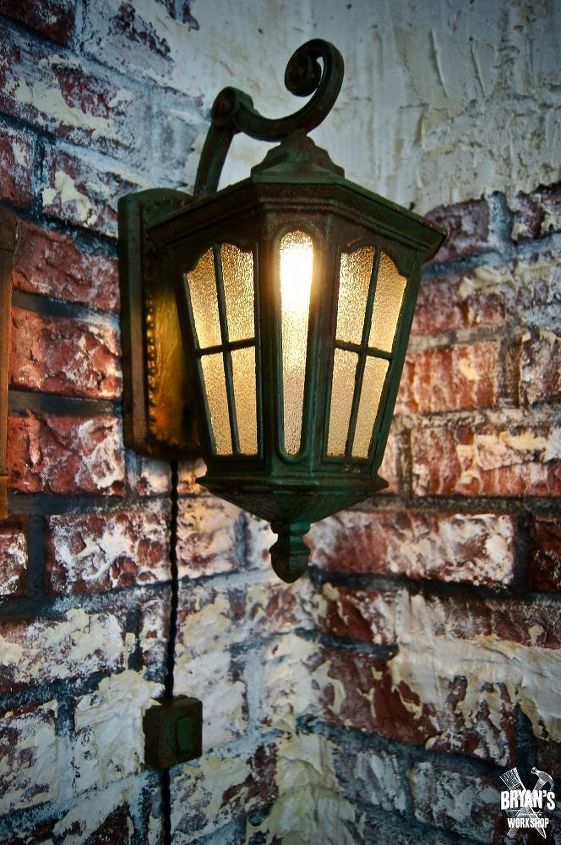
This is one of my next projects! I gave a shiny black wall light a rusty faux finish and put it on the new brick wall.
For more, come check me out on Facebook and Instagram. 
Resources for this project:
See all materials


Comments
Join the conversation
-
Thanks a lot for the kind of perfect topic I have not a lot of information about it but I have got an extra unique info in your unique post.
-
Love this idea!! I had a similar thought going through my head but now I have all the instructions, yippie. I am on a very, very tight budget so now I have to figure out if it would be more cost effective to do your technique or purchase brick paneling. Your method most likely would look better. Thanks so much Bryan for sharing your talent!


Frequently asked questions
Have a question about this project?
I love this!!! Your work looks amazing! My question, I recently exposed some portions of brick in my dining room, however, it is BORING FLAT BLONDE brick. Do you think this texture would work on flat brick? I sure hope so. Thank you for sharing your job. I hope to hear back from you.
I absolutely love this idea, the way the bricks look and the finished product! Awesome! My question is…if I were to do a full wall say 20 ft x 8 ft. Wouldn’t that be quite an expense for just the glue alone?? Also, how far does one toilet paper roll the glue and joint compound go?
Oh one other question…could you possibly use tissue paper?
thank you!
Could you shred and use any cardboard, or does it have to be toilet paper rolls? I am asking because I have a lot of Amazon boxes...