


Paper Clay Haunted House With Lights #2

Let's make some haunted houses folks!
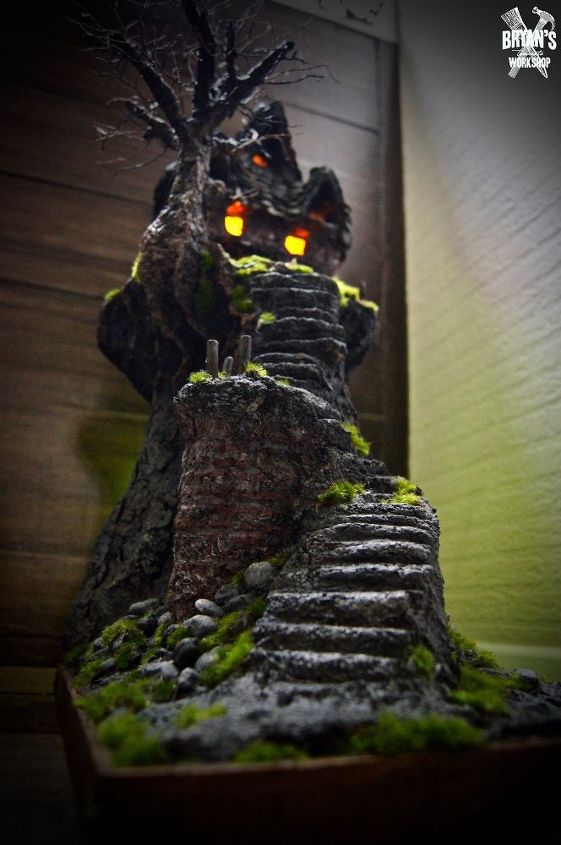
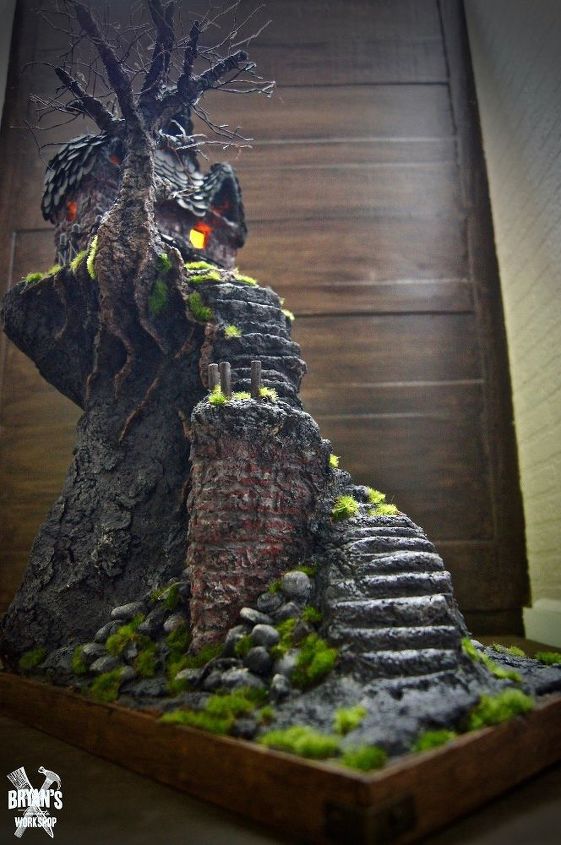
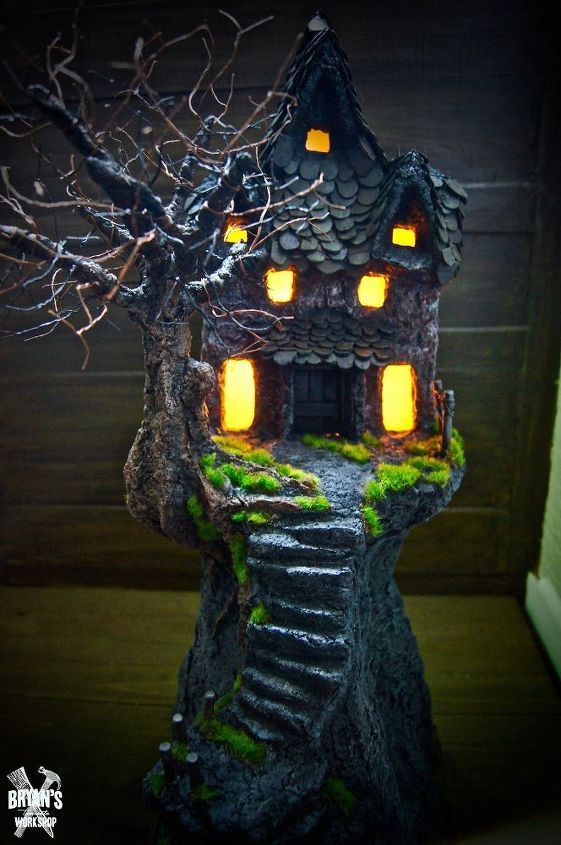
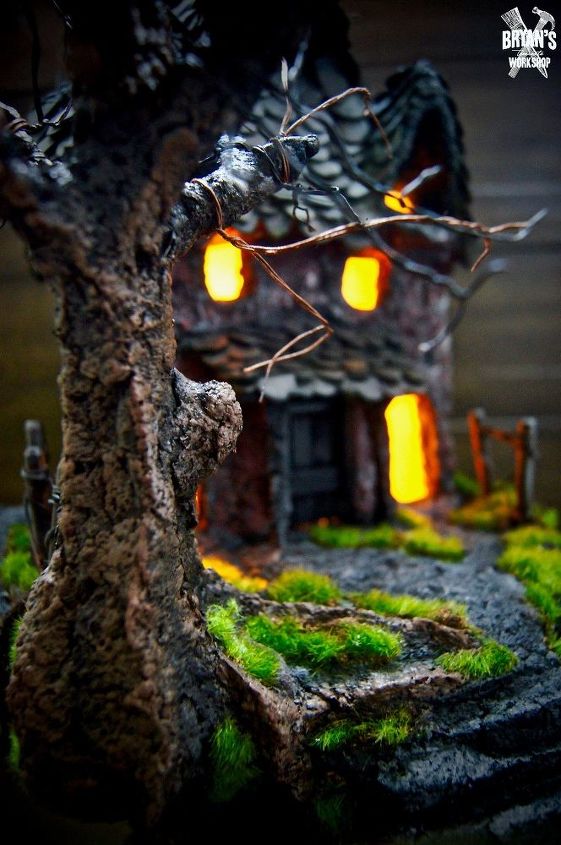
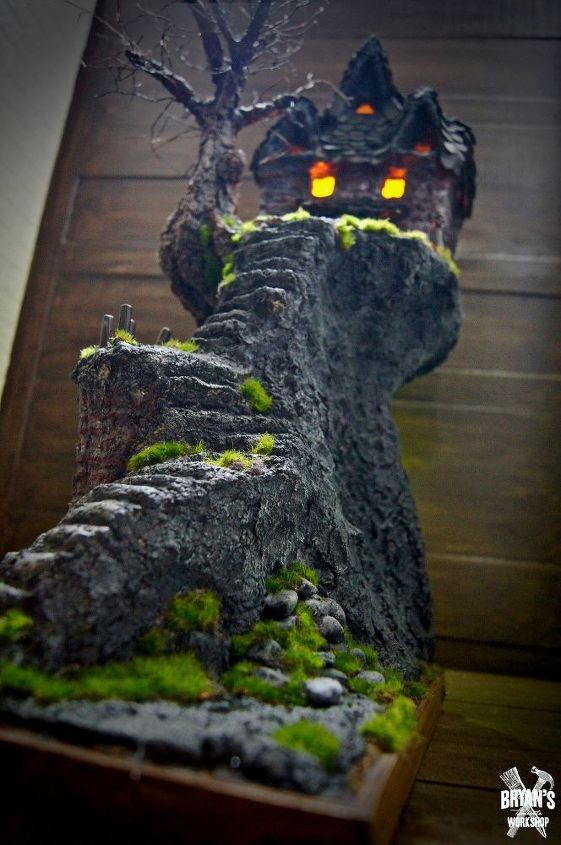
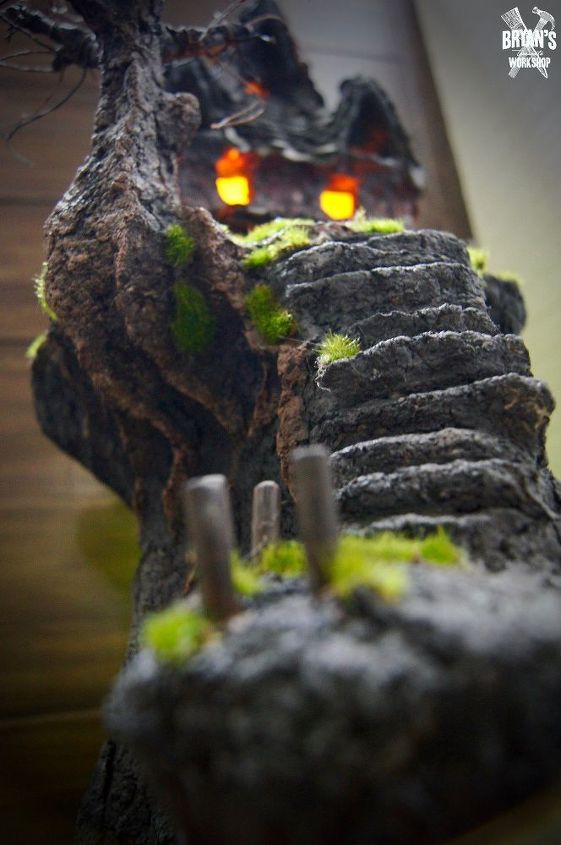
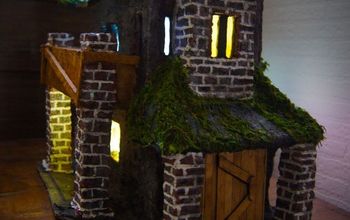
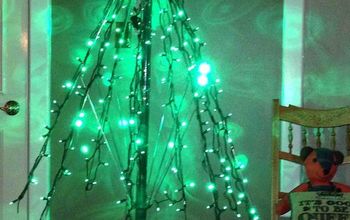
This is the finished house! It is surprisingly easy to make with my paper clay recipe.
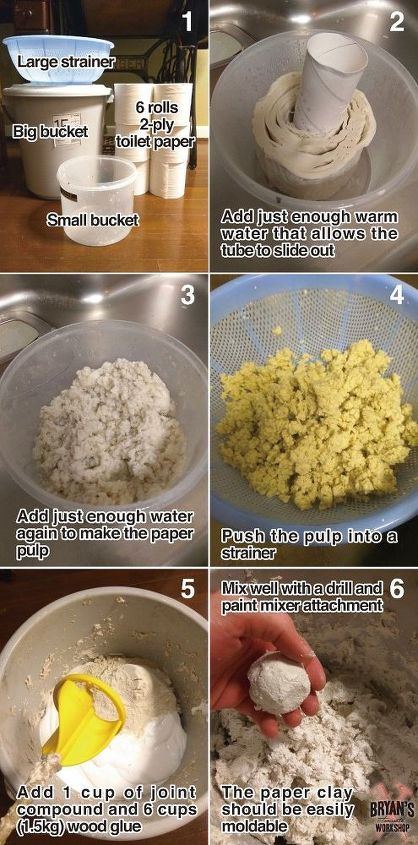
This is the recipe!
-6 rolls two-ply unscented toilet paper
-6 cups (1.5kg) wood glue/PVA glue
-1 cup joint compound
This is for one batch of clay.
I just finished making a faux brick wall with this same recipe and you can check it out here:
https://www.hometalk.com/diy/decorate/walls/paper-clay-brick-wall-38218367?r=2

This is what you'll need to make the armature. An armature is the skeleton of the project. It will hold the paper mache and paper clay.
Building supplies!
You'll need:
-boxes
-scissors/box cutter
-hot glue/hot glue gun
-painters tape/duct tape
-paper mache glue/newspaper for paper mache
-paint brush to apply the glue to the newspaper
-yellow clear file for the windows
-wood and trim for the base
-wax for the base
-hammer/nails for the base trim
-screws to screw your haunted house to the base
*Not pictured is a tube
**I know it's 'Papier-mâché'
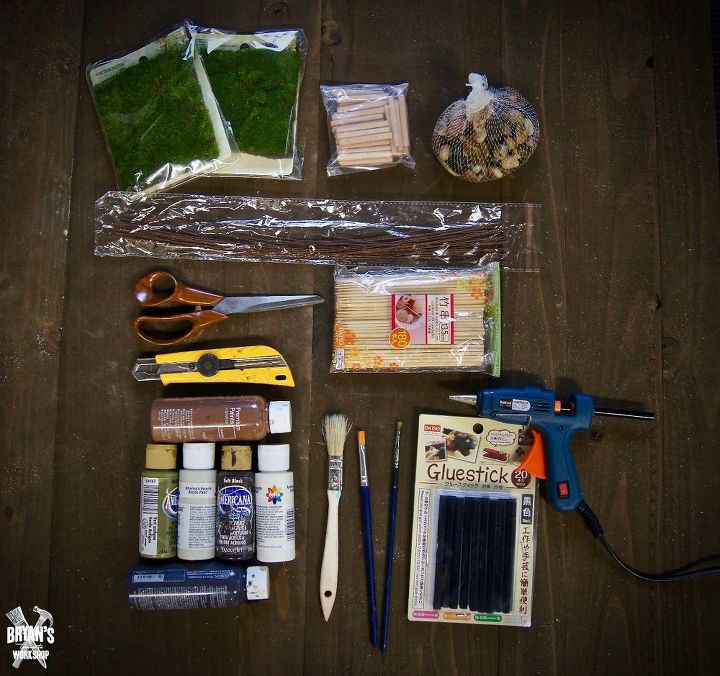
Detailing supplies!
You'll need:
-artificial grass
-rocks
-wooden pegs for the fence
-craft wire for the tree limbs and fences
-bamboo skewers for the roof and making brick lines
-scissors/box cutter
-hot glue/hot glue gun
-paint
-paint brushes
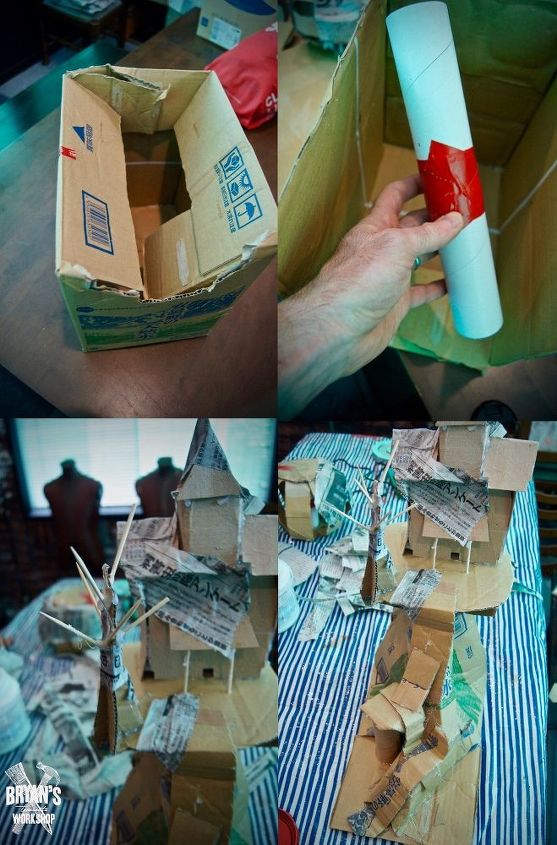
Let's build the armature!
All you need to do is cut and glue boxes together into a shape that looks similar to what you want to make. It does not need to look nice or neat. Just look at my armature! Yikes!
I started with an empty box and put a tube in to support the house. You can also use printer paper tightly rolled into a tube and taped together.
The tree is just pieces of a box and skewers.
Reinforce the windows with duct tape and cover any big gaps with painters tape.
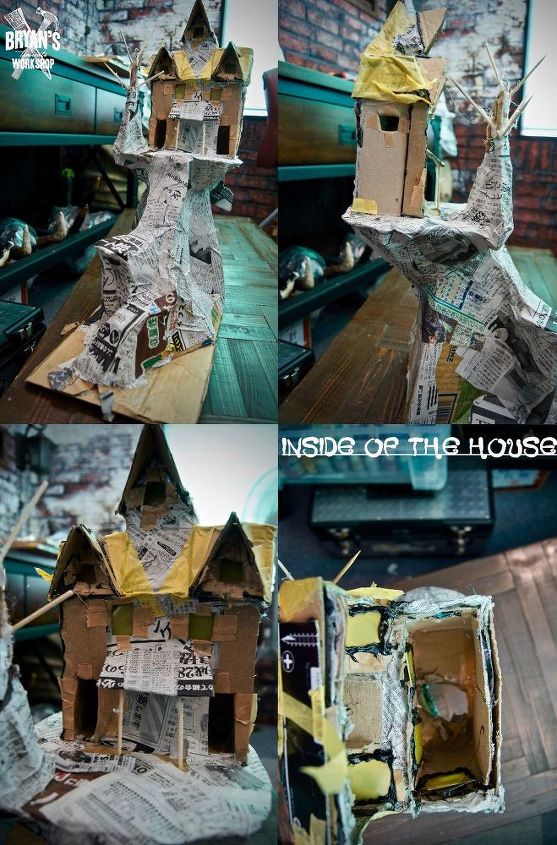
Once the armature is ready, you can paper mache.
I used wallpaper paste as my paper mache glue. You can also use wood glue mixed with a little water or just glue.
I don't use flour or anything that has a chance of growing mold.
Cut and fold over the roof to glue in your windows. I used a yellow clear file for my windows. Check the transparency of the file, because you might need to stack a couple window cutouts together.
I cutout my roof tiles and hot glued them to the house.
Leave a hole or an opening in the back to fit a light in.
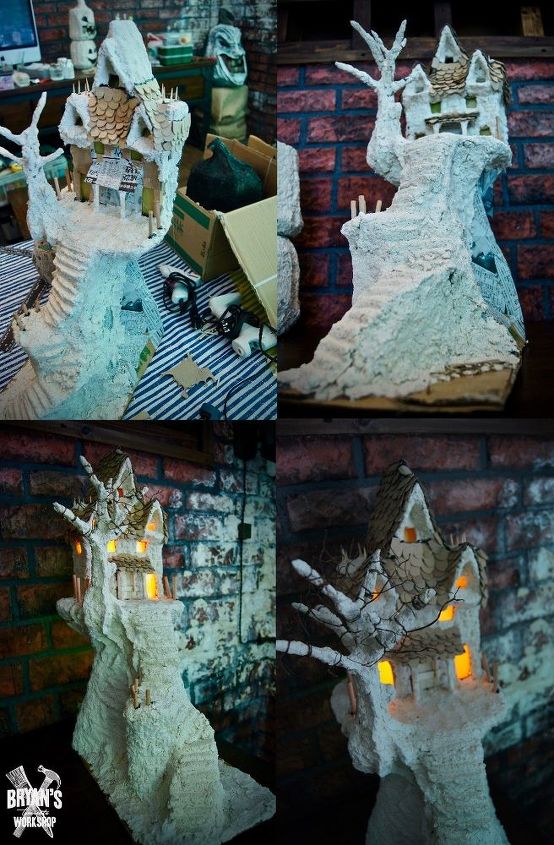
I used a skewer to help me with the stairs and make brick lines on the house.
You don't need any sculpting tools for the textures. Just use your fingers and push and pinch the clay into designs/accents.
Detailing tips:
-hot glue real rocks down and paint them
-glue down small patches of artificial grass for a realistic look
-Base paint the entire project matte black first. Spray paint is OK.
-Dilute your colors with water for a dingy/spooky look.
Twist craft wire in the paper clay tree to make branches.


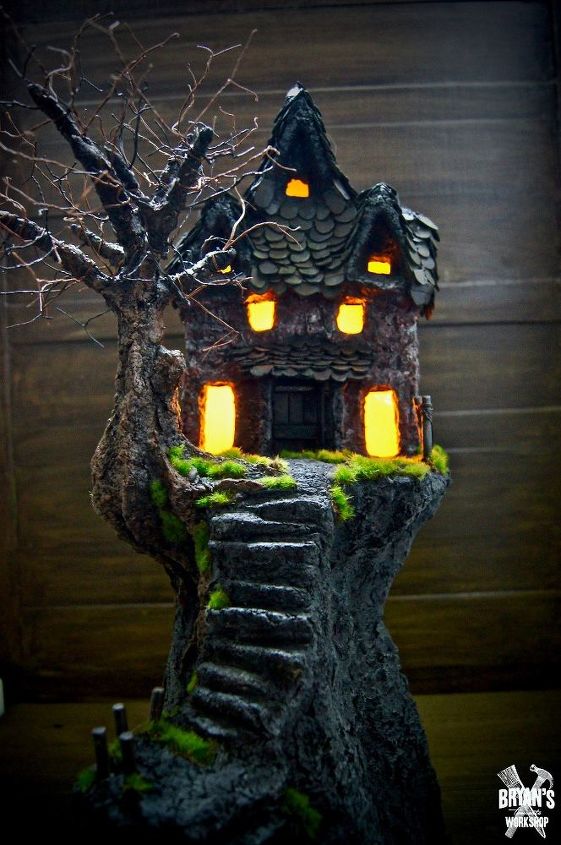
Dry brush white on the very top parts of your project to accent them.
I hope you like my haunted house number 2.
-If you make a painting mistake, you can always paint over it.
-Use a hairdryer to speed up the paint drying time.
It's almost Halloween time and we go bananas for Halloween at the workshop. I'm also working on a 'Renters Friendly' paper clay brick wall.
For more come visit me on Facebook and Instagram.
DIY Halloween decor
Resources for this project:
See all materials


Comments
Join the conversation
-
Wow I would love to be able to make this. You did a awesome job. Thanks for sharing.
Pat
-
Really, really cool. I've made fairy garden mushroom houses and other bits out of paper clay. This is awesome!


Frequently asked questions
Have a question about this project?
Amazing. Looks great and frightening. Thanks for the recipe. Can it be use outside if it sealed?
What are the dimensions? Was that one batch enough for your whole project?