


How to Paint a Potting Bench
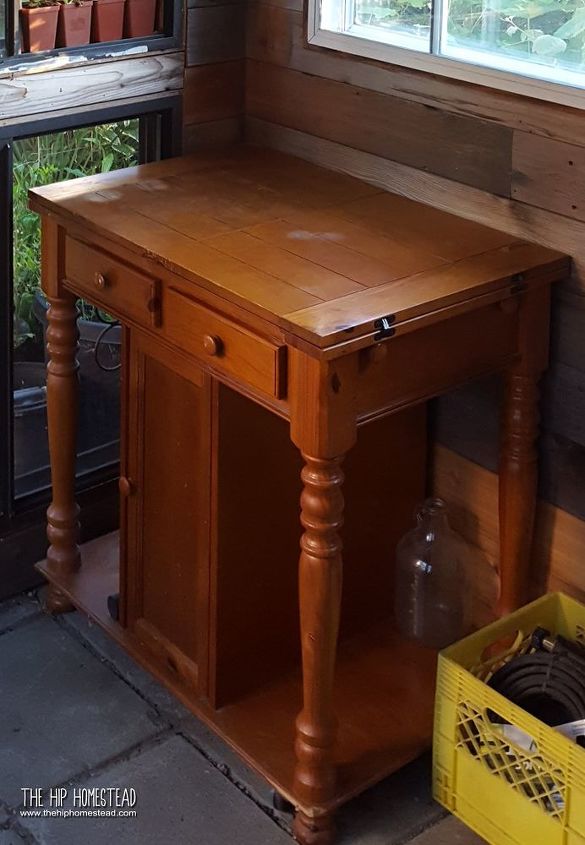
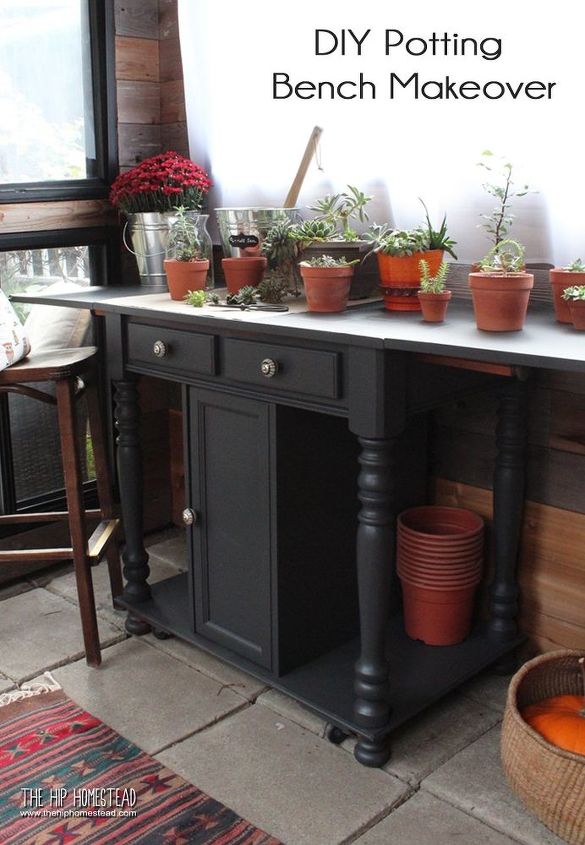
When I found this 80's kitchen island at a local auction house, I knew it would make a perfect potting bench for my new potting shed. So, I put in an absentee bid and went home to avoid the crowds of the auction that would be held later that night.
I was pretty pleased when I got a call the next day saying that I had won the bid and I could pick up my treasure later that day. I guess nobody else saw the diamond in the rough that I saw. See BEFORE pic below.
What you'll need to paint your potting bench:
- Potting bench: I used a hideous 80's rolling kitchen island, but any counter height piece of furniture will do.
- Paint of your choosing, semi-gloss will hold up better and be more durable/washable
- Small sanding block
- TSP Paint prep product
- Rubber gloves
- Bucket of hot water & old rag
- Small trim roller
- 3-inch paint brush
- Wagner Paint Sprayer (optional but fantastic)
How to Paint a Potting Bench
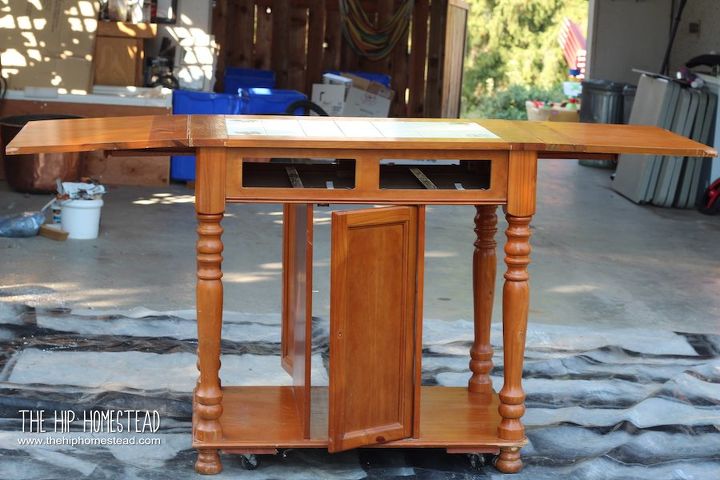
Start by removing any doors, drawers, and knobs. My cabinet doors wouldn't come off without a fight so I chose to leave them on.
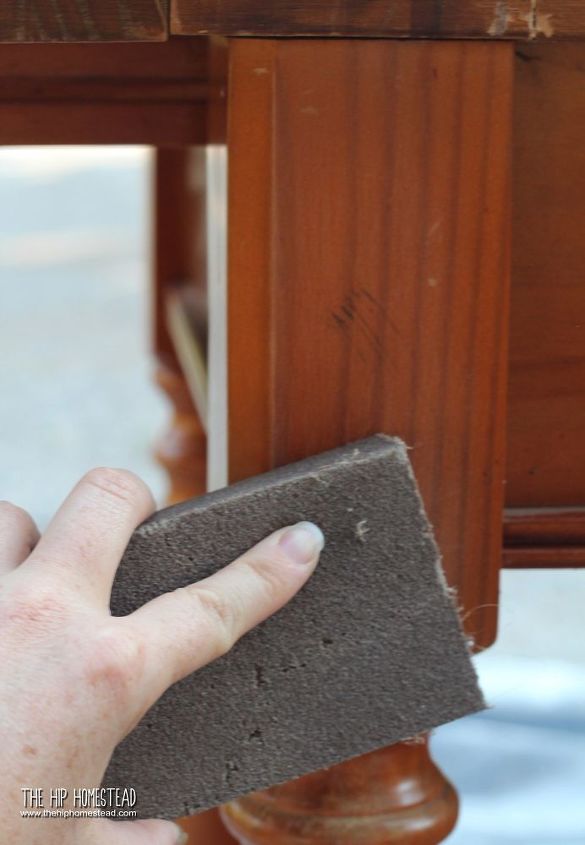
Preparing for Paint
Give the entire piece a light sand with your sanding block to remove any varnish and give the paint something to stick to. Do your best to sand with the grain of the wood to avoid any ugly scratch marks.
Dissolve the TSP product in a bucket of hot water, as per the package instructions. Using rubber gloves and an old rag thoroughly wipe down the entire potting bench and all the parts to remove any grease or grime that might inhibit the paint from sticking.
Let it dry fully before painting (15 -30 mins depending on your weather).
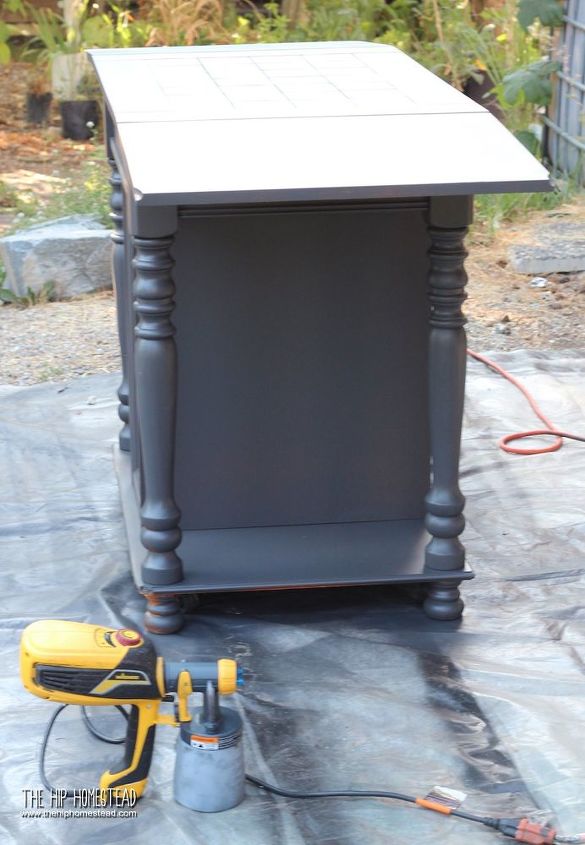
Painting the Potting Bench
I used a basic interior semigloss paint and my Wagner paint sprayer to get 2 good coats of paint on the potting bench.
If you have never used a paint sprayer before, simply load the paint container with your paint and working in a steady back and forth method, apply a light but even coat of paint to the entire piece.
Paint applied with a sprayer will dry quickly so you can recoat in 20-30 mins. Nice eh?!
Painting the Drawer Fronts
I chose to use a small trim roller for the front of the drawers. I did not paint the entire drawer because I did not want to impede the sliding action of the drawer, which can happen if the paint is too thick and clogs up the drawer runners.
So, the sides of the drawers and inside the cabinet stayed wood. I also sprayed the wooden drawer pulls, even though I knew I would be replacing the front 3 pulls.
Caring for your Painted Potting Bench
This potting bench makeover was an upcycle project and was pretty easy to do, but I still want my painted potting bench to stay looking nice, so when in use I cover the top with craft paper or a piece of white marine vinal that I have.
Covering the top keeps water from sitting on the wood and raising the wood grain, and it prevents my terra cotta pots from scratching the top of the potting bench.
Other than that I just wipe my painted potting bench down from time to time with a damp cloth and allow it to air dry.
That's it!
To see more photos and read the full post
Resources for this project:
See all materials


Comments
Join the conversation
-
Have an old metal cabinet just waiting for your good idea!
Thanks for the motivation!
-
wow nice


Frequently asked questions
Have a question about this project?
Great job! Will this be kept outdoors and if so, will it stand up to the weather?
is there some way to remove gorilla glue from carpet. It has been there about 3 yrs.?