


Farmhouse Coat Rack for Small Spaces

by
Zest it Up
11 Materials
$30
2 Hours
Easy
I would very much consider myself a small space inhabitant. I do not have a “tiny home” that exudes minimalism and tidiness in a manner deserving of a design show, but I like to think that I have put some thought into clever, multi-tasking details. When you live in a 1,500 sq/ft townhouse with your hubby, two teenage boys and eleven year old daughter, things can get really tight. The dining room table absolutely doubles as a homework desk, the coffee table masks huge storage bins for my sewing/knitting supplies and mismatched socks (because I am a real person and totally fold my masses of laundry while binging on Netflix), and my coffee cart cleverly hides away oodles of school supplies and Boy Scout paperwork behind it’s tidy little cabinet doors.
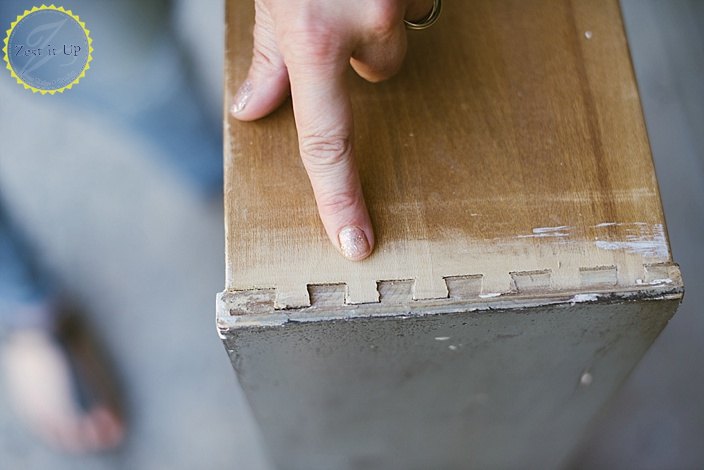
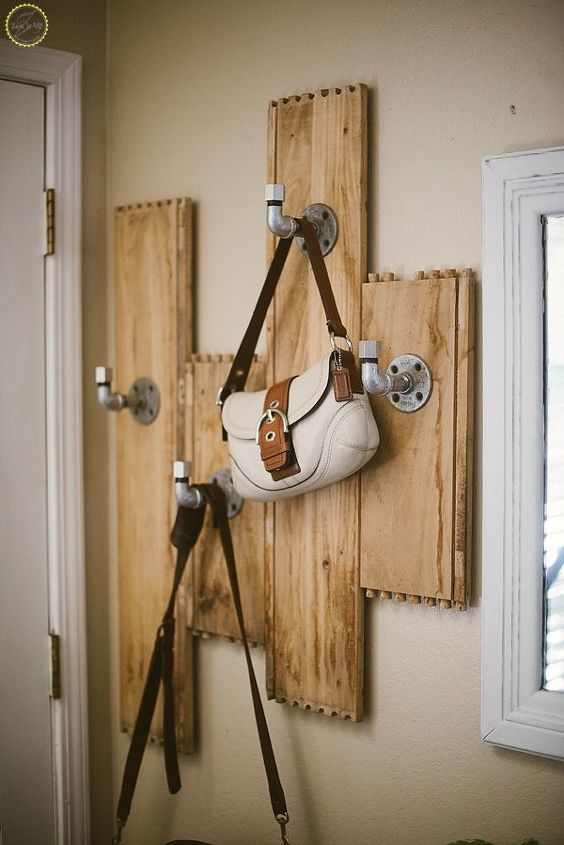
I am big on keeping the footprint of things in my house down to a minimum, and using vertical height helps me to get that done. I do not know about your house, but the front entry is one of the most notorious locations for piles and clutter to amass. In order to keep things manageable, and not overwhelming, I built a simple pipe coat/purse/hat rack for the wall space right by my front door. Using an old drawer for reclaimed wood, the project cost me only around $40 to pull off, and now things have a home when we walk in the door. You can use any discarded drawer, just make sure that the sides are real wood (not pressboard, and I liked the extra detailing that the dovetailed joints gave my final piece…kinda like the crenellations of a castle).
Photo Cred: Anya McInroy
Supplies:
- 1 old drawer (preferably with dovetailed joints)
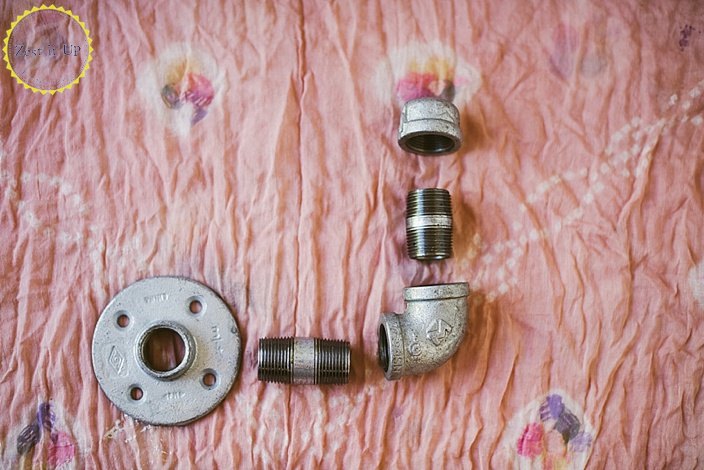
- 4 pipe flanges (3/4″ flanges)
- 4 pieces of 1″ long 3/4″ pipes
- 4 elbows (3/4″)
- 4 pieces of 1/2″ long 3/4″ pipes
- 4 caps (3/4″)
- 1″ wood screws for assembly, and 3″ screws for installation
- drill (optional, but recommended)
- wood glue
- 2 pieces of 1″X4″ board cut to 24″ long
- sander (optional)
The first order of business is demolition. If your drawer is older, then the glue holding the dovetailed joints will give pretty darn easy with a couple whacks. I was able to just use a hammer, but you may find a rubber mallet even more effective (aka you can hit harder without scarring the wood).

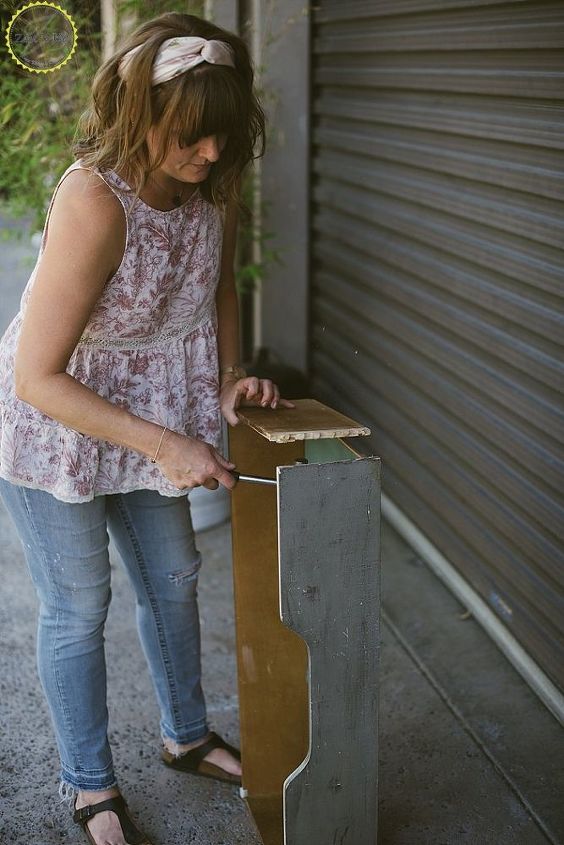
Once all four sides are freed, get busy creating your organizer. I love the staggered effect. Just remember that whatever “design” you come up with, you must reverse it upside down so that you can get to work on the backside of the piece.
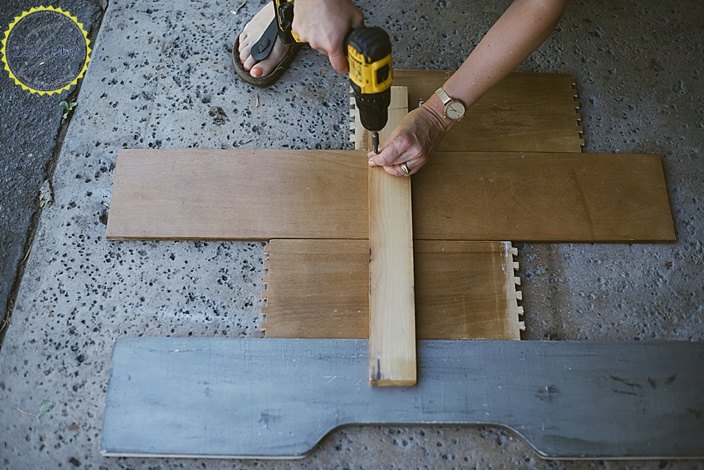
I used 1″ wood screws to attach a 1″ X 4″ board cut to 24″ to the back of all four of my drawer pieces. Note that my boards have definitely been flipped over, so that I am working on the backside. Not pictured here is the second 1″ X 4″ board that I attached about 6″ below the first, giving me two runners of support for my boards. I recommend using some wood glue on both 1″ X 4″‘s before screwing them into place on the drawer boards…it will give you extra strength which is always a plus!
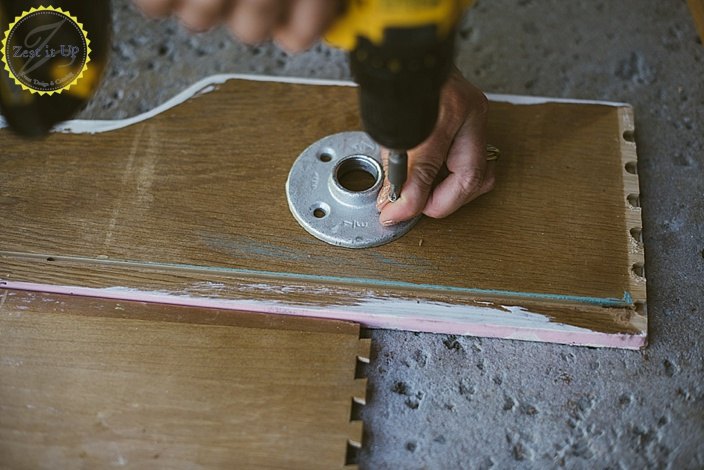
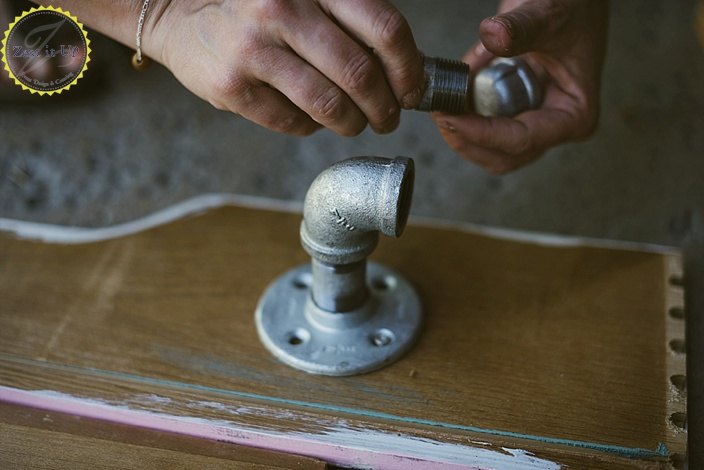
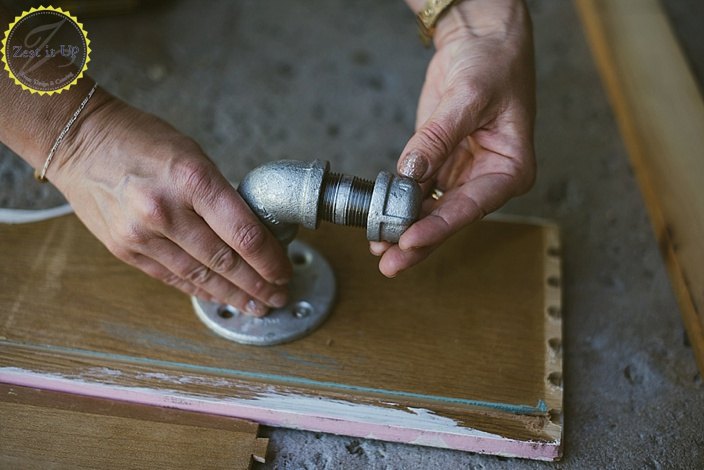
Once you have attached both of the 1″X4″‘s to all four of your drawer boards, it is time to flip it over and work on the front. In all honesty, I should have sanded my boards down at this point, before I attached the pipe flanges, so that I had a uniform finish on my piece without all those bits of paint (remember it was a used drawer). So, if you tackle this project, make sure to sand now. Then attach one flange to each board at a staggered height.
Now, it is just about some fun pipe assembly. Attach your hooks as you see above. Start with screwing in your 1″ inch piece of pipe to your flange, followed by your elbow, then the 1/2″ pipe, and then top it with your pipe cap. Viola! You have a hook shape for holding purses, coats, hats, or even an umbrella!
Repeat these steps for each drawer board.
I wanted my new industrial farmhouse coat rack to be secure enough to hold the weight of my computer bag, so I used a stud finder and then screwed right through the front of my piece, through the 1″X 4″‘s on the back and right into the stud in the wall. I did this in a few places, and I am happy to report that I have been using mine for a year now! It is super secure and it handles whatever I need to throw on it’s hooks (including my ridiculously heavy computer bag every night).
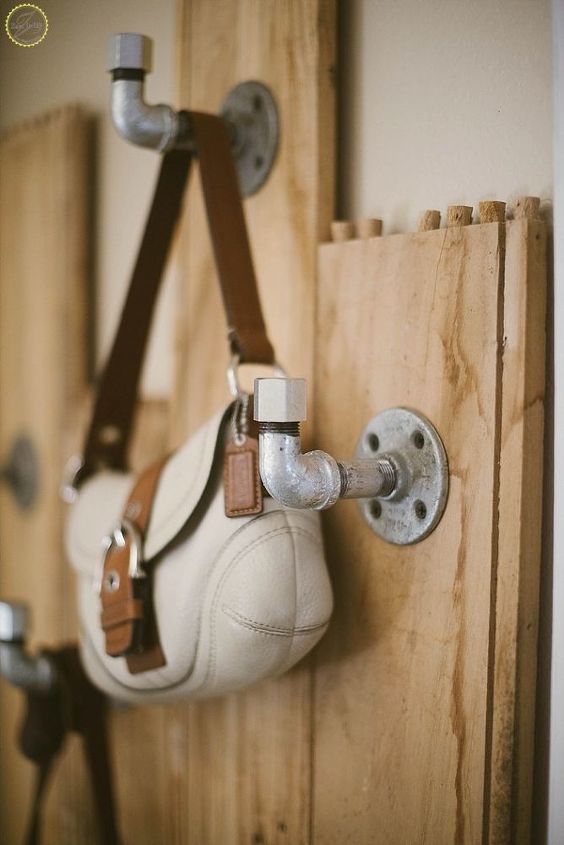
Honestly, there are so many favorite things about this project for me. I loved that it whipped up so fast, that it was a recycle project, and that it was so inexpensive to organize my front entry. However, I REALLY have a sweet spot for all the worn wood texture, those stupid cute crenellations, and the pipe detailing which ties in beautifully with the galvanized tin accessories that punctuate my house. If the silver toned hooks aren’t for you, you can absolutely play with different finished pipes, heck you can even paint them and/or the drawer boards. It is a simple project that you can really make your own!
Have fun getting organized!
xoxo
Chanda-Panda
Resources for this project:
See all materials


Any price and availability information displayed on [relevant Amazon Site(s), as applicable] at the time of purchase will apply to the purchase of this product.
Hometalk may collect a small share of sales from the links on this page.More info
Want more details about this and other DIY projects? Check out my blog post!
Comments
Join the conversation
2 of 35 comments
-
I love your idea & instructions. Very creative!
-
Genial!


Frequently asked questions
Have a question about this project?